
Introduction
This manual provides detailed instructions for the installation, operation, and maintenance of your ESSEBAGNO Portofino Kitchen Sink Mixer. Please read this manual thoroughly before installation and use to ensure proper function and longevity of the product. Keep this manual for future reference.
Safety Information
- Always turn off the main water supply before beginning any installation or maintenance work.
- Ensure all connections are secure to prevent leaks.
- If you are unsure about any part of the installation process, consult a qualified plumber.
- Do not use abrasive cleaners or harsh chemicals on the faucet finish, as this may damage the surface.
Package Contents
Verify that all components are present before starting installation:
- 1 x ESSEBAGNO Portofino Kitchen Sink Mixer (Model 9083072)
- 35 cm braided stainless steel hoses (2 included)
- Mounting hardware (ESSEFIX System components)
- Installation kit for hoses
- User Manual

Image: ESSEBAGNO Portofino Kitchen Sink Mixer, Model 9083072.
Specifications
| Manufacturer | Essebagno |
| Model Number | 9083072 |
| Product Dimensions | 5 x 26.3 x 23.8 cm |
| Item Weight | 2.4 Kilograms |
| Color | Green |
| Style | Pull-out Sprayer |
| Finish | Brushed |
| Material | Brass (body), Metal (handle) |
| Installation Method | Single-hole, Deck Mounted |
| Number of Holes | 1 |
| Spout Height | 23.7 Centimeters |
| Spout Reach | 22.4 Centimeters |
| Total Height | 43.3 Centimeters |
| Base Diameter | 47.5 mm |
| Handle Placement | Central |
| Number of Handles | 1 |
| Special Features | Detachable Sprayer, Anti-limescale Aerator, Cold Water Start, Energy Saving |
| Certifications | ACS (Sanitary Conformity Accreditation) |

Image: Technical dimensions of the Portofino mixer.
Installation Guide
1. Preparation
- Ensure the main water supply to your kitchen is turned off.
- Clear the area around the sink for easy access.
- Unpack all components and verify against the "Package Contents" list.
2. Mounting the Faucet (ESSEFIX System)
The ESSEFIX system allows for easy, tool-free installation. Follow these steps:
- Insert the faucet body into the single mounting hole on your sink or countertop.
- From underneath the sink, secure the faucet using the provided ESSEFIX mounting hardware. Hand-tighten initially, then ensure it is firm and stable.
3. Connecting Water Hoses
The included 35 cm braided stainless steel hoses are designed for easy connection:
- Connect the hot and cold water supply hoses to the corresponding inlets on the faucet body. The faucet features a cold water start function.
- Connect the other ends of the hoses to your hot and cold water supply lines. Ensure all connections are tight to prevent leaks.
- Connect the pull-out spray hose to the designated connection point on the faucet body.
4. Final Checks
- Once all connections are made, slowly turn on the main water supply.
- Check all connections for any signs of leaks. Tighten if necessary.
- Run water through the faucet for a few minutes to flush out any debris and check for proper operation.
Operating Instructions
Water Flow and Temperature Control
The single lever handle controls both water flow and temperature:
- To turn on the water, lift the handle upwards.
- To increase water flow, lift the handle further.
- To adjust temperature, move the handle left for hot water and right for cold water. The faucet features a cold water start, meaning lifting the handle in the central position will initially provide cold water, promoting energy saving.
Pull-Out Spray Function
The faucet is equipped with a pull-out spray featuring two jet types:
- Gently pull the spray head from the spout to extend the hose.
- Press the button on the spray head to switch between the two available spray patterns (e.g., stream and spray).
- After use, guide the spray head back into the spout until it is securely docked.
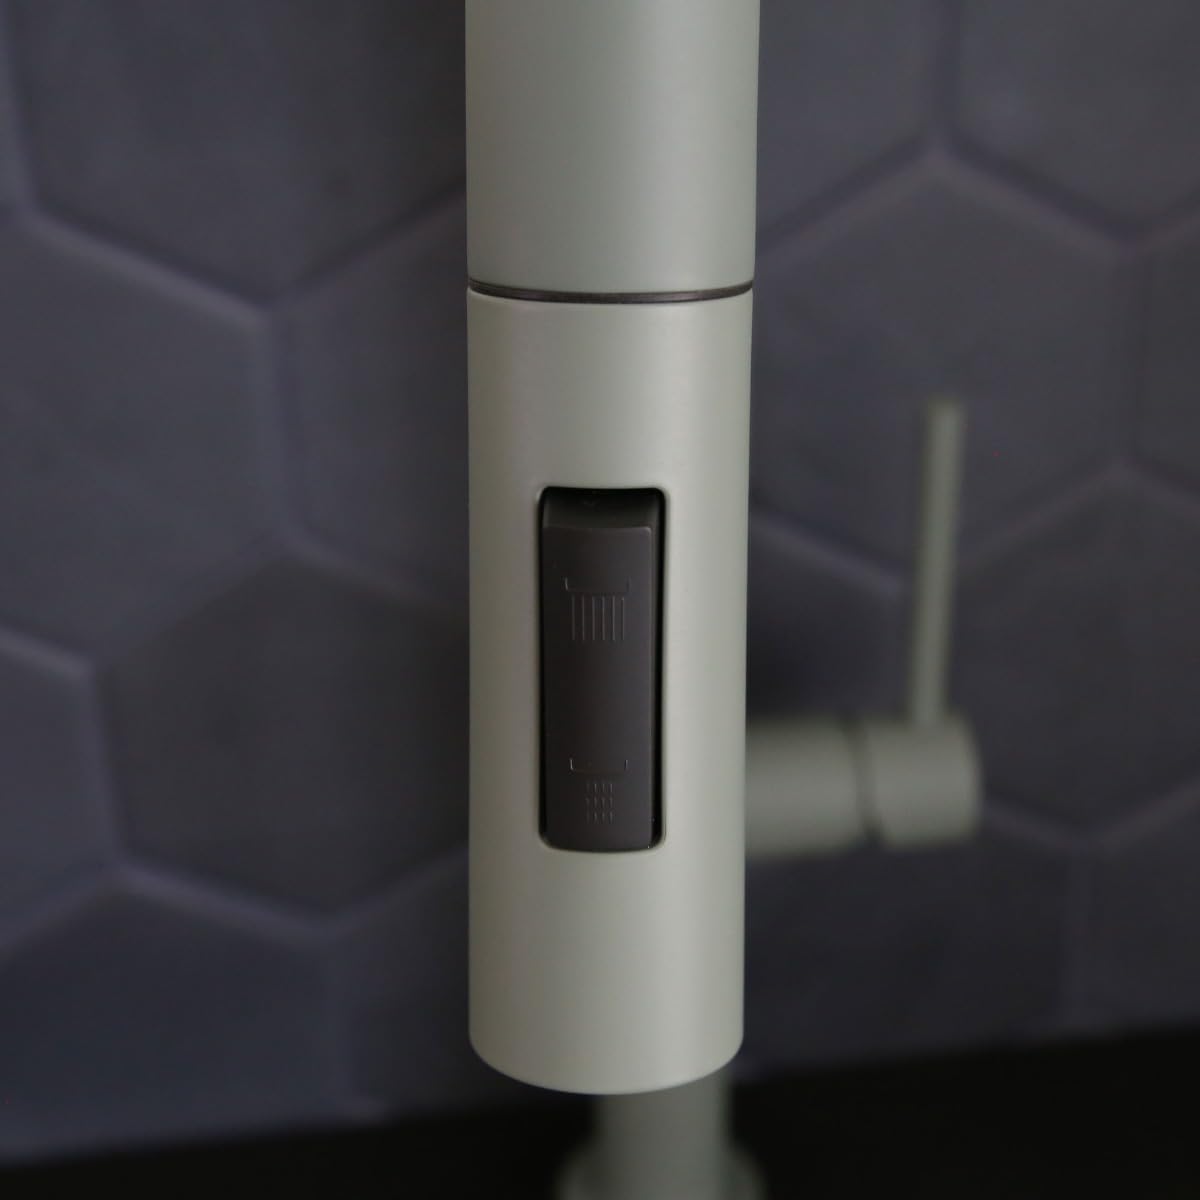
Image: Detail of the pull-out spray head with spray pattern selector button.

Image: Detail of the single lever handle.
Maintenance
Cleaning the Faucet
- Clean the faucet regularly with a soft cloth and mild soap and water.
- Rinse thoroughly with clean water and dry with a soft cloth to prevent water spots.
- Do not use abrasive cleaners, scouring pads, or chemical solvents, as these can damage the finish.
Anti-Limescale Aerator
The faucet is equipped with an anti-limescale aerator to limit limescale buildup. To maintain optimal water flow:
- Periodically unscrew the aerator from the tip of the spout.
- Rinse any accumulated debris or limescale under running water. For stubborn deposits, soak the aerator in a solution of white vinegar and water.
- Reattach the aerator securely.
Troubleshooting
| Problem | Possible Cause | Solution |
|---|---|---|
| Low Water Flow | Clogged aerator; partially closed shut-off valve; kinked supply hose. | Clean the aerator (see Maintenance); ensure shut-off valves are fully open; check supply hoses for kinks. |
| Leaks at Connections | Loose connections; damaged O-rings or washers. | Tighten connections carefully; replace O-rings or washers if damaged. |
| Water Temperature Issues | Incorrect handle position; issues with water heater or supply. | Adjust handle to desired temperature; check water heater settings and supply lines. |
| Pull-Out Spray Not Retracting Properly | Hose obstruction; counterweight issue. | Check under the sink for any obstructions to the hose; ensure the counterweight is properly positioned and not snagged. |
If you encounter problems not listed here or if the suggested solutions do not resolve the issue, please contact customer support.
Warranty and Support
For warranty information or technical support, please refer to the warranty card included with your product or visit the official ESSEBAGNO website. Please have your model number (9083072) and purchase date ready when contacting support.
Contact Information:
- Website: www.essebagno.com (example link, replace if actual link is known)
- Email: support@essebagno.com (example email)