
1. Introduction
This manual provides detailed instructions for the installation, operation, and maintenance of your GEONFINO S1pro Smart Door Lock with Handle. Please read this manual thoroughly before installation and use to ensure proper functionality and security.

Figure 1: GEONFINO S1pro Smart Door Lock with Handle
2. Product Overview
2.1 Key Features
- Multiple Unlocking Methods: Fingerprint recognition, TT Lock App control, passcodes, physical keys, and IC cards.
- TT Lock App Integration: Manage access logs, generate temporary or custom codes, and share access with guests.
- Enhanced Security: Features anti-peeping password technology and an automatic lock function.
- Long Battery Life: Up to 18 months of operation on a single charge, with a USB-A emergency charging port.
- Durable Design: Constructed from zinc material, suitable for residential and commercial use.
2.2 Components
The GEONFINO S1pro Smart Door Lock package typically includes:
- Front Panel with Handle
- Rear Panel with Handle
- Mortise Lock Body
- Strike Plate and Strike Box
- Mounting Hardware (screws, spindles)
- Physical Keys (2)
- IC Cards (2)
- User Manual
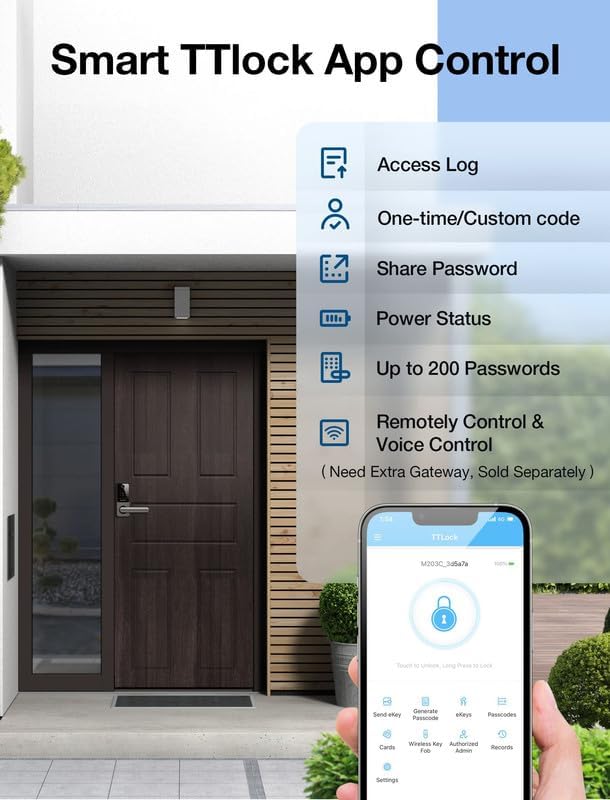
Figure 2: Five Keyless Entry Methods
3. Installation
Before installation, confirm your door's handedness (left or right-handed). The reversible door handle allows adjustment to match your door's configuration. Follow the steps below for a smooth installation process.
3.1 Door Preparation
Ensure your door meets the following specifications:
- Backset: 2-3/8 inches or 2-3/4 inches (60mm-70mm)
- Hole Diameter: ≥ 54mm (2-1/8 inches)
- Door Thickness: 1-3/5 inches to 2 inches (40mm-50mm)

Figure 3: Door Measurement Guide
3.2 Installation Steps
- Install the Mortise Lock: Insert the mortise lock into the door edge and secure it with screws.
- Install the Front Panel: Route the cable through the door hole and attach the front panel.
- Install the Rear Panel: Connect the cable to the rear panel, then attach the rear panel to the door, ensuring the handle is correctly oriented.
- Test Functionality: After installation, test all unlocking methods and the auto-lock feature.
Note: A new password must be set immediately after installation. The lock will not function without an initial password setup.
No official installation videos were provided in the product data. Please refer to the included paper manual for detailed visual instructions.
4. Operation
4.1 Unlocking Methods
- Fingerprint: Place your registered finger on the sensor. The lock will unlock in approximately 1 second. The lock supports up to 100 fingerprints.
- Passcode: Enter your registered passcode on the keypad. The lock features anti-peeping technology, allowing you to enter random digits before and after your actual code to obscure it.
- IC Card: Tap a registered IC card on the designated area of the lock.
- Physical Key: Use the provided physical keys as a backup unlocking method.
- TT Lock App: Use the TT Lock application on your smartphone via Bluetooth.

Figure 4: Fingerprint Unlocking

Figure 5: Anti-Peeping Passcode Feature
4.2 TT Lock App Control
The TT Lock app provides comprehensive control over your smart lock:
- Access Logs: View a history of who entered and when.
- Generate Passcodes: Create one-time, timed, or permanent passcodes for guests or service providers.
- Share Access: Easily share eKeys or passcodes with others.
- Power Status: Monitor the lock's battery level.
- Remote Control: With an optional Gateway (sold separately), you can remotely control the lock and integrate with voice assistants like Alexa or Google Assistant.

Figure 6: TT Lock App Interface
4.3 Automatic Locking
The lock features an adjustable auto-lock function. After the door closes, the lock will automatically engage after a set period, enhancing security and convenience.

Figure 7: Auto-Lock Functionality
5. Maintenance
5.1 Battery Management
The GEONFINO S1pro Smart Door Lock is powered by 4 AAA batteries (not included). It offers an 18-month battery life under normal usage conditions.
- Low Battery Alarm: The lock will provide an audible and visual alert when the battery level is low.
- Emergency Charging: If the batteries completely drain, use a power bank with a USB-A cable to temporarily power the lock via the emergency charging port located on the front panel.
- Battery Replacement: Replace all four AAA batteries when the low battery warning appears.

Figure 8: Battery Life and Weather Protection
5.2 Cleaning
Clean the lock's exterior with a soft, dry cloth. Avoid using abrasive cleaners or solvents, as these can damage the finish and electronic components.
6. Troubleshooting
If you encounter issues with your GEONFINO S1pro Smart Door Lock, please refer to the following common problems and solutions:
- Lock not responding: Check battery levels. If low, replace batteries or use emergency charging.
- Fingerprint not recognized: Ensure your finger is clean and dry. Re-register your fingerprint if the issue persists.
- Passcode not working: Verify the correct passcode is entered. Ensure anti-peeping digits are not interfering with the actual code.
- Auto-lock not engaging: Check the auto-lock settings in the TT Lock app. Ensure the door sensor is properly aligned.
- App connectivity issues: Ensure Bluetooth is enabled on your phone and you are within range of the lock. Restart the app or your phone if necessary.
For more complex issues or if the problem persists, please contact GEONFINO customer support.
7. Specifications
| Feature | Specification |
|---|---|
| Brand | GEONFINO |
| Model Name | S1pro |
| Lock Type | Biometric |
| Special Features | Anti-Peeping Password, Auto-Lock, Fingerprint, One-Touch Lock, Passcode Unlock |
| Material | Zinc |
| Color | Sliver Smart Lock with Handle |
| Item Dimensions (L x W x H) | 1 x 1 x 1 inches |
| Item Weight | 4.13 pounds |
| Recommended Uses | Residential and commercial door security and access control |
| Controller Type | Android, Hand Control, Mechanical knob |
| Control Method | App |
| Connectivity Protocol | Bluetooth |
| Batteries Required | Yes (4x AAA, not included) |
| Manufacturer | Zhongshan City Geonfino Co., Ltd |
8. Warranty & Support
8.1 Warranty Information
For specific warranty details, please refer to the warranty card included with your product packaging or visit the official GEONFINO website. Warranty terms typically cover manufacturing defects for a specified period from the date of purchase.
8.2 Customer Support
If you require assistance with installation, operation, or troubleshooting, please contact GEONFINO customer support through the following channels:
- Email: Refer to your product packaging or the official GEONFINO website for contact email.
- Website: Visit the GEONFINO Store on Amazon


