1. Introduction
Thank you for purchasing the vidaXL 9.8 x 9.8 ft Cream White Retractable Roof Garden Pergola. This manual provides essential information for the safe assembly, operation, and maintenance of your new pergola. Please read these instructions carefully before beginning assembly and retain them for future reference.
This pergola is designed to provide a shaded outdoor area, enhancing your garden or patio. Its retractable roof allows for adjustable shade, adapting to various weather conditions and preferences.
2. Safety Information
- Read all instructions: Ensure you understand all assembly and operating instructions before use.
- Two-person assembly: Assembly requires at least two adults for safety and ease of installation.
- Secure anchoring: Always anchor the pergola securely to the ground using the provided ground pins or suitable alternatives to prevent tipping in windy conditions.
- Weather conditions: Retract the canopy during strong winds, heavy rain, or snow to prevent damage to the pergola structure and canopy.
- Clearance: Ensure adequate clearance around the pergola for safe operation and to avoid obstruction.
- Inspection: Regularly inspect all bolts, nuts, and connections for tightness. Tighten as necessary.
- Weight limit: Do not hang heavy objects from the pergola frame.
- Children and pets: Keep children and pets away from the assembly area.
3. Package Contents
Before starting assembly, verify that all parts listed below are present and undamaged. If any parts are missing or damaged, do not proceed with assembly and contact customer support.
- Pergola metal frame components (posts, beams, crossbars)
- Retractable roof canopy (Cream White polyester with PA coating)
- Ground pins / Anchors
- Assembly hardware (screws, bolts, nuts, washers)
- Assembly tools (screwdriver, spanner - typically required, check included tools)
- Instruction manual
4. Setup & Assembly
Assembly typically requires two people and basic tools such as a screwdriver and a spanner. Follow these general steps for assembly. Refer to the detailed diagrams in your physical manual for specific part identification and connection points.
4.1. Preparation
- Choose a flat, level surface for assembly and placement of the pergola.
- Unpack all components and lay them out, identifying each part against the parts list.
- Ensure you have the necessary tools: screwdriver and spanner.
4.2. Frame Assembly
- Assemble the Base: Connect the horizontal base beams to the vertical posts. Ensure all connections are finger-tight at this stage.
- Attach Top Beams: Secure the top horizontal beams to the vertical posts. This forms the main rectangular structure.
- Install Crossbars: Attach the smaller crossbars that support the retractable canopy. These typically slide into designated slots or attach with bolts.
- Tighten All Connections: Once the main frame is upright and stable, fully tighten all bolts and screws using the spanner and screwdriver. Do not overtighten.

Image: The metal frame of the pergola before the canopy is installed, showing the posts, beams, and crossbars.
4.3. Canopy Installation
- Attach Canopy to Crossbars: Carefully unfold the cream white canopy. Depending on the design, the canopy will either slide into channels on the crossbars or attach via hooks/loops.
- Secure Retraction Mechanism: Ensure the canopy's retraction mechanism (e.g., ropes, pull handles) is correctly installed and functional.
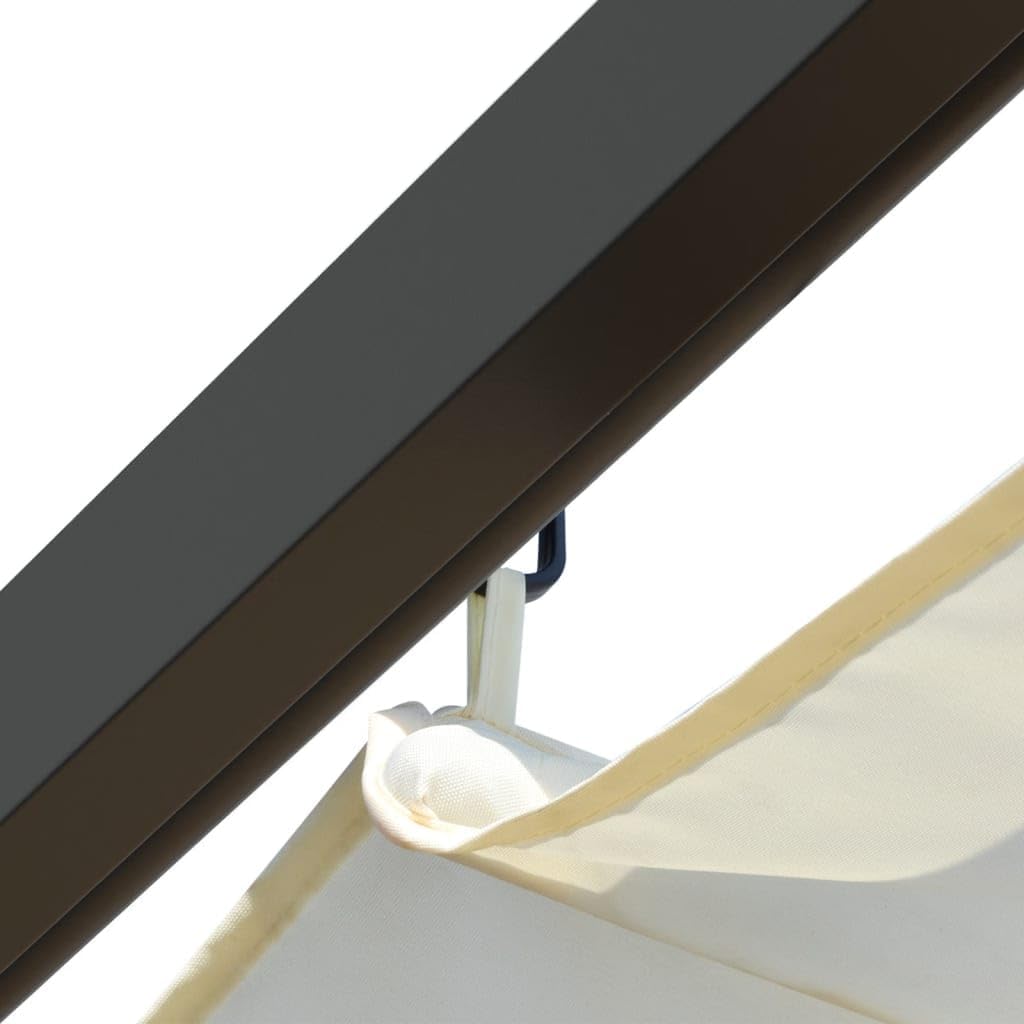
Image: A close-up view of the canopy fabric attached to the pergola frame using a hook, illustrating the attachment method for the retractable roof.
4.4. Anchoring the Pergola
- Position the Pergola: Move the assembled pergola to its desired final location.
- Insert Ground Pins: Use the provided ground pins or other suitable anchoring hardware to secure each post to the ground. This is crucial for stability and safety, especially in windy conditions.

Image: The fully assembled pergola with its cream white retractable roof extended, showing overall dimensions of 300 cm (118.1 inches) width and length, and 225 cm (88.6 inches) height.
5. Operating Instructions
The vidaXL pergola features a retractable roof for adjustable shade. Follow these steps to operate the canopy:
- To Extend the Canopy: Gently pull the designated handle or rope system to slide the canopy fabric along its tracks until it reaches the desired extension. Ensure it is evenly extended to prevent stress on the fabric.
- To Retract the Canopy: Gently pull the designated handle or rope system in the opposite direction to retract the canopy fabric. Ensure it folds neatly to prevent creasing or damage.
- Weather Precautions: Always retract the canopy during strong winds, heavy rain, or snow to protect the fabric and frame from damage.
6. Maintenance
Proper maintenance will extend the life of your pergola and keep it looking its best.
6.1. Cleaning
- Canopy: Clean the polyester canopy with mild soap and water. Use a soft brush or cloth. Rinse thoroughly with clean water and allow it to air dry completely before retracting or storing. Do not use harsh chemicals or abrasive cleaners.
- Frame: Wipe the powder-coated steel frame with a damp cloth and mild detergent. Dry thoroughly to prevent rust.
6.2. Seasonal Care & Storage
- Winter Storage: In areas with harsh winters, it is recommended to remove the canopy and store it indoors in a dry place. While the frame is weather-resistant, covering it during winter months can further extend its lifespan.
- Regular Inspection: Periodically check all nuts, bolts, and connections to ensure they are tight. Re-tighten as needed.
7. Troubleshooting
This section addresses common issues you might encounter with your pergola.
| Problem | Possible Cause | Solution |
|---|---|---|
| Pergola feels unstable or wobbly. | Loose connections; inadequate anchoring; uneven ground. | Ensure all bolts and screws are fully tightened. Verify ground pins are securely in place. Relocate to a more level surface if necessary. |
| Canopy does not retract/extend smoothly. | Obstruction in tracks; dirty tracks; damaged mechanism; uneven tension. | Check tracks for debris and clean if necessary. Inspect the retraction mechanism for damage. Ensure the canopy is aligned correctly. |
| Water pooling on canopy. | Canopy not taut enough; heavy rainfall. | Ensure the canopy is fully extended and taut. Retract the canopy during heavy rain to prevent pooling and potential damage. |
| Rust spots on metal frame. | Scratches in powder coating; prolonged exposure to moisture. | Clean the affected area and apply rust-inhibiting paint to touch up scratches. Ensure the frame is dried after cleaning or rain. |
8. Specifications
| Feature | Detail |
|---|---|
| Model Number | 49325 |
| Brand | vidaXL |
| Color | Cream White |
| Shape | Rectangular / Square |
| Material (Frame) | Powder-Coated Steel, Alloy Steel |
| Material (Canopy) | Polyester with PA coating |
| Dimensions (W x L x H) | 118.1 x 118.1 x 88.6 inches (300 x 300 x 225 cm) |
| Item Weight | 94.8 lbs (46 kg) |
| Water Resistance Level | Water Resistant |
| Assembly Required | Yes |
9. Customer Support
For any questions, missing parts, or assistance with assembly or operation, please contact vidaXL customer support. Refer to your purchase documentation or the vidaXL website for the most current contact information.
Online Support: Visit the official vidaXL website for FAQs, product information, and contact options.
Warranty Information: Please retain your proof of purchase for any warranty claims. Specific warranty terms and conditions may vary by region and product. Refer to the warranty card included with your product or the vidaXL website for details.


