
1. Product Overview and Compatibility
This manual provides instructions for the SIXTOP 9-inch Android Car Stereo, model Android 2+32G. This unit is designed for installation in Hyundai Veloster vehicles manufactured between 2011 and 2017.

Image 1.1: The SIXTOP 9-inch Android Car Stereo main unit, showing the screen and included accessories like a camera and microphone.

Image 1.2: The car stereo integrated into the dashboard of a Hyundai Veloster, demonstrating its fit and appearance.
The unit is compatible with Hyundai Veloster models from 2011 to 2017. Please verify your vehicle's model year before installation. Ensure your vehicle's original dashboard configuration matches the provided images for proper fitment.
2. Package Contents
Verify that all components listed below are included in your package:

Image 2.1: A visual representation of all items included in the product package, such as cables, camera, and user manual.
- Car Stereo with Frame
- Rear View Camera
- Microphone
- Power Cable (1.5m)
- RCA Cable
- USB Cable (2 units)
- GPS Antenna
- Radio Antenna
- USB Adapter Cable
- Installation Tool
- User Manual
3. Installation Guide
Professional installation is recommended. Ensure the vehicle's battery is disconnected before beginning installation.
3.1 General Installation Notes
- Carefully remove the original car stereo and trim panels.
- Connect the provided wiring harness to the car stereo and the vehicle's existing wiring.
- Ensure all connections are secure to prevent intermittent issues.
3.2 CANbus Protocol Box (for Amplified Systems)
If your Hyundai Veloster is equipped with an original factory amplifier, an additional CANbus protocol box may be required for proper audio output and steering wheel control functionality. If you experience no sound after installation, contact customer service with pictures of your original car's center console and wiring sockets for assistance in obtaining the correct CANbus box.
3.3 Rear View Camera Installation
The included rear view camera provides a clear image when reversing. Follow the wiring diagram for correct connection:

Image 3.1: Detailed wiring diagram illustrating how to connect the camera input cable, camera power cable, and reversing light positive/ground connections.
- Connect the camera's video output to the 'Camera Input' on the stereo.
- Connect the camera's power cable to the vehicle's reversing light (positive and ground).
- Ensure the two short wires on the camera are connected.
- After installation, navigate to Factory Settings (Password: 000000) and set the camera resolution to AHD/25 if needed.
4. Basic Operation
4.1 Power On/Off and Touchscreen Navigation
Press the power button to turn the unit on or off. The 9-inch touchscreen allows for intuitive control of all functions. Swipe, tap, and drag gestures are used for navigation.
4.2 Steering Wheel Controls
The unit supports the original steering wheel buttons of your car for convenient control of audio functions, enhancing driving safety.

Image 4.1: Illustration of how the vehicle's steering wheel buttons can be mapped to control various functions on the car stereo, such as volume and track changes.
To configure steering wheel controls, access the 'Steering Learn' option in the settings menu. Follow the on-screen prompts to assign functions to each button.
5. Connectivity Features
5.1 Apple CarPlay and Android Auto
Synchronize your smartphone's essential features, including navigation, music, messages, and voice assistant, directly to the car stereo. This feature supports both wireless and USB connections.

Image 5.1: Examples of the Apple CarPlay and Android Auto user interfaces displayed on the car stereo screen, showing various compatible applications.
- Connection: Ensure your phone's Wi-Fi is enabled. Connect via Bluetooth, then open the 'ZLINK5' app on the stereo to automatically connect. Alternatively, use a USB cable and open the 'ZLINK5' app.
- Voice Control: Utilize your phone's voice assistant for hands-free operation.
5.2 Mirror Link
Project your mobile phone's screen onto the car stereo display. This is useful for viewing downloaded videos or other content from your phone.

Image 5.2: The car stereo screen showing a mirrored display from a smartphone, with options for USB or Wi-Fi/USB connection.
- Connection: Select the 'ZLINK5' app and switch to the 'Mirror Link' connection option.
- Supports both USB and Wi-Fi/USB connections.
5.3 Bluetooth
Connect your mobile phone via Bluetooth for hands-free calls, address book synchronization, and music playback.

Image 5.3: Displays the Bluetooth settings menu, music playback interface, and an incoming call screen on the car stereo.
- Pairing: Go to Bluetooth settings on the stereo and your phone, search for available devices, and pair.
- Calls: Make and receive calls directly from the stereo.
- Music: Stream audio from your phone to the car stereo.
5.4 Wi-Fi and GPS Navigation
Connect the stereo to a Wi-Fi network to access online features and download applications. The built-in GPS allows for navigation.
- Wi-Fi: Connect to a Wi-Fi hotspot to download apps from the Play Store, stream online music, and watch videos.
- GPS Navigation: Download offline navigation maps directly from the Play Store. Online maps can also be used when connected to Wi-Fi.
6. Audio and Display Settings
6.1 FM/RDS Radio
Tune into FM radio stations and receive RDS (Radio Data System) information where available.

Image 6.1: The FM/RDS radio interface showing current frequency, station presets, and controls.
- Frequency Range: FM 87.5-108 MHz.
- Functions: Listen to news, music, weather forecasts, and traffic information.
6.2 DSP Function (HiFi/EQ)
Adjust various sound effects and equalizer settings to customize your audio experience.

Image 6.2: The Digital Sound Processor (DSP) interface, showing an equalizer with adjustable frequency bands and preset sound modes.
- Access the DSP settings to fine-tune audio output for optimal sound quality.
6.3 Split Screen Function
Operate two applications simultaneously on the screen, such as navigation and music playback.

Image 6.3: An example of the split-screen function, displaying a navigation map on one side and a music player on the other.
- Click the rectangle icon at the top of the screen, select a browse page, and drag it to the left or right side.
6.4 Desktop Themes
Personalize your car stereo's interface by choosing from 26 different desktop themes.

Image 6.4: A collection of different desktop themes that can be applied to the car stereo interface, offering various visual styles.
- Long-press on a blank space on the homepage to access theme options and select your preferred theme.
7. Reversing Camera Function
The system automatically displays the rear view camera feed when the vehicle is shifted into reverse gear, providing enhanced visibility for parking and maneuvering.
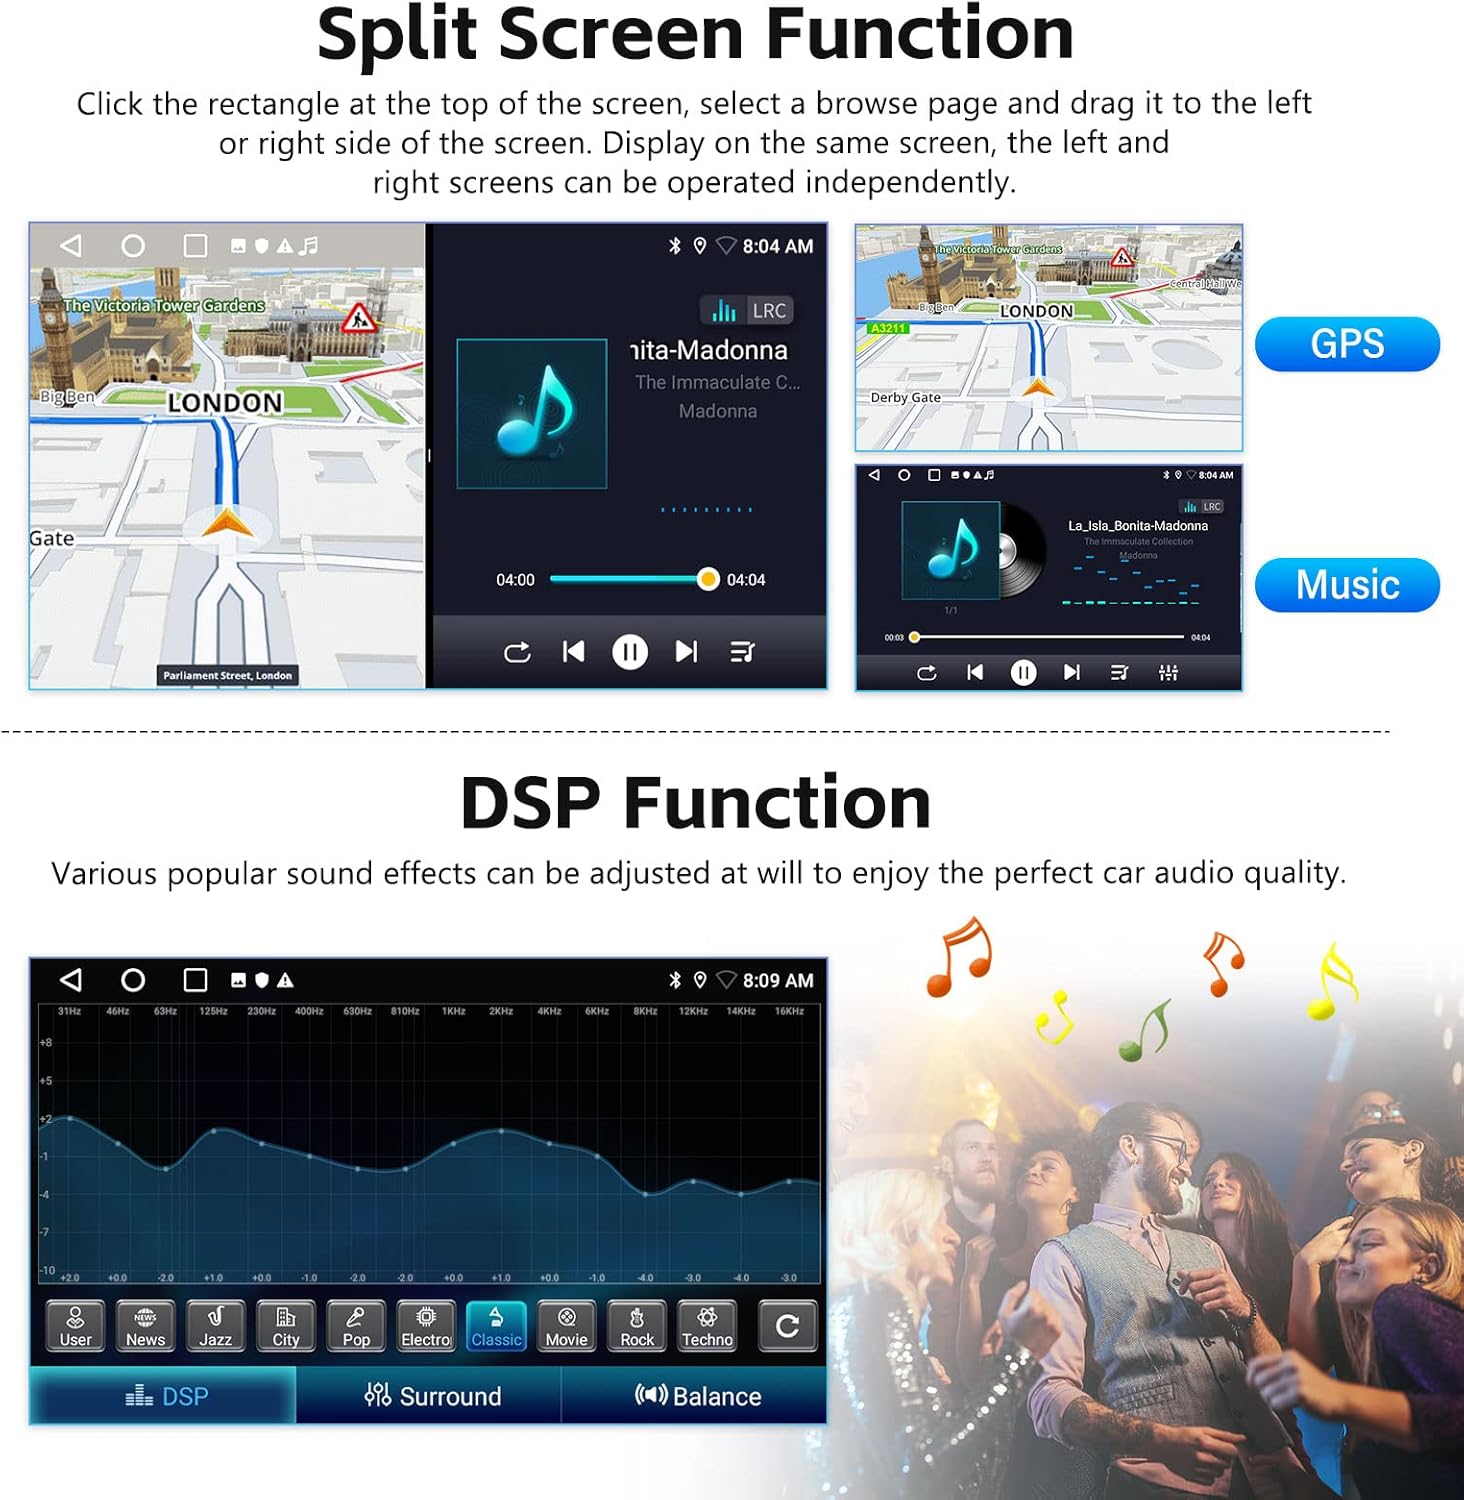
Image 7.1: The car stereo screen showing the reversing display with parking assist lines, and an illustration of a car backing up.
- The camera provides waterproof night vision for clear images in various conditions.
- Ensure the camera resolution is correctly set in Factory Settings (Password: 000000) to AHD/25.
8. Specifications
Detailed technical specifications for the Android Radio and AHD Camera components:
Image 8.1: A table outlining the technical specifications for both the Android radio unit and the AHD camera, including memory, display, and video formats.
| Feature | Specification | Feature | Specification |
|---|---|---|---|
| Memory | 2GB (RAM) + 32GB (ROM) | Screen Resolution | 1024*600 |
| Work Temperature | -20℃-75℃ | Power Output | 4*45W |
| Reversing Input | AHD/CVBS | Radio Band | FM/RDS |
| Video Format | MKV/RMVB/AVI/MP4/MDV etc. | Audio Format | APE/FLAC/WAV/MP3/WMA etc. |
| Language | Chinese/English/French/Italian/Korean/Japanese/Arabic/Spanish/Portuguese/Russian/Turkish/Vietnamese/Hebrew/Polish/German | Factory Setting Keyword | 000000 |
| Picture Format | PNG/JPEG/JPG/GIF/WBMP/BNP etc. | Video Output | NO |
| Feature | Specification | Feature | Specification |
|---|---|---|---|
| Image Sensor | 140A | TV System | NTSC / PAL Option |
| Effective Pixels | 1280 x 720 Pixels | Power | DC 12V |
| Video Cable Length | About 6M | Power Supply Cable Length | About 1.5M |
| Low-light Level Night Vision | 15m visible distance for night | Electronic Shutter | 1/50 to 1/100,000 seconds, 1/60 to 1/100,000 seconds |
9. Maintenance
To ensure the longevity and optimal performance of your car stereo, follow these maintenance guidelines:
- Screen Cleaning: Use a soft, lint-free cloth to gently wipe the touchscreen. Avoid abrasive cleaners or harsh chemicals that could damage the display.
- Software Updates: Periodically check for available software updates through the system settings to ensure you have the latest features and performance improvements.
- Environmental Conditions: Avoid exposing the unit to extreme temperatures or direct sunlight for prolonged periods.
10. Troubleshooting
This section addresses common issues you might encounter. If a problem persists, please contact customer support.
- No Sound After Installation:
If your car has an original amplifier, an additional CANbus protocol box is likely required. Contact customer service with photos of your car's center console and wiring for assistance. Ensure all audio cables are securely connected. - Incorrect Clock Time:
Check the time zone settings in the system. If the clock is consistently fast or slow, ensure the GPS antenna has a clear view of the sky for accurate time synchronization. - Intermittent Sound or Power Issues:
Verify all wiring connections are firm and properly seated. Loose connections can lead to inconsistent performance or battery drain. If issues persist, professional inspection of the wiring harness is recommended. - Steering Wheel Controls Not Working:
Ensure the CANbus box (if required) is correctly installed and configured. Re-perform the 'Steering Learn' process in the settings menu. - Rear View Camera Image Issues:
Check the camera's wiring connections, especially the two short wires on the camera. Verify the camera resolution setting in Factory Settings (Password: 000000) is set to AHD/25.
11. Warranty and Support
11.1 Warranty Information
The SIXTOP Android Car Stereo comes with a 1-year warranty from the date of purchase. Please retain your proof of purchase for warranty claims.
11.2 Customer Support
For technical assistance, troubleshooting, or warranty inquiries, please contact SIXTOP customer service.

Image 11.1: Online Support contact information.
Email: SIXTOP123@163.com

Image 11.2: Overview of support services offered, including quick response, replacement, and lifetime technical support.
- 24 Hours / 7 Days Quick Response
- 1-Year Replacement
- Lifetime Technical Support


