MOUNTAINONE Pipeline Inspection Camera with DVR
Model: 20M
Introduction
This manual provides comprehensive instructions for the MOUNTAINONE Pipeline Inspection Camera with DVR. This industrial endoscope is designed for inspecting various pipelines, including water supply pipes, air conditioning ducts, cable conduits, and sewer systems. It features a 4.3-inch LCD screen, an IP68 waterproof camera with 12 adjustable LEDs, and DVR functionality for recording inspections.
The system is equipped with a 20-meter high-intensity fiber cable, making it suitable for reaching difficult-to-access areas and providing clear visual feedback for diagnostic and maintenance purposes.
Product Components
The MOUNTAINONE Pipeline Inspection Camera system includes the following components:
- 4.3-inch LCD Monitor with sun visor
- 16GB TF Card (pre-installed or included separately)
- 1000TVL HD Camera
- 20M Fiberglass Cable
- 2 Camera Protective Covers
- Charger (5V1A)
- Screwdriver
- User Manual
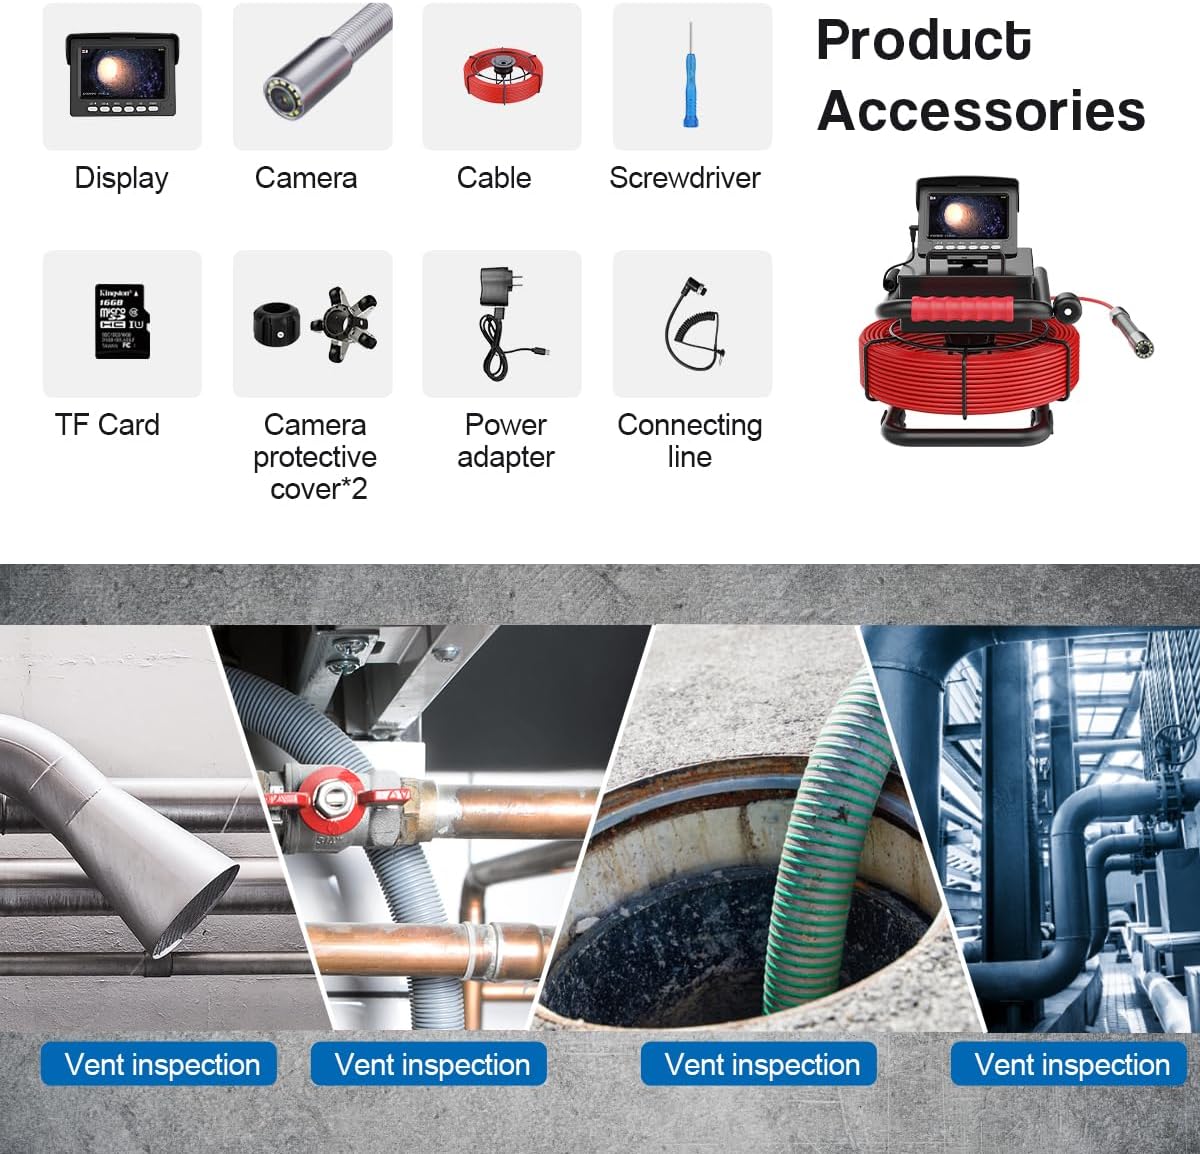
Figure 1: Overview of included product accessories.

Figure 2: The complete pipeline inspection camera system.
Specifications
| Feature | Specification |
|---|---|
| Monitor Size | 4.3-inch TFT Color Display |
| Monitor Resolution | 480*272 pixels |
| External Memory | TF Card (up to 32GB, 16GB included) |
| Battery Capacity | 5600mAh |
| Charger | 5V1A |
| Charging Time | Approximately 5 hours |
| Continuous Operation Time | Approximately 6 hours |
| Cable Length | 20 meters (fiber tube) |
| Camera Light Source | 12 high-intensity adjustable LEDs |
| Camera Viewing Angle | 145° |
| Camera Resolution | 1000TVL HD Megapixel |
| Camera Material | Stainless Steel (#304) |
| Camera Dimensions | 22mm * 42mm |
| Protection Cover Material | Steel Plastic |
| Waterproof Level | IP68 |
| Video Resolution | 1080p |
| Connectivity Technology | USB |
| Item Weight | 5.28 Kilograms |

Figure 3: Product dimensions for various components.
Setup
- Charge the Battery: Connect the charger to the monitor and a power outlet. The battery indicator on the monitor will show charging status. Ensure the battery is fully charged before first use (approximately 5 hours).

Figure 4: Battery and monitor connections.
- Insert TF Card: Locate the TF card slot on the monitor. Gently insert the provided 16GB TF card until it clicks into place. This card is essential for recording video and capturing images.
- Connect Camera Cable: Uncoil the fiberglass cable from the reel. Connect the camera end of the cable to the designated port on the monitor. Ensure a secure connection.
- Attach Protective Cover: Select the appropriate camera protective cover based on the pipe diameter and attach it to the camera head. This helps center the camera and protects it from damage. Two types of covers are provided.

Figure 5: Camera protective covers and bracket.
Operating Instructions
- Power On/Off: Press and hold the 'POWER' button on the monitor to turn the device on or off. The LCD screen will display the camera feed.
- Adjust LED Brightness: Use the 'LED-' and 'LED+' buttons on the monitor to adjust the brightness of the 12 LEDs on the camera head. This is crucial for optimal visibility in dark environments.
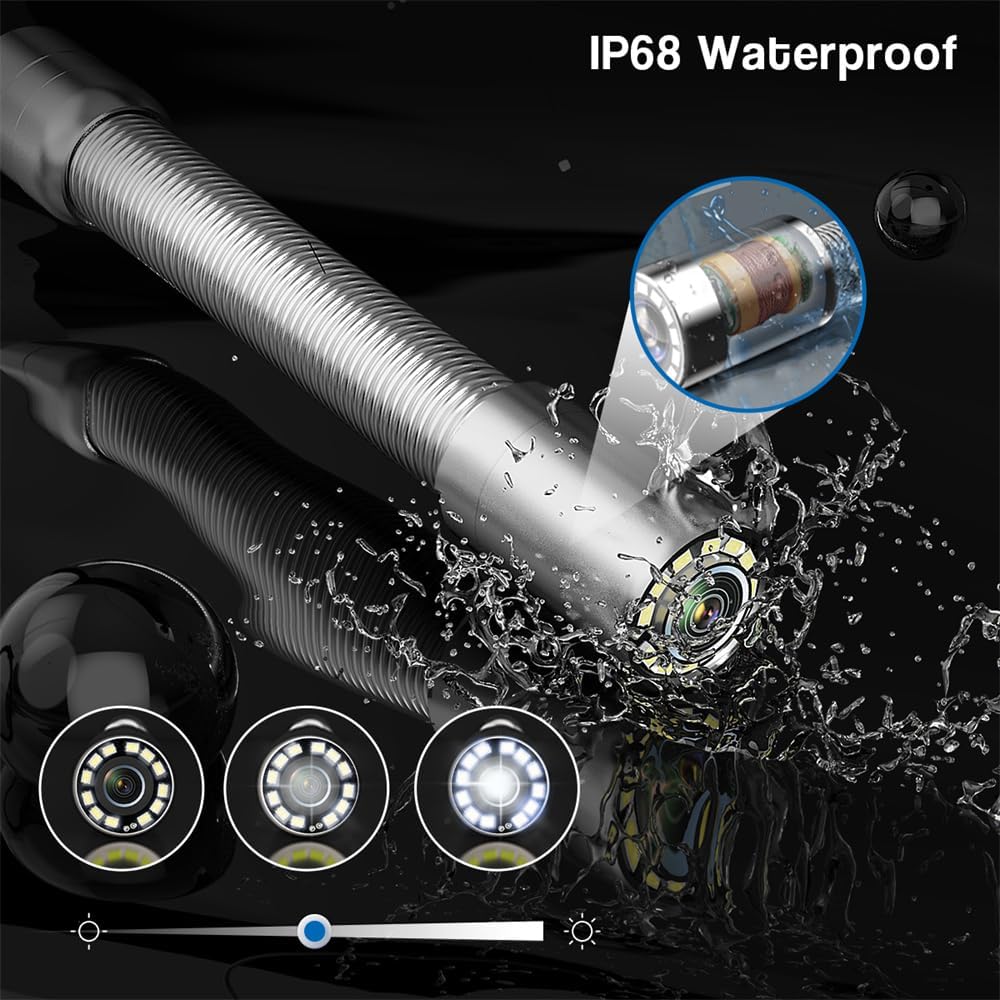
Figure 6: IP68 waterproof camera head with adjustable LEDs.
- Deploying the Camera: Carefully feed the camera head and cable into the pipeline. Use the portable reel to manage the cable length. The reel assists in both releasing and coiling the cable.

Figure 7: Cable management with portable reel and centering device.
- Recording Video/Capturing Photos: Press the 'OK' button to start/stop video recording. Press the 'MENU' button to access options for capturing still images or reviewing recorded media.
- Playback: Navigate through the menu using the directional buttons to access the playback mode. Select recorded videos or photos from the TF card for review on the monitor.
Maintenance
- Cleaning the Camera Head: After each use, especially in dirty environments, gently clean the camera lens and housing with a soft, damp cloth. Ensure no debris obstructs the lens or LEDs.
- Cable Care: Always coil the fiberglass cable neatly onto the reel after use to prevent kinks or damage. Avoid sharp bends or excessive force.
- Battery Storage: For long-term storage, ensure the battery is partially charged (around 50%) and store the device in a cool, dry place. Avoid fully discharging the battery for extended periods.
- General Cleaning: Wipe the monitor and main unit with a dry or slightly damp cloth. Do not use abrasive cleaners or solvents.
Troubleshooting
- No Power: Ensure the battery is fully charged. Check the charger connection. If the issue persists, the battery may need replacement.
- No Image on Screen: Verify that the camera cable is securely connected to the monitor. Check if the camera lens is clean and unobstructed.
- Poor Image Quality: Adjust the LED brightness using the 'LED-' and 'LED+' buttons. Clean the camera lens. Ensure the protective cover is correctly installed and not blocking the view.
- Recording Issues: Check if the TF card is properly inserted and has sufficient free space. Ensure the TF card is not corrupted. Format the TF card if necessary (refer to monitor menu for options).
- Cable Does Not Extend/Retract Smoothly: Inspect the cable for any physical damage or kinks. Ensure the reel mechanism is free of obstructions.
Applications
The MOUNTAINONE Pipeline Inspection Camera is suitable for a wide range of inspection tasks, including but not limited to:
- Water supply pipelines
- Air conditioning ducts
- Cable conduits
- Pipeline vacuum systems
- Industrial lead pipes
- Underground construction pipelines
- Confined space rescue operations
- Underground cave exploration
- Underwater research
- Sewer and drain inspections
- Household appliance maintenance
Figure 8: Various inspection applications.
Support
For further assistance, technical support, or inquiries regarding your MOUNTAINONE Pipeline Inspection Camera, please refer to the contact information provided with your purchase documentation or visit the official MOUNTAINONE website.


