
Introduction
This manual provides detailed instructions for the operation and maintenance of your LAUNCH CR3008 Plus OBD2 Diagnostic Scan Tool. This device is designed to assist in diagnosing vehicle issues by reading and clearing diagnostic trouble codes (DTCs), monitoring vehicle systems, and performing various diagnostic tests.
1. Setup
1.1. Unpacking and Initial Inspection
Carefully unpack the LAUNCH CR3008 Plus device and inspect it for any signs of damage. Ensure all components are present.
1.2. Connecting to Your Vehicle (Plug & Play)
The LAUNCH CR3008 Plus is a plug-and-play device, powered directly by your vehicle's OBD-II port. No external power source is required for basic operation.
- Locate the 16-pin Data Link Connector (DLC) in your vehicle. This port is typically located under the dashboard on the driver's side.
- With the vehicle's ignition off, firmly connect the diagnostic tool's cable to the vehicle's DLC.
- Turn the vehicle's ignition to the "ON" position (do not start the engine). The device will automatically power on and initiate communication with the vehicle's onboard computer.

Image: The LAUNCH CR3008 Plus connected to a vehicle's OBD-II port, demonstrating its plug-and-play functionality and battery voltage test feature.
2. Operating Instructions
2.1. Basic Operation and Menu Navigation
The device features a 2.8-inch TFT color LCD screen and a silicone keypad for easy navigation. Use the directional buttons to scroll through menus and the "OK" button to confirm selections.

Image: The LAUNCH CR3008 Plus displaying its diagnostic menu, highlighting various functions available to the user.
2.2. Language Selection
The device supports 8 languages: English, Spanish, French, German, Russian, Japanese, Portuguese, and Italian. To change the language, navigate to the "Settings" menu and select "Language".
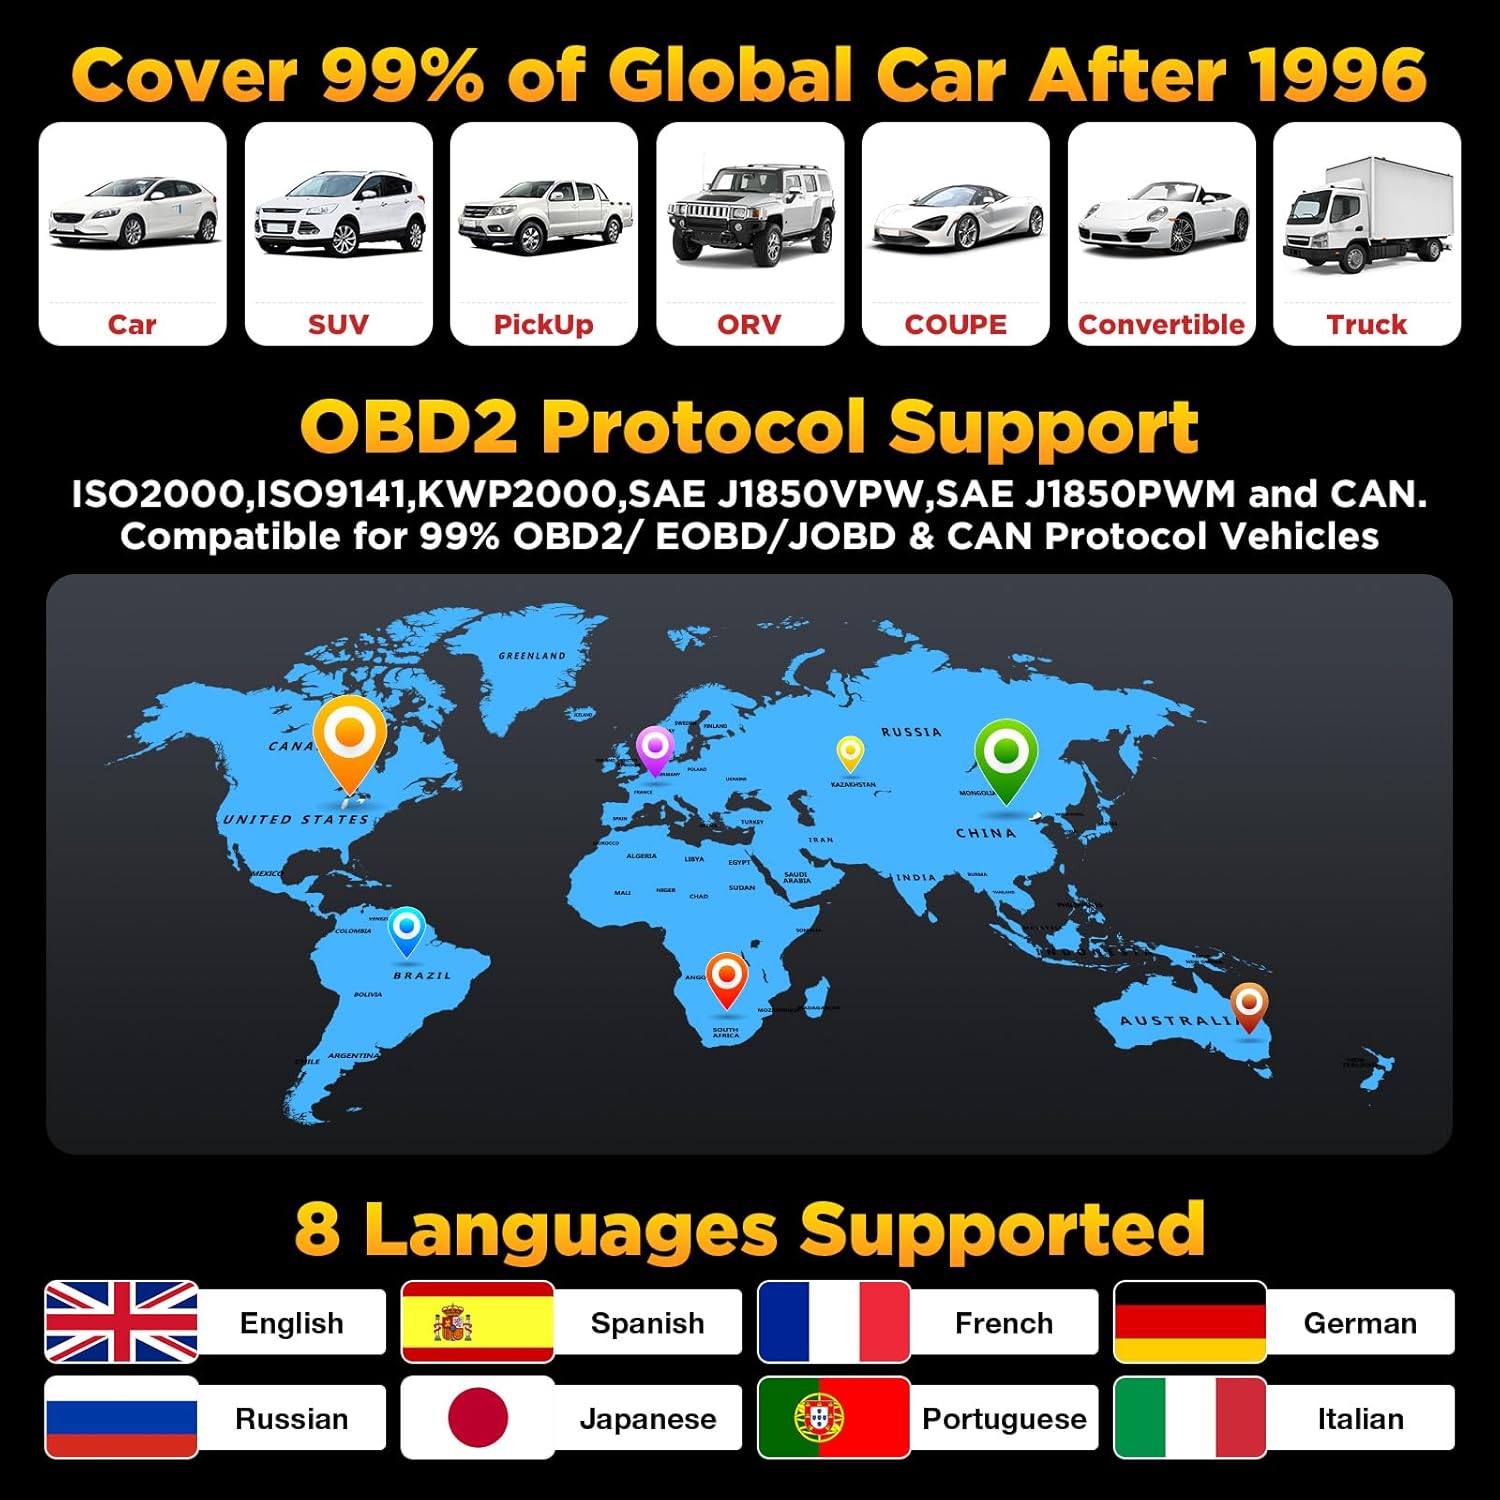
Image: The LAUNCH CR3008 Plus interface showing the selection of supported languages and a map illustrating global vehicle compatibility.
2.3. Full OBD2/EOBD Functions
The LAUNCH CR3008 Plus provides comprehensive OBD2/EOBD diagnostic functions:
- Read Codes: Retrieves Diagnostic Trouble Codes (DTCs) from the vehicle's computer.
- Clear Codes: Erases DTCs from the vehicle's computer and turns off the Malfunction Indicator Lamp (MIL).
- Live Data: Displays real-time data stream from the vehicle's sensors.
- DTC Lookup: Provides definitions for generic and manufacturer-specific codes.
- Freeze Frame: Stores a snapshot of vehicle operating conditions at the time an emission-related fault occurred.
- I/M Readiness: Checks the readiness of the emission monitoring systems. A one-key I/M readiness function is available for quick checks.
- O2 Sensor Test: Retrieves O2 sensor monitor test results.
- EVAP System Test (Mode 8): Initiates a test of the vehicle's Evaporative Emission System.
- On-Board Monitor Test (Mode 6): Retrieves results for emission-related powertrain components and systems that are not continuously monitored.
- Vehicle Information (VIN): Retrieves the Vehicle Identification Number, Calibration ID, and Calibration Verification Number.
- Battery Voltage Test: Monitors the vehicle's battery voltage in real-time.

Image: Overview of the full OBD2 functions offered by the LAUNCH CR3008 Plus, detailing its diagnostic capabilities.
2.4. Clearing the Check Engine Light
When a fault code is detected, the Check Engine Light (MIL) illuminates. To turn off the MIL after addressing the underlying issue:
- Connect the tool to your vehicle.
- Navigate to the "Erase Codes" option in the diagnostic menu.
- Confirm the action to clear the codes. This will also turn off the MIL.

Image: The LAUNCH CR3008 Plus demonstrating how to turn off the Check Engine Light and clear fault codes.
2.5. I/M Readiness Check
The one-key I/M Readiness function allows for a quick check of the emission system's status, which is crucial for passing smog tests.
- From the main menu, press the dedicated "I/M" button.
- The device will display the status of various emission monitors (e.g., MIL, MIS, FUE, CCM, CAT, HCAT, O2S, EVAP, AIR, EGR). A checkmark indicates a complete test, while an 'X' indicates an incomplete test or fault.
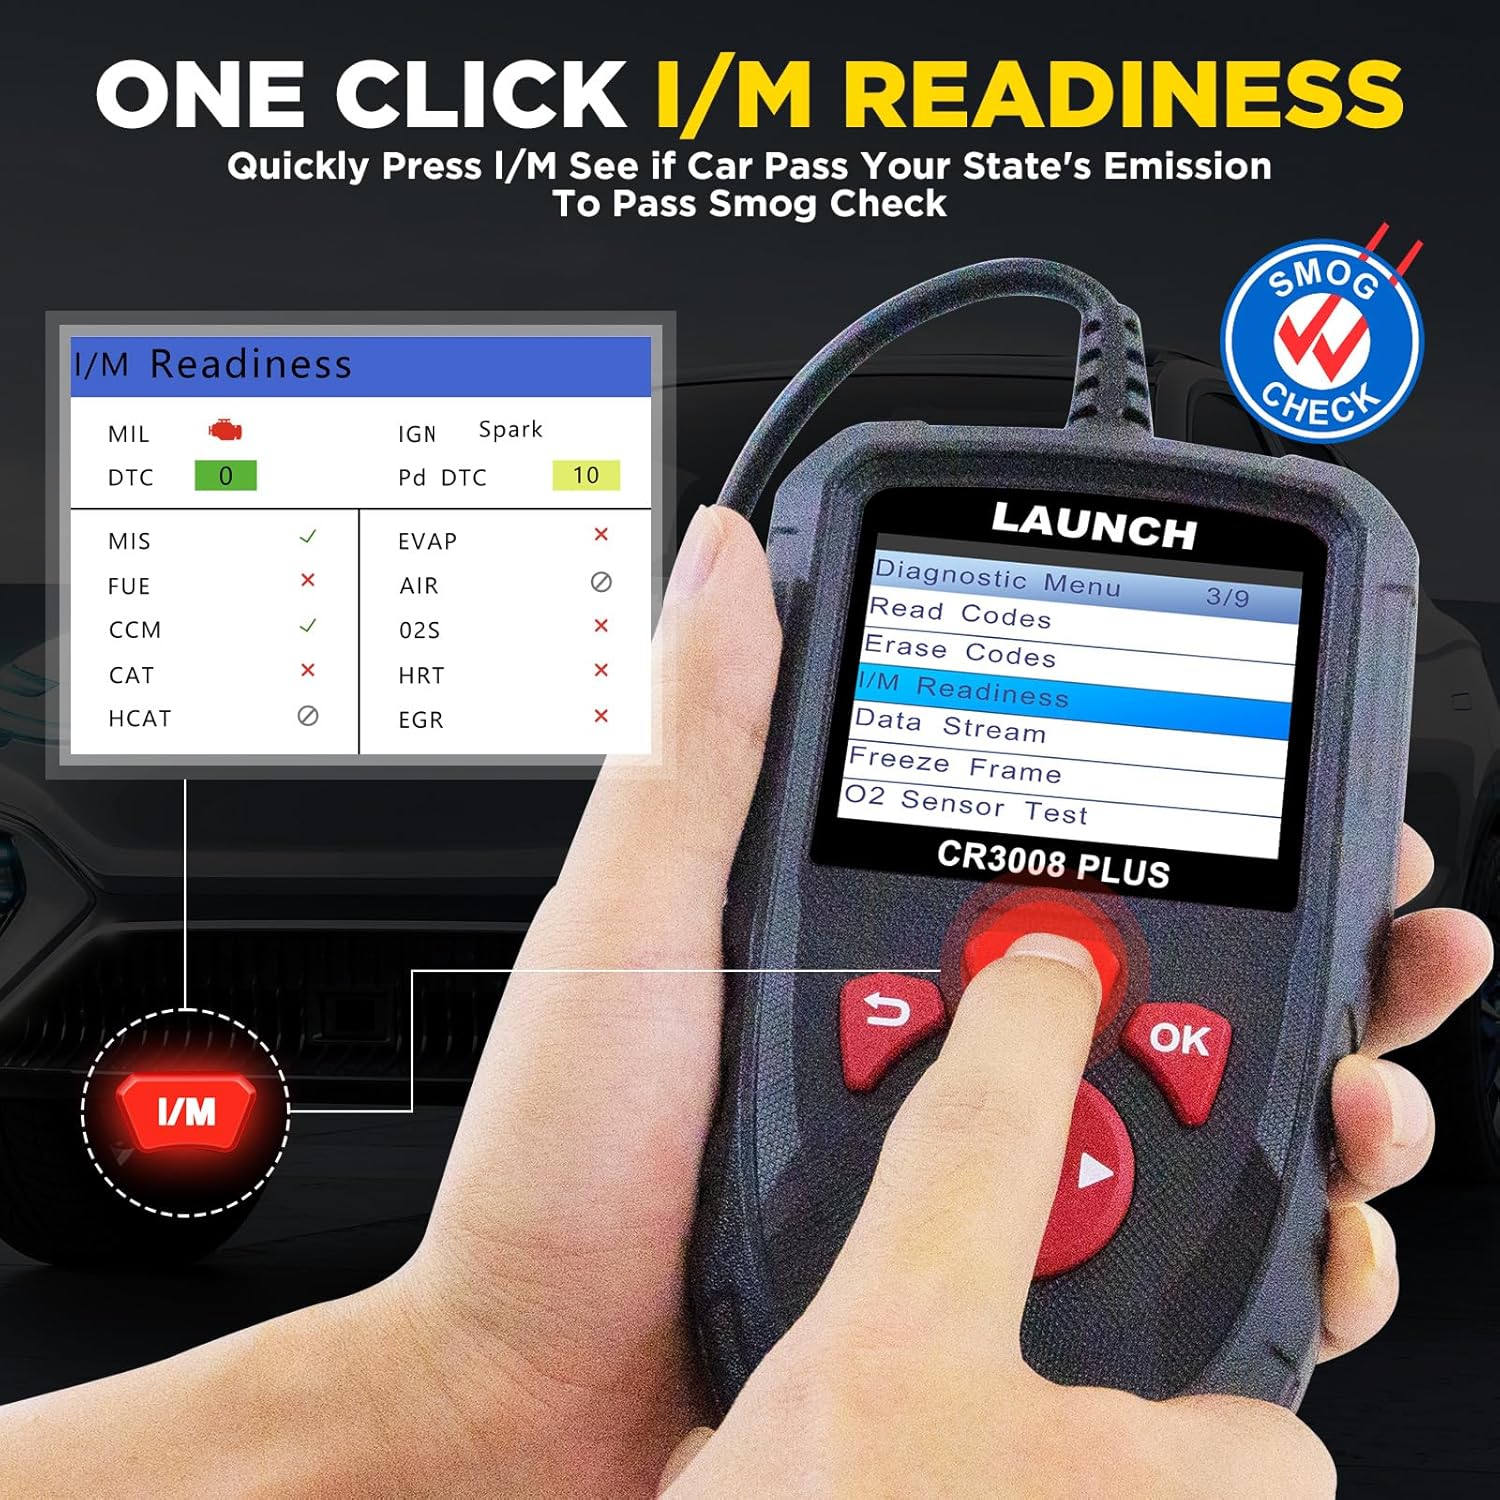
Image: The LAUNCH CR3008 Plus performing a one-click I/M Readiness test, indicating system status for emission checks.
2.6. Data Record, Review, and Print
The device allows you to record, review, and print diagnostic reports. This feature helps in tracking vehicle performance over time and sharing diagnostic information.
- Record Data: During live data stream viewing, select the record option to save data.
- Review Data: Access saved data records from the "Review" menu.
- Print Data: Connect the device to a computer via USB. Use the LAUNCH update tool software to print diagnostic reports.
Image: The LAUNCH CR3008 Plus connected to a computer for data printing, illustrating the process of generating diagnostic reports.
3. Maintenance
3.1. Software Updates
The LAUNCH CR3008 Plus offers lifetime free software updates to ensure compatibility with new vehicle models and improved functionality.
- Visit the official LAUNCH website to download the latest update software.
- Install the software on your computer.
- Connect the CR3008 Plus to your computer using the provided USB cable.
- Follow the on-screen instructions in the update software to perform the update.

Image: The LAUNCH CR3008 Plus connected to a laptop, demonstrating the process for lifetime free software updates.
4. Troubleshooting
If you encounter issues with your LAUNCH CR3008 Plus, consider the following:
- Device does not power on: Ensure the device is correctly connected to the vehicle's OBD-II port and the vehicle's ignition is in the "ON" position. Check the vehicle's battery voltage.
- Communication error: Verify the connection to the OBD-II port. Ensure the vehicle supports the OBD-II protocol (most vehicles after 1996 in the US, 2000 in Europe, and 2008 in Asia).
- Incorrect readings or functions: Ensure the software is up to date. Functions may vary by vehicle make, model, and year.
- Product damaged or used upon receipt: If you receive a damaged or used item, contact customer support for a replacement.
For further assistance, refer to the "Warranty & Support" section.
5. Product Specifications
| Feature | Specification |
|---|---|
| Brand | LAUNCH |
| Model Number | CR3008 Plus |
| Power Source | Vehicle OBD-II Port (Battery Powered) |
| Operating System | LAUNCH SYSTEM |
| Screen Size | 2.8 Inches |
| Supported Languages | English, Spanish, French, German, Russian, Japanese, Portuguese, Italian |
| Vehicle Compatibility | Universal (99% of US vehicles after 1996, EU vehicles after 2000, Asian vehicles after 2008) |
| GTIN/UPC | 884508007705 |
6. Warranty and Customer Support
The LAUNCH CR3008 Plus comes with a 60-day return policy and a warranty of up to 5 years. For any issues or inquiries, our customer service team is available 24 hours a day, 365 days a year.
You can contact support via the Amazon messaging system or through the email address provided on the product details page.
For questions regarding product functionality and vehicle compatibility, please contact customer support for detailed information.


