
Introduction
This manual provides detailed instructions for the operation and maintenance of your Sharp Alarm Clock. Please read this manual thoroughly before using the product to ensure proper function and longevity. This alarm clock is designed for ease of use and features convenient charging options for your devices.
Key Features
- Super Fast USB-C Charging: Equipped with a USB Type-C port for rapid charging of compatible smartphones, including the latest models.
- Fast 2 Amp USB-A Charging: Includes a standard USB Type-A port delivering 2 Amps for efficient charging of various devices.
- Dual Alarms: Set two independent alarms for different wake-up times.
- 9-Minute Snooze: Provides a convenient snooze function for extra rest.
- 3-Step Dimmer: Adjustable display brightness with three levels to suit your preference.
- Easy-to-Read Green LED Display: Clear 0.7-inch green LED numbers for visibility day or night.
- Optional Battery Backup: Retains time and alarm settings during power outages (requires 2 x AAA batteries, not included).
Product Overview
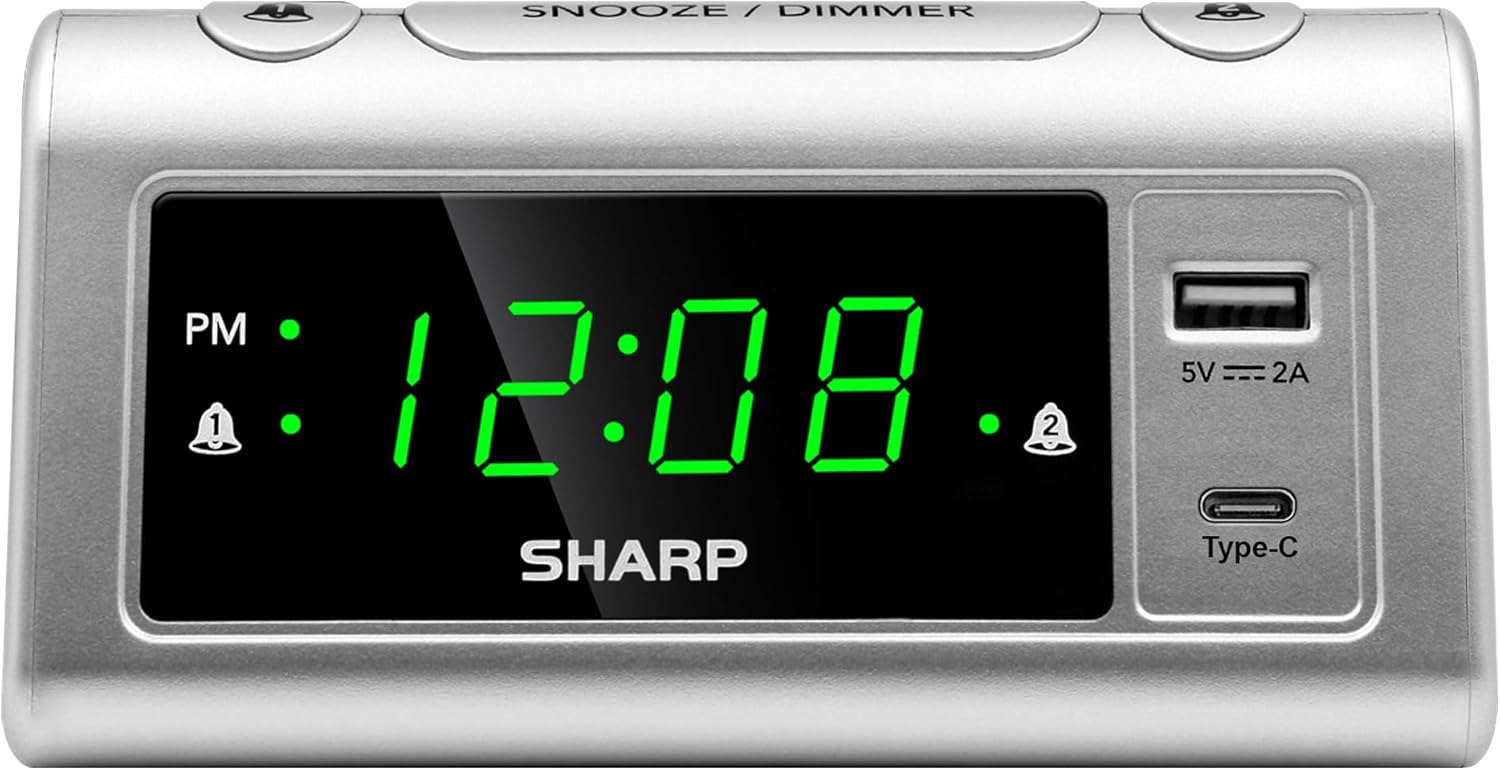
Front view of the Sharp Alarm Clock, showcasing the large green LED time display, PM indicator, alarm indicators, and the integrated USB-A and USB-C charging ports on the right side.

Top-down view of the alarm clock with labels indicating the 'Time Set', 'Time Advancing', 'Time Receding', 'Alarm 1 Set ON/OFF', 'Alarm 2 Set ON/OFF', 'Snooze/Dimmer Control (3-Levels of Brightness)', 'Super Fast Charging USB-C', and 'Fast Charging 2 Amp USB'. Dimensions are also shown as 5.65 inches wide and 2.95 inches high.
Setup
1. Power Connection
Plug the AC power cord into a standard 120V AC wall outlet. The clock display will illuminate, and the time will default to 12:00 AM.
2. Battery Backup Installation
For optional battery backup, insert 2 x AAA batteries (not included) into the battery compartment located on the bottom of the unit. This feature ensures that time and alarm settings are retained during a power interruption. The display will not be lit during battery backup, but the alarm will still sound.

The bottom of the alarm clock, revealing the battery compartment for 2 AAA batteries (not included) to provide backup power for settings.
Operating Instructions
1. Setting the Time
- Press and hold the TIME SET button. The hour digits will begin to flash.
- While holding TIME SET, press the HOUR button repeatedly to adjust the hour. Observe the PM indicator for correct AM/PM setting.
- While holding TIME SET, press the MINUTE button repeatedly to adjust the minutes.
- Release the TIME SET button to confirm the time.
2. Setting Alarms (Dual Alarms)
This clock features two independent alarms (Alarm 1 and Alarm 2).
- Press and hold the ALARM 1 SET button. The hour digits for Alarm 1 will flash.
- While holding ALARM 1 SET, press the HOUR button to set the desired alarm hour.
- While holding ALARM 1 SET, press the MINUTE button to set the desired alarm minutes.
- Release the ALARM 1 SET button to confirm.
- To activate Alarm 1, press the ALARM 1 ON/OFF button until the alarm indicator (bell icon) appears next to 'AL1' on the display.
- Repeat steps 1-5 for ALARM 2 SET and ALARM 2 ON/OFF to set and activate the second alarm.
3. Snooze Function
When an alarm sounds, press the large SNOOZE / DIMMER button on top of the clock. The alarm will pause for 9 minutes and then sound again.
4. Display Dimmer
To adjust the brightness of the LED display, repeatedly press the SNOOZE / DIMMER button when the alarm is not sounding. Cycle through the three brightness levels (High, Medium, Low) and an Off setting.

The Sharp Alarm Clock displaying the time, with a hand adjusting the dimmer function on the top of the unit. This allows for comfortable viewing in various lighting conditions.
5. USB Charging Ports
The alarm clock features both a USB Type-C port and a standard USB Type-A port for charging your electronic devices. Simply connect your device's charging cable to the appropriate port on the right side of the clock.
- USB Type-C: Provides super-fast charging for compatible devices like the iPhone 15 or Galaxy smartphones.
- USB Type-A: Delivers 2 Amps of fast charging power for other USB-powered devices.

The Sharp Alarm Clock with a smartphone connected to its USB-C port, indicating active charging. The clock also features a USB-A port for additional device charging.
Maintenance
- Cleaning: Wipe the clock with a soft, dry cloth. Do not use abrasive cleaners or solvents.
- Power Cord: Regularly inspect the power cord for any damage. If damaged, discontinue use and contact customer support.
- Battery Replacement: Replace AAA backup batteries annually or when the clock's settings are no longer retained during power outages.
Troubleshooting
| Problem | Solution |
|---|---|
| Clock display is blank. | Ensure the AC power cord is securely plugged into a working outlet. Check if the dimmer is set to 'Off'. |
| Alarm does not sound. | Verify that the alarm is set and activated (bell icon visible). Check the alarm time is correct (AM/PM). |
| USB ports are not charging. | Ensure the clock is powered via AC. Check the charging cable and device compatibility. |
| Time/settings lost after power outage. | Install fresh AAA batteries for the backup function. |
Specifications
- Brand: Sharp
- Model: B0CHXR25FJ
- Color: Silver
- Display Type: LED (Green)
- Product Dimensions: 5.56"W x 2.67"H
- Power Source: Corded Electric
- Battery Backup: 2 x AAA batteries (not included)
- USB-C Output: Super Fast Charging
- USB-A Output: 2 Amps Fast Charging
- Special Features: Charging Port, Corded, Dual Alarms, 3-Step Dimmer, Snooze
Official Product Video
An official video from Sharp, titled 'Sharp Clocks - Keeps the Rhythm of Your Day', showcasing the features and design of Sharp alarm clocks, including this model.
Warranty and Support
For warranty information or technical support, please refer to the documentation included with your product or visit the official Sharp website. Keep your purchase receipt as proof of purchase for any warranty claims.


