
Introduction
This manual provides detailed instructions for the assembly, operation, and maintenance of your GOLINPEILO Multi-Purpose Workbench with Pegboard and Drawer, Style A. Please read all instructions carefully before assembly and use to ensure safe and efficient operation. Keep this manual for future reference.
Safety Information
Warning: This product includes small parts that may pose a choking hazard to children. Always keep small parts out of reach of children. This workbench is heavy and may tip over if not properly assembled or used. Always follow the assembly instructions carefully to ensure stability. Do not exceed the load capacity of 331 lb. Always maintain the workbench in good condition and follow the manufacturer's instructions for proper use and maintenance.
- Ensure all bolts and fasteners are securely tightened before use.
- Do not stand or climb on the workbench.
- Distribute weight evenly across the work surface and shelves.
- Keep the work area clear and well-lit.
- Wear appropriate safety gear when working with tools on the bench.
Package Contents
Please verify that all components are present before beginning assembly. If any parts are missing or damaged, please contact customer service.
- Steel Frame Components
- MDF Work Surface
- MDF Bottom Shelf
- MDF Pegboard
- Drawer Assembly
- 12 Hooks for Pegboard
- Assembly Hardware (bolts, nuts, washers, etc.)
- Instruction Manual
Assembly Instructions
Assembly is required. Please follow these steps carefully. It is recommended to have a second person assist with assembly for easier handling of larger components.
- Step 1: Assemble the Steel Frame. Begin by connecting the main vertical and horizontal steel frame components using the provided bolts and nuts. Ensure all connections are finger-tightened initially.

Image: Initial assembly of the workbench's steel frame.
- Step 2: Install the Bottom Shelf. Place the MDF bottom shelf onto the designated supports within the steel frame. Secure it in place according to the diagrams in your hardware packet.
- Step 3: Attach the Main Work Surface. Position the larger MDF work surface onto the upper frame supports. Secure it firmly with the appropriate hardware.
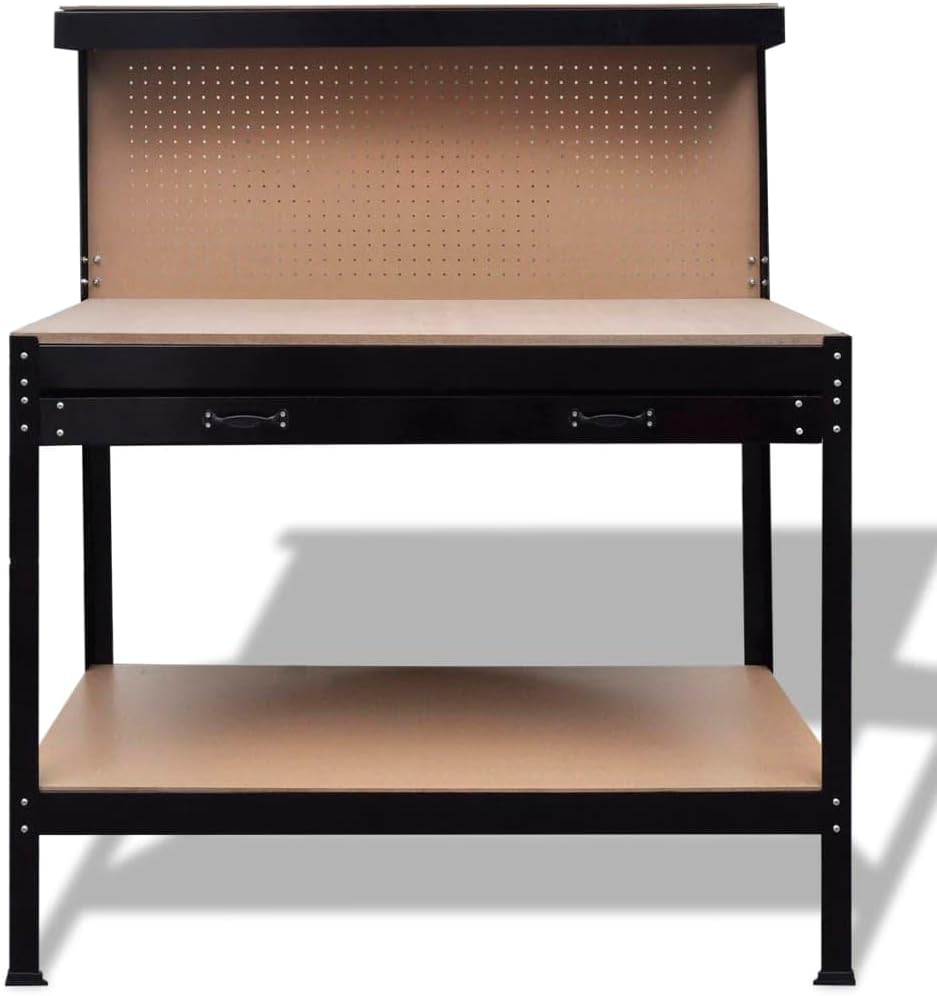
Image: Front view of the workbench, showing the main work surface and pegboard area.
- Step 4: Assemble and Install the Drawer. Follow the separate instructions for assembling the drawer components. Once assembled, slide the drawer into its designated runners beneath the main work surface.
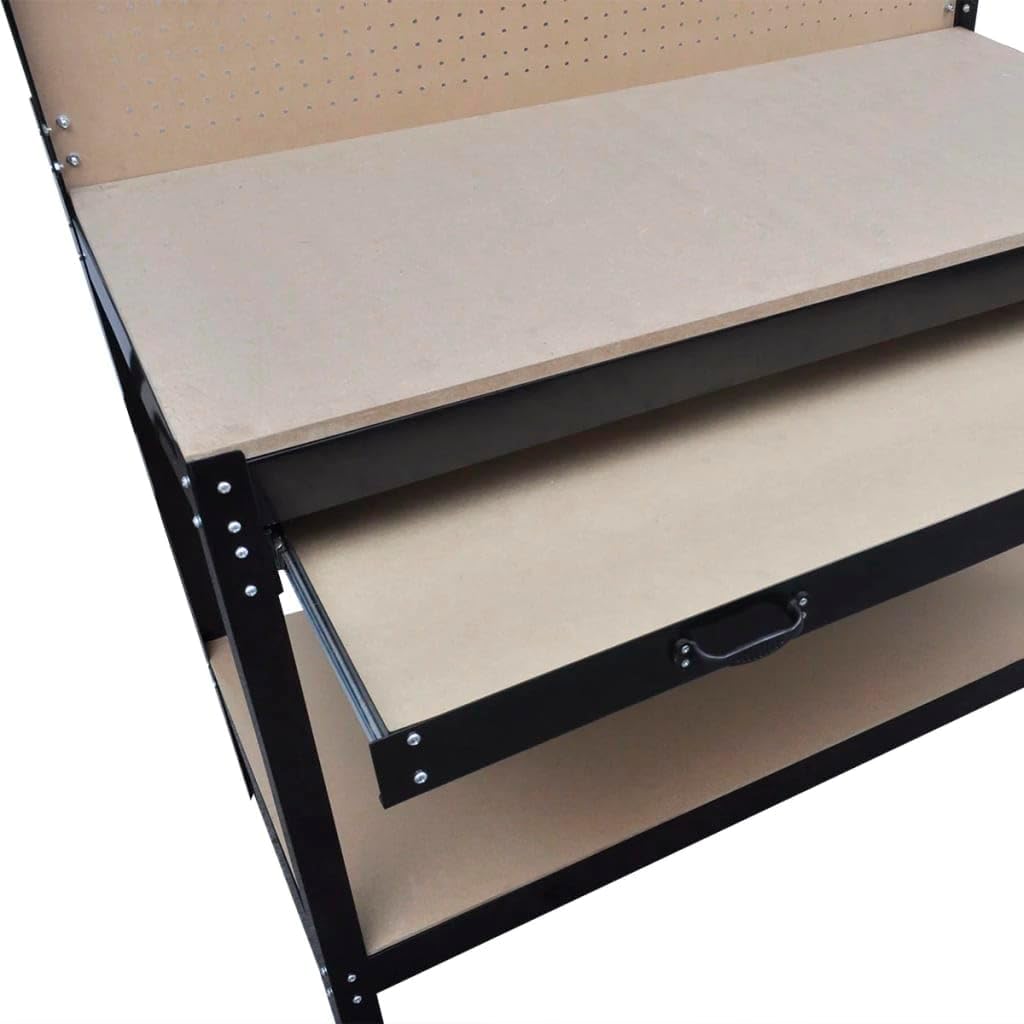
Image: Detail of the workbench drawer, showing its construction and handles.
- Step 5: Attach the Pegboard. Mount the MDF pegboard to the rear uprights of the workbench frame. Ensure it is securely fastened.
- Step 6: Final Tightening. Once all components are in place, systematically tighten all bolts and fasteners using appropriate tools. Do not overtighten.

Image: Angled view of the workbench after full assembly, showcasing its features.
- Step 7: Install Pegboard Hooks. Insert the 12 provided hooks into the pegboard holes as desired for tool organization.
After assembly, ensure the workbench is stable and all parts are secure before placing any items on it.
Operating Instructions
The GOLINPEILO Multi-Purpose Workbench is designed for various tasks in a home workshop or garage environment.
- Work Surface: Use the main MDF work surface for tasks requiring a stable and spacious area. Avoid placing extremely hot items directly on the surface without protection.
- Drawer: The large drawer is suitable for storing smaller tools, accessories, and hardware. Ensure the drawer slides smoothly and is not overloaded.
- Pegboard: Utilize the pegboard and included hooks to organize frequently used tools, keeping them visible and easily accessible.
- Bottom Shelf: The bottom shelf provides additional storage for bulkier items, power tools, or material supplies. Distribute weight evenly.
Always ensure the workbench is on a level surface to prevent instability during use.
Maintenance
Regular maintenance will prolong the life and ensure the safe operation of your workbench.
- Cleaning: Wipe down steel surfaces with a damp cloth and mild detergent. Clean MDF surfaces with a dry or slightly damp cloth. Avoid abrasive cleaners.
- Fasteners: Periodically check all bolts and nuts for tightness. Re-tighten if necessary to maintain structural integrity.
- Drawer Slides: If the drawer becomes stiff, apply a small amount of silicone lubricant to the slides.
- Damage Inspection: Regularly inspect the steel frame and MDF boards for any signs of damage, rust, or wear. Replace damaged parts if safety is compromised.
Troubleshooting
| Problem | Possible Cause | Solution |
|---|---|---|
| Workbench is wobbly or unstable. | Loose fasteners; uneven floor. | Check and tighten all bolts. Ensure the workbench is on a level surface. Adjust rubber feet if applicable. |
| Drawer does not slide smoothly. | Obstruction in slides; lack of lubrication; overloaded drawer. | Clear any obstructions. Apply silicone lubricant to drawer slides. Reduce the weight in the drawer. |
| Pegboard hooks fall out easily. | Incorrect hook installation; overloaded hooks. | Ensure hooks are fully inserted and correctly oriented. Do not overload hooks with heavy tools. |
Specifications
| Material | Steel frame + MDF |
| Overall Size (W x D x H) | 45.3" x 21.7" x 55" |
| Drawer Size (W x D x H) | 42.5" x 16.3" x 2.6" |
| Bottom Shelf Height from Ground | 10.8" |
| Working Height | 35.8" |
| Load Capacity | 331 lb |
| Color | Brown |
| Assembly Required | Yes |
Warranty and Customer Support
GOLINPEILO is committed to providing quality products and excellent customer service. If you have any questions, require assistance with assembly, or encounter any issues with your workbench, please do not hesitate to contact our customer service team.
If any part is missing or damaged during shipping, please contact us first and provide pictures of the damaged part. Our customer service team will respond within 24 hours and assist with replacements or other solutions as needed.
For support, please refer to the contact information provided at the point of purchase or visit the official GOLINPEILO store online.