1. Introduction
This manual provides detailed instructions for the installation, configuration, and maintenance of the FRONTECH FT-0470 H61 Motherboard. Please read this manual thoroughly before proceeding with installation to ensure proper setup and operation.
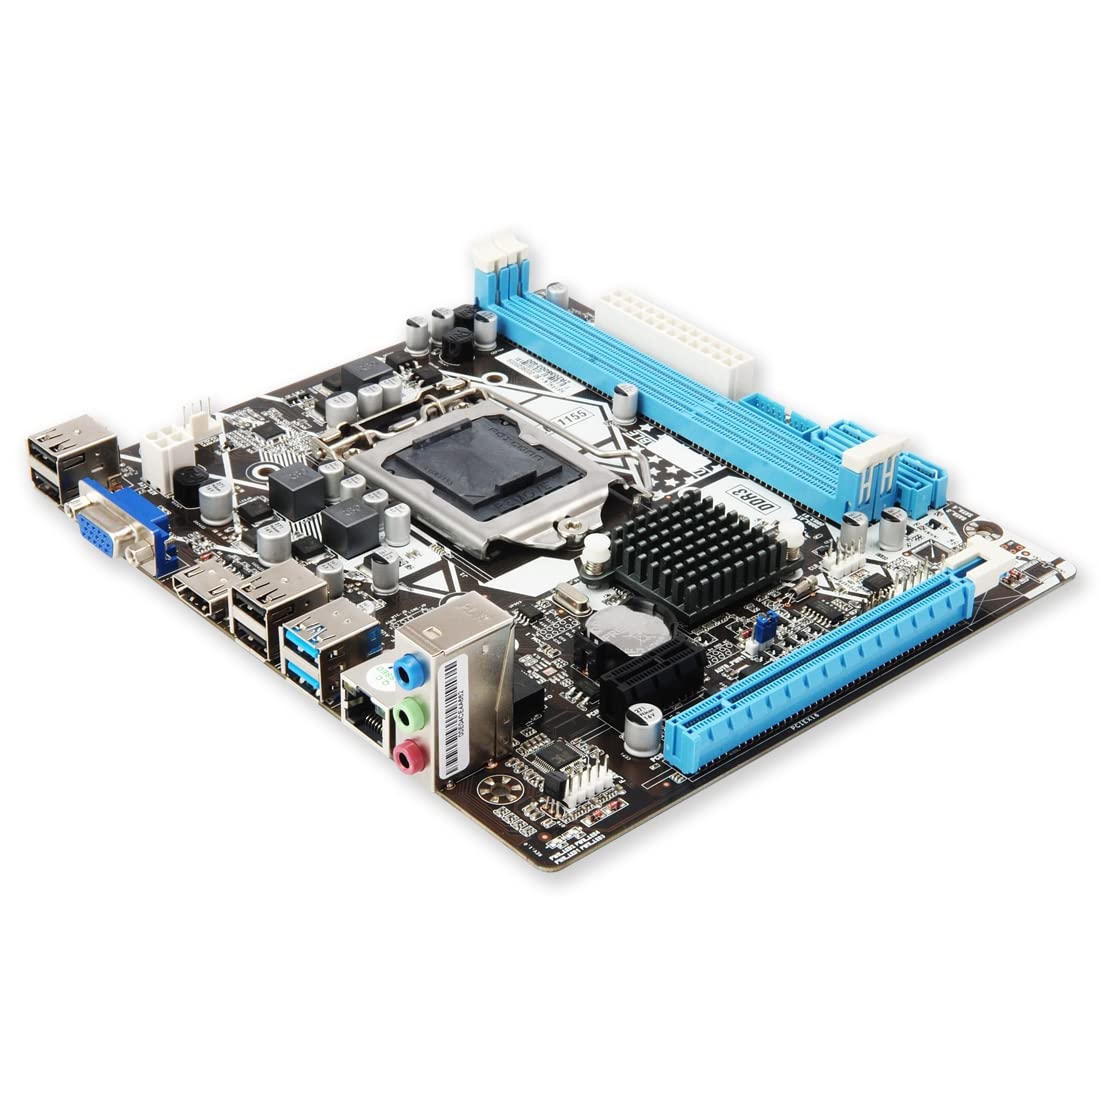
Image 1.1: The FRONTECH FT-0470 H61 Motherboard with its retail packaging, driver CD, and SATA cables.
2. Product Overview
The FRONTECH FT-0470 H61 Motherboard is designed to support Intel LGA1155 socket processors, including i3, i5, i7, and Pentium series. It features the Intel H61 Express Chipset, providing a stable and efficient platform for personal computing.
Key Features:
- Processor Support: LGA1155 socket for Intel i3/i5/i7/Pentium processors.
- Chipset: Intel H61 Express Chipset.
- Memory: 2 x DDR3 RAM slots, supporting 1066/1333/1600 MHz, up to 16GB total.
- Storage: 4 x SATA ports, 1 x NVMe slot.
- Expansion Slots: 1 x PCI Express x16 slot, 1 x PCI Express x1 slot.
- Connectivity: 6 x USB ports (USB 2.0), HDMI, VGA, Ethernet (LAN 10/100Mbps), 6-channel HD Audio.

Image 2.1: The FRONTECH H61 Motherboard mounted inside a computer case, highlighting its key specifications such as CPU support, chipset, memory, sound, expansion, and LAN.

Image 2.2: A visual representation of the FRONTECH H61 Motherboard, emphasizing its H61 Express Chipset and compatibility with Intel i3/i5/i7 series CPUs.
3. Setup and Installation
Follow these steps carefully to install your FRONTECH FT-0470 H61 Motherboard into your computer system.
3.1. Preparing Your System
- Ensure your power supply is disconnected from the wall outlet.
- Open your computer case and prepare the mounting area for the motherboard.
- Gather necessary tools: screwdriver, thermal paste, anti-static wrist strap.
3.2. CPU Installation
- Locate the LGA1155 CPU socket on the motherboard.
- Gently lift the load lever and open the CPU socket cover.
- Align the notches on your Intel LGA1155 processor with the socket. Carefully place the CPU into the socket without forcing it.
- Close the socket cover and push down the load lever until it locks into place.
- Apply a small amount of thermal paste to the center of the CPU.
- Install the CPU cooler according to its manufacturer's instructions.
3.3. RAM Installation
- Locate the two DDR3 RAM slots.
- Open the clips at both ends of the RAM slot.
- Align the notch on the DDR3 memory module with the notch in the slot.
- Insert the memory module firmly into the slot until the clips snap into place. Repeat for the second module if installing dual channel memory.
3.4. Storage Device Installation
- SATA Drives: Connect your SATA hard drives or SSDs to the 4 available SATA ports using SATA data cables. Connect power from your power supply.
- NVMe SSD: If using an NVMe SSD, locate the NVMe slot and install the drive, securing it with the provided screw.
3.5. Expansion Card Installation
- Graphics Card: Insert your PCI Express x16 graphics card into the designated slot until it clicks. Secure it with a screw to the case.
- Other Cards: Install any other PCI Express x1 cards into the available slot.
3.6. Connecting Peripherals and Power
Refer to the diagram below for identifying the rear I/O ports and front panel connectors.

Image 3.1: Diagram illustrating the rear input/output ports of the FRONTECH H61 Motherboard, including USB, VGA, HDMI, Ethernet, and audio jacks.

Image 3.2: Close-up of the FRONTECH H61 Motherboard highlighting the 6x USB 2.0, 1x VGA, 1x HDMI, 1x RJ45 (Ethernet), and 1x 3-in-1 Audio Port.
- Connect the 24-pin ATX power connector and the 4-pin 12V CPU power connector from your power supply to the motherboard.
- Connect front panel headers (power button, reset button, HDD LED, power LED, front USB, front audio) to their respective pins on the motherboard. Refer to your case manual for specific pin assignments.
- Connect USB devices, monitor (via HDMI or VGA), Ethernet cable, and audio devices to the rear I/O panel.
4. Operating Instructions
After successful installation, power on your system. The motherboard will initiate the Power-On Self-Test (POST) process.
4.1. BIOS/UEFI Setup
- During POST, press the designated key (usually DEL or F2) to enter the BIOS/UEFI setup utility.
- Configure boot order, date/time, and other system settings as needed.
- Save changes and exit BIOS/UEFI.
4.2. Operating System Installation
- Insert your operating system installation media (USB drive or DVD).
- Boot from the installation media and follow the on-screen prompts to install your preferred operating system.
- Install necessary drivers for the chipset, audio, LAN, and other components, typically found on the included driver CD or the manufacturer's website.
5. Maintenance
Proper maintenance ensures the longevity and stable performance of your motherboard.
- Dust Removal: Regularly clean dust from the motherboard and CPU cooler using compressed air. Ensure the system is powered off and unplugged before cleaning.
- Temperature Monitoring: Monitor system temperatures to prevent overheating. Ensure proper airflow within the PC case.
- BIOS Updates: Periodically check the manufacturer's website for BIOS updates. Update only if necessary and follow instructions carefully.
- Driver Updates: Keep your drivers updated for optimal performance and compatibility.
6. Troubleshooting
This section addresses common issues you might encounter.
6.1. No Display Output
- Check if the monitor is properly connected to the graphics card or motherboard's integrated graphics port (VGA/HDMI).
- Ensure the graphics card is fully seated in its PCIe slot and has adequate power connected.
- Verify that RAM modules are correctly installed in their slots. Try reseating them or testing with one module at a time.
- Confirm the CPU is correctly installed and the CPU cooler is functioning.
6.2. System Fails to Boot
- Check all power connections to the motherboard (24-pin ATX and 4-pin CPU power).
- Ensure the power supply is functional.
- Disconnect all non-essential peripherals and expansion cards to isolate the issue.
- Clear CMOS by removing the CMOS battery for a few minutes or using the clear CMOS jumper (refer to motherboard layout).
6.3. Peripherals Not Detected
- USB Devices: Try different USB ports. Ensure front panel USB headers are correctly connected.
- SATA Drives: Check SATA data and power cables. Verify drives are enabled in BIOS.
- Network: Ensure Ethernet cable is connected and LAN drivers are installed. Check network settings in the operating system.
- Audio: Ensure audio cables are correctly plugged into the appropriate jacks. Install audio drivers.
7. Specifications
Detailed technical specifications for the FRONTECH FT-0470 H61 Motherboard.
| Feature | Specification |
|---|---|
| Brand | FRONTECH (GENERIC) |
| Model | FT-0470 |
| Manufacturer | JAY INFOSYS |
| CPU Socket | LGA 1155 |
| Compatible Processors | Intel i3/i5/i7/Pentium (2nd & 3rd Generation) |
| Chipset | Intel H61 Express Chipset |
| RAM Memory Technology | DDR3 1066/1333/1600 MHz |
| Memory Slots | 2 DIMM |
| Maximum RAM Capacity | 16 GB |
| Graphics Card Interface | PCI Express x16, PCI Express x1 |
| Storage Interfaces | 4 x SATA, 1 x NVMe Slot |
| USB Ports | 6 x USB 2.0 (Rear I/O) + Front Panel Headers |
| Video Output | 1 x HDMI, 1 x VGA |
| Audio | 6-channel HD Audio Codec |
| LAN | 10/100 Mbps Ethernet |
| Product Dimensions | 12 x 12 x 10 cm |
| Country of Origin | India |
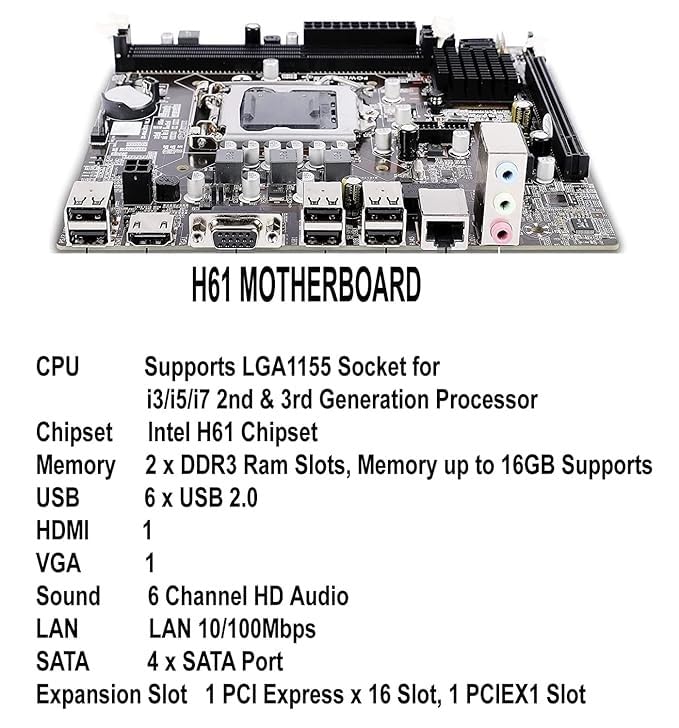
Image 7.1: A detailed view of the H61 Motherboard, listing key specifications such as CPU support, memory, USB, HDMI, VGA, sound, LAN, SATA, and expansion slots.
8. Warranty and Support
The FRONTECH FT-0470 H61 Motherboard comes with a 1-Year Limited Warranty from the date of purchase. This warranty covers manufacturing defects under normal use conditions.
For technical support, warranty claims, or further assistance, please contact the manufacturer, JAY INFOSYS, or your local retailer.
Keep your proof of purchase for warranty validation.


