1. Introduction
This manual provides essential instructions for the safe and effective use, assembly, and maintenance of your Medline Aluminum Drop-Arm Commode with Locking Casters. Please read this manual thoroughly before initial use and retain it for future reference. This commode is designed to assist individuals requiring support for toileting, offering features for enhanced safety and ease of transfer.
2. Safety Information
Important Safety Precautions:
- Weight Capacity: Do not exceed the maximum weight capacity of 300 lbs (136 kg). Exceeding this limit may result in injury or damage to the commode.
- Locking Casters: Always ensure all four casters are locked before a user attempts to sit on or stand from the commode. Unlock casters only when moving the commode.
- Stability: Ensure the commode is placed on a flat, stable, and dry surface. Uneven surfaces can compromise stability.
- Transfers: Use caution during transfers. The drop-arm feature is designed to facilitate easier lateral transfers, but assistance may still be required depending on user mobility.
- Assembly: Verify all components are securely assembled before each use. Refer to the assembly section for detailed instructions.
- Inspection: Regularly inspect the commode for any signs of wear, damage, or loose parts. Discontinue use immediately if any issues are found and contact Medline customer support.
- Cleaning: Follow the cleaning instructions to maintain hygiene and product longevity.
3. Package Contents
Before assembly, verify that all components are present and undamaged. If any parts are missing or damaged, do not proceed with assembly and contact Medline customer support.
- Commode Frame (main body with legs and casters)
- Backrest
- Seat with Lid
- Commode Bucket
- Splashguard
- Drop-Arm Armrests (pre-attached or separate, depending on model variant)
4. Setup and Assembly
The Medline Aluminum Drop-Arm Commode is designed for tool-free assembly. Follow these steps carefully:
- Unpack Components: Carefully remove all parts from the packaging and lay them out on a clean, flat surface.
- Attach Backrest: Align the backrest with the designated slots on the commode frame. Press firmly until it snaps securely into place.
- Attach Seat: Place the commode seat onto the frame, ensuring it is properly aligned and secured.
- Insert Bucket and Splashguard: Position the splashguard inside the commode seat opening, then slide the commode bucket into the frame from the front or rear, ensuring it is seated correctly beneath the splashguard.
- Adjust Height (if necessary): The commode features adjustable legs. To adjust the height, locate the spring-loaded pins on each leg. Depress the pin and slide the leg extension up or down to the desired height. Ensure all four legs are adjusted to the same height and the pins are fully engaged in the adjustment holes for stability.

Figure 1: Fully assembled Medline Aluminum Drop-Arm Commode. This image shows the commode with its seat, lid, armrests, and locking casters, ready for use.
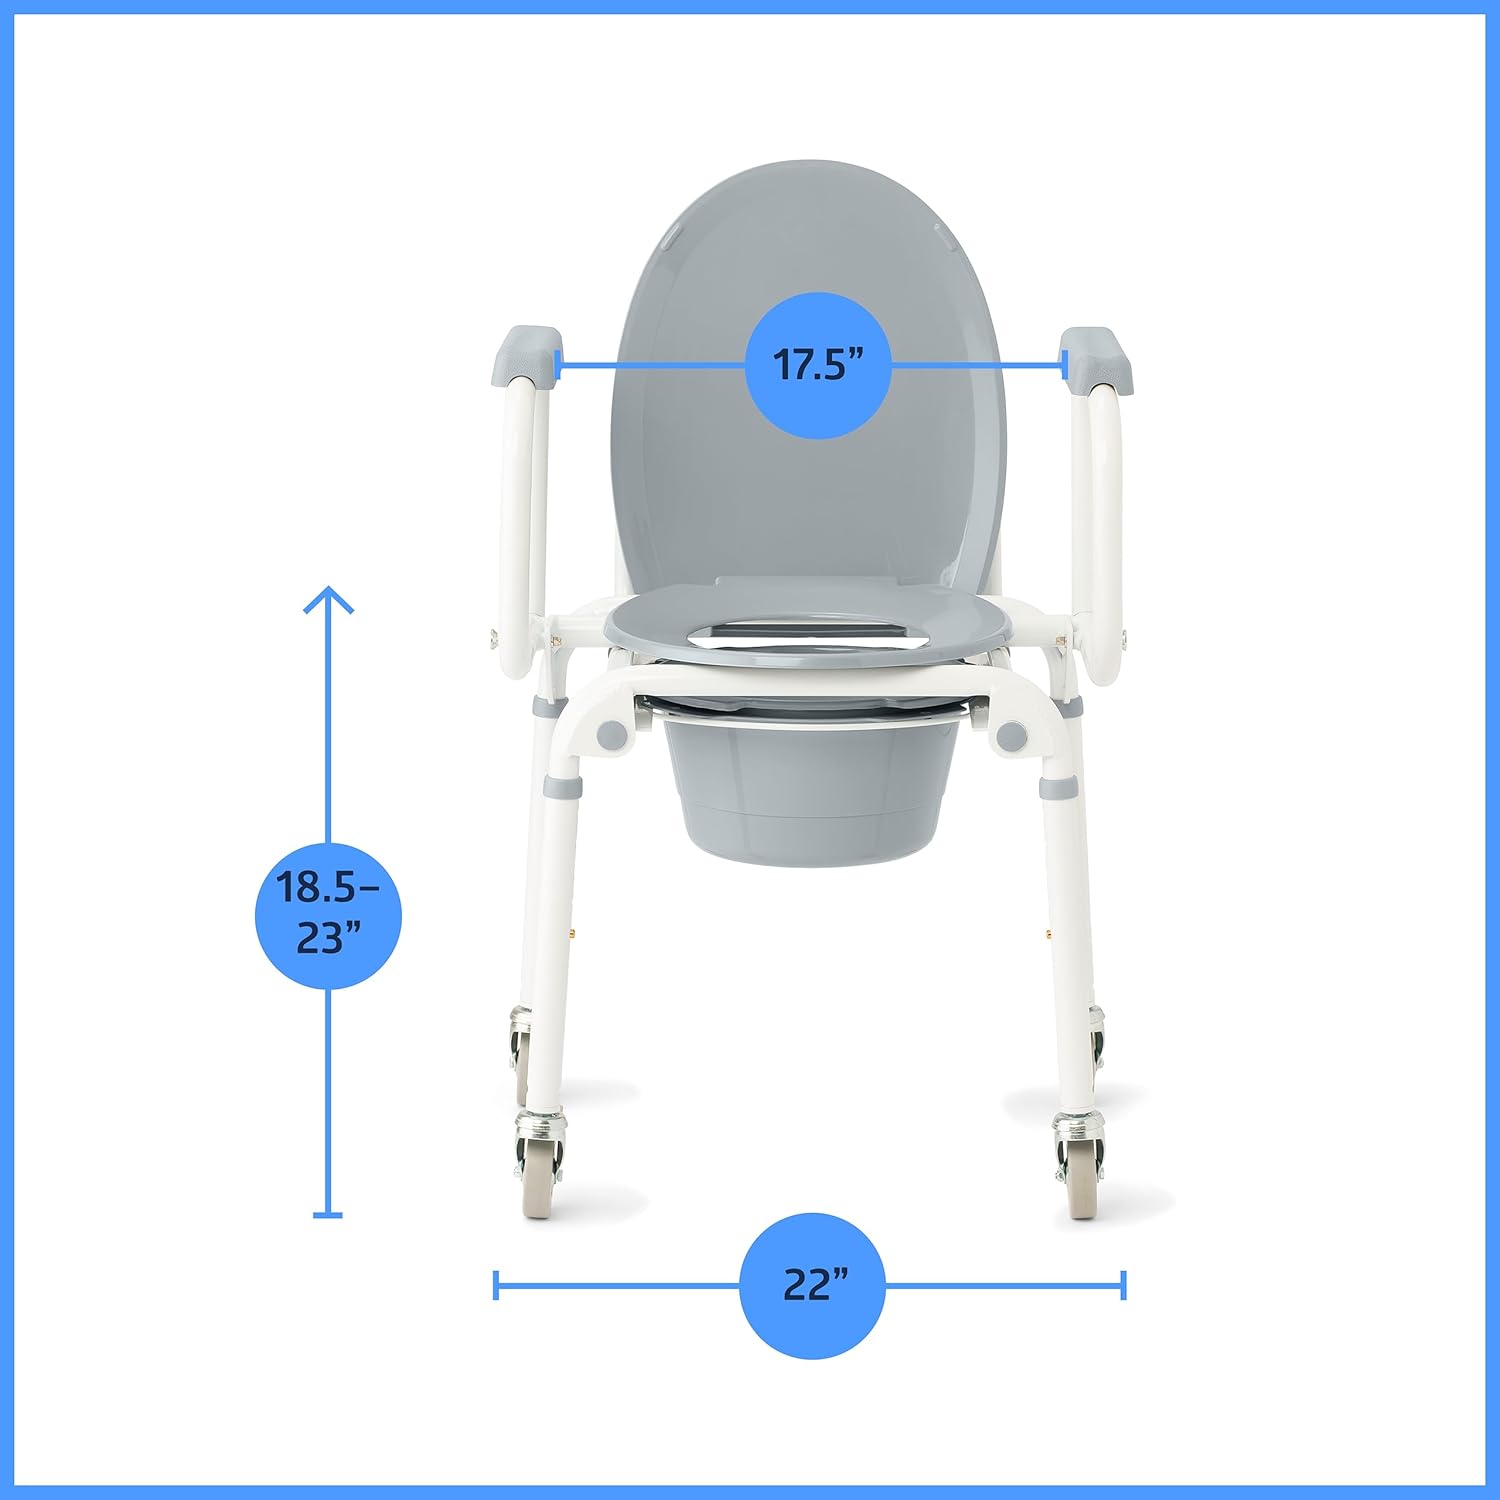
Figure 2: Key dimensions of the Medline Commode. This image illustrates the adjustable height range (18.5"-23"), seat width (17.5"), and overall width (22"), important for proper placement and user comfort.
5. Operating Instructions
This commode can be used bedside or positioned over a standard toilet.
- Bedside Use: Place the commode next to the bed. Ensure all four casters are locked before the user attempts to sit or stand.
- Over-the-Toilet Use: If using over a toilet, ensure the commode's height is adjusted appropriately to clear the toilet bowl. Lock all four casters before use.
- Using Drop-Arm Armrests: The armrests can be dropped down to facilitate easier lateral transfers from a bed, wheelchair, or other surfaces. To drop an armrest, locate the release mechanism (typically a button or lever) near the armrest pivot point, depress it, and lower the armrest. Raise the armrest until it locks securely back into position before use.
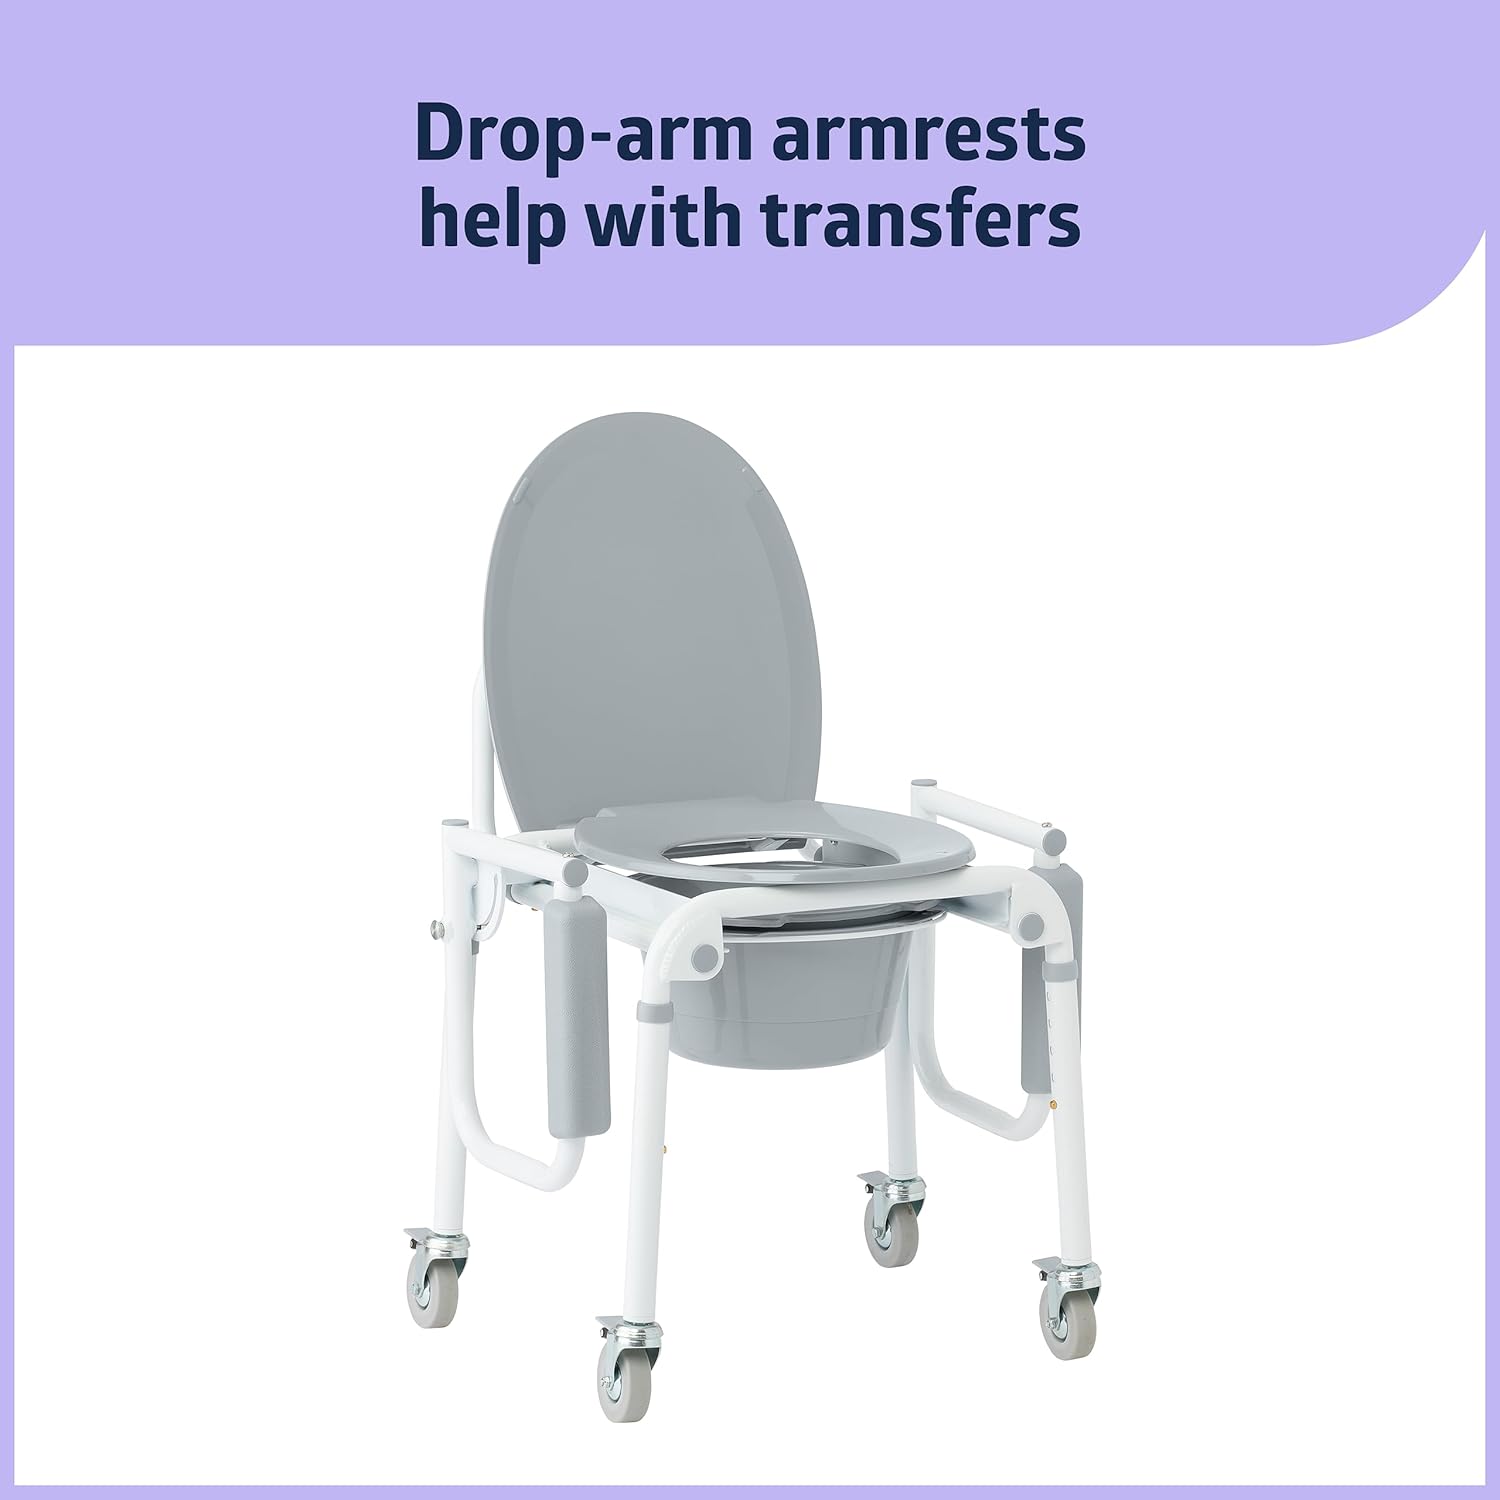
Figure 3: Drop-arm armrests in lowered position. This image demonstrates how the armrests can be lowered to assist with lateral transfers, improving accessibility for users.
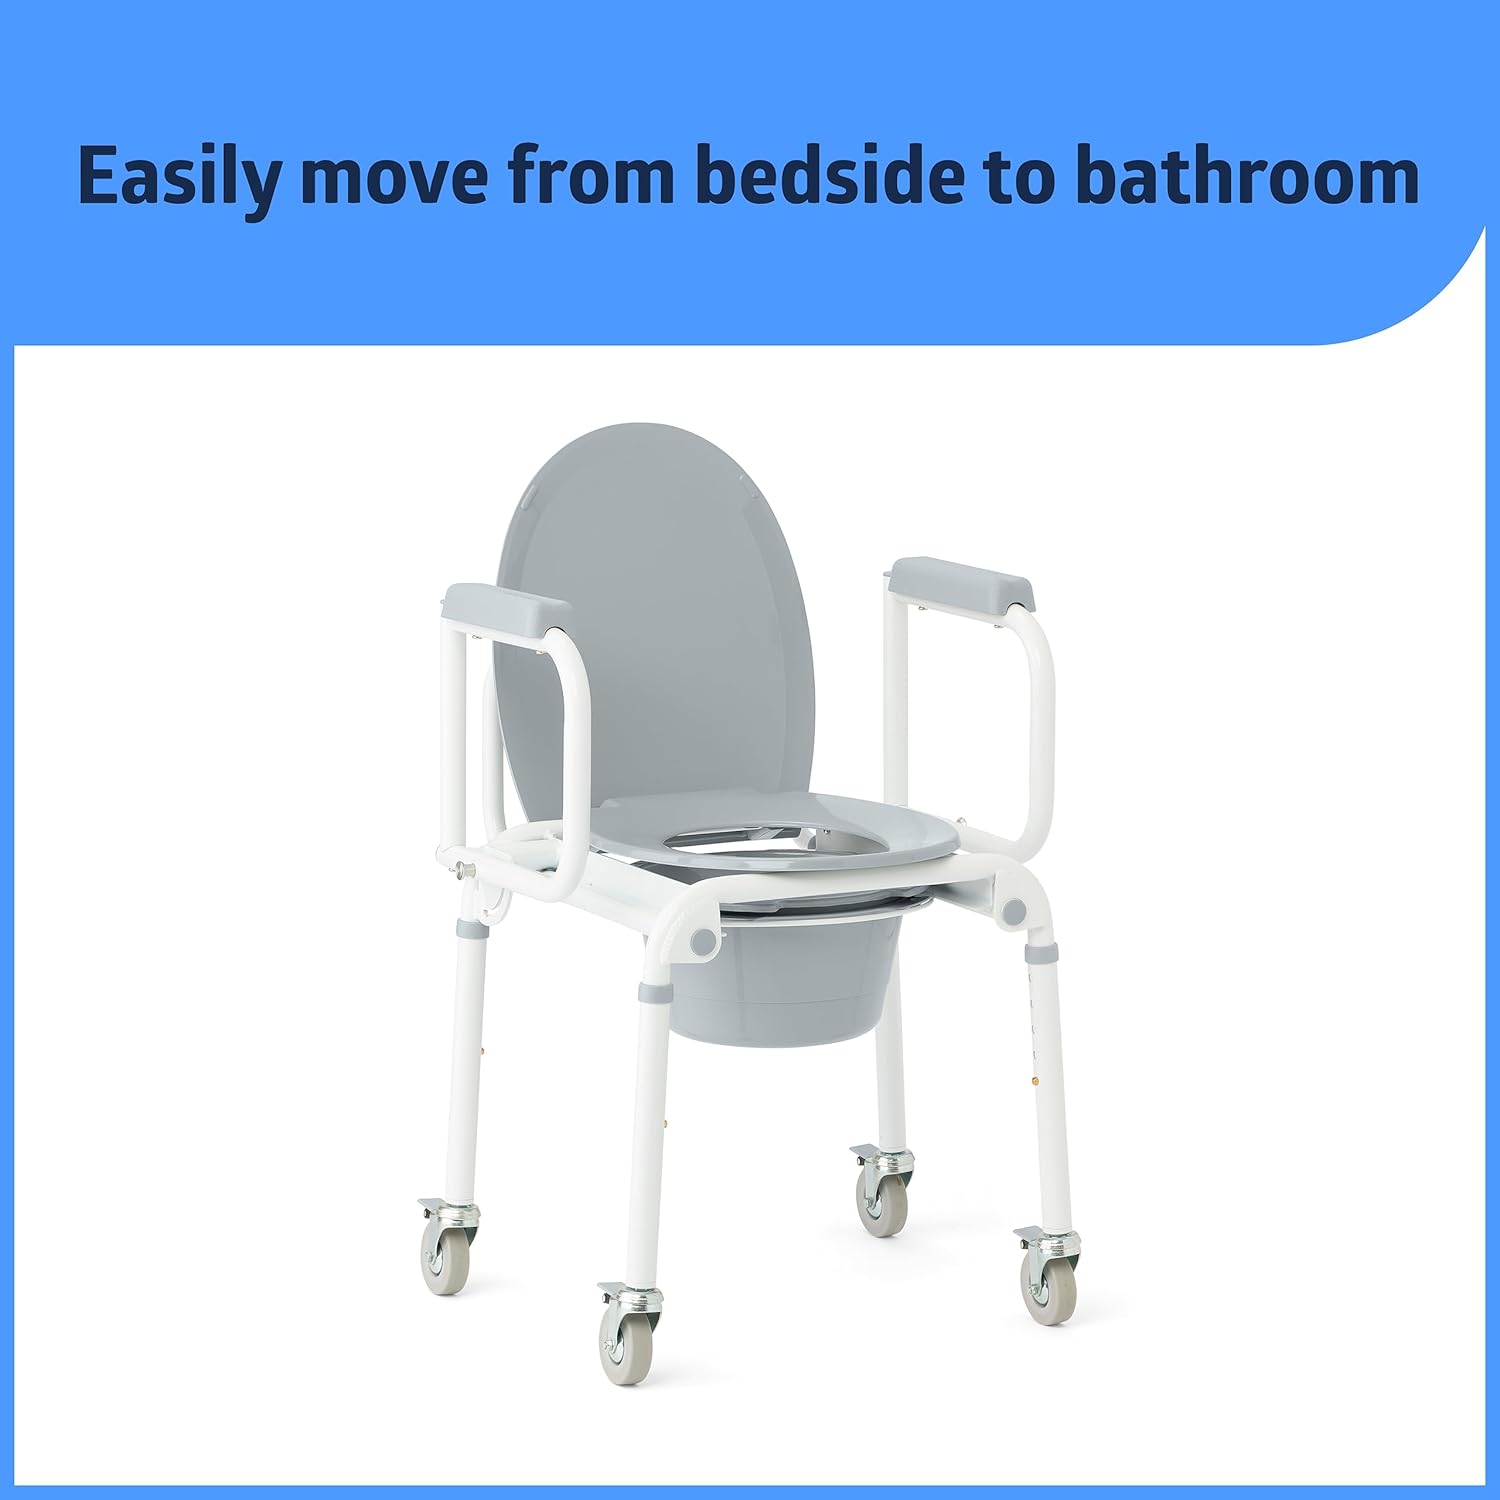
Figure 4: Commode easily moved from bedside to bathroom. This image shows the commode's mobility, highlighting its utility for various locations within a home.
- Locking Casters: Each caster wheel is equipped with a locking mechanism. To lock a caster, press down on the lever located on the wheel. To unlock, lift the lever. Always ensure all casters are locked when the commode is stationary and in use.
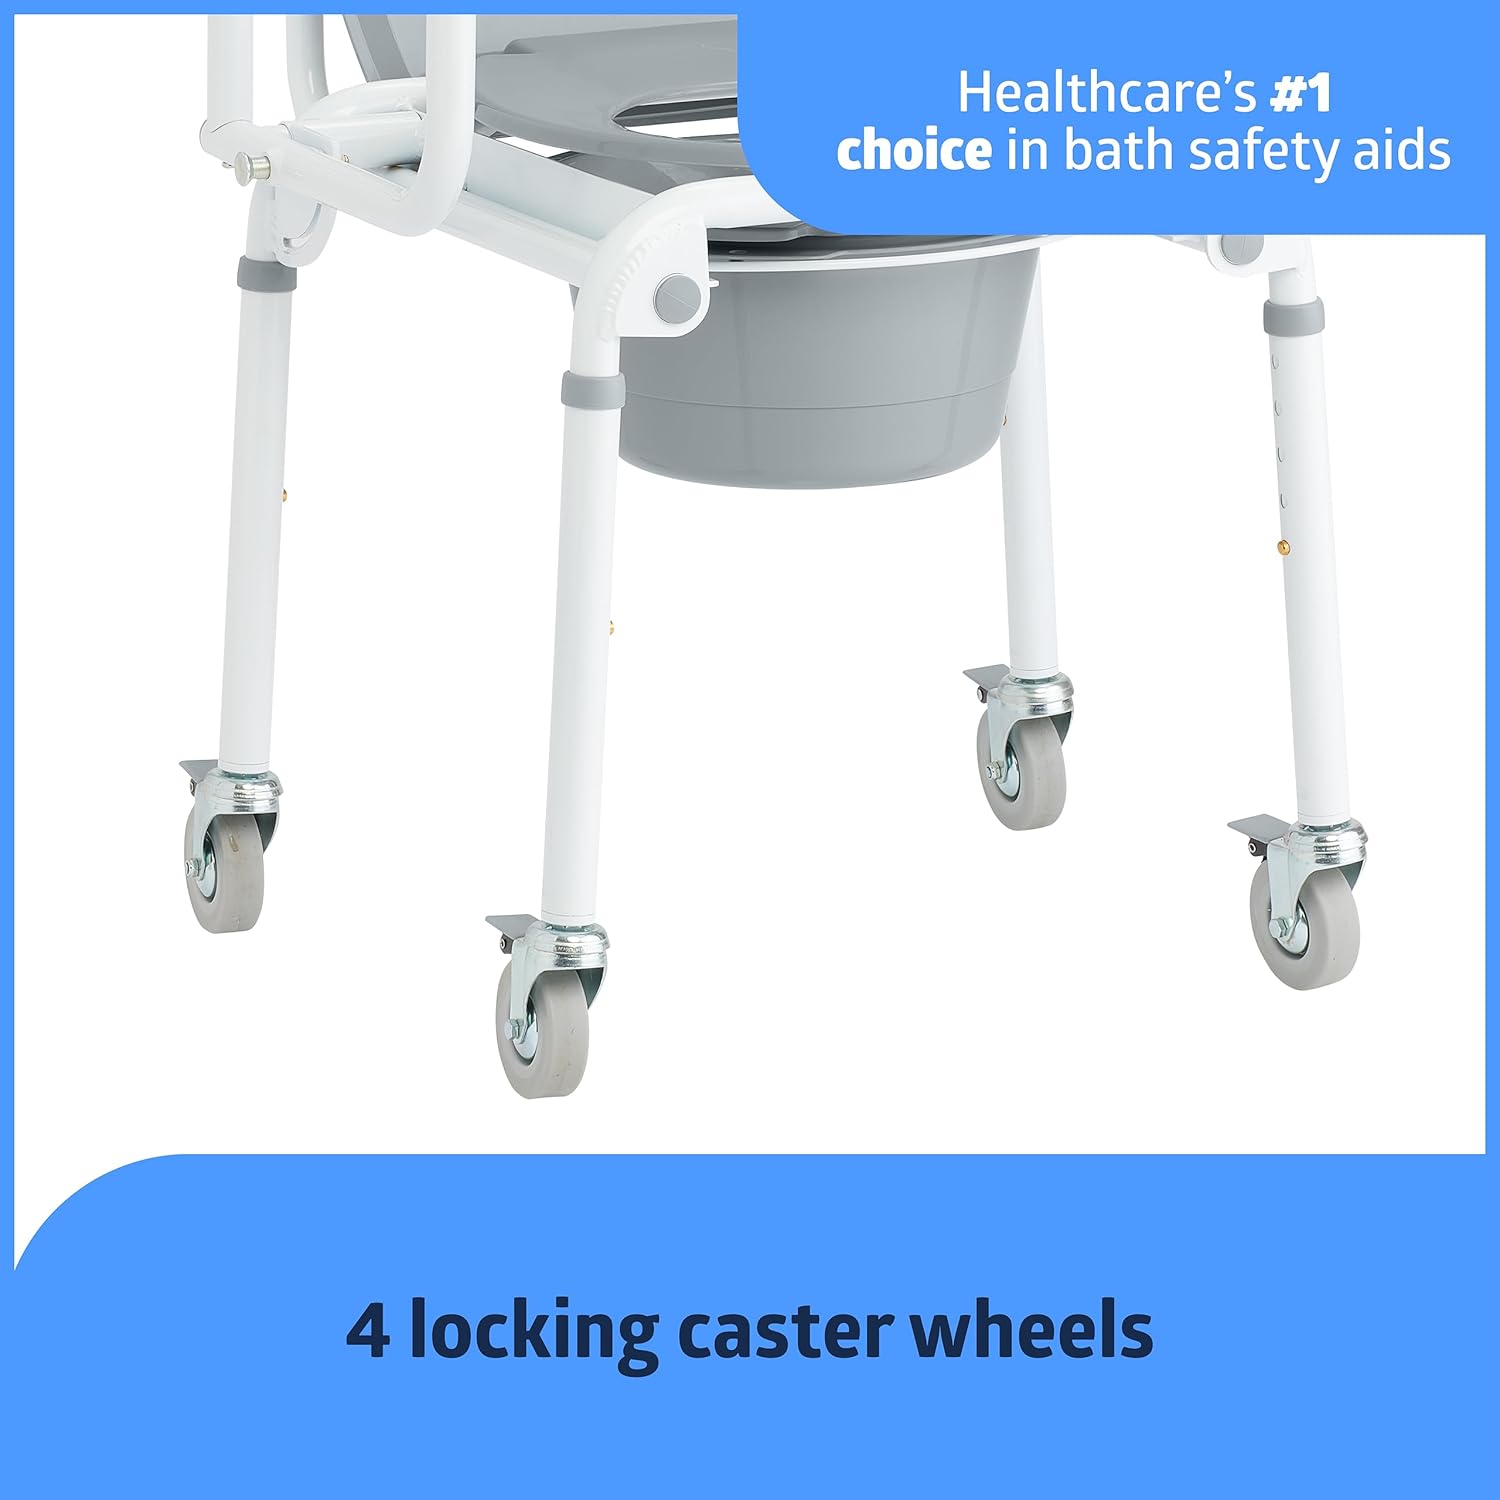
Figure 5: Close-up of the four locking caster wheels. This image details the casters, emphasizing the locking mechanism for enhanced safety and stability during use.
6. Maintenance and Cleaning
Regular cleaning and maintenance will ensure the longevity and hygienic operation of your commode.
- Daily Cleaning: After each use, remove the commode bucket and empty its contents. Clean the bucket and splashguard with a mild disinfectant cleaner and warm water. Rinse thoroughly and dry before reinserting.
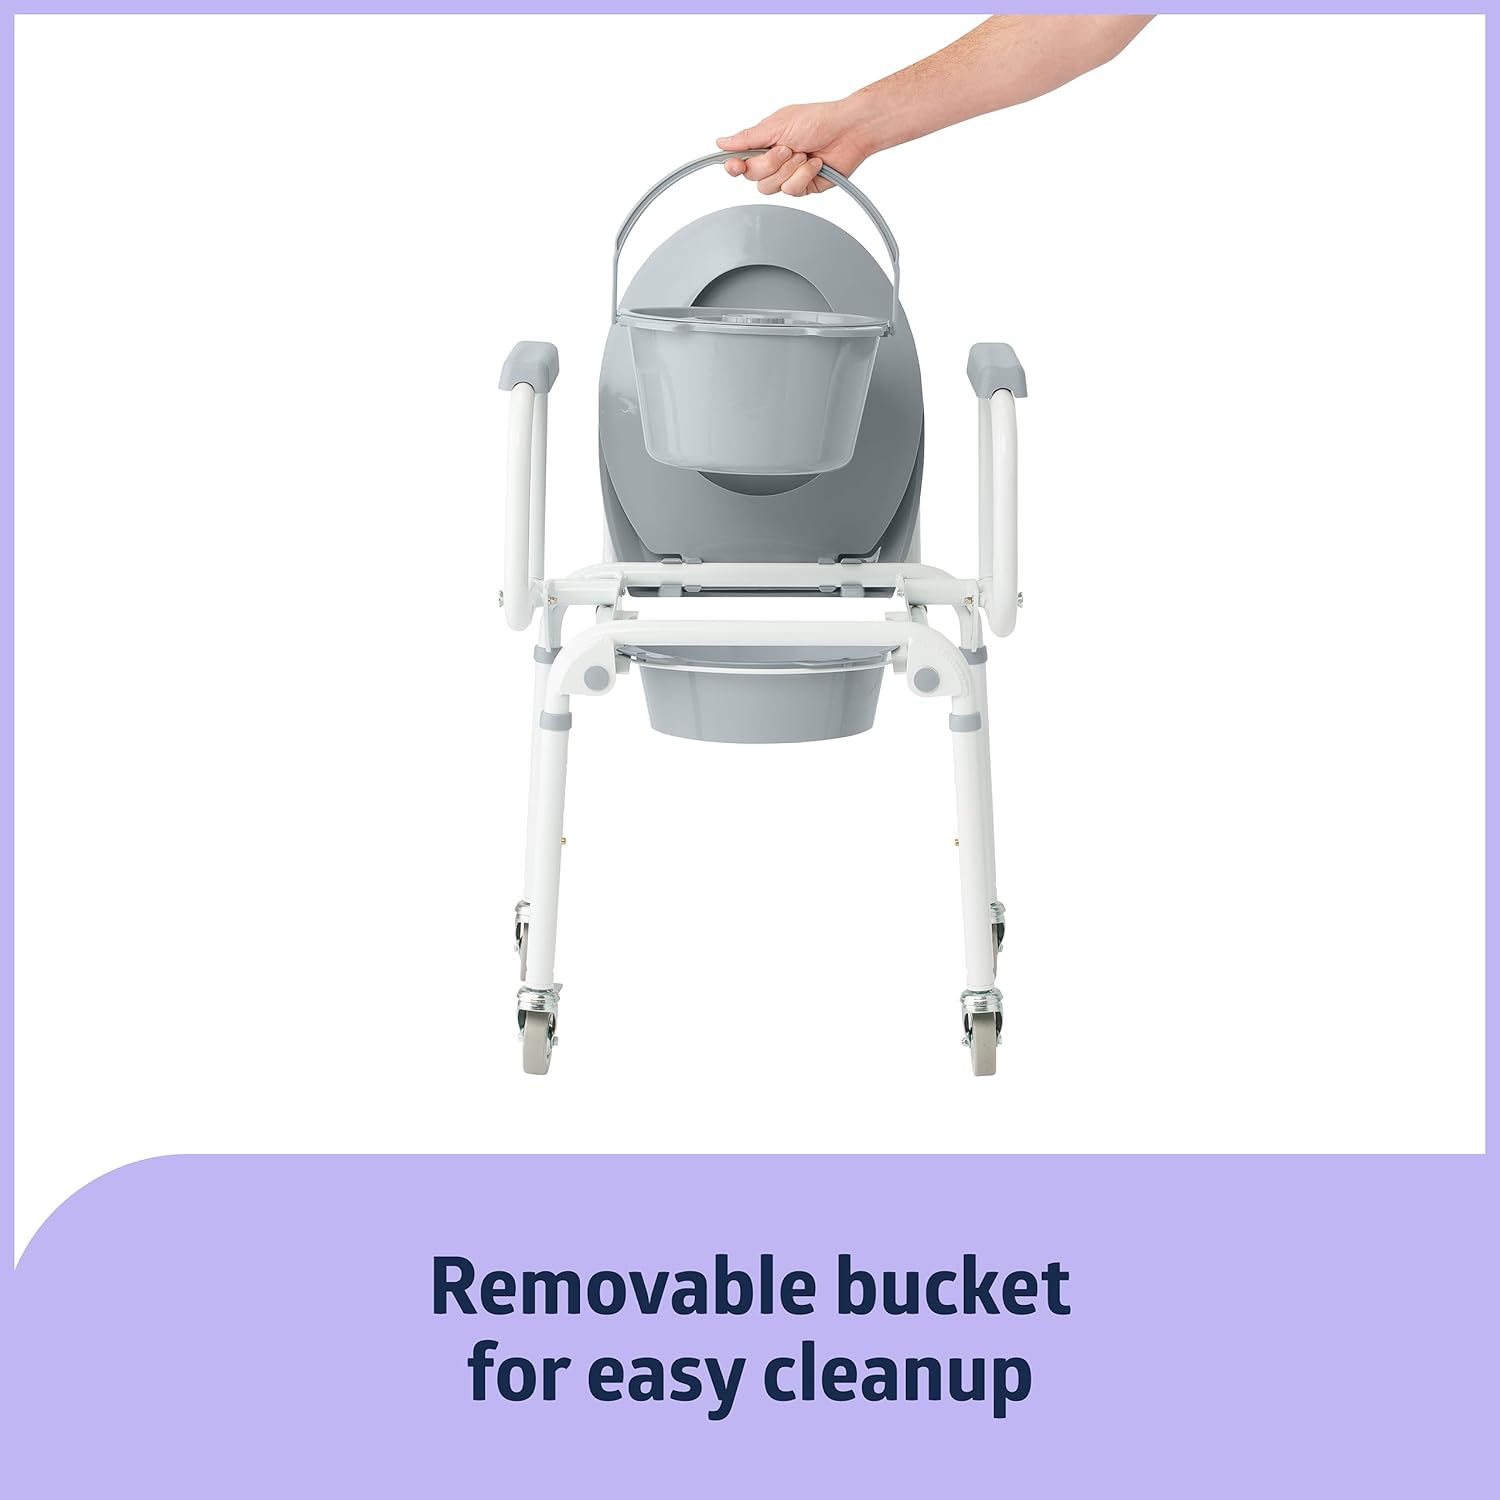
Figure 6: Removable bucket for easy cleanup. This image shows a hand lifting the commode bucket, illustrating the ease of removal for cleaning and hygiene maintenance.
- Frame and Seat Cleaning: Wipe down the commode frame, seat, and armrests with a damp cloth and a mild, non-abrasive cleaner. Avoid harsh chemicals that may damage the finish. Dry thoroughly.
- Inspection: Periodically check all nuts, bolts, and fasteners to ensure they are tight. Inspect the casters for smooth operation and ensure the locking mechanisms function correctly. Check the integrity of the seat and backrest for any cracks or damage.
- Storage: Store the commode in a dry, clean environment when not in use.
7. Troubleshooting
If you encounter any issues with your commode, refer to the following common problems and solutions:
- Commode feels unstable:
- Ensure all four legs are adjusted to the same height and the spring-loaded pins are fully engaged.
- Verify the commode is on a flat, level surface.
- Check that all casters are locked when the commode is stationary.
- Difficulty with assembly:
- Review Section 4: Setup and Assembly, ensuring each step is followed precisely.
- Ensure components are correctly oriented before attempting to snap them into place.
- If a part appears bent or damaged, do not force it. Contact customer support for assistance.
- Casters not rolling smoothly or locking:
- Check for debris (hair, lint) wrapped around the caster wheels. Clean as necessary.
- Ensure the locking lever is fully engaged or disengaged.
If problems persist after attempting these solutions, please contact Medline customer support.
8. Specifications
| Model Number | G1-506DWX1 |
| Weight Capacity | 300 lbs (136 kg) |
| Adjustable Height Range | 18.5" - 23" |
| Seat Depth | 16.5" |
| Inside Armrests Width | 17.5" |
| Package Dimensions | 22.34 x 16 x 13.27 inches |
| Item Weight | 18.35 Pounds |
| Material | Aluminum Frame |
9. Warranty and Support
For information regarding the product warranty, please refer to the warranty card included with your purchase or visit the official Medline website. If you require technical assistance, have questions about assembly, or need to report a damaged part, please contact Medline customer support.
Medline Customer Support:
- Phone: 800-633-5463
- Website: www.medline.com


