
OLIGHT I3T2-BK-300000
OLIGHT I3T 2 EOS Pocket EDC Flashlight User Manual
Model: I3T2-BK-300000 | Brand: OLIGHT
1. Product Overview
The OLIGHT I3T 2 EOS is a compact and bright Everyday Carry (EDC) flashlight designed for versatility and reliability. It features a dual-output tail switch, offering both low and high brightness modes, and is powered by a single AAA battery.
Key features include:
- Small yet Bright: Delivers a maximum output of 200 lumens with a 62-meter beam distance.
- Versatile Power Choices: Operates on a standard AAA alkaline battery and can boost output up to 300 lumens with a rechargeable battery.
- IPX8 Waterproof: Engineered to withstand submersion in water up to 3 meters.
- Extended Runtime: Features an extended battery life, running for over 5 hours, and maintains a surface temperature below 45°C during prolonged use.
- Hands-Free Convenience: Equipped with a dual-way pocket clip for secure attachment to belts, pockets, or gear.

Image: The OLIGHT I3T 2 EOS flashlight in black, showcasing its compact design and pocket clip.
2. What's in the Box
Upon opening your OLIGHT I3T 2 EOS package, you should find the following items:
- I3T 2 EOS Flashlight x 1
- 1.5V Alkaline AAA battery x 1
- O-ring x 2
- User Manual x 1
3. Setup
3.1 Battery Installation
The OLIGHT I3T 2 EOS flashlight comes with one 1.5V Alkaline AAA battery included. To install or replace the battery:
- Unscrew the tail cap of the flashlight by turning it counter-clockwise.
- Insert the AAA battery with the positive (+) end facing towards the head of the flashlight.
- Screw the tail cap back on clockwise until it is securely tightened. Ensure the O-rings are properly seated to maintain water resistance.
The flashlight can also be powered by a rechargeable AAA battery for increased output (up to 300 lumens).

Image: Illustration showing the flexible battery options for the I3T 2 EOS, including standard AAA and rechargeable batteries.
4. Operating Instructions
The I3T 2 EOS features a simple tail switch for operation.
4.1 Turning On/Off and Mode Selection
- Momentary On (Low Mode): Lightly press the tail switch. Release to turn off.
- Constant On (High Mode): Fully press the tail switch until a click is heard. Press again to turn off.
- Switching Modes: If the light is turned off and then quickly turned on again (within 0.5 seconds), it will switch to the other brightness mode. For example, if it was in High mode, it will turn on in Low mode, and vice-versa.

Image: Visual comparison of the flashlight's high and low brightness modes in an outdoor setting.
4.2 Using the Pocket Clip
The dual-direction pocket clip allows for versatile carrying options:
- Attach to a pocket or belt for easy access.
- Clip to the brim of a hat for hands-free illumination.
- Secure to backpack straps or other gear.
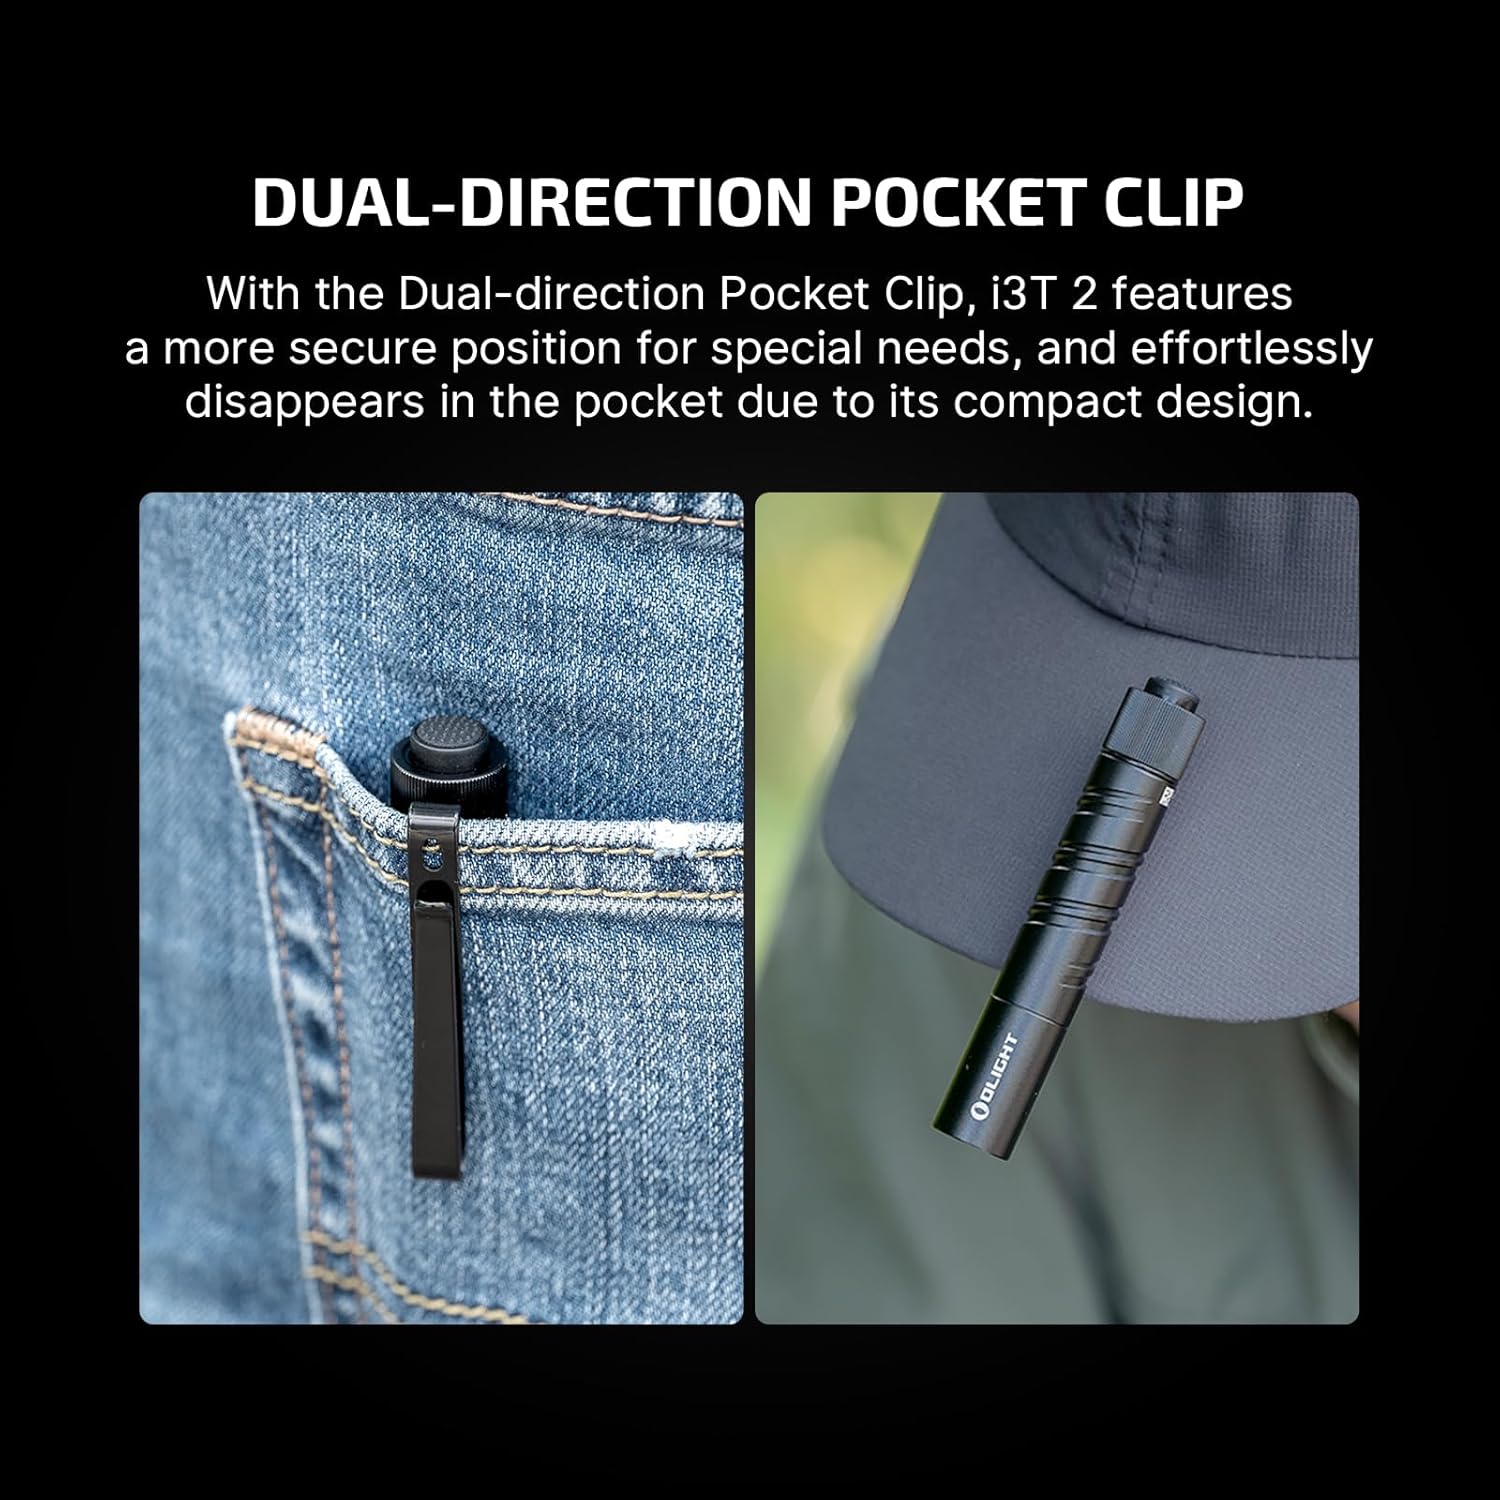
Image: The OLIGHT I3T 2 EOS flashlight demonstrating its use with the dual-direction pocket clip, attached to a pocket and a hat.
5. Maintenance
Proper maintenance ensures the longevity and optimal performance of your OLIGHT I3T 2 EOS flashlight.
5.1 Cleaning
- Wipe the flashlight body with a clean, soft cloth.
- For stubborn dirt, use a damp cloth with mild soap, then wipe dry.
- Do not use harsh chemicals or abrasive materials, as they may damage the finish.
5.2 O-Ring Maintenance
To maintain the IPX8 waterproof rating, regularly inspect and lubricate the O-rings located at the tail cap threads. Replace O-rings if they appear damaged or worn.
5.3 Battery Care
- Remove the battery if the flashlight will not be used for an extended period to prevent leakage.
- Store batteries in a cool, dry place.
- Dispose of used batteries responsibly according to local regulations.
6. Troubleshooting
If you encounter issues with your OLIGHT I3T 2 EOS flashlight, refer to the following common troubleshooting steps:
| Problem | Possible Cause | Solution |
|---|---|---|
| Flashlight does not turn on. | Battery inserted incorrectly or depleted. | Check battery polarity. Replace with a fresh battery. |
| Light is dim or flickers. | Low battery or loose tail cap. | Replace battery. Ensure tail cap is fully tightened. |
| Tail switch is unresponsive. | Dirt or debris on contacts. | Clean the contact points on the tail cap and flashlight body with a clean cloth. |
If the issue persists after trying these steps, please contact OLIGHT customer support for further assistance.
7. Specifications
| Feature | Detail |
|---|---|
| Brand | OLIGHT |
| Model | I3T2-BK-300000 |
| Special Feature | EDC, Lightweight |
| Color | Black |
| Power Source | Battery Powered |
| Light Source Type | LED |
| Material | Aluminum |
| White Brightness | 200 Lumens (Alkaline AAA), up to 300 Lumens (Rechargeable AAA) |
| Light Path Distance | 62 Meters |
| Battery Cell Composition | Alkaline (compatible with rechargeable) |
| Number of Batteries | 1 AAA (included) |
| Water Resistance Level | IPX8 Waterproof (up to 3 meters) |
| Product Dimensions | 3.5"D x 0.59"W x 0.59"H (89mm x 15mm x 15mm) |
| Item Weight | 1.76 ounces |
| Runtime (Alkaline AAA) | High: 19 minutes (200 lumens), Low: 21 hours (5 lumens) |

Image: Detailed output specifications table for the OLIGHT I3T 2 EOS, showing lumen output, runtime, and beam distance for different battery types and modes.
8. Warranty and Support
8.1 Warranty Information
The OLIGHT I3T 2 EOS Pocket EDC Flashlight comes with a Lifetime Warranty from OLIGHT. Please refer to the official OLIGHT website or the included User Manual for full warranty terms and conditions.
8.2 Customer Support
For any questions, technical assistance, or warranty claims, please contact OLIGHT customer support. You can find contact information on the official OLIGHT website or within the User Manual provided with your product.
A digital copy of the user manual is available here.
Related documentsI3T2-BK-300000


Ask a question about this manual
Ask about setup, troubleshooting, compatibility, parts, safety, or missing instructions. Manuals+ will review the question and use this page’s manual context to help answer it.