
1. Overview
The UUQ 3-9x40 Rifle Scope is designed for hunting and target shooting, offering flexible magnification for short to mid-range applications. It features a 40mm objective lens for a clear sight picture and a red/green illuminated rangefinder reticle for enhanced visibility in various lighting conditions. Constructed from durable aircraft-grade aluminum alloy, this scope is shock-resistant, waterproof, and fog-proof, ensuring reliable performance in outdoor environments.

Image: The UUQ 3-9x40 Rifle Scope, showcasing its overall design and robust construction.
2. Product Features
- Variable Magnification: 3-9x magnification range suitable for diverse shooting distances.
- 40mm Objective Lens: Provides a wide field of view and excellent light transmission for clear images.
- Illuminated Rangefinder Reticle: Red/green illumination with 5 brightness settings for optimal visibility in varying light.
- Precision Adjustments: 1/4 MOA windage and elevation adjustments for accurate targeting.
- Fast Focus Eyepiece: Allows for quick and easy reticle focus.
- Durable Construction: Aircraft-grade aluminum alloy body, shock-resistant, waterproof, and fog-proof with O-ring seals and nitrogen filling.
- Compatibility: Includes two 20mm mounts compatible with standard Picatinny or Weaver rails.
- Protective Gun Sock: Enlarged 53.5 x 4.3 inch gun sock made from durable, elastic material for firearm protection.
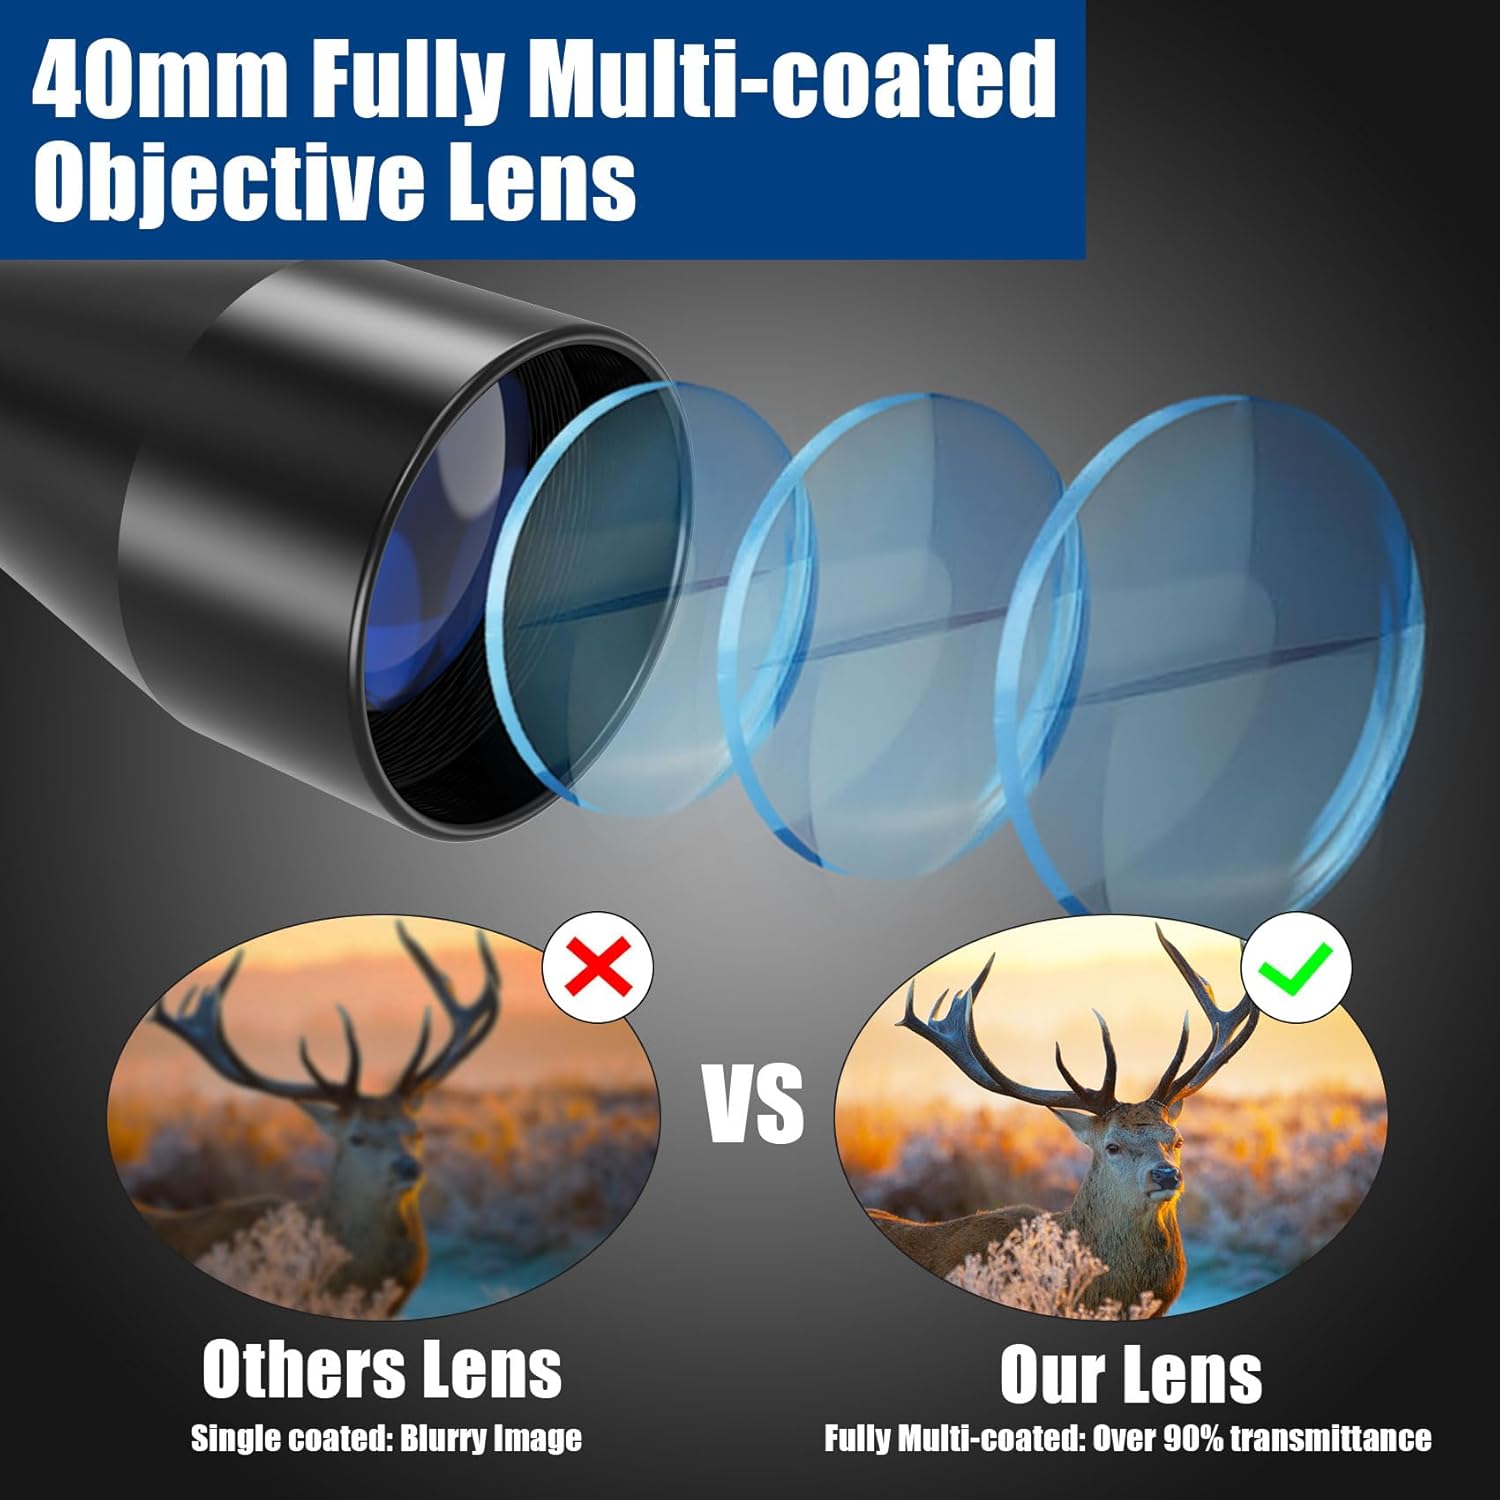
Image: Illustration of the 40mm fully multi-coated objective lens, highlighting its light transmission capabilities compared to single-coated lenses.
3. Package Contents
Verify that all items listed below are included in your package:
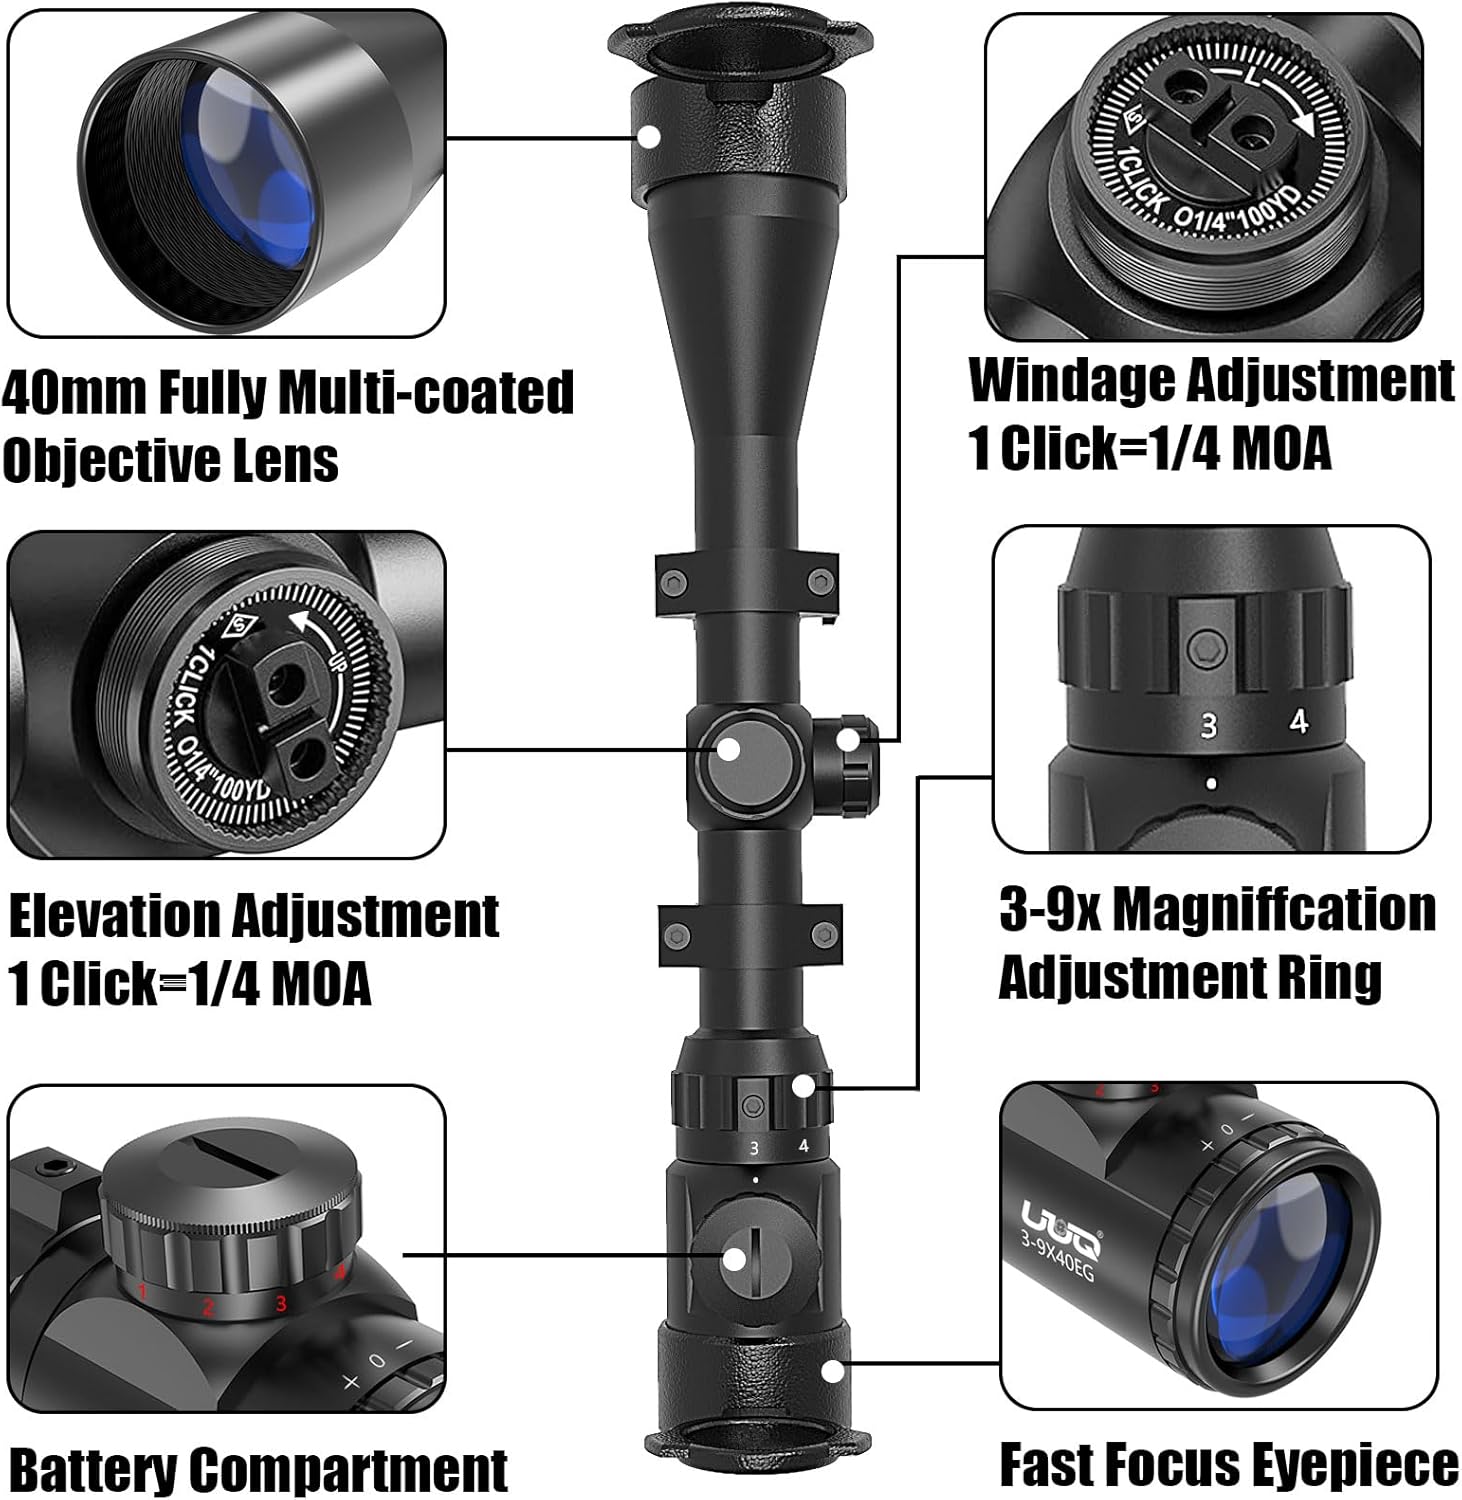
Image: An exploded view showing all components included in the package, numbered for easy identification.
- 3-9x40EG Rifle Scope (1)
- Lens Covers (2)
- Cleaning Cloth (3)
- 20mm Mounts (x2) (4)
- Allen Wrench (5)
- Instructions (6)
- CR2032 Battery (7)
- Gun Sock (8)

Image: Details of the gun sock dimensions and the 20mm rail mount compatibility.
4. Setup
4.1. Battery Installation
The reticle illumination requires a CR2032 battery. To install:
- Locate the battery compartment on the illumination turret (refer to image below).
- Unscrew the battery cap counter-clockwise.
- Insert the CR2032 battery with the positive (+) side facing up.
- Screw the battery cap back on clockwise until secure.
4.2. Mounting the Scope
The scope comes with two 20mm mounts compatible with standard Picatinny or Weaver rails.
- Attach the two 20mm mounts to your rifle's Picatinny or Weaver rail. Ensure they are spaced appropriately to support the scope evenly.
- Place the rifle scope into the mounts.
- Adjust the scope's position for proper eye relief. Eye relief is the distance between your eye and the eyepiece lens when you see a full field of view.
- Ensure the reticle is level.
- Tighten the mount screws evenly and securely using the provided Allen wrench. Do not overtighten.

Image: Detailed view showing the battery compartment on the illumination turret and the 20mm mounts.
5. Operating Instructions
5.1. Adjusting Magnification
The scope features a variable magnification from 3x to 9x. To adjust:
- Rotate the magnification adjustment ring, located near the eyepiece, to your desired power setting (3x, 4x, 5x, 6x, 7x, 8x, 9x).
- Higher magnification provides a closer view but a narrower field of view.

Image: Comparison of 3x and 9x magnification views at 300 yards, illustrating the effect of magnification adjustment.
5.2. Focusing the Eyepiece
To achieve a sharp reticle image:
- Point the scope at a plain, bright background (e.g., a clear sky).
- Look through the scope and quickly rotate the fast focus eyepiece (the ring closest to your eye) until the reticle appears sharp and clear.
- Avoid staring through the scope for too long during this adjustment, as your eye may compensate for blurriness.
5.3. Reticle Illumination
The scope features a red/green illuminated reticle with 5 brightness settings for each color.
- Rotate the illumination turret (located on the left side of the scope) to select either red (R) or green (G) illumination.
- Continue rotating the turret to increase or decrease the brightness level from 1 (lowest) to 5 (highest).
- Turn the turret to the '0' position to turn off the illumination.

Image: Depiction of the illumination turret and the 5 brightness levels for both red and green reticle illumination.
5.4. Windage and Elevation Adjustment
Windage and elevation turrets are used to zero the scope. Each click adjusts the point of impact by 1/4 MOA (1/4 inch at 100 yards).
- Elevation Adjustment: The top turret adjusts the vertical point of impact. Rotate it clockwise to move the point of impact down, and counter-clockwise to move it up.
- Windage Adjustment: The right-side turret adjusts the horizontal point of impact. Rotate it clockwise to move the point of impact right, and counter-clockwise to move it left.
- After zeroing, you may reset the turrets to '0' by lifting the turret cap, rotating it to '0', and then pushing it back down.
Image: Close-up views of the windage and elevation adjustment turrets, showing the 1/4 MOA click values.
6. Maintenance
6.1. Cleaning
- Lenses: Use the provided cleaning cloth or a soft, lint-free cloth specifically designed for optical lenses. Gently wipe away dust and smudges. For stubborn marks, use a small amount of lens cleaning fluid. Avoid using harsh chemicals or abrasive materials.
- Body: Wipe the scope body with a soft, damp cloth to remove dirt and debris.
6.2. Storage
- Store the scope in a cool, dry place, away from direct sunlight and extreme temperatures.
- Always use the provided lens covers to protect the objective and eyepiece lenses when not in use.
- Utilize the included gun sock for additional protection during storage and transport.
- Remove the CR2032 battery if storing the scope for extended periods to prevent leakage.
7. Troubleshooting
| Problem | Possible Cause | Solution |
|---|---|---|
| Blurred image | Eyepiece not focused; Lens dirty | Adjust fast focus eyepiece; Clean lenses with optical cloth. |
| Reticle illumination not working | Battery drained or incorrectly installed; Illumination turned off | Replace CR2032 battery, ensuring correct polarity; Turn illumination turret to a numbered setting. |
| Inaccurate shots / Cannot zero | Scope mounts loose; Incorrect zeroing procedure; Rifle issue | Check and tighten scope mounts; Review zeroing steps; Consult a gunsmith for rifle inspection. |
| Fogging inside scope | Extreme temperature changes; Seal compromise | Allow scope to acclimate to temperature; If persistent, contact support as internal seals may be compromised. |
8. Specifications
- Brand: UUQ
- Model: 3-9x40EG
- Magnification: 3x - 9x
- Objective Lens Diameter: 40 mm
- Length: 12.3 inches (312 mm)
- Exit Pupil Diameter: 69.1mm ~ 85.09mm
- Field of View: 13.41 - 40.38 @ 100 yards
- Windage & Elevation Click Value: 1/4 MOA (1/4" @ 100 yards)
- Reticle: Red/Green Illuminated Rangefinder
- Illumination Settings: 5 brightness levels for each color
- Material: Aircraft-grade Aluminum Alloy
- Weight: 1.2 pounds
- Product Dimensions: 3.91"L x 2.91"W x 13.82"H
- Waterproof/Fogproof: Yes, O-ring sealed and nitrogen filled
- Battery Type: CR2032 (included)
9. Warranty and Support
For warranty information or technical support, please refer to the contact details provided with your purchase or visit the official UUQ website. Keep your proof of purchase for any warranty claims.

