Introduction
The LoopTone LP Vinyl Turntables Tachometer Disc and Strobe Light is designed for precise calibration and speed detection of LP record players. This essential tool helps ensure your turntable operates at the correct rotational speed for optimal audio playback and assists in accurate cartridge alignment.
Key Features:
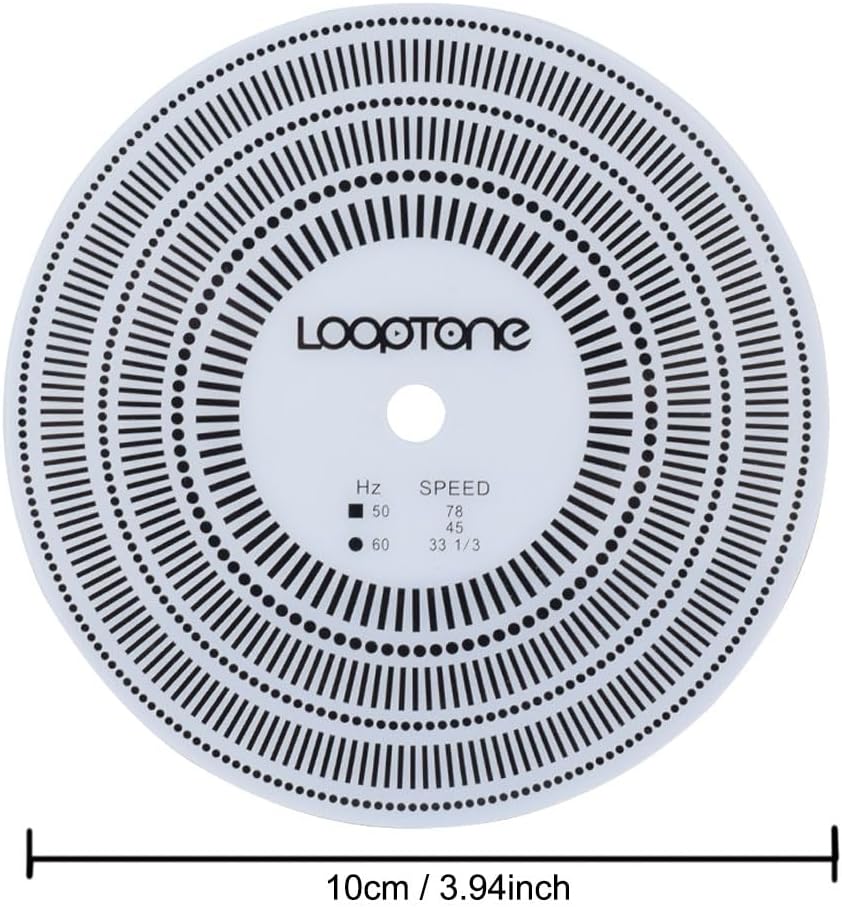
- Tachometer Disc: Specifically designed to detect the rotation speed of LP records, testing 33/45/78 RPM at 50/60Hz.
- Stroboscopic Speed Strobe Light: Generates 50/60Hz corresponding frequency flash for accurate speed verification, featuring higher accuracy and smaller deviation due to a dedicated chip.
- Portability: Compact and convenient for easy operation and storage.
- Power Source: Strobe light is powered by two AAA batteries (not included).
Package Contents
- 1 x Strobe Light
- 1 x Tachometer Disc

Setup
1. Install Batteries in Strobe Light
- Locate the battery compartment on the back of the strobe light unit.
- Open the battery compartment cover.
- Insert two AAA batteries (not included), ensuring correct polarity (+/-).
- Close the battery compartment cover securely.

2. Prepare Turntable
- Ensure your turntable is powered off before placing the tachometer disc.
- Remove any existing platter mats from your turntable. The tachometer disc is designed to be placed directly on the platter.
Operating Instructions
1. Turntable Speed Detection (Stroboscopic Side)
- Place the tachometer disc directly onto your turntable platter. Ensure the side with the stroboscopic patterns and "LoopTone" logo is facing upwards.
- Power on your turntable and set it to the desired speed (33 1/3, 45, or 78 RPM).
- Turn on the strobe light. Select the appropriate frequency (50Hz or 60Hz) based on your region's electrical supply. For North America, use 60Hz.
- Hold the strobe light approximately 1-2 inches above the rotating tachometer disc.
- Observe the stroboscopic patterns on the disc.
- If the patterns appear stationary, your turntable speed is accurate.
- If the patterns appear to move clockwise, the turntable speed is too fast.
- If the patterns appear to move counter-clockwise, the turntable speed is too slow.
- Adjust your turntable's speed control (if available) until the corresponding pattern for your selected RPM appears stationary under the strobe light.


2. Cartridge Alignment (Protractor Side)
The reverse side of the tachometer disc features a protractor for accurate cartridge alignment. Proper alignment minimizes tracking errors and improves sound quality.
- Flip the tachometer disc over so the protractor side is facing upwards.
- Place the disc on the turntable platter.
- Carefully position your tonearm so the stylus rests on the designated calibration points (A and B) on the protractor.
- Adjust your cartridge's position (forward/backward, angle) until the stylus is perfectly aligned with the grid lines at both calibration points. The cartridge body should be parallel to the grid lines.
- Repeat the process for both calibration points, making small adjustments until optimal alignment is achieved.

Video: This video demonstrates the use of a stroboscope disc and protractor for turntable speed verification and cartridge alignment. It shows how to place the disc, use an incandescent light source to observe the patterns for speed adjustment, and then flip the disc to use the protractor side for aligning the cartridge stylus at two calibration points. While a different brand is shown, the principles apply to the LoopTone Tachometer Disc.
Maintenance
- Keep the tachometer disc clean and free of dust or debris. Use a soft, dry cloth to wipe it gently.
- Store the tachometer disc and strobe light in their original packaging or a protective case when not in use to prevent damage.
- Replace the AAA batteries in the strobe light when the light dims or fails to operate.
- Avoid exposing the devices to extreme temperatures, humidity, or direct sunlight.
Troubleshooting
Strobe Light Not Turning On:
- Check if the batteries are inserted correctly with the right polarity.
- Replace the batteries with fresh AAA batteries.
Stroboscopic Patterns Not Stationary:
- Ensure the correct frequency (50Hz or 60Hz) is selected on the strobe light for your region.
- Verify your turntable's speed adjustment mechanism is functioning correctly.
- Make sure the room lighting is not interfering with the strobe effect. Dimming ambient lights can improve visibility.
Difficulty with Cartridge Alignment:
- Ensure the turntable is level.
- Take your time and make very small, precise adjustments to the cartridge.
- Refer to your turntable's manual for specific cartridge adjustment procedures.
Specifications
| Product Dimensions | 5.98 x 4.21 x 1.18 inches |
| Item Weight | 2.08 ounces |
| Item Model Number | TR-CS1 |
| Brand | LoopTone |
| Maximum Rotational Speed | 78 RPM |
| Included Components | 1* Strobe Light, Tachometer Disc |
| Special Feature | Portable |
| Material | Plastic |
| Power Source | Battery Powered |
Warranty
LoopTone provides a one-year solution for product quality problems. Please retain your proof of purchase for warranty claims.
Support
For any questions, technical assistance, or warranty inquiries, please contact LoopTone customer service. Refer to the product packaging or the official LoopTone website for contact details.
Video: An overview of the LoopTone Tachometer Disc and Strobe Light, demonstrating its components and basic function for turntable speed testing.


