
Introduction
This manual provides detailed instructions for the proper setup, operation, and maintenance of your TOPPING D70 Pro OCTO Fully Balanced DAC. Please read this manual thoroughly before using the device to ensure optimal performance and longevity.
Key Features
- Equipped with 8 Cirrus Logic CS43198 DAC chips for high-fidelity audio reproduction.
- Achieves ultra-low distortion (THD+N <0.00007%) and high signal-to-noise ratio (SNR 134dB).
- Features a full-color screen with three touch buttons for an intuitive user interface, supporting playback information, FFT, and VU meter displays.
- Integrated Bluetooth 5.1 connectivity, supporting LDAC, aptX-Adaptive, aptX HD, aptX, AAC, and SBC audio encoding for wireless audio streaming.
- Utilizes the XMOS XU316 third-generation solution for USB input, supporting PCM768kHz/32bit and DSD512 audio decoding, compatible with various operating systems.
- Offers versatile output options including RCA single-ended and XLR balanced outputs, which can be used individually or simultaneously.

Image: Illustration of the 8-core driver architecture with Cirrus Logic CS43198 chips.
Package Contents
Verify that all items listed below are included in your package:
- 1 x TOPPING D70 Pro OCTO DAC Unit
- 1 x USB Cable
- 1 x AC Power Cable
- 1 x Remote Control
- 1 x Quick Start Guide
- 1 x Bluetooth Antenna

Image: Contents list of the D70 Pro OCTO DAC, including the main unit, remote, cables, antenna, and guide.
Setup Guide
1. Power Connection
Connect the supplied AC power cable to the power input on the rear panel of the D70 Pro OCTO and then to a suitable power outlet. Ensure the power switch on the rear panel is in the OFF position before connecting, then switch to ON after all connections are made.
2. Audio Input Connections
The D70 Pro OCTO supports multiple input types:
- USB Input: Connect your computer or other USB audio source using the provided USB cable. For Windows systems, driver installation may be required.
- AES Input: Use an AES/EBU cable to connect to compatible professional audio equipment.
- Optical Input: Connect via a TOSLINK optical cable for digital audio sources.
- Coaxial Input: Connect via an RCA coaxial cable for digital audio sources.
- Bluetooth Input: For wireless connection, ensure the Bluetooth antenna is securely attached to the rear panel.
3. Audio Output Connections
The D70 Pro OCTO offers both balanced and unbalanced analog outputs:
- XLR Balanced Output: Connect to amplifiers or active speakers with XLR inputs using balanced XLR cables.
- RCA Single-Ended Output: Connect to amplifiers or active speakers with RCA inputs using RCA cables.
Both XLR and RCA outputs can be used simultaneously. You can also select specific output modes via the device's menu.

Image: Rear panel connections of the D70 Pro OCTO, illustrating various input and output ports.
4. 12V Trigger Function
The D70 Pro OCTO includes a 12V Trigger input and output. This allows the DAC to be triggered by other devices to switch on and off, or to actively trigger other devices to synchronize power states.

Image: Detail of the 12V Trigger ports and output level settings (4V/5V) on the D70 Pro OCTO.
Operation
User Interface (Aurora UI)
The D70 Pro OCTO features a full-color display and three touch buttons for navigation. The Aurora UI allows you to view playback information, FFT (Fast Fourier Transform) spectrum, or VU (Volume Unit) meters. Customize the display to your preference.

Image: Front panel of the D70 Pro OCTO, highlighting the color display and key features.
Bluetooth Connectivity
To use Bluetooth, ensure the antenna is connected. Enable Bluetooth in the setup menu. On your source device, search for "TOPPING D70 Pro OCTO" and pair. The DAC supports high-quality codecs like LDAC and aptX-Adaptive.
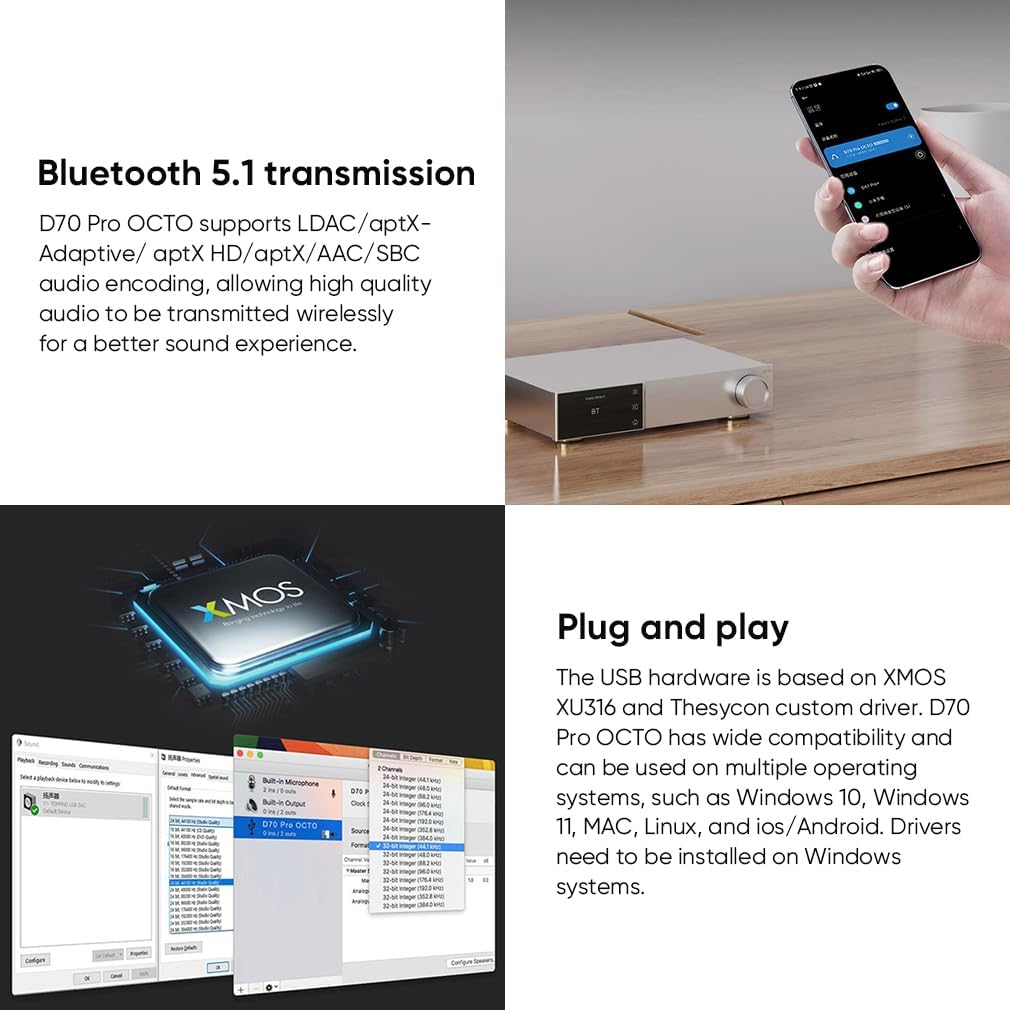
Image: Bluetooth 5.1 transmission and USB compatibility features of the D70 Pro OCTO.
Output Level Adjustment
The D70 Pro OCTO allows selection between 4V and 5V output modes for XLR and RCA outputs. This can be adjusted in the device's settings to match the input sensitivity of your connected amplifier or active speakers.
Maintenance
- Keep the device clean by wiping it with a soft, dry cloth. Avoid using harsh chemicals or abrasive materials.
- Ensure proper ventilation around the unit to prevent overheating.
- Avoid exposing the device to extreme temperatures, humidity, or direct sunlight.
- Disconnect the power cable if the device will not be used for an extended period.
Troubleshooting
If you encounter any issues with your D70 Pro OCTO, please refer to the solutions below. For further assistance, contact AOSHIDA customer support.
Common Issues and Solutions:
- Cannot be turned on:
- Check the power connection.
- Ensure the rear panel power switch is in the ON position.
- Try using a different power cable or power outlet.
- Noisy playback:
- Try playing different audio tracks.
- Verify that the specifications of the songs are supported by the unit.
- If noise occurs only when playing DSD files, adjust the computer system volume, music player volume, and driver volume to maximum.
- Check the source, downstream equipment, and cables for issues.
- If noise disappears after unplugging the USB cable, it may be interference from the source. Consider using a USB isolation device.
- One channel with noise / no output:
- Check the source, downstream equipment, and cables.
- Try swapping the left and right channel connections and test with another source.
- Channel imbalance:
- Set to 'C' (Balance) in the Setup Menu -> Advance -> Channel balance.
- Check the source, downstream equipment, and cables.
- Try swapping left and right channel connections and test with another source.
- Cannot pair Bluetooth:
- Enable Bluetooth function in the setup menu first.
- The device may already be connected to another Bluetooth device.
- Press and hold the headphone button on the remote control to enter pairing mode.
- Bring the Bluetooth device closer to the D70 Pro OCTO.
- Turn the power of the unit off and on again, then try pairing.
- Bluetooth audio cut off:
- Bring the Bluetooth device closer to the D70 Pro OCTO.
- Remove obstructions between the Bluetooth device and the unit.
- To prevent electromagnetic interference, locate the unit away from microwave ovens, wireless LAN devices, and other Bluetooth devices.
- Reconnect the Bluetooth device.
- Connected USB device not recognized:
- Ensure the USB cable is connected properly. Try checking or changing the cable.
- Try a different USB port on your computer.
- A driver issue may be present. Try reinstalling the driver.
- The issue might be with the PC. Try connecting to another computer.
- Some phones require OTG function to be enabled first.
- Remote control not responding:
- Enable remote control function in the setup menu.
- Insert two fresh AAA batteries.
- Aim the remote control at the remote control receiver on the unit.
- Bring the remote control closer to the device.
- Use your Android phone's camera to check if the IR transmitter at the top of the remote blinks when a button is pressed. If it doesn't, the remote is defective.
- If you have multiple Topping devices, ensure you are using the correct remote control.
- Cannot adjust unit's volume:
- If DAC mode was set in [Setup Menu -> Advanced -> DAC mode], the volume is not adjustable and is at maximum.
- To adjust volume, set the unit to PRE mode.
- Sample rate displayed does not match music file:
- The choice of music player app, its settings, and computer/phone settings impact the sampling rate.
- The unit displays the input signal's sampling rate.
- If the music player is set to exclusive mode, the audio signal will not be resampled by the computer/phone, and the unit will display the original file's sampling rate.
- If not in exclusive mode, the audio signal may be resampled by the computer/phone, and the unit will display the resampled rate.
- Recommended players: Audirvana on macOS and Foobar on Windows OS.
- DAC abnormal, DIR abnormal, PN voltage abnormal, 5V voltage abnormal, FFT module abnormal:
- Disconnect other devices and reboot the unit. If the problem persists, the unit may be defective. Contact your place of purchase.
- Firmware issues (File size large, Firmware damage, Topping other firmware, Unknown file, Update failed, No firmware):
- Please re-flash the correct firmware.
- For "File size large", try rebooting the computer or using another computer.
Video: Official troubleshooting guide for the TOPPING D70 Pro OCTO DAC, demonstrating solutions for common operational issues.
Technical Specifications
| Feature | Specification |
|---|---|
| Brand | AOSHIDA (Manufacturer: TOPPING) |
| Model | D70 Pro OCTO |
| DAC Chips | 8x Cirrus Logic CS43198 |
| USB Solution | XMOS XU316 |
| USB Input Support | PCM768kHz/32bit, DSD512 |
| Bluetooth Version | 5.1 |
| Bluetooth Codecs | LDAC, aptX-Adaptive, aptX HD, aptX, AAC, SBC |
| Inputs | USB, AES, Bluetooth, Optical, Coaxial |
| Outputs | RCA (Single-Ended), XLR (Balanced) |
| THD+N (A-wt) | RCA: <0.00008% @1kHz, XLR: <0.00007% @1kHz |
| SNR (A-wt) | RCA: 128dB @1kHz, XLR: 134dB @1kHz |
| Dynamic Range (A-wt) | RCA: 128dB @1kHz, XLR: 134dB @1kHz |
| Output Level (0dBFS) | RCA: 2.1Vrms (4V Mode), 2.6Vrms (5V Mode) XLR: 4.2Vrms (4V Mode), 5.2Vrms (5V Mode) |
| Product Dimensions (L x W x H) | 22.2 x 17.6 x 4.8 CM (Approx. 8.74"L x 6.93"W) |
| Item Weight | 1.54 Kilograms |
| Material Type | Copper |
Image: Dimensional drawing of the D70 Pro OCTO DAC.
Warranty Information
For specific warranty terms and conditions, please refer to the documentation provided with your purchase or contact the seller directly. AOSHIDA provides customer support for any questions during use.
Customer Support
Should you have any questions, require technical assistance, or need to report an issue with your TOPPING D70 Pro OCTO DAC, please contact AOSHIDA Audio-US, the seller, for prompt guidance and resolution.
You can typically find contact information for the seller on your purchase receipt or through the platform where the product was acquired.
