
Pulsar FXQ30
Pulsar Thermal Imaging Front Attachment FXQ30 User Manual
Model: FXQ30 | Brand: Pulsar
Introduction
The Pulsar Thermal Imaging Front Attachment FXQ30 is a high-performance thermal imaging device designed to enhance your optical equipment. It features a highly sensitive thermal imaging sensor for precise detail recognition in various weather conditions, and can quickly transform into a thermal imaging spotter. This manual provides essential information for the proper setup, operation, and maintenance of your FXQ30.

Figure 1: Pulsar Thermal Imaging Front Attachment FXQ30 main unit.
Package Contents
Upon opening the package, ensure all listed components are present and in good condition:
- Proton attachment (FXQ30 unit)
- Hard cover protective case
- Carrying case
- 3 rail mounts
- 3 scope mounts
- USB Cable
- Remote control
- Lens cover
- Mains Charger

Figure 2: All included accessories for the Pulsar FXQ30.
Setup
1. Charging the Battery
The FXQ30 uses an APS5 battery pack. Before first use, fully charge the battery using the provided mains charger and USB cable.
- Locate the battery compartment on the device.
- Insert the APS5 battery pack into the compartment, ensuring correct orientation.
- Connect the USB cable to the device's USB port and the mains charger.
- Plug the mains charger into a power outlet.
- Monitor the charging status via the Stream Vision app on your smartphone, as there is no direct status light on the device.
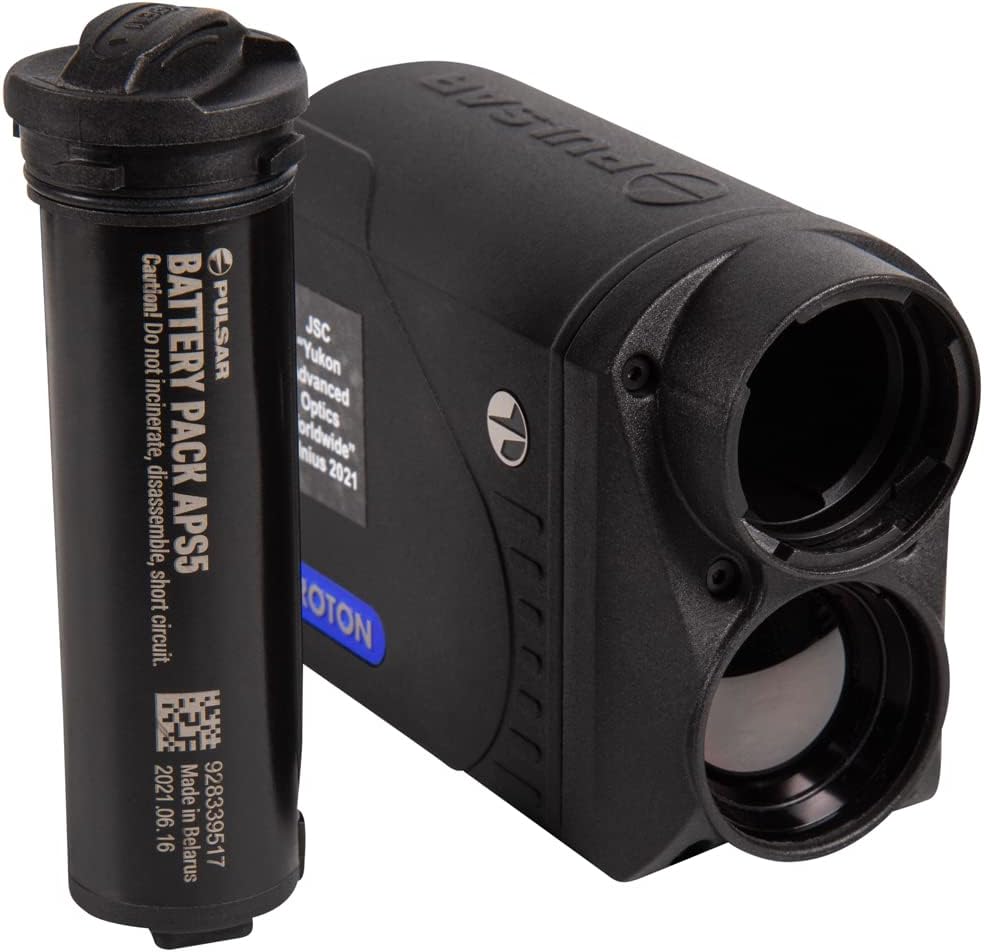
Figure 3: Pulsar FXQ30 with APS5 battery pack.

Figure 4: Battery insertion into the Pulsar FXQ30.
2. Attaching to Day Optics (Riflescope)
The FXQ30 is designed to be used as a front attachment for riflescopes using the quick-release PSP adaptor mount.
- Select the appropriate scope mount from the included accessories that matches your riflescope's objective lens diameter.
- Attach the PSP adaptor mount to the front of your riflescope.
- Securely attach the FXQ30 to the PSP adaptor mount. Ensure precise alignment for optimal viewing.
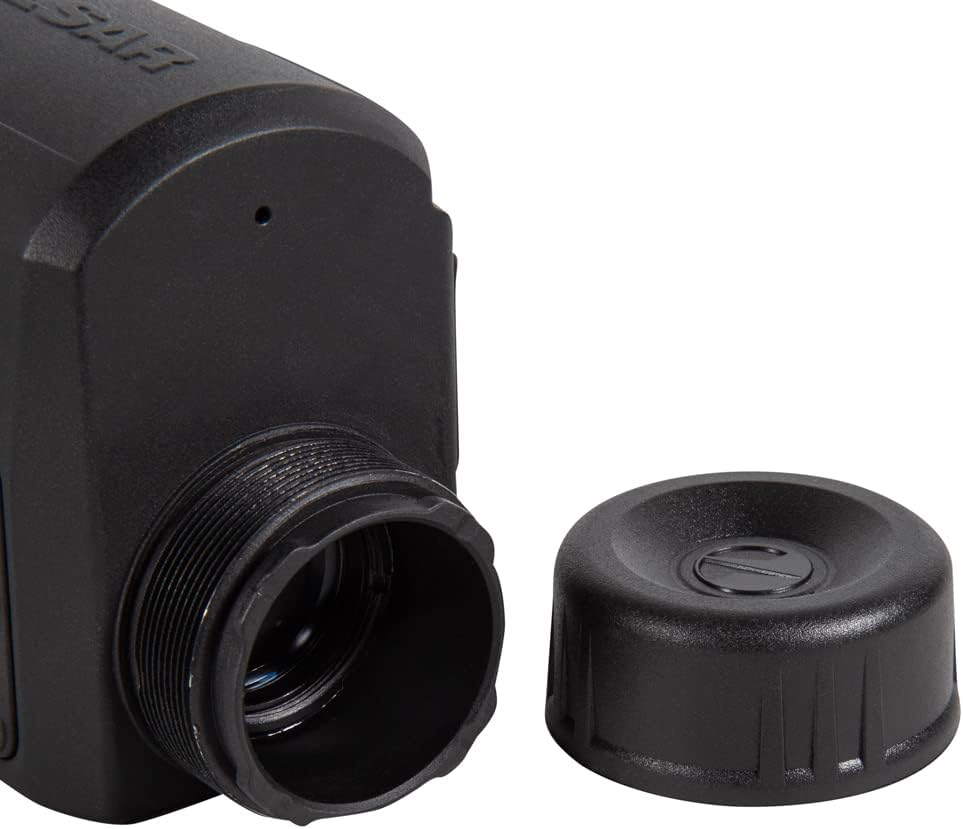
Figure 5: Front lens of the Pulsar FXQ30 with cap removed, ready for attachment.
3. Transforming to Spotter
The Proton FXQ can be quickly transformed into a thermal imaging spotter by attaching it to a 5x30B Pulsar monocular (sold separately).
- Detach the FXQ30 from your riflescope if currently attached.
- Connect the FXQ30 to the compatible 5x30B Pulsar monocular.
- The device is now ready for use as a handheld thermal spotter.
Operating Instructions
1. Powering On/Off
To power on the device, press and hold the power button (blue button) located on the control panel.

Figure 6: Control panel of the Pulsar FXQ30, showing the power button.
To power off, press and hold the power button again until the device shuts down.
2. Menu Navigation and Settings
The FXQ30 features a rotary encoder and additional buttons for menu navigation and settings adjustment. Refer to the on-screen menu (visible through your attached riflescope or monocular) for specific options.
- Rotary Encoder: Rotate to scroll through menu options. Press to select an option.
- Other Buttons: Used for quick access to frequently used functions or specific menu actions.
For detailed menu functions and settings, it is recommended to connect the device to the Stream Vision app on your smartphone.
3. Recording Video and Photos
The FXQ30 has a built-in video recorder with 16 GB of memory.
- To start recording video, press the dedicated REC button (if available, or navigate through the menu).
- To stop recording, press the REC button again.
- To capture a photo, press the photo capture button (if available, or navigate through the menu).
- Recorded footage and photos can be downloaded to a PC or smartphone via the USB cable or Stream Vision app.

Figure 7: USB port on the Pulsar FXQ30 for data transfer and charging.
Maintenance
1. Cleaning the Device
- Use a soft, lint-free cloth to clean the exterior of the device.
- For lenses, use a specialized lens cleaning cloth and solution. Avoid abrasive materials.
- Do not use harsh chemicals or solvents.
2. Storage
- When not in use, store the FXQ30 in its hard protective case in a cool, dry place.
- Ensure the lens cap is on to protect the objective lens.
- For long-term storage, it is advisable to remove the battery.

Figure 8: The durable hard protective case for the Pulsar FXQ30.
Troubleshooting
| Problem | Possible Cause | Solution |
|---|---|---|
| Device does not power on. | Battery is depleted or not inserted correctly. | Charge the battery fully. Ensure the battery is inserted with correct polarity. |
| Poor image quality / blurry image. | Lens is dirty or focus is incorrect. | Clean the lens with a suitable lens cloth. Adjust the focus of the attached riflescope or monocular. |
| Cannot connect to smartphone app. | Bluetooth/Wi-Fi is off on device or phone, or app is outdated. | Ensure wireless connectivity is enabled on both devices. Update the Stream Vision app to the latest version. |
| Recording issues. | Memory full or software glitch. | Transfer recorded files to free up memory. Restart the device. |
Specifications
| Feature | Detail |
|---|---|
| Model Name | Proton (FXQ30) |
| Part Number | PL76653K |
| Sensor Sensitivity (NETD) | 40mK |
| Internal Storage | 16 GB |
| Material | Magnesium-Alloy |
| Item Dimensions (LxWxH) | 4.68 x 2.3 x 2.95 inches |
| Item Weight | 12.8 ounces |
| Manufacturer | Sellmark Corporation |
| Date First Available | February 11, 2022 |
Warranty and Support
Warranty Information
The Pulsar Thermal Imaging Front Attachment FXQ30 comes with a 3 Year Limited Warranty. This warranty covers defects in materials and workmanship under normal use. Please retain your proof of purchase for warranty claims.
For full warranty terms and conditions, please refer to the official Pulsar website or contact their customer service.
Customer Support
If you encounter any issues not covered in the troubleshooting section or require further assistance, please contact Pulsar customer support. Visit the official Pulsar website for contact details and additional resources.
Important: This product is controlled for export and in-country transfer under the Export Administration Regulations (EAR). Diversion contrary to U.S. law prohibited.
Related documentsFXQ30


Ask a question about this manual
Ask about setup, troubleshooting, compatibility, parts, safety, or missing instructions. Manuals+ will review the question and use this page’s manual context to help answer it.