
Holy Stone 808266650
Holy Stone FAA Compliant Remote Identification Broadcast Module
Model: 808266650
1. Introduction and Overview
The Holy Stone Remote Identification (RID) Broadcast Module is designed to ensure your drone operations comply with the latest US FAA regulations. This module broadcasts essential identification and location data of your unmanned aircraft system (UAS) during flight, providing a seamless solution for drone pilots to meet the FAA's Remote ID requirements. It is a crucial accessory for responsible and compliant drone piloting.
The FAA's Notice of Proposed Rulemaking (NPRM) on Remote Identification of Unmanned Aircraft Systems was published on December 31, 2019, with operational compliance required by March 16, 2024. This module helps you adhere to these regulations, allowing you to fly with confidence.
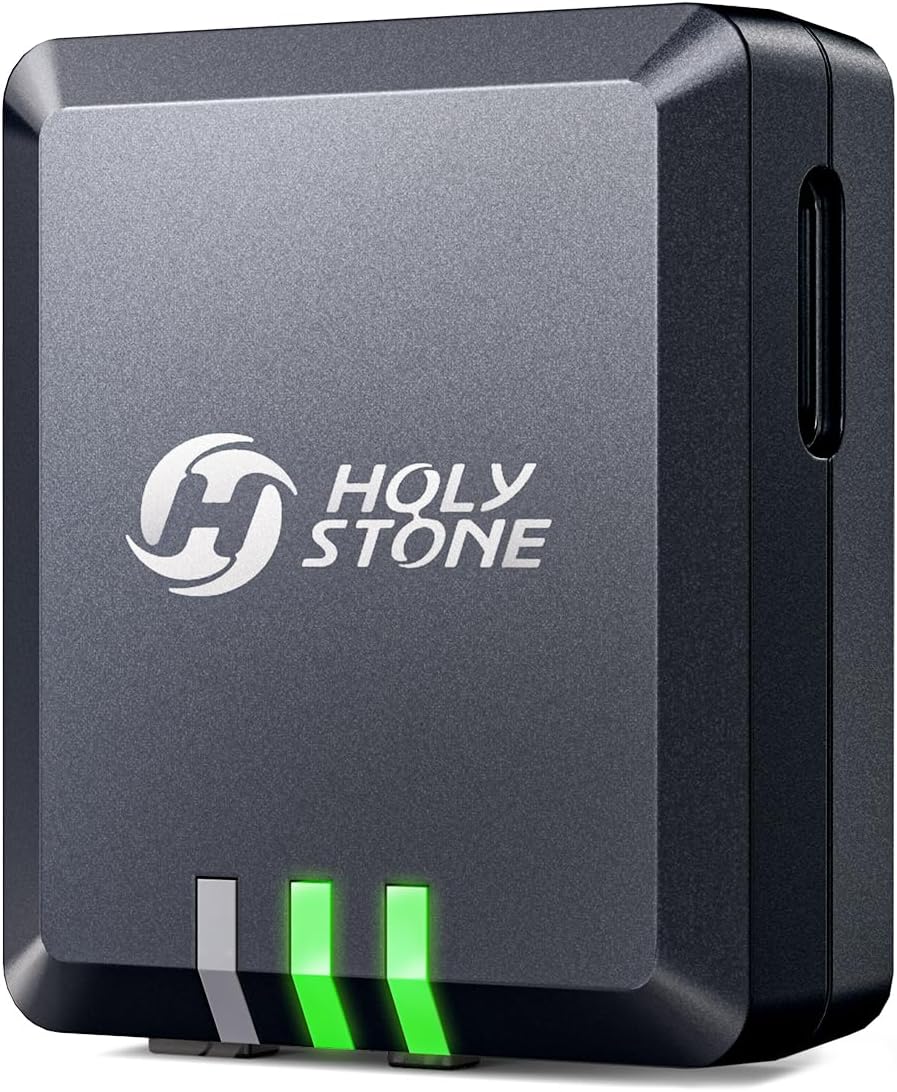
Image 1.1: Holy Stone Remote ID Broadcast Module.
2. Key Features
- FAA Regulation Compliance: Specifically designed to meet US FAA Declaration of Compliance for Remote ID, ensuring your drone broadcasts necessary identification data.
- Broadcasting Capabilities: Broadcasts Drone ID, Longitude & Latitude, Height, Speed, and Time Mark.
- Wide Compatibility: Compatible with Holy Stone drones including HS720R, HS720G, HS720E, HS720, HS700E, HS600 GPS 4K Drone, and adaptable to many other drone models on the market.
- Safety and Performance: Features protection against overcharging, over-discharging, and low temperatures, enhancing flight safety.
- Lightweight and Compact: Weighs 13.5g (without Velcro) / 14.2g (with Velcro) with dimensions of 1.34 x 1.10 x 0.53 inches (3.4 x 2.8 x 1.35 cm), minimizing impact on drone performance.
- Long Battery Life: Offers approximately 5 hours of usage time on a single charge.
- High-Accuracy GPS Tracking: Provides a positioning range of 500m and position accuracy of 3-5m, aiding in drone recovery and tracking.

Image 2.1: The Remote ID module mounted on a drone, illustrating its broadcasting capabilities for compliance.

Image 2.2: The module's strong compatibility with different types of aircraft, including FPV racing drones, RC gliders, helicopters, and jet fighters.
3. Package Contents
Upon opening your Holy Stone Remote ID Broadcast Module package, you should find the following items:
- RID Module × 1
- Adjustable Zip Tie Mount × 1
- Self-Locking Zip Tie × 12
- Velcros × 3
- User Manual × 1 (This document)
- Type-C Charging Cable × 1

Image 3.1: All items included in the product package.
4. Setup and Installation
Proper installation of the Remote ID module is crucial for optimal performance and compliance. Follow these steps carefully:
4.1. Module Positioning
To ensure optimal GPS performance, the ideal positioning spot can differ depending on your drone model. Consider the following guidelines:
- Avoid areas close to the propellers to prevent any damage or interference.
- Steer clear of directly overlaying or being too close to electronic parts that might cause signal interference.
- Opt for a spot that is both easy to access for installation/removal and clearly visible for status indicators.
Pro Tip: For the best GPS signal strength, consider positioning it on the drone's flat upper surface.

Image 4.1: Recommended positioning locations for the Remote ID module on different Holy Stone drone models (HS720, HS720E, HS720G, HS720R, HS600, HS600D).
4.2. Installation Method
The module can be attached using the provided Velcro strips or zip ties for a secure fit.
- Using Velcro:
a. Attach one Velcro strip to the designated positioning area on your drone.
b. Attach the corresponding Velcro strip to the bottom of the RID module.
c. Press the RID module firmly onto the Velcro on the drone until secure. - Using Zip Ties (for adjustable zip tie mount):
a. Secure the adjustable zip tie mount to the drone using the self-locking zip ties.
b. Insert the RID module into the mount, ensuring it clicks into place securely.

Image 4.2: Detailed steps for attaching the Remote ID module using Velcro and the adjustable zip tie mount.
5. Operating Instructions
5.1. Charging the Module
Before first use, fully charge the Remote ID module. A pulsing red light indicates low battery, signaling the need for charging.
- Connect the provided Type-C charging cable to the module's charging port.
- Connect the other end of the cable to a USB power source (e.g., computer USB port, USB wall adapter).
- Charging time is approximately 1.5 hours for a full charge.
- The light indicator will show charging status. Refer to the module's specific light patterns for full charge indication (typically a solid green light).

Image 5.1: Information on the module's long battery life and charging specifications.
5.2. Powering On/Off
- Power On: Press and hold the power button on the module until the indicator lights illuminate.
- Power Off: Press and hold the power button again until the indicator lights turn off.
5.3. Status Indicators
The module features indicator lights that provide information on its operational status:
- Green Lights: Indicate normal operation and successful broadcasting.
- Pulsing Red Light: Signals low battery, prompting for a safe and timely landing.
- Other Light Patterns: Refer to the Quick Start Guide for detailed explanations of other light indicators, such as charging status or error codes.
6. Maintenance
To ensure the longevity and optimal performance of your Holy Stone Remote ID Broadcast Module, follow these maintenance guidelines:
- Cleaning: Use a soft, dry cloth to wipe the module. Do not use liquid cleaners or solvents, as they may damage the electronics.
- Storage: Store the module in a cool, dry place away from direct sunlight and extreme temperatures. If storing for extended periods, ensure the battery is charged to about 50% to preserve battery health.
- Handling: Handle the module with care. Avoid dropping it or subjecting it to strong impacts, which can damage internal components.
- Charging: Always use the provided Type-C cable for charging. Avoid using damaged cables or non-standard chargers.
7. Troubleshooting
If you encounter issues with your Remote ID Broadcast Module, refer to the following common problems and solutions:
| Problem | Possible Cause | Solution |
|---|---|---|
| Module does not power on. | Battery is depleted. | Charge the module fully using the provided Type-C cable. |
| Module not broadcasting (no green lights). | Module not powered on; GPS signal weak; Module malfunction. | Ensure module is powered on. Relocate drone to an open area for better GPS signal. If issue persists, contact customer support. |
| Pulsing red light. | Low battery. | Land the drone safely and charge the module immediately. |
| Module detaches during flight. | Improper installation; Worn Velcro/zip ties. | Ensure secure attachment using fresh Velcro or new zip ties. Verify proper positioning away from vibrations. |
8. Specifications
| Attribute | Value |
|---|---|
| Product Dimensions | 1.54 x 1.18 x 1.54 inches (3.9 x 3.0 x 3.9 cm) |
| Item Weight | 2.89 ounces (81.9 g) |
| Model Number | 808266650 |
| Manufacturer Recommended Age | 14 years and up |
| Usage Time | Approx. 5 hours |
| Charging Time | Approx. 1.5 hours |
| Charging Cable | Type-C (included) |
| Positioning Range | 500m |
| Position Accuracy | 3-5m |
| Connectivity Technology | Bluetooth, Wi-Fi |
9. Warranty and Support
Holy Stone products are manufactured to the highest quality standards. This product comes with a standard manufacturer's warranty against defects in materials and workmanship. Please refer to the warranty card included in your package for specific terms and conditions, including the warranty period.
For technical support, troubleshooting assistance, or warranty claims, please contact Holy Stone Customer Service. You can typically find contact information on the Holy Stone official website or through the retailer where you purchased the product.
Please have your product model number (808266650) and proof of purchase ready when contacting support to expedite the process.
Related documents808266650


Ask a question about this manual
Ask about setup, troubleshooting, compatibility, parts, safety, or missing instructions. Manuals+ will review the question and use this page’s manual context to help answer it.