
TRIUMPHKEY 0067
TRIUMPHKEY 110CM L Shaped Desk with Shelves Instruction Manual
Model: 0067
Introduction
Thank you for choosing the TRIUMPHKEY 110CM L Shaped Desk. This manual provides essential information for the safe assembly, operation, and maintenance of your new desk. Please read these instructions carefully before beginning assembly and retain them for future reference.
This L-shaped desk is designed to maximize your workspace, offering a large surface area and integrated storage shelves. Its reversible design allows for flexible configuration to suit various room layouts.
Important Safety Information
- Read all instructions before assembly. Failure to follow instructions may result in injury or damage to the product.
- Ensure all parts are present and undamaged before assembly. Do not use if any parts are missing or defective.
- Assemble the desk on a soft, clean surface (e.g., carpet) to prevent scratches.
- Do not overtighten screws during assembly, as this may damage the threads or components.
- Keep small parts and packaging materials away from children and pets to prevent choking hazards.
- Do not stand or sit on the desk.
- Distribute weight evenly across the desk surface and shelves. Do not exceed the maximum weight capacity of 100 kg (70 kg for the main desk, 15 kg per shelf).
- Regularly check all fasteners to ensure they remain tight.
Package Contents
Before assembly, verify that all components listed below are present. If any parts are missing or damaged, please contact customer support.
- Desktop Panels (Main and Corner Sections)
- Steel Frame Components (Legs, Crossbars, Shelf Supports)
- Shelf Panels (2-tier)
- Adjustable Foot Pads
- Assembly Hardware (Screws, Bolts, Allen Wrench)
- Instruction Manual

Image: The desk packaging box, indicating the contents are securely packed for transport.
Assembly Instructions
Follow these steps carefully to assemble your TRIUMPHKEY L Shaped Desk. It is recommended to have two people for certain assembly steps.
- Prepare the Workspace: Clear a spacious area and lay down a blanket or cardboard to protect the desk components and your floor during assembly.
- Identify Parts: Unpack all components and hardware. Refer to the parts list in your manual to identify each piece.
- Assemble the Main Desk Frame: Attach the main desk legs to the long desktop panel using the provided screws. Ensure all connections are secure but do not fully tighten yet.
- Assemble the Corner Desk Frame: Attach the corner desk legs to the shorter desktop panel.
- Connect Desk Sections: Join the main desk section and the corner desk section to form the L-shape. Use the connecting plates and screws as indicated in your specific manual diagram.
- Install Shelf Frame: Attach the vertical shelf supports to the designated side of the desk. The shelves are reversible, allowing installation on either the left or right side of the corner section. Decide your preferred orientation before proceeding.

Image: A diagram illustrating how the storage shelves can be installed on either the left or right side of the L-shaped desk, providing flexible setup options.
- Install Shelves: Insert the shelf panels into the shelf frame. The shelves offer adjustable height options. You can choose to install both shelves or remove the middle shelf to accommodate a computer tower.

Image: A visual representation demonstrating three different height configurations for the desk's storage shelves, allowing customization for various items like books or a computer tower.
- Attach Crossbars and Adjustable Feet: Secure any X-shaped crossbars to the frame for added stability. Install the adjustable foot pads at the bottom of each leg.
- Final Tightening: Once all components are in place and the desk is upright, gradually tighten all screws and bolts. Ensure the desk is stable and level. Adjust the foot pads as needed to compensate for uneven floors.

Image: An exploded view diagram of the desk, pointing out key features such as height-adjustable shelves, double X crossbar design for stability, and height-adjustable legs.
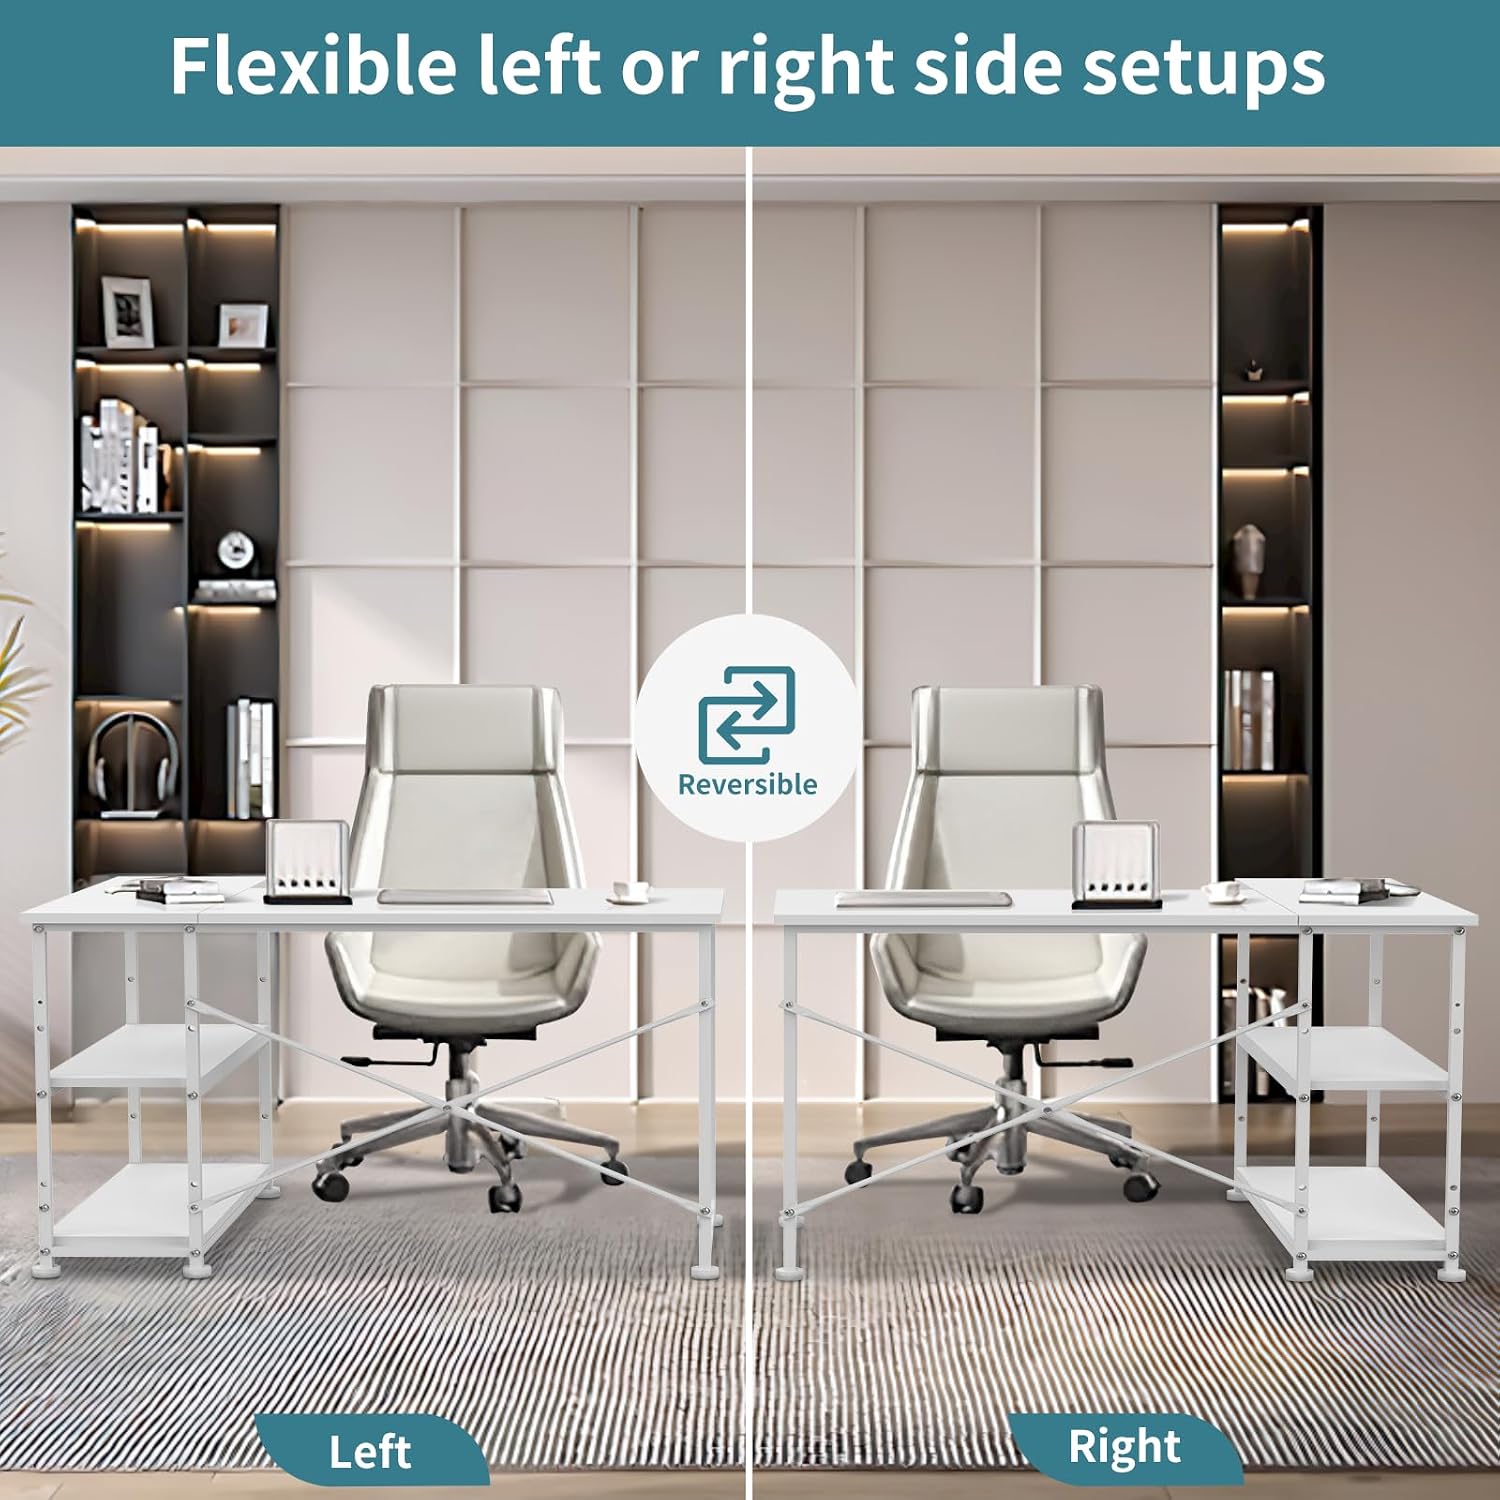
Image: A comparison showing two identical desks configured with the storage shelves on the left side and the right side, demonstrating the reversible design feature.
Operating Instructions
Utilizing the Reversible Shelves
The 2-tier storage shelves can be configured on either the left or right side of the L-shaped desk during assembly. This allows you to adapt the desk to your room layout and personal preference. If you wish to change the orientation after initial assembly, partial disassembly of the shelf unit will be required.
Adjusting Shelf Height
The shelves offer multiple height settings. To adjust, remove the shelf panel, reposition the shelf supports to the desired height, and reinsert the shelf. The middle shelf can also be removed entirely to create space for taller items, such as a computer tower.
Leveling the Desk
The desk is equipped with adjustable foot pads. If the desk wobbles or is uneven, gently lift each corner and rotate the corresponding foot pad until the desk is stable and level on your floor surface.
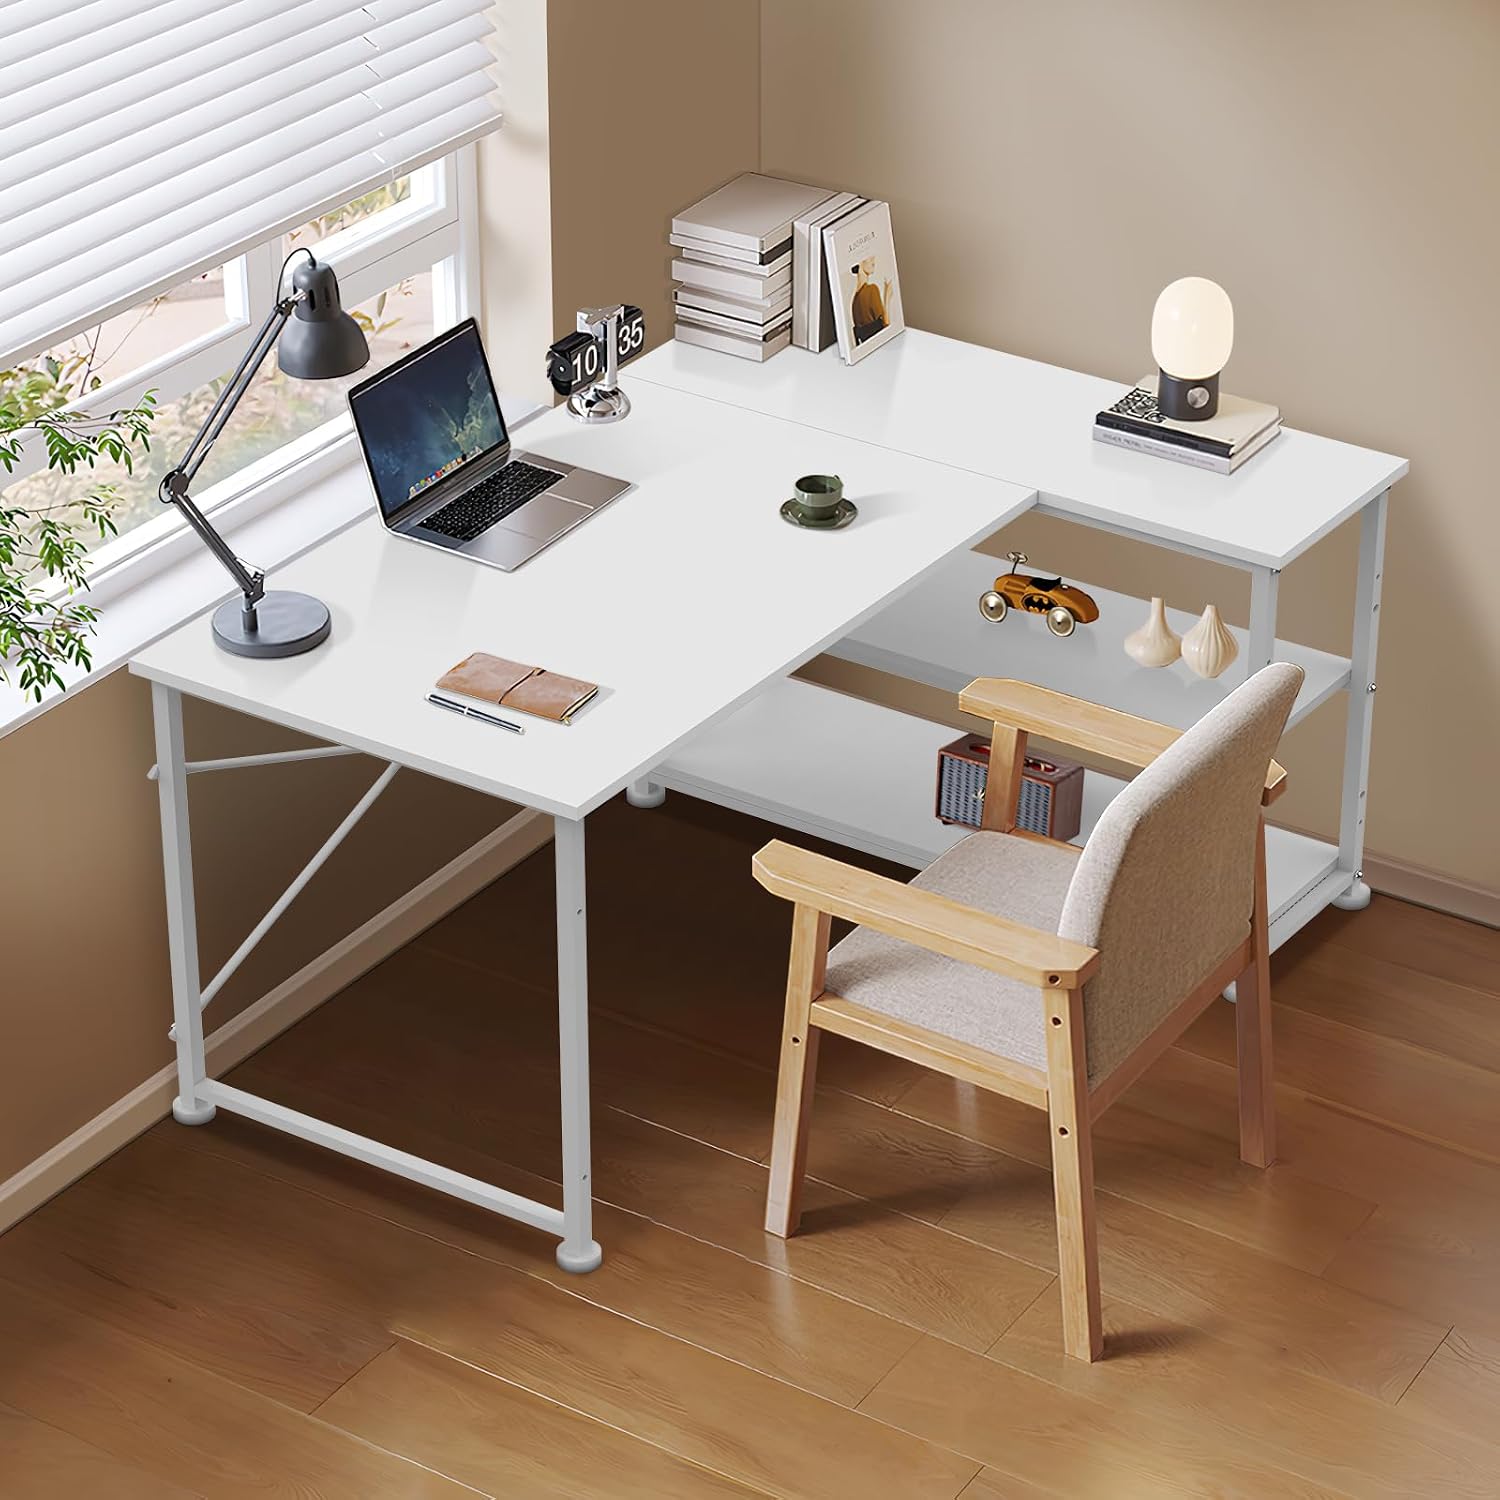
Image: The TRIUMPHKEY L Shaped Desk positioned in a corner of a room, showcasing its functional design with a laptop, lamp, and decorative items, highlighting its suitability for home office use.
Maintenance
Cleaning
To clean the desk surfaces, wipe with a damp cloth. For stubborn marks, a mild soap solution can be used, followed by wiping with a clean, dry cloth. Avoid using abrasive cleaners or harsh chemicals, as these can damage the finish.
Care
- Avoid placing hot items directly on the desk surface. Use coasters or protective pads.
- Protect the desk from direct sunlight and excessive moisture to prevent warping or discoloration.
- Periodically check all screws and bolts to ensure they remain tight. Retighten as necessary to maintain stability.
Troubleshooting
Desk is Wobbly
- Check all fasteners: Ensure all screws and bolts are securely tightened.
- Adjust foot pads: Use the adjustable foot pads on the bottom of the legs to level the desk on uneven surfaces.
- Verify assembly: Double-check that all frame components and crossbars are correctly installed according to the instructions.
Parts Do Not Align
- Loosen fasteners: Slightly loosen all screws in the affected section, align the parts, and then retighten.
- Re-check orientation: Ensure that components are oriented correctly as per the assembly diagrams. Some parts may appear similar but have specific alignments.
Missing or Damaged Parts
If you find any parts missing or damaged upon opening the package, please contact TRIUMPHKEY customer support immediately with your purchase details and a description of the issue.
Specifications
| Brand | TRIUMPHKEY |
| Model Number | 0067 |
| Overall Dimensions (L-Shape) | 110cm W x (50-80cm) D x 75cm H (Approx. 43.31"W x 19.69"-31.5"D x 29.53"H) |
| Color | White |
| Top Material | Engineered Wood |
| Frame Material | Steel |
| Item Weight | 16.8 Kilograms |
| Maximum Weight Recommendation | 100 Kilograms (Main Desk: 70 kg, Each Shelf: 15 kg) |
| Special Features | Reversible L-Shape Configuration, Adjustable Shelf Height, Adjustable Foot Pads |
| Assembly Required | Yes |

Image: A comprehensive diagram illustrating the various dimensions of the L-shaped desk, including overall width, depth, height, and individual shelf measurements.
Warranty and Support
TRIUMPHKEY is committed to providing quality products and customer satisfaction. This product comes with a standard manufacturer's warranty against defects in materials and workmanship. For specific warranty terms and conditions, please refer to the documentation included with your purchase or contact TRIUMPHKEY customer service.
If you have any questions regarding assembly, missing parts, product functionality, or require technical support, please contact our customer service team. Details for contacting support are typically found on the packaging or on the TRIUMPHKEY official website.
Please have your model number (0067) and purchase information ready when contacting support.
Ask a question about this manual
Ask about setup, troubleshooting, compatibility, parts, safety, or missing instructions. Manuals+ will review the question and use this page’s manual context to help answer it.