
1. Introduction
Thank you for choosing the MOBYAT XTM024 3 Phase 4 Wire Digital Energy Meter. This device is designed for accurate measurement of active energy consumption in three-phase four-wire AC power networks. It features an LCD display for clear readings and is suitable for DIN rail mounting. This manual provides essential information for safe installation, operation, and maintenance of your energy meter.
2. Safety Information
WARNING: Installation and maintenance of this device must be performed by qualified electricians only. Failure to follow these instructions may result in electrical shock, fire, or serious injury.
- Always disconnect power before installation or maintenance.
- Ensure proper grounding to prevent electrical hazards.
- Verify all wiring connections are secure and correct according to the wiring diagram.
- Do not operate the meter if it appears damaged.
- Keep the device away from moisture and extreme temperatures.
3. Product Overview
The MOBYAT XTM024 is a compact digital energy meter designed for precise energy measurement. It features an LCD display for energy readings and LED indicators for phase status and pulse output.
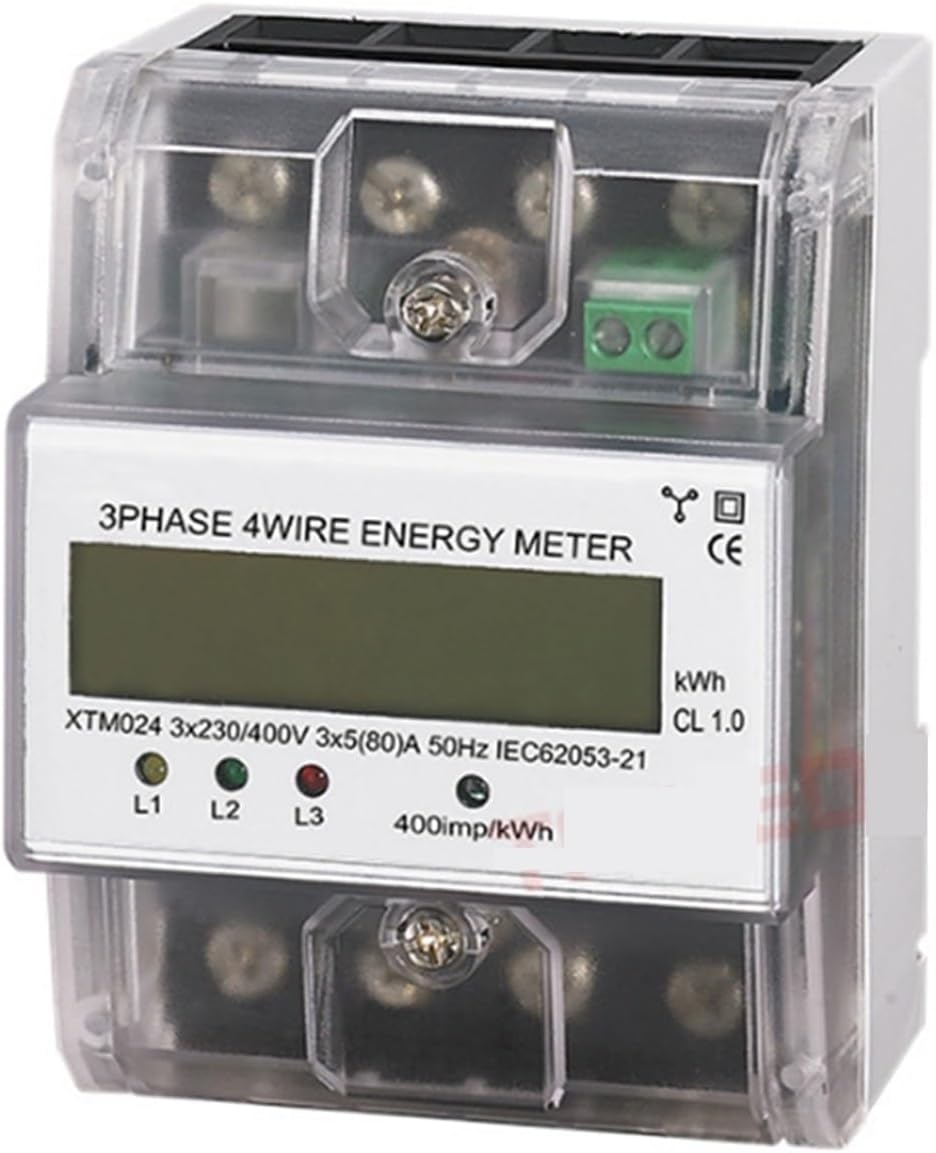
Figure 3.1: Front view of the MOBYAT XTM024 Digital Energy Meter. This image shows the LCD display, phase indicator LEDs (L1, L2, L3), and the pulse output indicator.
Key Components:
- LCD Display: Shows 6 digits for integer kWh and 2 digits for decimal kWh.
- L1, L2, L3 Indicators: LEDs that illuminate to indicate active phases.
- Pulse Output Indicator: An LED that flashes at a rate of 400 impulses per kWh, indicating energy consumption.
- Wiring Terminals: Connections for input and output phases and neutral.
- DIN Rail Mounting Clip: For easy installation on a standard DIN rail.
4. Setup and Installation
The XTM024 meter is designed for DIN rail mounting. Ensure the installation environment meets the specified operating conditions.
4.1 Mounting
- Ensure the power supply to the installation area is completely disconnected.
- Locate a standard 35mm DIN rail within your electrical panel.
- Align the meter's DIN rail clip with the rail and press firmly until it clicks into place.
- Verify the meter is securely fastened and does not wobble.
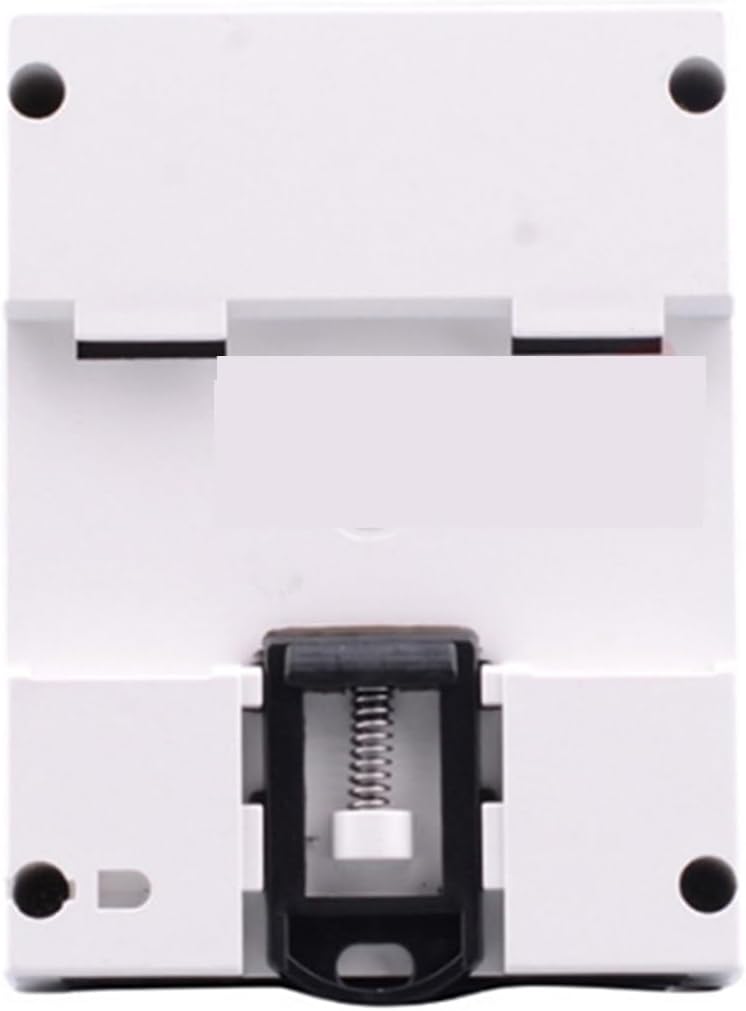
Figure 4.1: Back view of the MOBYAT XTM024 Digital Energy Meter, illustrating the DIN rail mounting mechanism.
4.2 Wiring Diagram
The XTM024 is a 3-phase 4-wire meter. Connect the input and output wires according to the diagram typically found on the meter's casing or in the product packaging. Ensure correct phase (L1, L2, L3) and neutral (N) connections.
- Connect the incoming Phase 1 (L1), Phase 2 (L2), Phase 3 (L3), and Neutral (N) wires to the corresponding input terminals.
- Connect the outgoing Phase 1 (L1), Phase 2 (L2), Phase 3 (L3), and Neutral (N) wires to the corresponding output terminals.
- Tighten all terminal screws securely to prevent loose connections and overheating.
- Double-check all connections before restoring power.
5. Operating Instructions
5.1 Power On
After successful installation and wiring, restore power to the circuit. The meter's LCD display should illuminate, and the phase indicator LEDs (L1, L2, L3) should light up if the respective phases are active.
5.2 Reading the Display
The LCD display shows the total active energy consumption in kilowatt-hours (kWh). The format is typically 6 digits for the integer part and 2 digits for the decimal part (e.g., 000000.00 kWh).
5.3 Pulse Output Indicator
The pulse output LED (often labeled 'IMP' or similar) will flash at a rate of 400 impulses per kWh. A faster flash rate indicates higher power consumption.
6. Maintenance
The MOBYAT XTM024 energy meter is designed for long-term, maintenance-free operation. However, periodic checks are recommended:
- Cleaning: Gently wipe the meter's exterior with a soft, dry cloth. Do not use abrasive cleaners or solvents.
- Connection Check: Periodically inspect wiring terminals for any signs of loosening or corrosion. Ensure all connections remain tight. (Always disconnect power before performing this check.)
- Environmental Conditions: Ensure the operating environment remains within the specified temperature and humidity ranges.
7. Troubleshooting
7.1 No Display / Meter Not Powering On
- Check if the main power supply to the meter is active.
- Verify all wiring connections are correct and secure, especially the phase and neutral inputs.
- Ensure the voltage supply is within the meter's specified operating range.
7.2 Incorrect Readings
- Confirm that the meter is correctly wired for a 3-phase 4-wire system. Incorrect phase sequencing or neutral connection can affect accuracy.
- Ensure the current rating of the meter matches the expected load.
- Check for any external electromagnetic interference that might affect the meter's operation.
7.3 Pulse LED Not Flashing
- Verify that there is an active load consuming power through the meter. The LED will only flash when energy is being consumed.
- Check for proper wiring as described in Section 4.2.
8. Specifications
| Parameter | Value |
|---|---|
| Model | XTM024 |
| Type | Three Phase Four Wire Electronic Type |
| Reference Voltage | 3 X 220/380V AC, 3 X 230/400V AC |
| Rated Voltage | AC220V/400V |
| Operating Voltage Range | 0.9-1.1 Rated Voltage |
| Utmost Voltage Range | 0.8-1.15 Rated Voltage |
| Reference Current Options | 3 X 5(80A), 3 X 1.5(6A), 3 X 30(100A) |
| Base Current | 1.5A/5A/30A |
| Max Current | 6A/80A/100A (depending on model variant) |
| Accuracy Level | 1.0 (IEC62053-21) |
| Rated Frequency | 50Hz |
| Constant Pulse | 400imp / kWh |
| Display | LCD 6 + 2 digits |
| Power Consumption | 2W, 10VA |
| Starting Current | 0.004Ib |
| Operating Temperature | -20 ~ 55°C |
| Storage Temperature | 25 ~ 70°C |
| Average Humidity Value of Year | 75% |
| Humidity Range | 20-80% |
| Installation Method | DIN Rail |
| Dimensions (Approx.) | 10.1 X 7.6 X 6.5cm / 3.97 X 2.99 X 2.55in |
| Weight (Approx.) | 500g |
| Material | Metal + ABS |
9. Warranty and Support
For warranty information and technical support, please refer to the documentation provided with your purchase or contact your retailer. Keep your purchase receipt as proof of purchase.
For further assistance, please contact MObyat customer service through the official channels provided by your seller.