
LUMENIX LMBCN-CHG-Y
LUMENIX Amber 72-LED Rechargeable Wireless Strobe Beacon Light User Manual
Model: LMBCN-CHG-Y | Brand: LUMENIX
1. Introduction
This manual provides essential information for the safe and effective operation of your LUMENIX Amber 72-LED Rechargeable Wireless Strobe Beacon Light. Designed for enhanced visibility and safety, this portable warning light is suitable for various applications including construction, emergency vehicles, and road maintenance. Please read this manual thoroughly before use and retain it for future reference.
2. Product Features
- Wireless and Rechargeable: Offers convenience and portability with up to 8 hours of continuous lighting. Includes a car charger for easy recharging.
- Powerful Illumination: Equipped with 72 high-intensity amber LEDs providing 360-degree super bright coverage for maximum visibility.
- Dual Control Methods: Easily control the light using the included wireless remote control or the integrated control panel on the light body.
- Multiple Flashing Modes: Features 12 distinct flashing modes to suit various needs and conditions, with a last-used pattern recall function.
- Easy Magnetic Installation: Strong magnetic base allows for quick and secure attachment to metal surfaces, ideal for vehicles and equipment.
- Durable and Weather Resistant: Built to withstand harsh conditions, ensuring reliable performance.

Figure 2.1: Key Features of the LUMENIX Strobe Beacon Light.
3. Package Contents
- 1 x LUMENIX Amber 72-LED Rechargeable Wireless Strobe Beacon Light
- 1 x Wireless Remote Control
- 1 x Car Charger (12V cigarette lighter adapter)
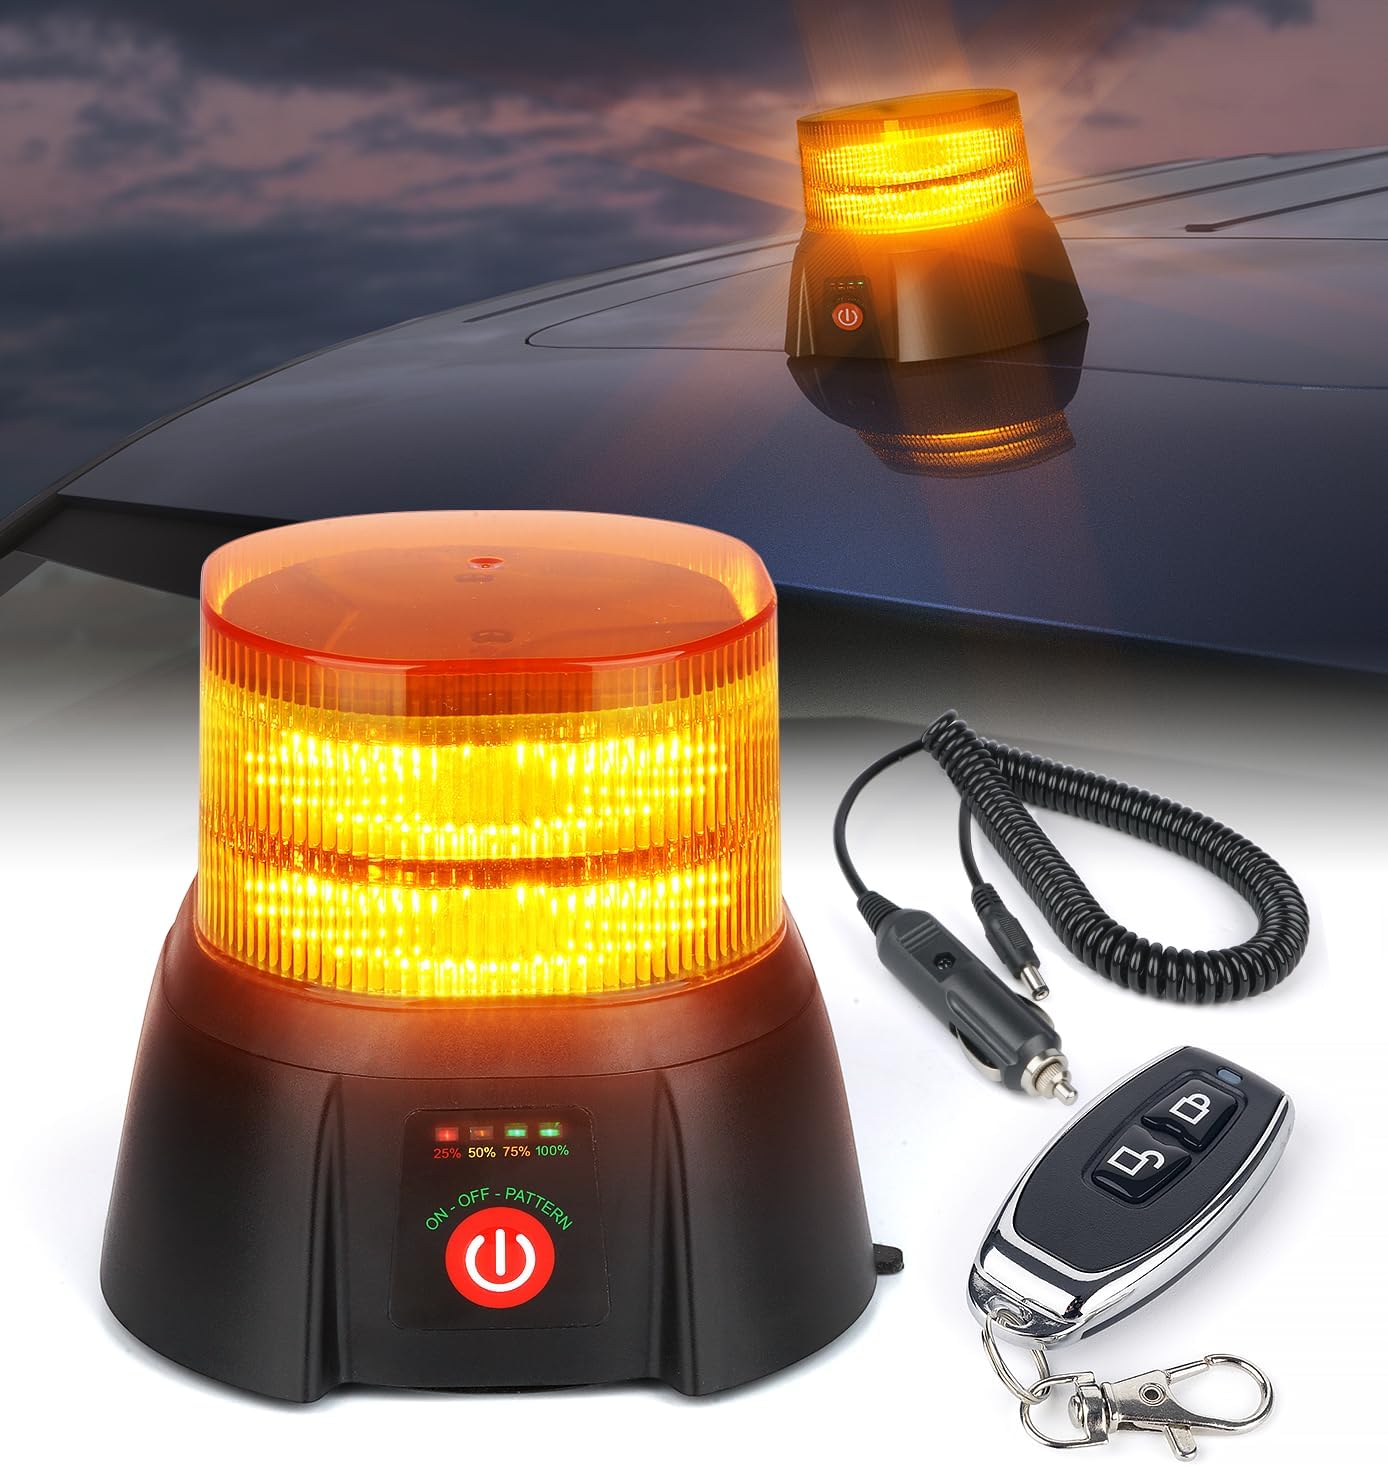
Figure 3.1: Contents included with the LUMENIX Strobe Beacon Light.
4. Setup and Installation
4.1 Charging the Device
The beacon light is equipped with a rechargeable battery. Before first use, fully charge the device. Connect the provided car charger to the charging port on the light and plug the other end into your vehicle's 12V cigarette lighter socket. The battery indicator lights on the control panel will show the charging progress (25%, 50%, 75%, 100%).

Figure 4.1: Charging the Beacon Light using the Car Charger.
4.2 Mounting the Light
The beacon light features a strong magnetic base for secure attachment to any iron metal surface. Ensure the surface is clean and dry before mounting for optimal adhesion. The magnetic mount allows for quick and convenient placement on vehicle rooftops, trailers, or other suitable metal surfaces.

Figure 4.2: Magnetic Mounting of the Beacon Light.
For optimal safety and visibility, position the light where it is clearly visible to others, such as on the roof of a vehicle or elevated equipment. Avoid placing the light in locations where it might obstruct the driver's view or become dislodged during movement.

Figure 4.3: Benefits of Wireless Installation for Safety and Tidiness.
5. Operation
5.1 Powering On/Off and Changing Modes
The LUMENIX strobe beacon light can be operated using two methods: the integrated control panel on the light body or the wireless remote control.
Using the Control Panel:
- Short Press: Press the "ON-OFF-PATTERN" button briefly to power on the light and cycle through the 12 different flashing modes.
- Long Press: Press and hold the "ON-OFF-PATTERN" button to power off the light.
Using the Wireless Remote Control:
- The remote control allows for convenient operation from a distance, up to 50 meters in open areas.
- Use the dedicated buttons on the remote for Power On/Off and Modes Switch.

Figure 5.1: Dual Control Methods for the Beacon Light.
5.2 Flashing Modes
The light offers 12 distinct flashing patterns. These modes are designed to provide optimal visibility in various conditions and for different purposes. The device features a memory function that recalls the last used pattern when powered on again.

Figure 5.2: Example of Beacon Light in use with various flashing patterns.
5.3 Battery Level Indication
The control panel on the light body includes indicators for battery level (25%, 50%, 75%, 100%). Monitor these indicators to ensure the light has sufficient charge for your needs.

Figure 5.3: Battery Level Indicators on the Control Panel.
5.4 Official Product Videos
Video 5.1: Official demonstration of the LUMENIX 72-LED Rechargeable Wireless Portable Strobe Beacon Light with Remote Switch, showcasing its features and operation.
Video 5.2: Official video showcasing the LUMENIX Amber 72-LED Rechargeable Wireless Strobe Beacon Light with Remote Control, highlighting its visibility and ease of use.
6. Specifications
| Specification | Detail |
|---|---|
| Brand | LUMENIX |
| Model Number | LMBCN-CHG-Y |
| Light Source Type | LED (72 LEDs) |
| Color | Amber |
| Power Source | Battery Powered |
| Battery Description | Alkaline (Note: Batteries are not included for the remote, only for the main unit) |
| Voltage | 1.5 Volts (for internal components, charging is 12V) |
| Mounting Type | Magnetic Mount |
| Bulb Features | Flashing modes, Remote control |
| Special Features | Waterproof |
| Item Weight | 0.83 Kilograms (1.83 pounds) |
| Dimensions | 5.63 x 5.63 x 5.59 inches |
| Country of Origin | China |

Figure 6.1: Detailed Product Specifications and Usage Examples.
7. Maintenance
- Cleaning: Use a soft, damp cloth to clean the exterior of the light. Avoid abrasive cleaners or solvents that could damage the lens or housing.
- Storage: When not in use for extended periods, store the light in a cool, dry place. Ensure the battery is partially charged (around 50%) before storage to prolong battery life. Recharge periodically if stored for very long durations.
- Battery Care: Avoid fully discharging the battery frequently. Recharge the light promptly when the battery indicator shows low charge.
- Magnetic Base: Periodically check the magnetic base for any debris or damage that might affect its adhesion. Clean as necessary.
8. Troubleshooting
| Problem | Possible Cause | Solution |
|---|---|---|
| Light does not turn on. | Low battery. | Charge the light using the provided car charger. |
| Remote control not working. | Remote battery depleted or out of range. | Replace the remote control battery (if applicable, typically coin cell). Ensure you are within the 50-meter operating range. |
| Light falls off surface. | Surface is not magnetic, dirty, or light is not fully seated. | Ensure the mounting surface is iron metal, clean, and dry. Press the light firmly onto the surface to engage the magnetic base. Avoid high-speed applications if not securely mounted. |
| Light modes do not change. | Button malfunction or remote issue. | Try using the other control method (remote if using button, or button if using remote). Ensure remote battery is good. |
9. Safety Information
- Do not disassemble or modify the light. This may cause damage, electric shock, or fire.
- Keep out of reach of children.
- Do not stare directly into the light when it is active, as it may cause eye strain or temporary vision impairment.
- Ensure the light is securely mounted before operating a vehicle or machinery.
- Adhere to all local laws and regulations regarding the use of warning lights on vehicles.
- Use only the provided charging cable.
- Do not expose the light to extreme temperatures or direct sunlight for prolonged periods.
10. Warranty and Support
For warranty information or technical support, please contact LUMENIX customer service through the retailer where the product was purchased or visit the official LUMENIX brand store online. Please have your model number (LMBCN-CHG-Y) and purchase date available when contacting support.
LUMENIX is committed to providing high-quality LED lighting solutions and reliable customer support.
Visit the LUMENIX Store for more products and information.
Ask a question about this manual
Ask about setup, troubleshooting, compatibility, parts, safety, or missing instructions. Manuals+ will review the question and use this page’s manual context to help answer it.