1. Introduction
This manual provides comprehensive instructions for the installation, operation, and maintenance of your PEXMOR Electric Bike Conversion Kit. Please read this manual thoroughly before beginning installation to ensure safe and correct assembly and usage.
2. Safety Information
- Always wear a helmet and appropriate safety gear when riding an electric bicycle.
- Ensure all connections are secure and properly insulated to prevent electrical shorts.
- Do not operate the kit in wet conditions unless specified as waterproof.
- Regularly inspect all components for wear and tear, especially brakes and electrical connections.
- Keep hands and clothing clear of moving parts, such as the motor and chain.
- This kit is designed for specific bicycle types and sizes. Verify compatibility before installation.
3. Package Contents
The PEXMOR Electric Bike Conversion Kit includes the following components:
- Hub Motor Wheel (24-inch front wheel)
- Controller (36V 750W)
- LCD Display (SW900)
- Twist Throttle
- Brake Levers (with power cut-off)
- Pedal Assist Sensor (PAS)
- Torque Arm
- Cable Ties
- Cable Cover
- Transfer Power Cord
- Controller Bag
- Battery Bag (Battery not included)
- User Manual
- Tool Kit
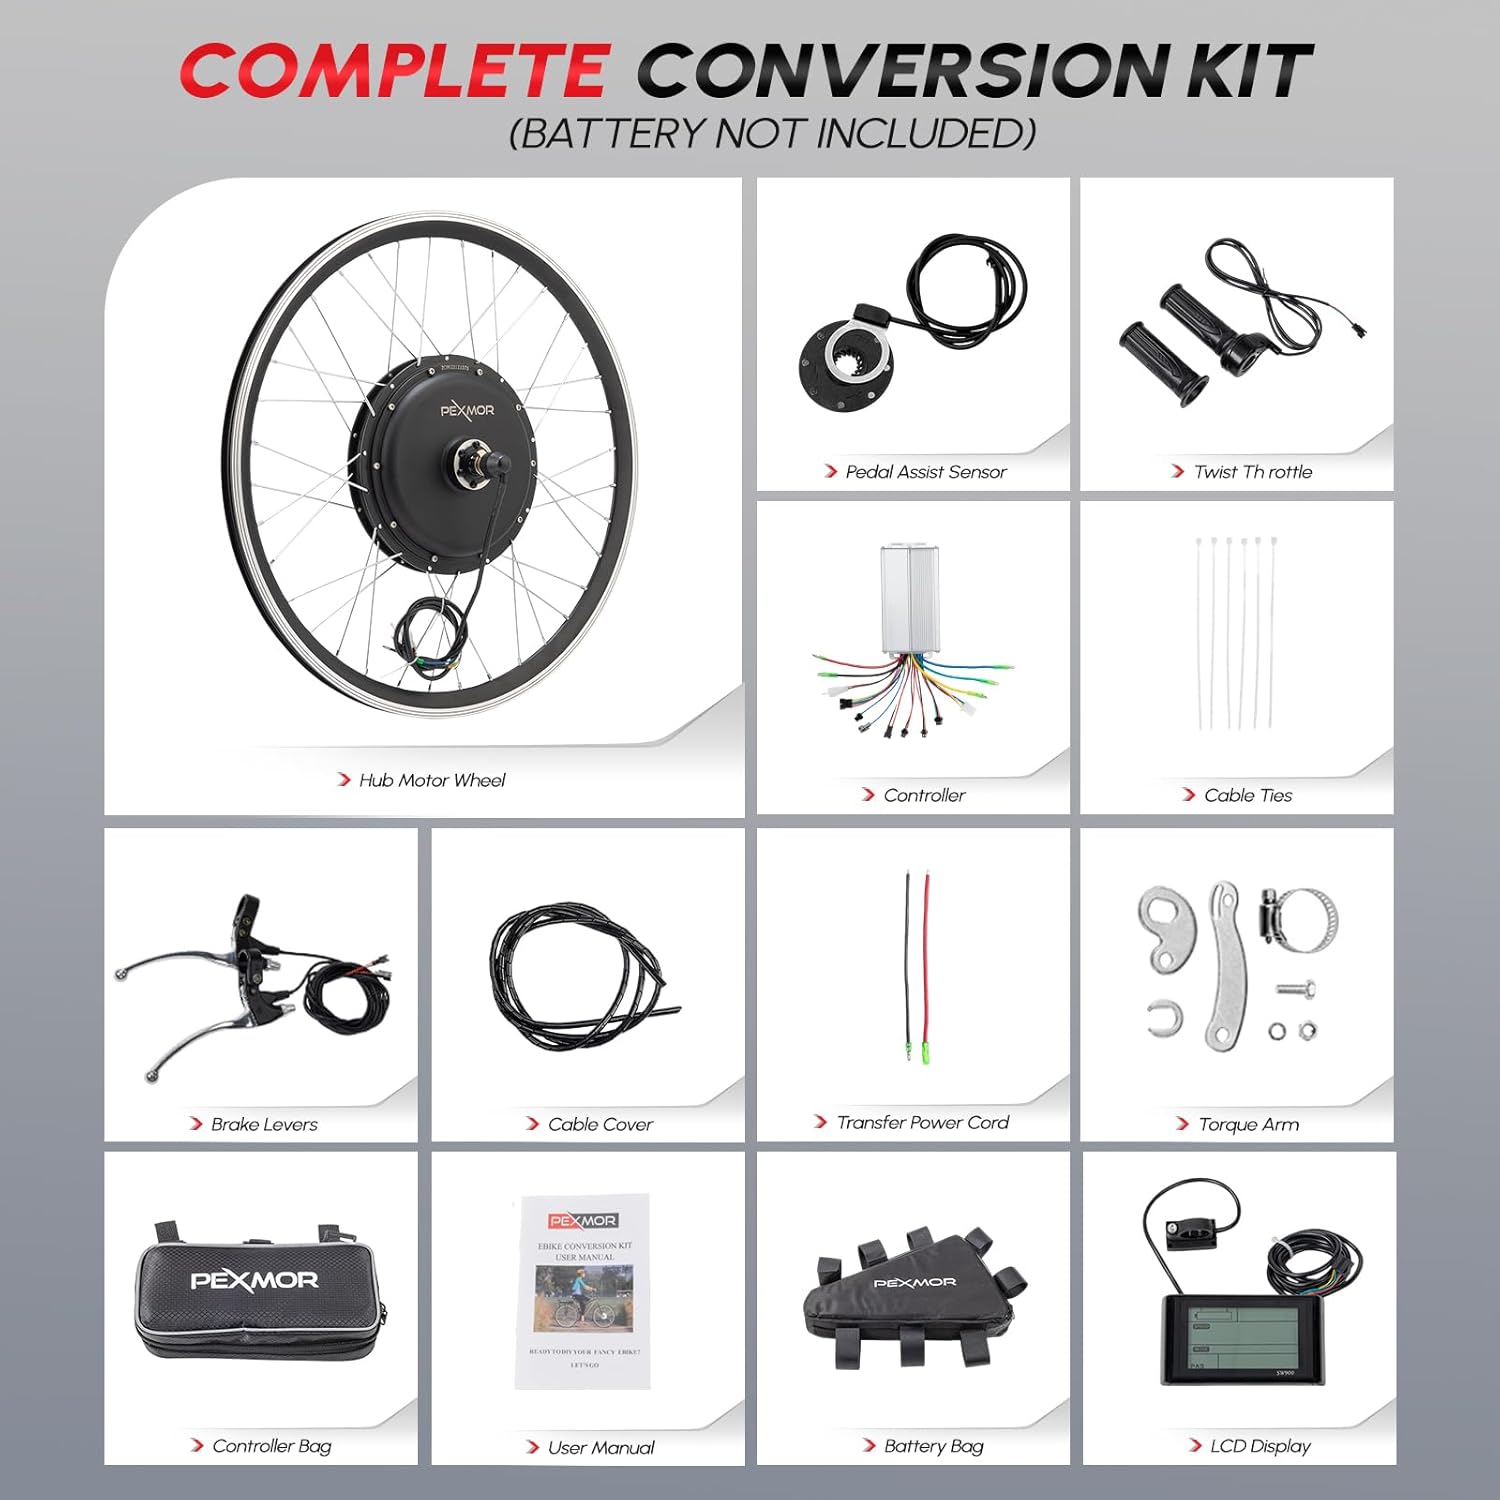
Figure 1: Complete PEXMOR Electric Bike Conversion Kit components. Note: Battery is not included.
4. Setup and Installation
This section provides detailed steps for installing the PEXMOR Electric Bike Conversion Kit. Please watch the accompanying video for visual guidance.
Video 1: Comprehensive Installation Guide. This video demonstrates the installation of handlebar components (throttle, brake levers, display), the Pedal Assist System (PAS), and the controller, including wiring and fixation.
4.1. Handlebar Component Installation
- Replace the original throttle with the new twist throttle provided in the kit. Secure it by tightening the screw.
- Install the LCD display on the handlebar. Ensure it is firmly attached. If the handlebar is thin, use the provided belt for adjustment.
- Choose to replace the original brake levers with the new ones provided, or retain your existing ones. The new brake levers include power cut-off functionality for safety.
4.2. Pedal Assist System (PAS) Installation
- Use a tool to loosen and remove the pedal shaft screw and the dental disc.
- Remove the shaft from the bottom bracket.
- Install the PAS magnetic disc. Ensure the arrow direction on the disc points to the forward pedaling direction. It must not be reversed.
- Reinstall the shaft, ensuring the magnetic disc rotates with the shaft.
- Reinstall the dental disc and foot pedal. Tighten all screws securely.
- If conditions permit, apply glue to secure the magnetic disc in place.
4.3. Controller Installation and Fixation
- Connect the controller to the motor, display, throttle, and PAS sensor using the corresponding connectors. Ensure all connections are firm and correct.
- Install and fix the controller and its cables according to your preference. You can use the provided cable ties or purchase a dedicated controller bag for a cleaner setup.
- After all components are fixed, connect the battery to the controller to power the system.
5. Operating Instructions
5.1. Powering On/Off
To power on the system, ensure the battery is connected and press the power button on the LCD display. To power off, press and hold the power button.
5.2. Riding Modes
The PEXMOR Electric Bike Conversion Kit offers 4 riding modes:
- Throttle Mode: Provides power directly via the twist throttle, similar to a motorcycle.
- Pedal Assist System (PAS) Mode: Provides motor assistance as you pedal, making riding easier. The level of assistance can be adjusted via the LCD display.
- Manual Mode: Ride the bicycle like a traditional bike without any motor assistance.
- Presets Mode: Allows for pre-configured power levels or settings for different riding conditions.

Figure 2: PEXMOR Electric Bike 4 Riding Modes.
5.3. LCD Display Functions
The LCD display provides essential riding information:
- Battery Level
- Current Speed
- Trip Distance / Odometer
- Power Output (Wattage)
- PAS Level (Assistance Level)
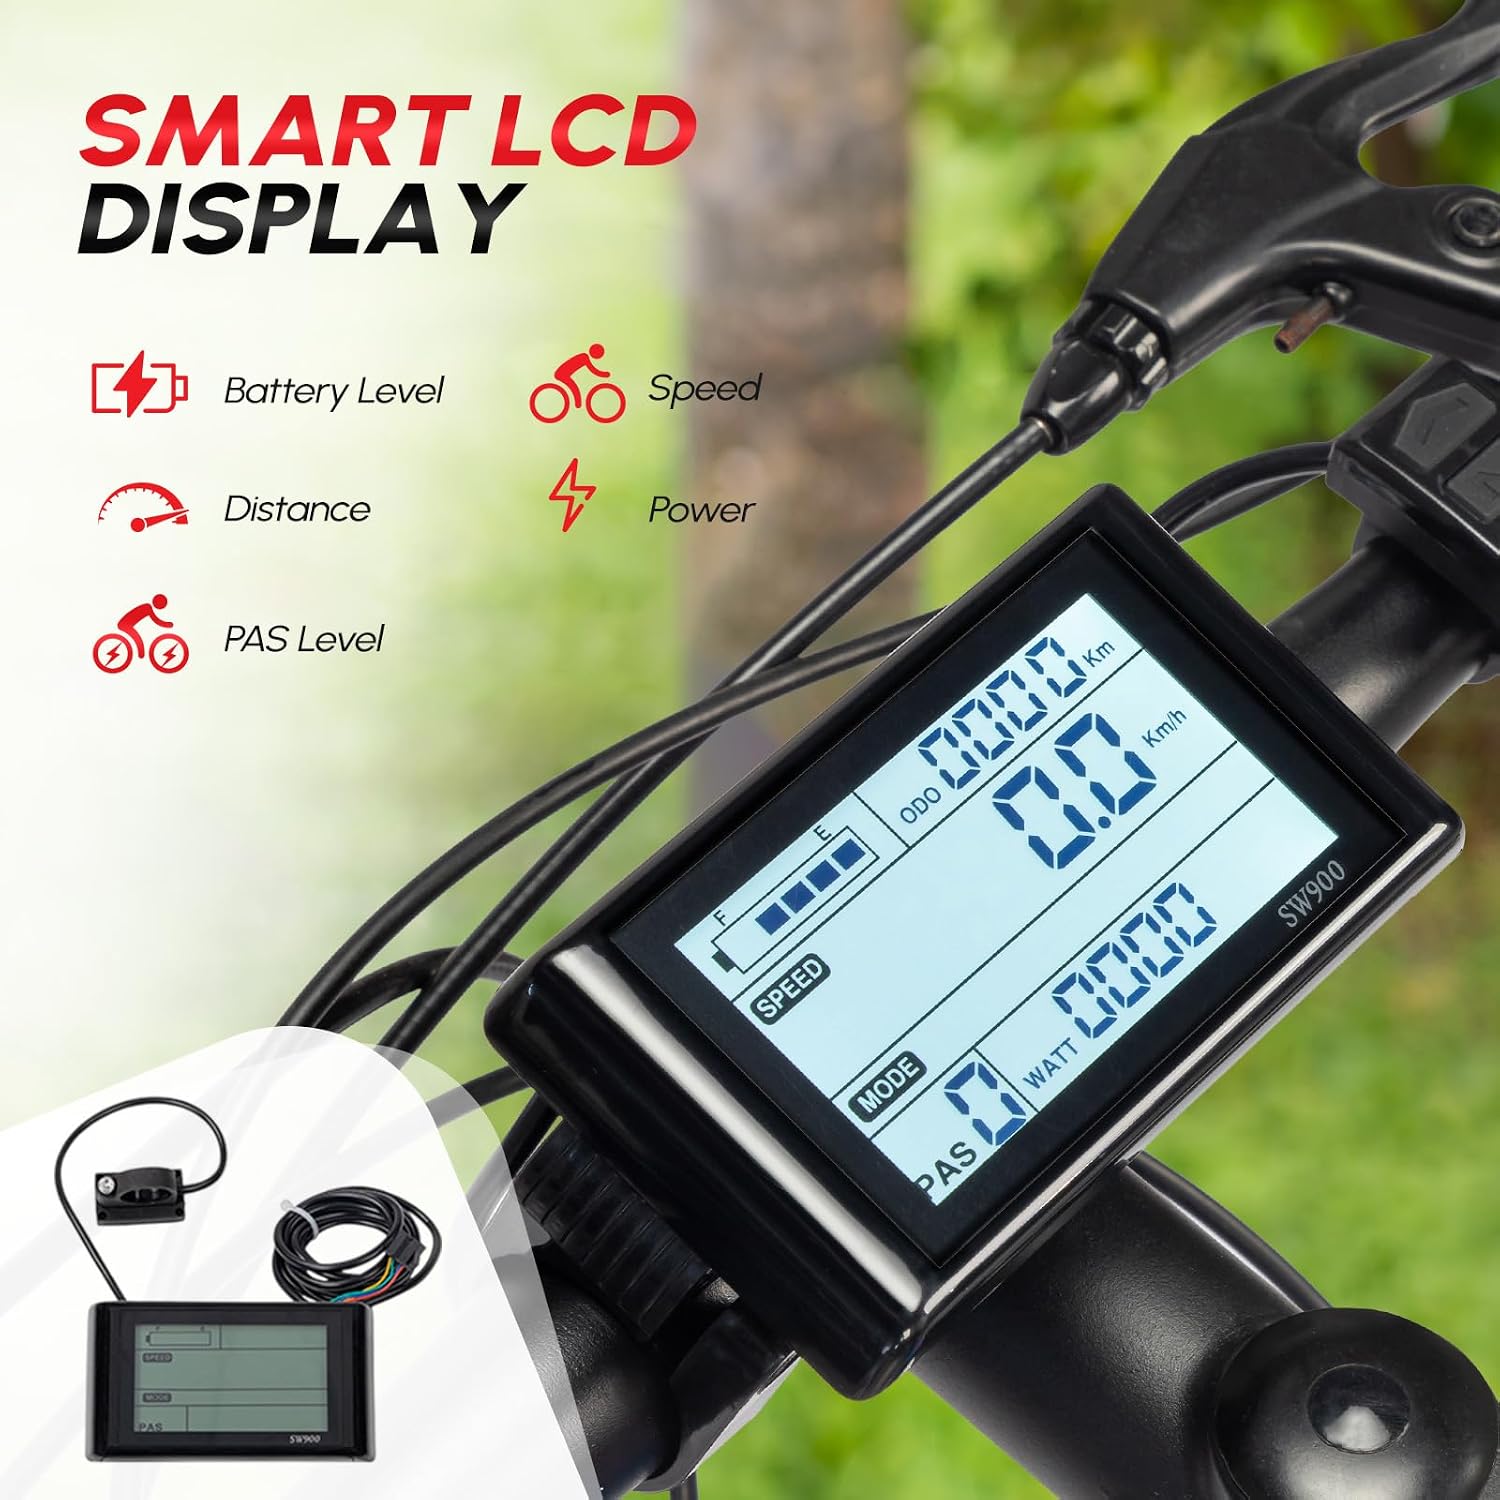
Figure 3: Smart LCD Display Interface.
6. Maintenance
- Keep the motor and controller clean and free from debris.
- Regularly check all electrical connections for tightness and corrosion.
- Inspect brake levers and cables for proper function and wear.
- Ensure the torque arm is securely fastened to prevent motor rotation.
- Store the electric bike in a dry place, away from extreme temperatures.
7. Troubleshooting
| Problem | Possible Cause | Solution |
|---|---|---|
| Motor not working | Loose connections, low battery, controller issue | Check all cable connections, charge battery, consult manufacturer |
| PAS not assisting | PAS sensor misaligned or faulty | Ensure PAS magnetic disc is correctly installed and arrow points forward. Check sensor connection. |
| Display not turning on | Loose display cable, power issue | Check display cable connection to controller. Verify battery power. |
| Motor cuts off | Overheating, faulty controller, loose connections | Allow motor to cool. Check all connections. Contact support if issue persists. |
8. Specifications
| Feature | Detail |
|---|---|
| Motor Type | 36V 750W Brushless Hub Motor |
| Max Speed | Up to 23.5 mph (38 km/h) |
| Wheel Size Compatibility | 24 inches (also available in 20 inches) |
| Front Dropout Spacing | 100mm / 3.93 inches |
| Controller Type | Upgrade 3 Modes Sine Wave Controller |
| Riding Modes | Throttle, PAS, Manual, Presets |
| Max Weight Recommendation | 100 Kilograms (220 lbs) |
| Frame Material | Aluminum |

Figure 4: Motor Wheel Size Specifications.

Figure 5: Applicable Fork Dropout Sizes.
9. Warranty and Support
For warranty information, technical support, or service inquiries, please refer to the documentation included with your purchase or contact PEXMOR customer service directly. Contact details can typically be found on the product packaging or the official PEXMOR website.


