
Zerodis Zerodisiko695st7f
Zerodis Single Phase Energy Meter User Manual
Model: Zerodisiko695st7f
1. Introduction
This user manual provides detailed instructions for the installation, operation, and maintenance of the Zerodis Single Phase Energy Meter. This smart metering switch allows for real-time monitoring of electricity consumption and remote control via a mobile application. It is designed for convenient energy management in residential settings.

Figure 1: Front view of the Zerodis Single Phase Energy Meter. This image shows the compact white casing of the energy meter with its display screen and Wi-Fi indicator. The model number ZMAi-90 and electrical specifications are visible on the front panel.
2. Safety Information
Please read all safety warnings and instructions carefully before installing or operating this device. Failure to follow these instructions may result in electric shock, fire, or serious injury.
- Installation should only be performed by qualified personnel.
- Ensure power is disconnected before any installation or maintenance work.
- Do not operate the device in wet or damp conditions.
- Do not disassemble or modify the device.
- Keep out of reach of children.
3. Package Contents
Verify that all items listed below are present in your package:
- 1 x Energy Meter
- 1 x English User Manual (this document)
- 4 x Decorative Covers
- 1 x Cover Opener
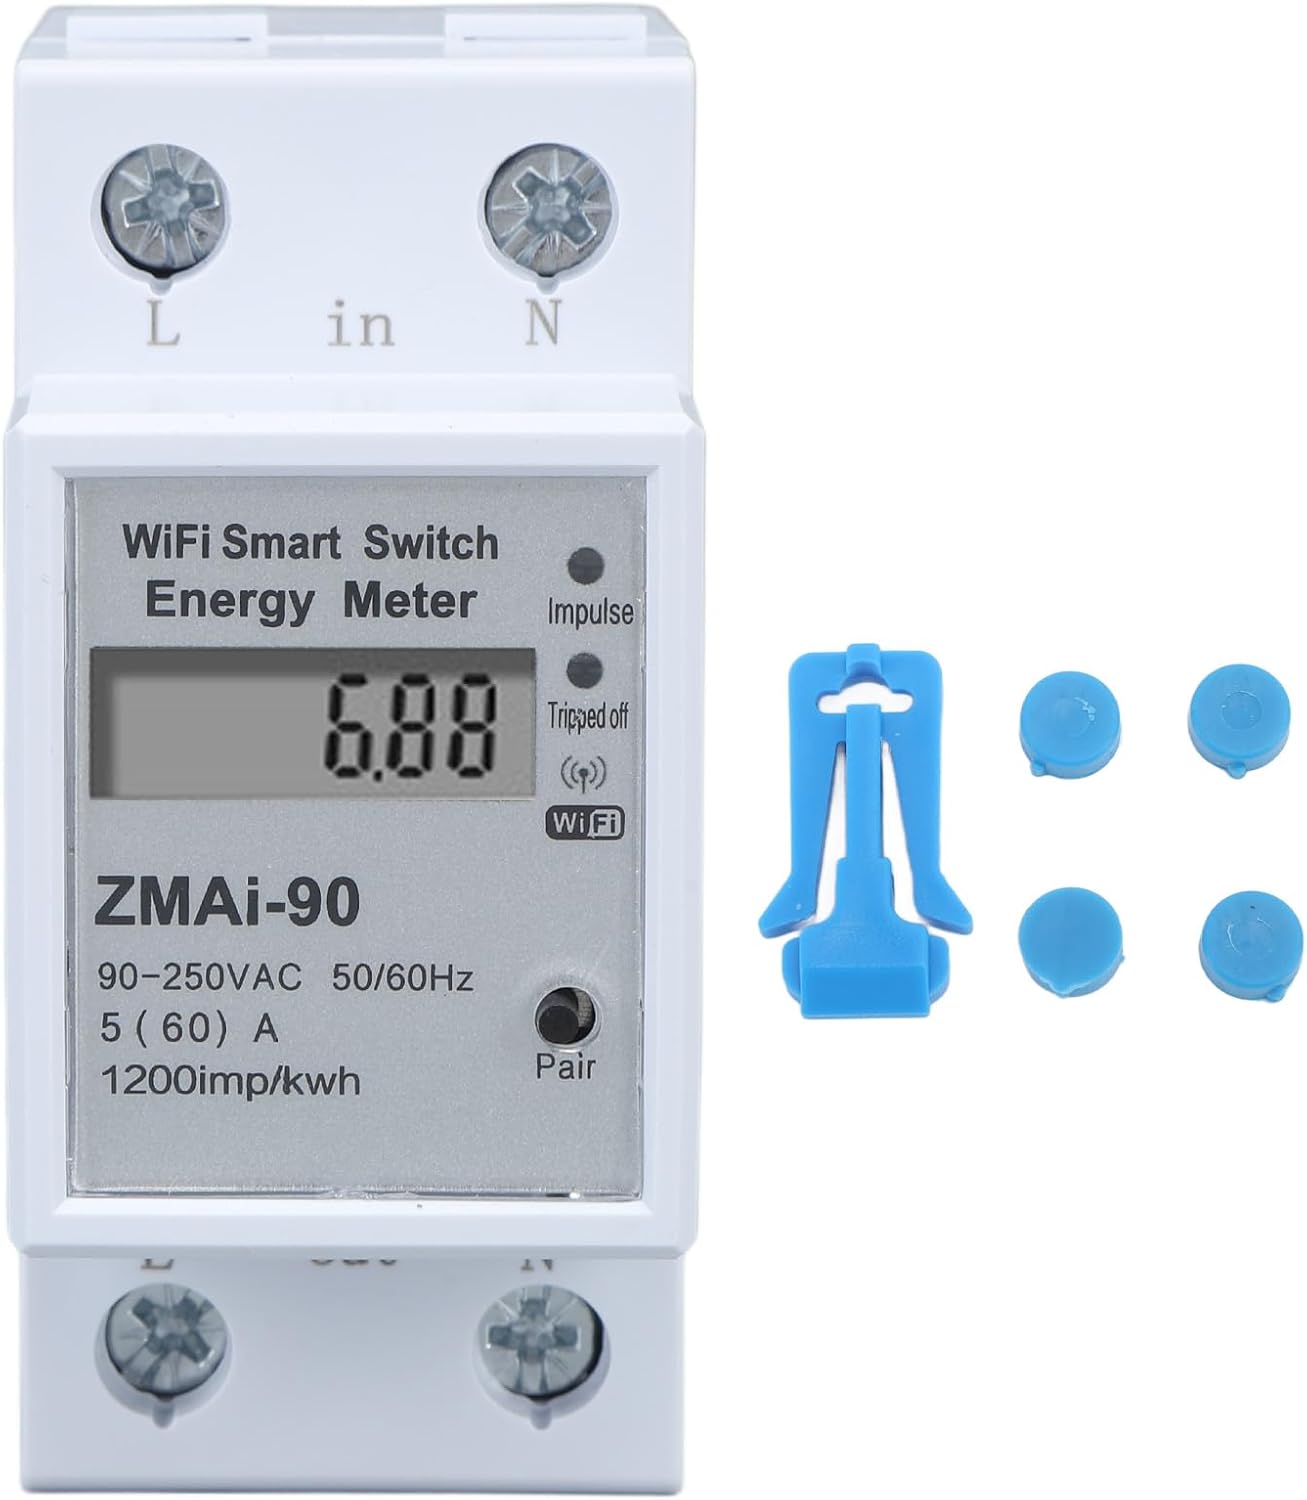
Figure 2: Contents of the package including the energy meter, decorative covers, and a cover opener. The image displays the main unit along with the small blue plastic accessories.
4. Specifications
| Parameter | Value |
|---|---|
| Item Type | Energy Meter |
| Material | ABS |
| Reference Voltage | 110-230V |
| Weight | Approx. 160g / 5.6oz |
| Size (L x W x H) | Approx. 36 x 79 x 66mm / 1.4 x 3.1 x 2.6in |
| Model Number | Zerodisiko695st7f |
| Manufacturer | Zerodis |
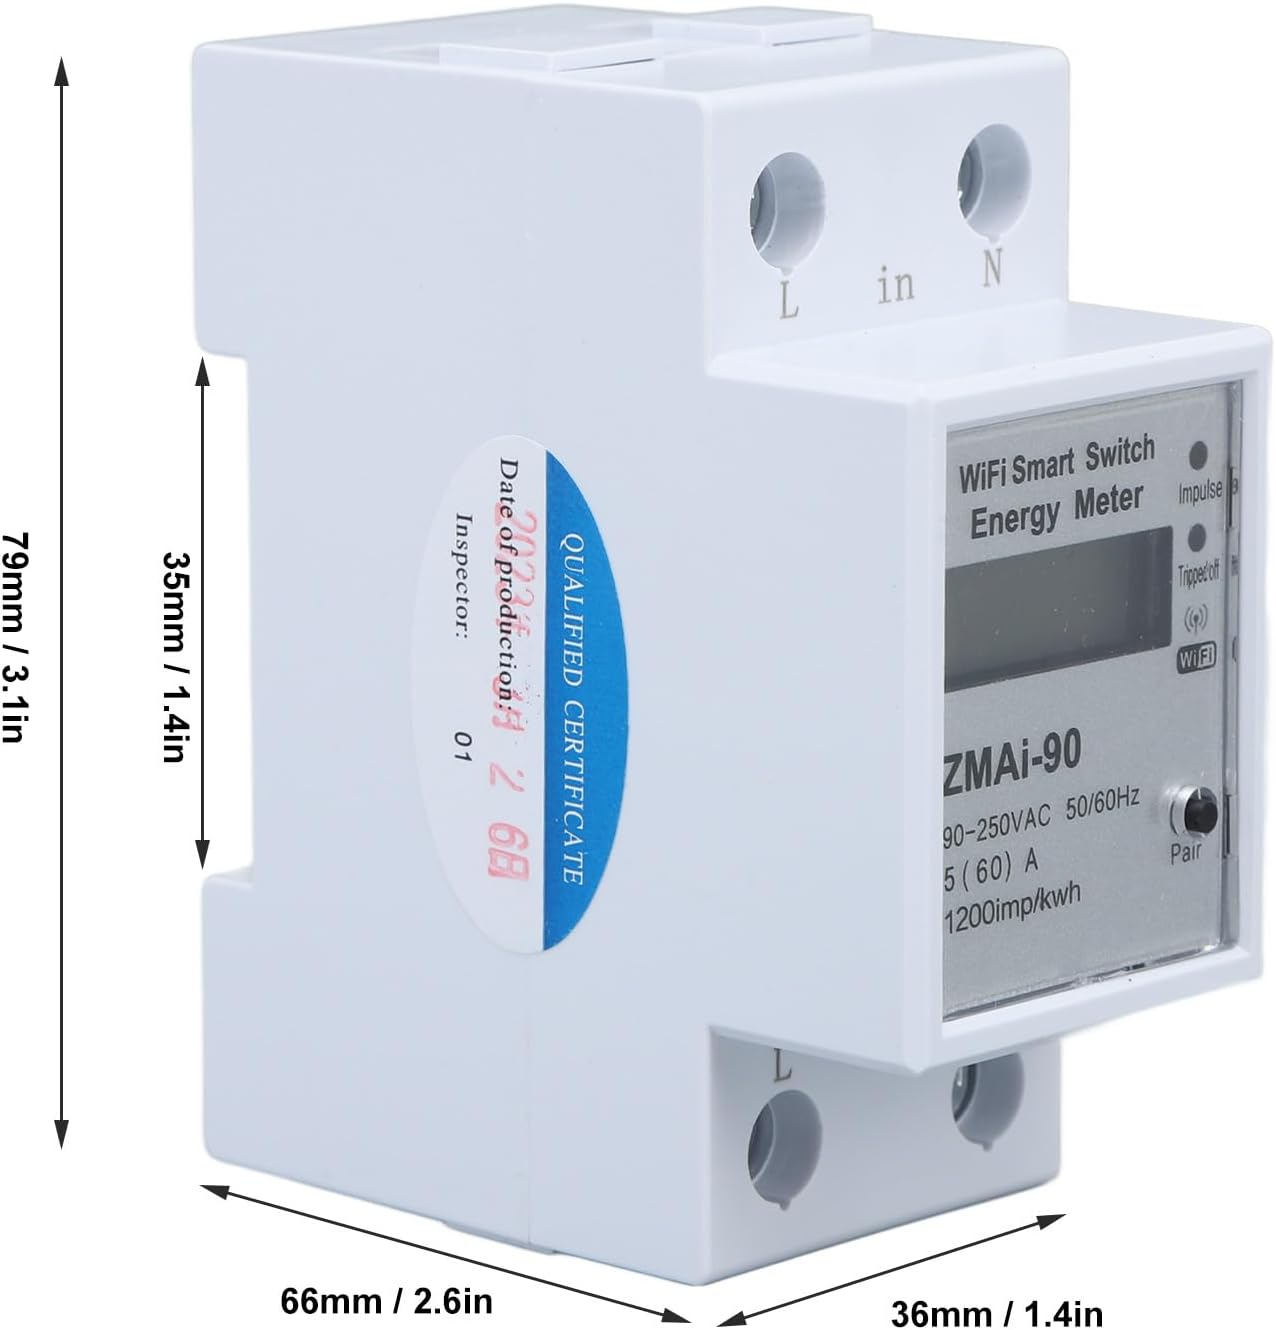
Figure 3: Dimensions of the Zerodis Single Phase Energy Meter. This image provides a side view of the meter with measurements indicating its length, width, and height in both millimeters and inches.
5. Setup and Installation
The Zerodis Single Phase Energy Meter is designed for easy installation. However, it is crucial to follow these steps carefully to ensure proper and safe operation.
5.1 Wiring Diagram
Connect the energy meter according to the following general wiring principles. Always consult a qualified electrician if you are unsure about the wiring process.
- Disconnect Power: Before starting any wiring, ensure the main power supply to the circuit is completely disconnected at the breaker.
- Identify Terminals: The meter has clearly marked "in" (input) and "out" (output) terminals for Line (L) and Neutral (N).
- Connect Input: Connect the incoming Line (L) wire from the power source to the "L in" terminal and the incoming Neutral (N) wire to the "N in" terminal.
- Connect Output: Connect the outgoing Line (L) wire to the load to the "L out" terminal and the outgoing Neutral (N) wire to the "N out" terminal.
- Secure Connections: Ensure all wire connections are tight and secure to prevent loose contacts and potential hazards.
- Restore Power: Once all connections are verified, restore power to the circuit.
5.2 Initial Power-Up
Upon successful wiring and power restoration, the meter's display will illuminate, showing current readings. The Wi-Fi indicator will blink, indicating it is ready for network pairing.
6. Operating Instructions
The Zerodis Energy Meter offers real-time monitoring and remote control capabilities via a mobile application. This section details how to use these features.
6.1 Mobile APP Control
The device utilizes Tuya intelligent technology for seamless integration with a mobile application. Download the appropriate app (e.g., Tuya Smart or Smart Life) from your device's app store.
- Add Device: Open the app and follow the instructions to add a new device. Select "Electrical Engineering" > "Energy Meter" or "Smart Switch".
- Pairing Mode: Ensure the energy meter's Wi-Fi indicator is blinking rapidly. If not, press and hold the "Pair" button on the meter for 5-7 seconds until it blinks rapidly.
- Connect to Wi-Fi: Enter your Wi-Fi network credentials in the app. The app will then search for and connect to the energy meter.
- Device Added: Once connected, the app will confirm that the device has been successfully added. You can then rename the device for easier identification.

Figure 4: Mobile remote control functionality. This image illustrates a smartphone screen displaying the app interface for controlling the energy meter, showing an on/off switch and Wi-Fi signal icon.
6.2 Key Functions via APP
- Remote On/Off Control: Use the main switch button in the app to turn the connected appliance on or off remotely.
- Real-Time Monitoring: View real-time electricity consumption data, including current (A), power (W), voltage (V), and total KWH.
- Schedule Function: Set schedules for automatic on/off operations. This is useful for automating appliances like water heaters or air conditioning.
- Timer Function: Set countdown timers for specific operations.
- Statistics: Access historical data and detailed electricity usage reports to analyze consumption patterns.
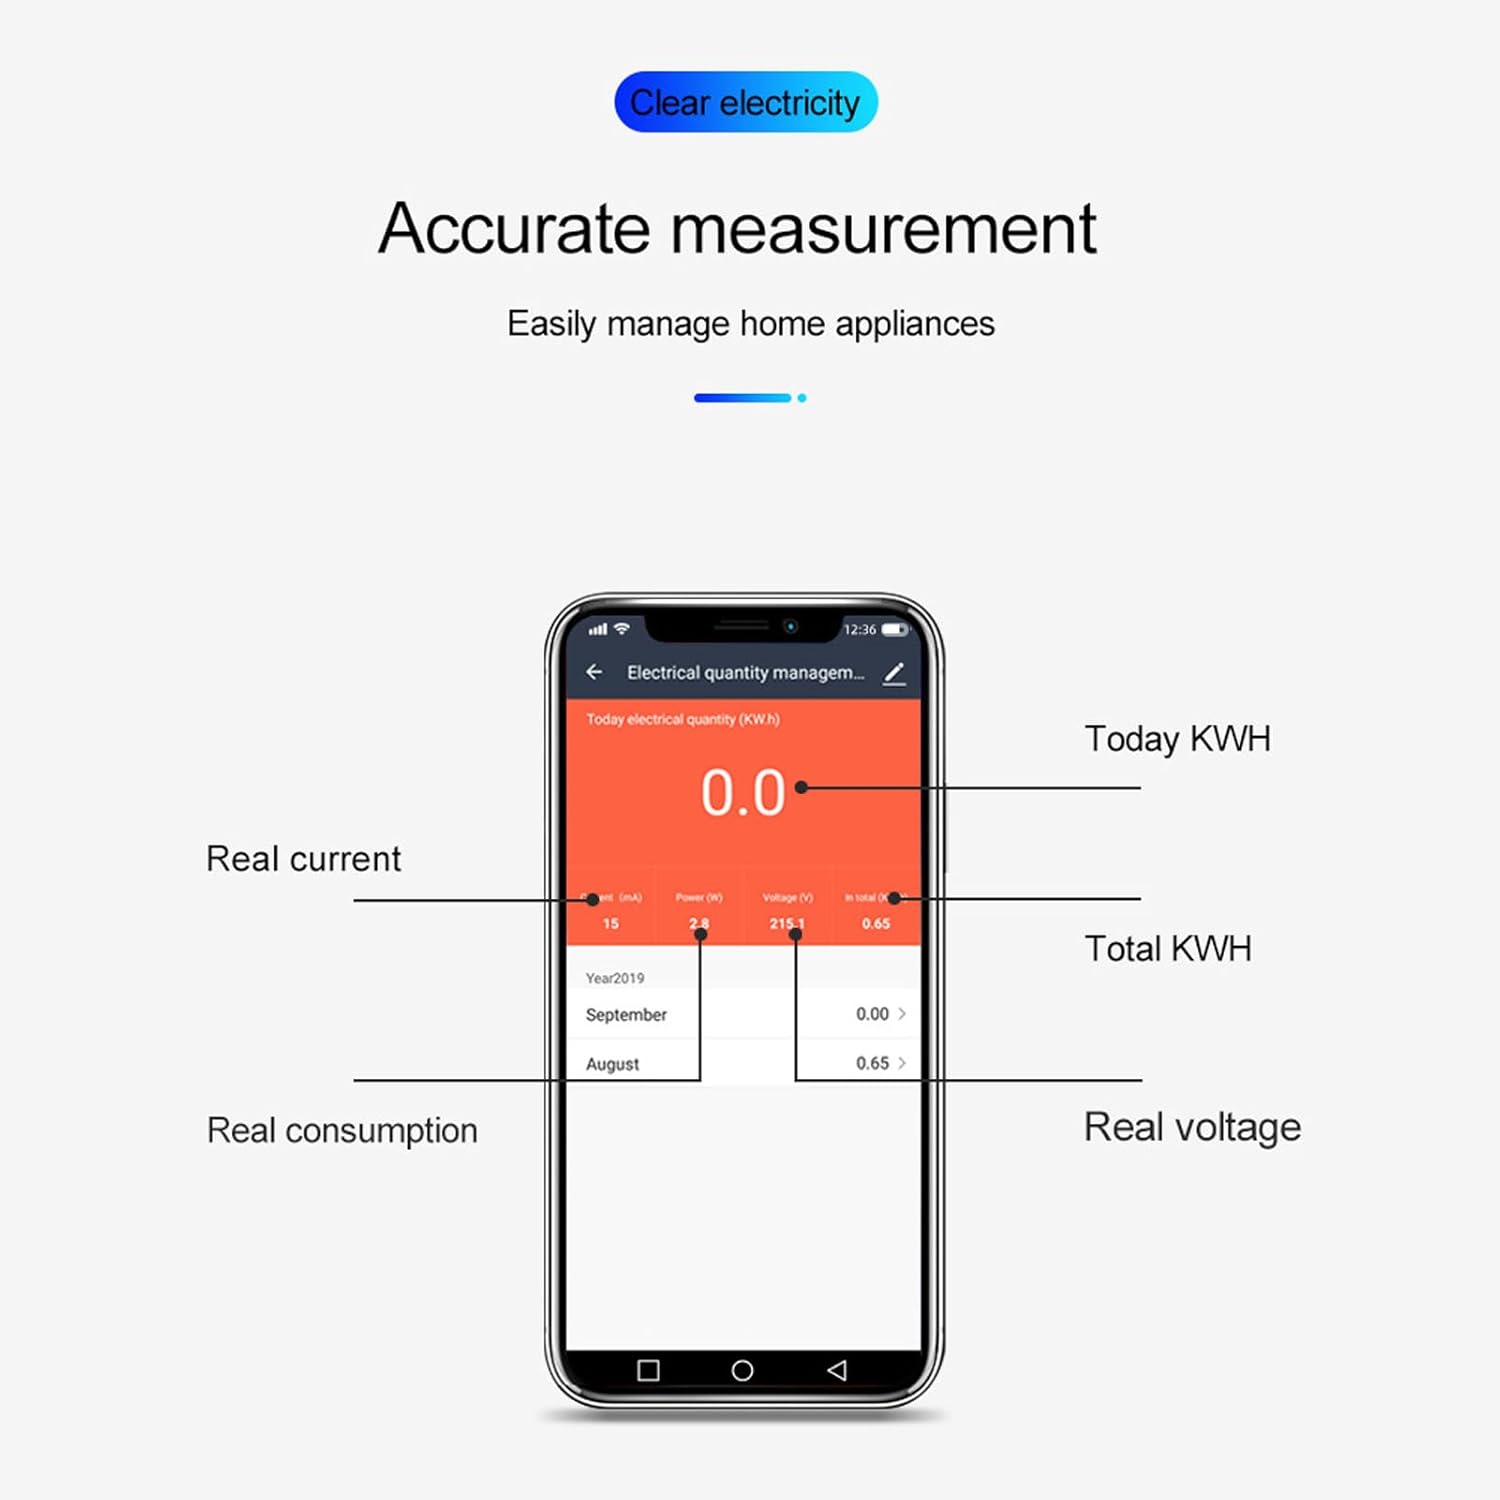
Figure 5: Accurate measurement display on the app. This image shows the app's interface for electrical quantity management, displaying real-time current, power, voltage, and total KWH readings.
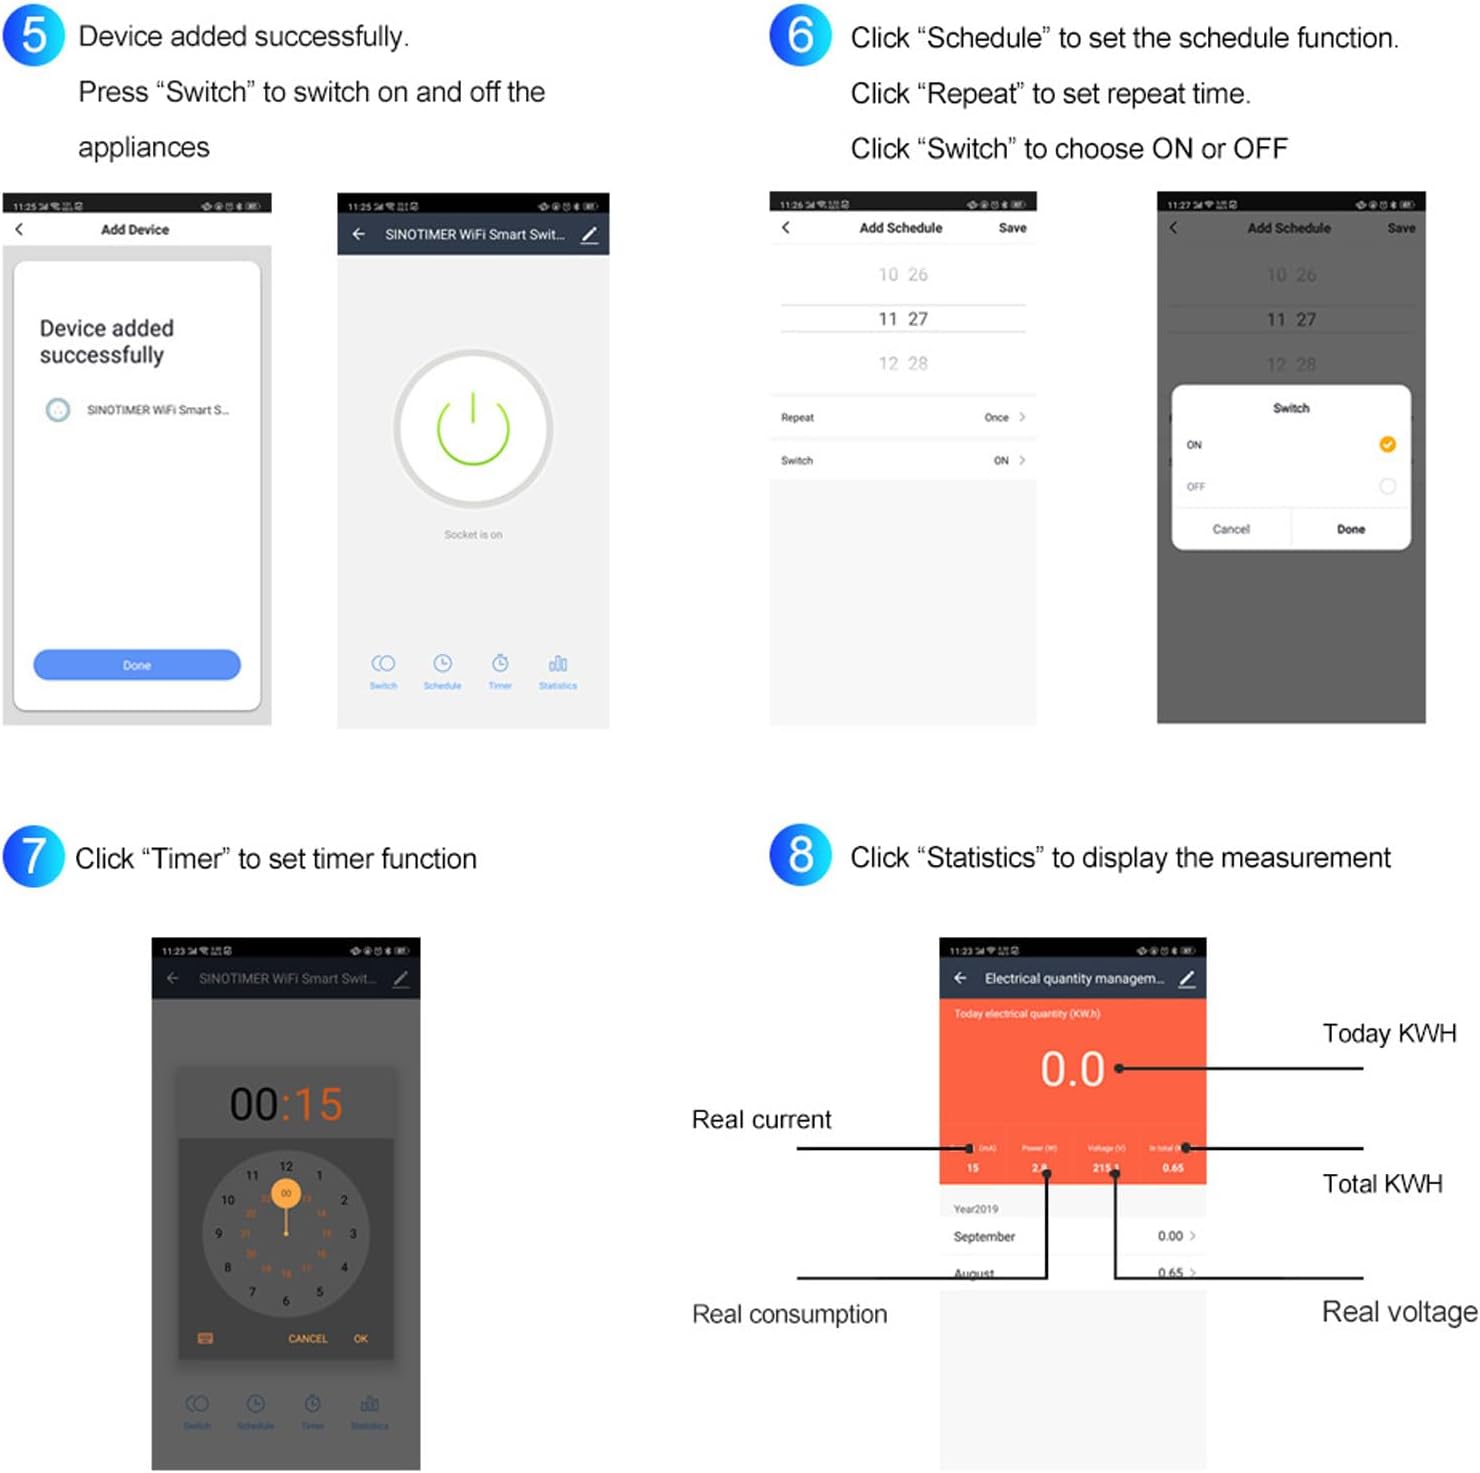
Figure 6: Step-by-step guide for app functions. This composite image illustrates various app screens, including device addition confirmation, setting schedules, using the timer, and viewing statistics.
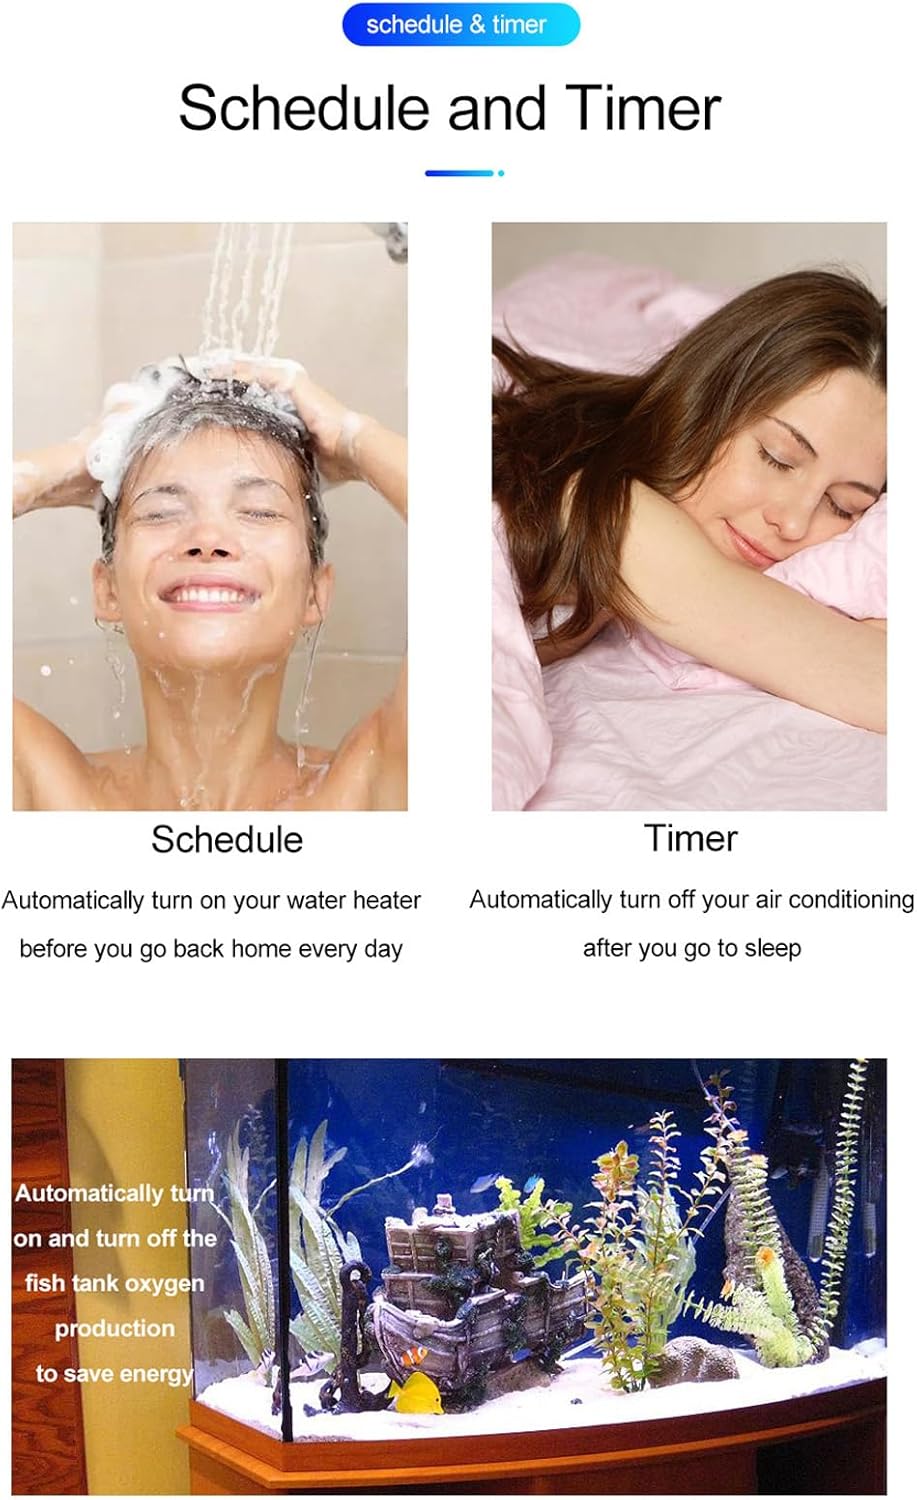
Figure 7: Practical examples of Schedule and Timer functions. This image shows scenarios where scheduling can automatically turn on a water heater and a timer can turn off air conditioning, along with an example of automating a fish tank oxygen pump.
7. Maintenance
The Zerodis Energy Meter requires minimal maintenance. Follow these guidelines to ensure its longevity and optimal performance:
- Cleaning: Use a soft, dry cloth to wipe the exterior of the device. Do not use abrasive cleaners or solvents.
- Environmental Conditions: Ensure the device is operated within its specified temperature and humidity ranges. Avoid exposure to direct sunlight, extreme heat, or moisture.
- Firmware Updates: Periodically check the mobile application for any available firmware updates for the device. Updates can improve performance and add new features.
- Connection Check: Occasionally check the wiring connections to ensure they remain secure. Disconnect power before performing any checks.
8. Troubleshooting
If you encounter issues with your Zerodis Energy Meter, refer to the following common problems and solutions:
| Problem | Possible Cause | Solution |
|---|---|---|
| Device not powering on. | No power supply; incorrect wiring; faulty device. | Check power at the circuit breaker. Verify wiring connections. If problem persists, contact support. |
| Cannot connect to Wi-Fi. | Incorrect Wi-Fi password; meter too far from router; meter not in pairing mode; 5GHz Wi-Fi network. | Ensure correct 2.4GHz Wi-Fi password. Move meter closer to router. Put meter into pairing mode (blinking Wi-Fi indicator). Ensure router is 2.4GHz compatible. |
| Readings are inaccurate or not updating. | Loose wiring connection; software glitch. | Check and secure all wiring connections (power off first). Restart the device by cycling power. Check for app updates. |
| Remote control not working. | No internet connection on phone or meter; app issue. | Verify internet connectivity for both your phone and the meter. Restart the app. Re-pair the device if necessary. |
9. Warranty and Support
For warranty information and technical support, please refer to the documentation provided with your purchase or contact Zerodis customer service through their official website or the retailer where the product was purchased.
Manufacturer: Zerodis
Model: Zerodisiko695st7f
Date First Available: August 15, 2023
Ask a question about this manual
Ask about setup, troubleshooting, compatibility, parts, safety, or missing instructions. Manuals+ will review the question and use this page’s manual context to help answer it.