
1. Introduction
This manual provides comprehensive instructions for the assembly, operation, and maintenance of your HOWE 8x12x7.5 FT Polycarbonate Greenhouse. Designed for outdoor use, this walk-in greenhouse features double swing doors, four adjustable roof vents, and a robust aluminum frame with 6mm twin-wall translucent PC panels for optimal plant growth and protection.

Figure 1: Fully assembled HOWE Polycarbonate Greenhouse, showcasing its spacious interior and clear panels.
2. Important Safety Information
Please read and understand all safety warnings before assembly and use. Failure to follow these instructions may result in injury or damage to the product.
- Heavy Components: Heavy components may cause injury if mishandled. Always use caution when assembling and moving greenhouse parts.
- Anchoring: Always anchor the greenhouse properly to prevent damage or injury caused by wind or snow.
- UV Exposure: UV exposure from inside the greenhouse may cause harm. Use appropriate protective gear when working inside the greenhouse.
- Chemical Treatments: Do not apply chemical treatments to the greenhouse material without proper ventilation.
- Ventilation: Ensure proper ventilation at all times to prevent excess moisture and heat buildup.
3. Components and Parts List
Before beginning assembly, verify that all parts are present and undamaged. Refer to the detailed parts lists below for each section. For exact quantities of all fasteners, please consult the full user guide PDF provided with your product or available online.
3.1. Door Components
| Part | No. | Qty |
|---|---|---|
| Door Frame (Left) | L16A | 2 |
| Door Frame (Right) | L17 | 2 |
| Door Panel (Left) | L18A | 2 |
| Door Panel (Right) | L18B | 2 |
| Door Panel (Center) | L18C | 2 |
| Door Panel (Top/Bottom) | L18D | 1 |
| Corner Connector | D45 | 8 |
| Polycarbonate Panel | Y11 | 4 |
| Screws (M5X12) | S26 | 8 |
| Screws (M4.2X16) | Z08 | 32 |
3.2. Window Components
| Part | No. | Qty |
|---|---|---|
| Window Frame (Top) | L11A | 4 |
| Window Frame (Bottom) | L12A | 4 |
| Window Side Frame | L19 | 8 |
| Window Panel | L20 | 4 |
| Window Hinge | L21 | 4 |
| Polycarbonate Panel | Y10 | 4 |
| Window Support Arm | A01 | 4 |
| Screws (Ø4X16D) | Z02 | 24 |
| Screws (Ø4X8) | Z04 | 8 |
| Screws (M4.2X16) | Z08 | 8 |
3.3. Base Components
| Part | No. | Qty |
|---|---|---|
| Base Rail | B2 | 2 |
| Base End Plate | A2 | 2 |
| Base Side Rail | C2 | 4 |
| Ground Stake | D307 | 3 |
| Ground Stake Connector | D306 | 4 |
| Base Anchor Clip | D114 | 16 |
| Bolt (M6X12) | S01 | 28 |
| Nut (M6) | M01 | 28 |
| Screw (M6X60) | S69 | 16 |
3.4. Wall Components
| Part | No. | Qty |
|---|---|---|
| Vertical Wall Post | L01E/F | 2 |
| Horizontal Wall Bar | L08C | 2 |
| Wall Top Bar | L10A/B | 4 |
| Wall Panel (Large) | Y2 | 6 |
| Wall Panel (Small) | Y1 | 4 |
| Corner Bracket | D317 | 4 |
| Bolt (M6X12) | S01 | Various |
| Nut (M6) | M01 | Various |
| Screws (M4.2X16) | Z08 | Various |
3.5. Top Components
| Part | No. | Qty |
|---|---|---|
| Roof Ridge Bar | L02C | 2 |
| Roof Panel (Large) | Y3 | 8 |
| Roof Panel (Small) | Y8 | 2 |
| Roof Connector | D17 | 2 |
| Gutter | L09C | 2 |
| Window Opener | A03 | 4 |
| Roof Vent Panel | Y9 | 4 |
| Bolt (M6X12) | S01 | Various |
| Nut (M6) | M01 | Various |
3.6. Accessories Components
| Part | No. | Qty |
|---|---|---|
| Rain Gutter End Cap | J55 | 2 |
| Rain Gutter Downspout (Right) | J56R | 2 |
| Rain Gutter Downspout (Left) | J56L | 2 |
| Door Handle | J94 | 4 |
| Door Latch | L25 | 4 |
| Door Hook | J93 | 4 |
| Panel Clip | J165 | 4 |
| Drainage Pipe | J166 | 4 |
| Screws (M4.2X16) | Z08 | 4 |
| Screws (Ø4X16D) | Z02 | 8 |
4. Assembly Instructions
Assembly requires careful attention to detail and is best performed with at least two people. Refer to the included video for visual guidance on each step. Always ensure parts are correctly oriented before securing them.
Video 1: Comprehensive installation guide for the HOWE 8x12 polycarbonate greenhouse. This video provides step-by-step visual instructions for assembling all major components, including doors, windows, base, walls, and roof.
4.1. Door Assembly (Video: 0:17 - 0:51)
Step 1: Assemble the left door frame using L16A, L17, and L18D. Secure with S26 screws. (Video: 0:22)
Step 2: Insert the Y11 polycarbonate panels into the assembled frame. (Video: 0:25)
Step 3: Attach D45 corner connectors and L18A/B profiles, tapping gently with a rubber mallet if needed. (Video: 0:27)
Step 4: Secure all corners with Z08 screws. (Video: 0:35)
Step 5: Repeat steps for the right door using L16A, L17, L18C, L18B, L18A, D45, Y11, S26, Z08. (Video: 0:37)
4.2. Window Assembly (Video: 0:52 - 1:06)
Step 1: Attach the A01 support arm to the L12A bottom frame using Z04 screws. (Video: 0:55)
Step 2: Insert the Y10 polycarbonate panel into the L20 window panel. (Video: 0:58)
Step 3: Assemble the L19 side frames and L11A top frame around the panel. (Video: 0:59)
Step 4: Secure the frame with Z02 screws at the corners. (Video: 1:01)
4.3. Base Assembly (Video: 1:07 - 1:21)
Step 1: Connect B2 and C2 base rails using D307 ground stakes. Secure with S01 bolts and M01 nuts. (Video: 1:08)
Step 2: Attach A2 end plates with D306 ground stake connectors. (Video: 1:11)
Step 3: Ensure ground stakes are correctly oriented for insertion into the ground. (Video: 1:14)
Step 4: Fix D114 base anchor clips onto each base section and secure to the ground using S69 screws. (Video: 1:16)
4.4. Wall Assembly (Video: 1:22 - 3:16)
Step 1: Begin by attaching L08C horizontal bars and L10A/B top bars to the base. (Video: 1:25)
Step 2: Install L01E/F vertical wall posts. Secure connections with S01 bolts and M01 nuts. (Video: 1:27)
Step 3: Continue building the wall framework, adding L23C and L26D horizontal bars as shown. (Video: 1:51)
Step 4: Insert the Y2 and Y1 polycarbonate wall panels into the frame grooves. (Video: 2:38)
Step 5: Secure panels and frame connections using S01 bolts, M01 nuts, and Z08 screws where indicated. (Video: 2:43)
4.5. Top Assembly (Video: 3:17 - 4:56)
Step 1: Assemble the L02C roof ridge bars and L01C/D roof connectors. Secure with S01 bolts and M01 nuts. (Video: 3:18)
Step 2: Install the main roof framework, ensuring all connections are tight. (Video: 3:29)
Step 3: Insert the Y3 and Y8 polycarbonate roof panels into the designated slots. (Video: 4:44)
Step 4: Attach the L09C gutters and D25 drainage components. (Video: 4:51)
Step 5: Install the Y9 roof vent panels and A03 window openers. (Video: 4:48, 4:31)
4.6. Door Installation (Video: 4:57 - 5:08)
Step 1: Attach the assembled doors to the main greenhouse frame using A51 hinges and Z17 screws. (Video: 5:00)
Step 2: Ensure doors swing freely and align correctly. (Video: 5:04)
4.7. Accessories Assembly (Video: 5:09 - 5:28)
Step 1: Install J55 rain gutter end caps and J56L/R downspouts. Secure with Z02 screws. (Video: 5:12)
Step 2: Attach J166 drainage pipes to the downspouts. (Video: 5:21)
Step 3: Install J94 door handles, L25 latches, and J93 door hooks. (Not explicitly shown in video, but implied by parts list and general greenhouse features).
Step 4: Secure J165 panel clips to reinforce panels where needed. (Video: 5:25)
5. Operating Instructions
Your HOWE greenhouse is designed for ease of use and optimal plant environment control.
- Double Swing Doors: The greenhouse features double swing doors for easy access and improved ventilation. Use the integrated door hooks to keep them open when desired.
- Adjustable Roof Vents: Four four-level adjustable roof vents allow you to control airflow and temperature. Open them to release excess heat and moisture, or close them to retain warmth.
- Rain Collection System: The built-in drainage system with pipes at the four corners allows for efficient water collection. Connect rain barrels to maximize water resource utilization for your plants.

Figure 2: Operational features including wide-opening doors and adjustable roof vents.
6. Maintenance
Regular maintenance will extend the life of your greenhouse and ensure optimal performance.
- Cleaning: Clean polycarbonate panels periodically with mild soap and water. Avoid abrasive cleaners or tools that could scratch the surface.
- Frame Inspection: Regularly inspect the aluminum frame for any signs of corrosion or loose fasteners. Tighten bolts and nuts as needed.
- Panel Seals: Check the integrity of panel seals and apply silicone sealant if any gaps or leaks are observed.
- Winter Preparation: In areas with heavy snowfall, consider clearing snow from the roof to prevent excessive load, although the greenhouse is rated for 18 psf snow load capacity.
- Ventilation System: Ensure roof vents operate smoothly and are free from obstructions.
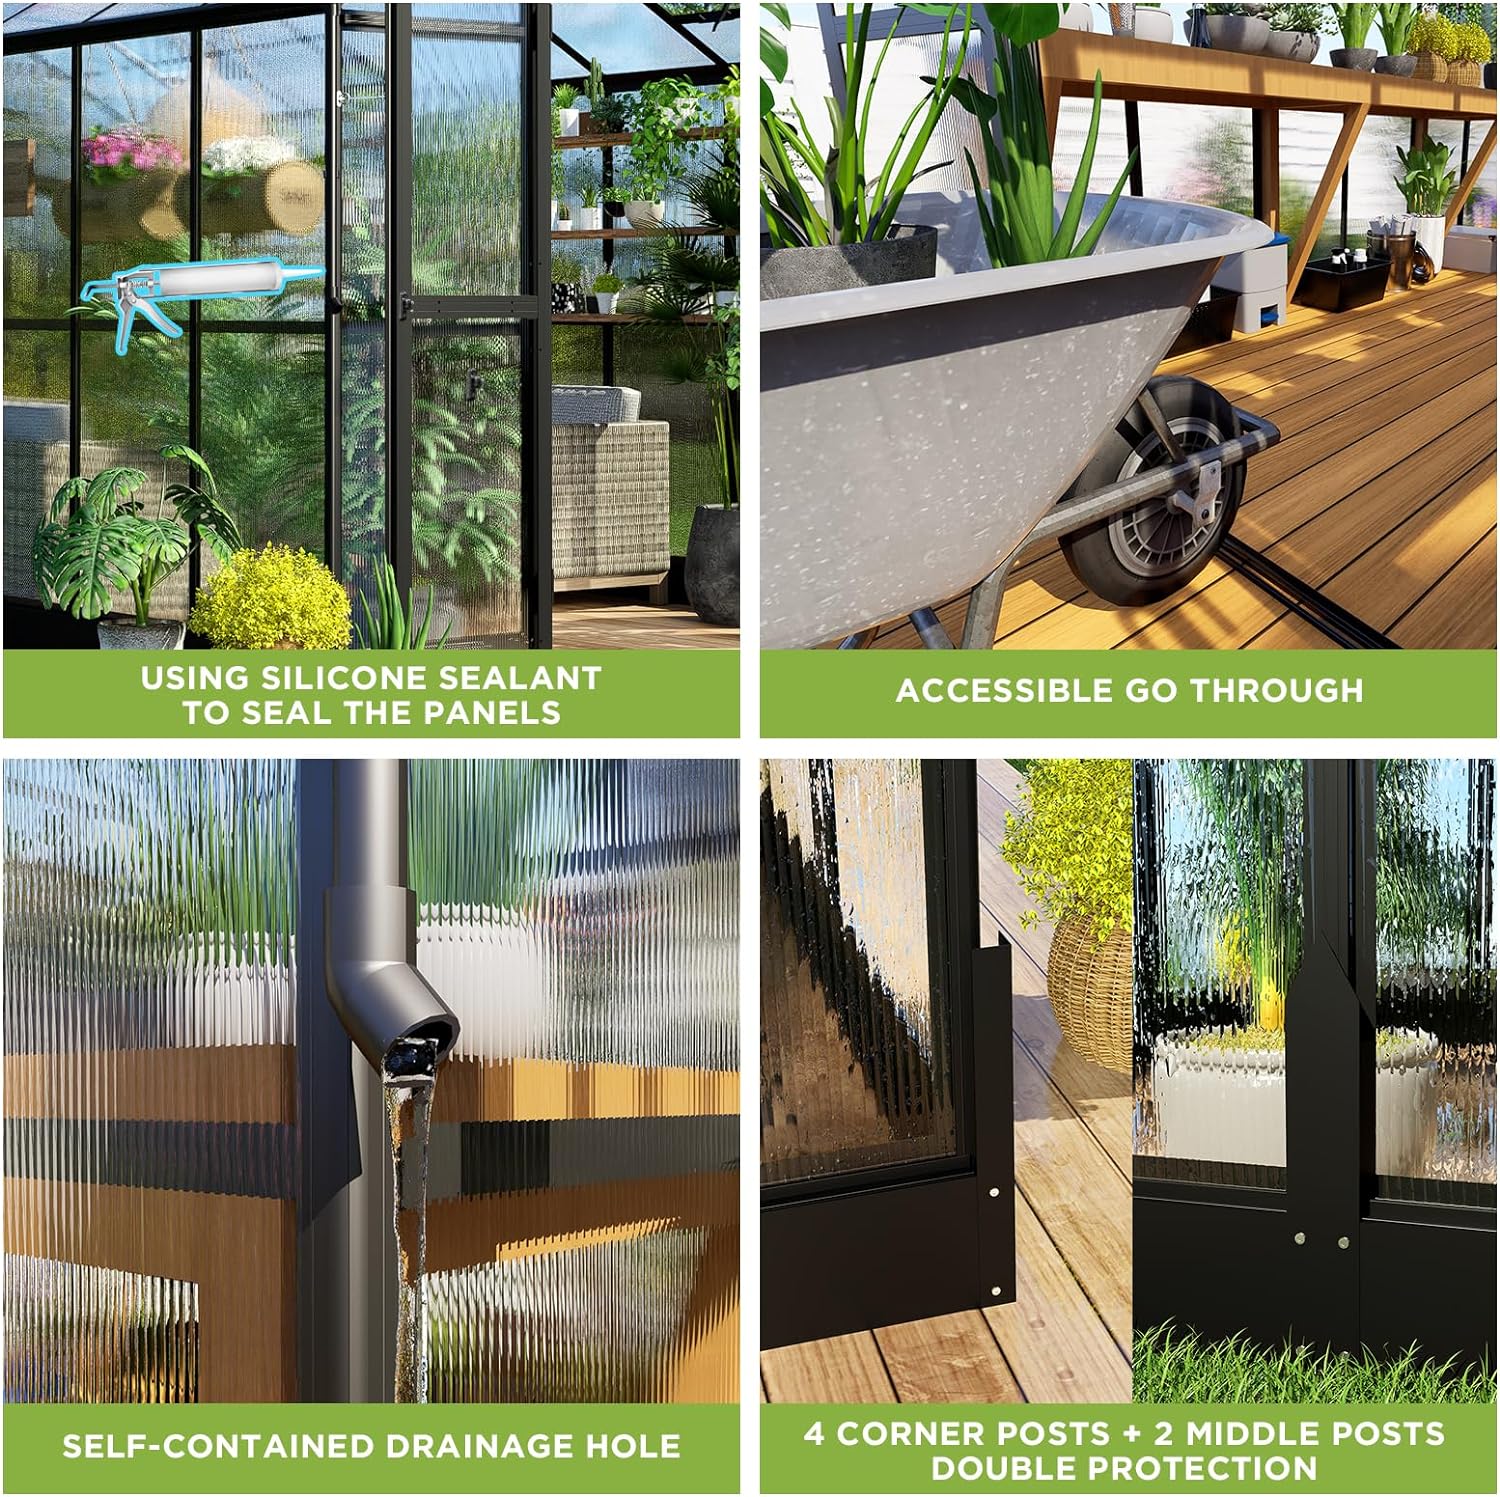
Figure 3: Key maintenance areas: panel sealing and drainage system.
7. Troubleshooting
Below are common issues and their potential solutions:
| Problem | Possible Cause | Solution |
|---|---|---|
| Difficulty during assembly | Instructions unclear, parts misaligned, insufficient help. | Review the video guide carefully. Ensure all parts are correctly oriented before tightening. Work with a second person for stability and alignment. |
| Greenhouse instability (wind/snow) | Improper anchoring or foundation. | Ensure the base is securely anchored to the ground or a solid foundation (e.g., concrete, treated lumber). Verify all ground stakes are fully inserted. |
| Water leakage | Gaps in panel seals or improper panel installation. | Inspect all panel edges and joints. Apply silicone sealant to any gaps or areas where water might penetrate. Ensure panels are fully seated in their grooves. |
| Doors binding or not closing properly | Misaligned door frame or hinges. | Check door frame squareness. Adjust hinges if necessary. Ensure the ground is level where the greenhouse is installed. |
| Roof vents not opening/closing smoothly | Obstruction or misaligned mechanism. | Clear any debris from the vent mechanism. Check that the support arms are correctly installed and lubricate moving parts if needed. |
8. Specifications
| Feature | Detail |
|---|---|
| Product Dimensions | 135"L x 91"W x 89"H (11.25 ft L x 7.58 ft W x 7.42 ft H) |
| Recommended Foundation Size | 12 ft x 8.5 ft |
| Item Weight | 180 Pounds |
| Cover Material | 6mm Twin-wall translucent Polycarbonate (PC) panels (UV Protection 99.99%) |
| Frame Material | Rust-resistant Aluminum (1.5mm thickness) |
| Number of Doors | 2 (Double Swing Doors) |
| Number of Vents | 4 (Four-level adjustable roof vents) |
| Wind Rating | 60 mph |
| Snow Load Capacity | 18 psf |
| Special Feature | Built-in Rainage Rain Collection Device (4 corners with drainage holes and pipes) |
| Indoor/Outdoor Usage | Outdoor |
| Manufacturer | HOWE |
| Model Number | YPG204 |

Figure 4: Key dimensions of the greenhouse.
9. Warranty and Support
Your HOWE greenhouse comes with a 30-day easy return policy. For any product-related inquiries, technical assistance, or warranty claims, please contact customer support.
- Customer Support: Refer to your purchase documentation for direct contact information or visit the HOWE store on Amazon.
- User Guide PDF: A detailed User Guide in PDF format is available for download at https://manuals.plus/m/087dd33109c631a43d1f9c82fdca4c65a82c1b89b9055c4168318a84a889303c. This document contains comprehensive parts lists and assembly diagrams.


