
TECKEEN LCD Power Supply Tester
TECKEEN LCD Power Supply Tester User Manual
Model: LCD Power Supply Tester
1. Introduction
Thank you for choosing the TECKEEN LCD Power Supply Tester. This device is designed to quickly and accurately test the output voltages of various computer power supplies, including ATX, BTX, ITX, and TFX formats. It features an LCD display for clear voltage readings and a buzzer for immediate fault detection, helping to prevent damage to your computer components.
2. Safety Information
- Always ensure the power supply is disconnected from the main power outlet before connecting or disconnecting the tester.
- Do not attempt to open or modify the tester. There are no user-serviceable parts inside.
- Use the tester in a dry environment. Avoid exposure to moisture or extreme temperatures.
- Keep out of reach of children.
3. Package Contents
- 1x TECKEEN LCD Power Supply Tester
4. Product Overview
The TECKEEN LCD Power Supply Tester is a compact device designed for ease of use. It features multiple connectors to accommodate various power supply cables and an LCD screen to display voltage readings.

Figure 4.1: Front view of the TECKEEN LCD Power Supply Tester, showing the LCD screen and various input ports.

Figure 4.2: Close-up view of the tester, highlighting the 20/24-pin ATX connector, 4-pin, 6-pin, and 8-pin connectors for various power supply cables.
4.1 Key Features
- LCD Display: Shows output voltage for +12V, -12V, +5V, -5V, +3.3V, +5V Standby (SB), and Power Good (PG) values.
- Audible Warning: A buzzer sounds and the corresponding value flashes if any parameter exceeds normal limits.
- Broad Compatibility: Supports ATX, BTX, ITX, TFX computer power supplies.
- Multiple Connectors: Includes jacks for 20/24-pin ATX, P4, P6, P8, Floppy, HDD, CDROM, and SATA.
5. Setup
Setting up the TECKEEN LCD Power Supply Tester is straightforward. Ensure your power supply is disconnected from the computer and any wall outlet before proceeding.
5.1 Connecting the Power Supply
- Locate the main 20/24-pin ATX connector from your power supply.
- Plug the power supply's 20/24-pin ATX connector into the corresponding jack on the power tester.
- If testing other connectors (e.g., P4, P6, P8, SATA, Floppy, HDD), plug them into their respective jacks on the tester. You can test multiple connectors simultaneously.
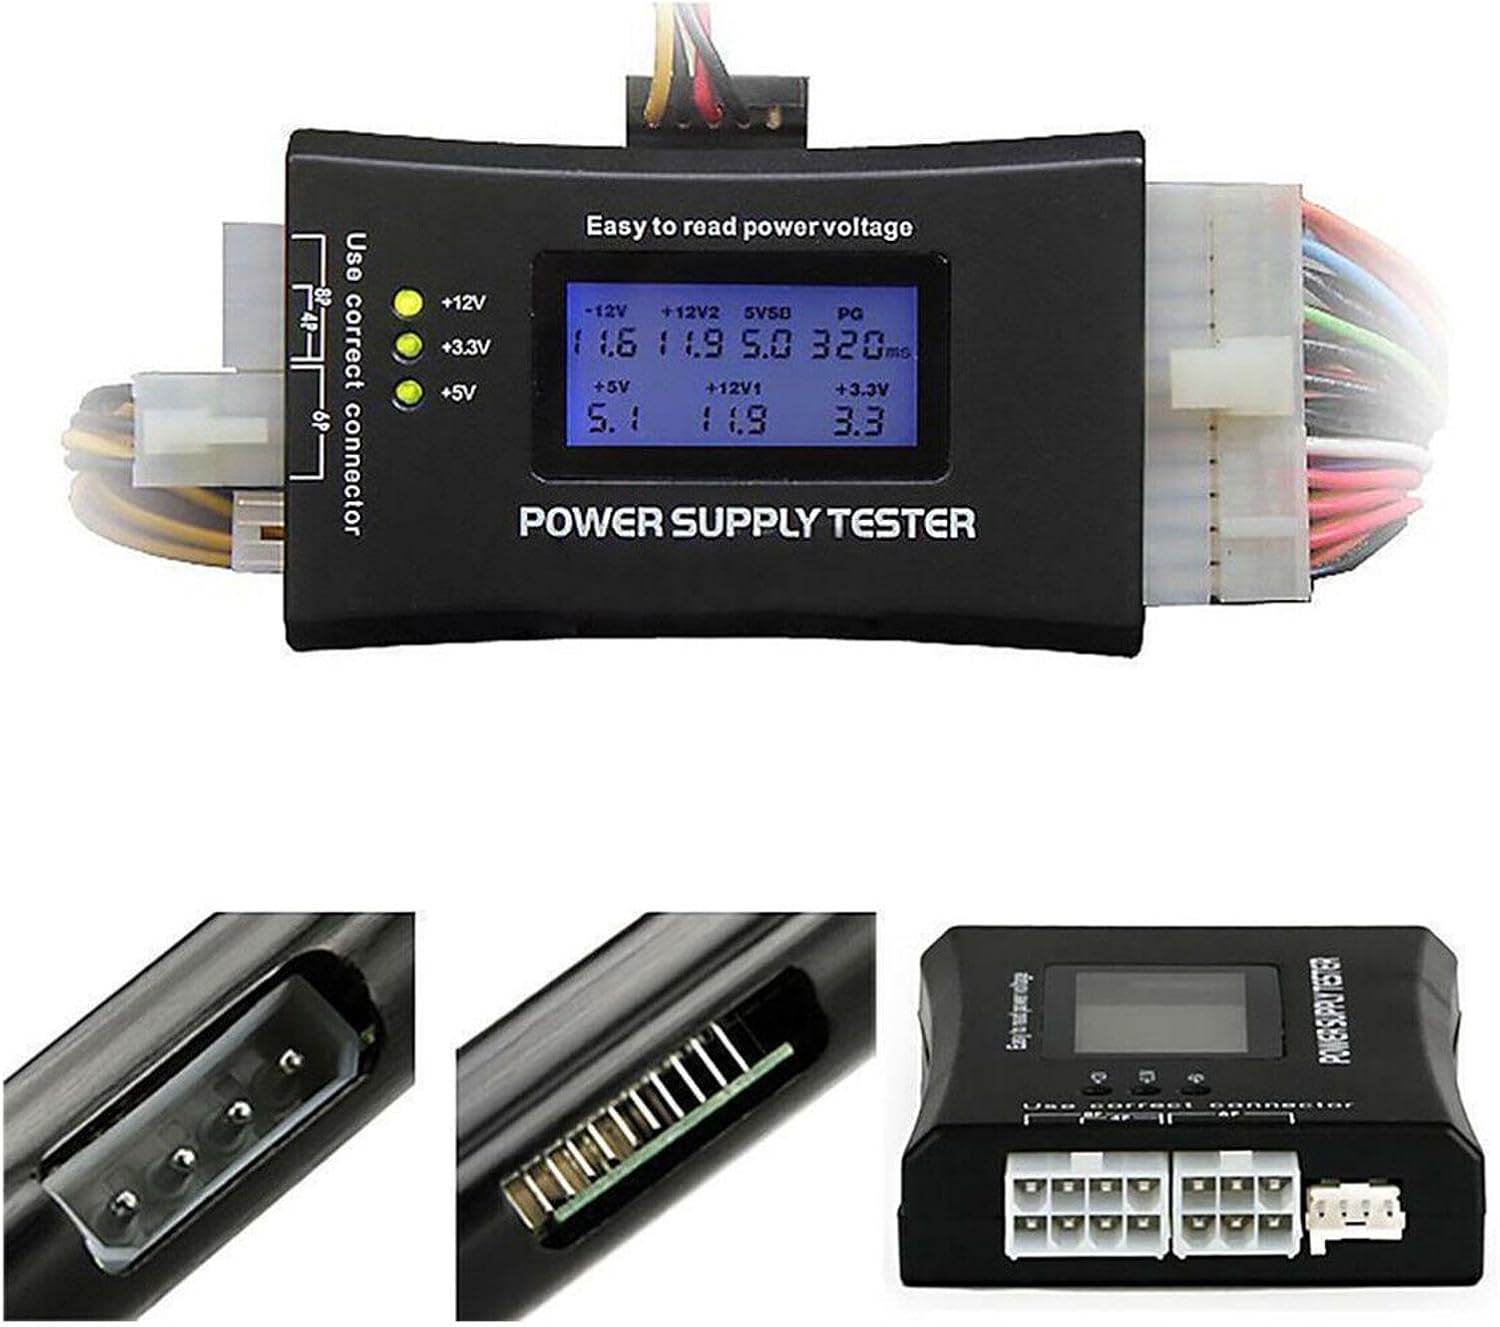
Figure 5.1: The power supply tester connected to various power supply cables, demonstrating multiple connections for comprehensive testing.
6. Operation
Once the power supply is connected to the tester, you can begin the testing process.
- Power On: Connect your power supply to a wall outlet and turn it on (if it has a switch). The tester will automatically power on.
- Initial Check: Upon powering on, you should hear a single beep sound. The LCD display will illuminate and show various voltage readings. If there is no flickering on the display and no continuous buzzer sound, the power supply output voltages are generally normal.
- Interpreting Results:
- Normal Operation: The LCD displays stable voltage values for +12V, -12V, +5V, -5V, +3.3V, +5V SB, and PG.
- Fault Detection: If a specific voltage signal is not detected, or if a detected voltage value is outside the normal operating range, you will hear a continuous long buzzer sound. Additionally, the corresponding voltage value or the PG value on the LCD will flash, indicating a power supply failure.

Figure 6.1: The LCD screen of the tester showing various voltage readings, including +12V, +5V, +3.3V, and PG (Power Good) values.
7. Specifications
| Material | Aluminum Alloy |
| Voltage Source | 20/24 pin (ATX connector) |
| Voltage Test Range | +12V, -12V, +5V, -5V, +3.3V, +5V Standby (SB), Power Good (PG) |
| Connectors Supported | Floppy, HDD, CDROM, SATA, 4-pin, 8-pin, 6-pin PCI-Express |
| Package Dimensions | 3.94 x 3.15 x 0.79 inches (10 x 8 x 2 cm) |
| Item Weight | 2.11 ounces (60 grams) |
8. Troubleshooting
- No Display/No Power: Ensure the power supply is properly connected to the tester and is receiving power from the wall outlet. Check the power supply's own switch if applicable.
- Continuous Buzzer Sound and Flashing Values: This indicates a fault in the power supply. One or more voltage rails are outside acceptable limits, or the Power Good signal is incorrect. The power supply should be replaced or serviced by a qualified technician.
- Incorrect Readings: Double-check that all connectors are firmly seated in the tester. Ensure you are using the correct connectors for your power supply type.
9. Maintenance
The TECKEEN LCD Power Supply Tester requires minimal maintenance.
- Cleaning: Wipe the device with a soft, dry cloth. Do not use liquid cleaners or solvents.
- Storage: Store the tester in a cool, dry place away from direct sunlight and extreme temperatures when not in use.
10. Warranty and Support
For warranty information or technical support, please refer to the documentation provided with your purchase or contact your retailer. Keep your proof of purchase for warranty claims.
Ask a question about this manual
Ask about setup, troubleshooting, compatibility, parts, safety, or missing instructions. Manuals+ will review the question and use this page’s manual context to help answer it.