1. Product Overview
The PawHut Pet Playpen (Model D51-254, 46 Panels) is a versatile and customizable enclosure designed for small animals such as guinea pigs, chinchillas, rabbits, and ferrets. Its modular design allows for various configurations, providing a safe and spacious environment for your pets both indoors and outdoors. This manual provides essential information for assembly, safe use, and maintenance of your pet playpen.

Image 1.1: Assembled PawHut Pet Playpen with pets.
2. Safety Information
- Always ensure all panels are securely connected using the provided connectors and cable ties to prevent collapse or escape.
- Regularly inspect the playpen for any loose or damaged parts. Replace or repair as necessary.
- Supervise pets, especially during initial use, to ensure they are comfortable and cannot escape or get injured.
- Ensure the mesh size is appropriate for your pet to prevent them from getting stuck. For very small animals, additional mesh or barriers may be required.
- Do not place the playpen near heat sources, open flames, or electrical hazards.
- This playpen is designed for small animals. Do not use for animals that may exert excessive force or attempt to chew through metal or plastic components.
3. Package Contents
Before assembly, verify that all components are present and undamaged. The package for the 46-panel model includes:
- 33 x Wire Panels (L35*W35 cm)
- 2 x Side-open Door Panels (L35*W35 cm)
- 11 x Resin Panels (L35*W35 cm)
- 1 x Ladder Panel (L42.5*W16 cm)
- 1 x Wooden Mallet
- 52 x Normal Buckles (Connectors)
- 2 x Door Buckles
- Several Plastic Cable Ties

Image 3.1: Included accessories and components.
4. Setup and Assembly
Follow these steps to assemble your PawHut Pet Playpen:
- Plan Your Layout: Before connecting panels, decide on the desired shape and size of your playpen. The modular design allows for various configurations, including multi-level structures.
- Connect Panels: Use the plastic connectors (buckles) to join the wire and resin panels. Insert the corners of the panels firmly into the slots of the connectors.
- Secure Connections: Use the included wooden mallet to gently tap the panels into the connectors, ensuring a tight and stable fit. A secure connection is crucial for the playpen's stability.
- Install Doors: If your design includes doors, integrate the side-open door panels into your structure. Use the door buckles to secure the door panels in place.
- Add Ladders and Resin Panels: For multi-level designs, use the ladder panel to connect different levels. Place resin panels as flooring for elevated sections.
- Reinforce with Cable Ties: For added stability, especially for multi-level structures or frequently used doors, use the plastic cable ties to reinforce connections between panels and around connectors. This strengthens the entire structure.
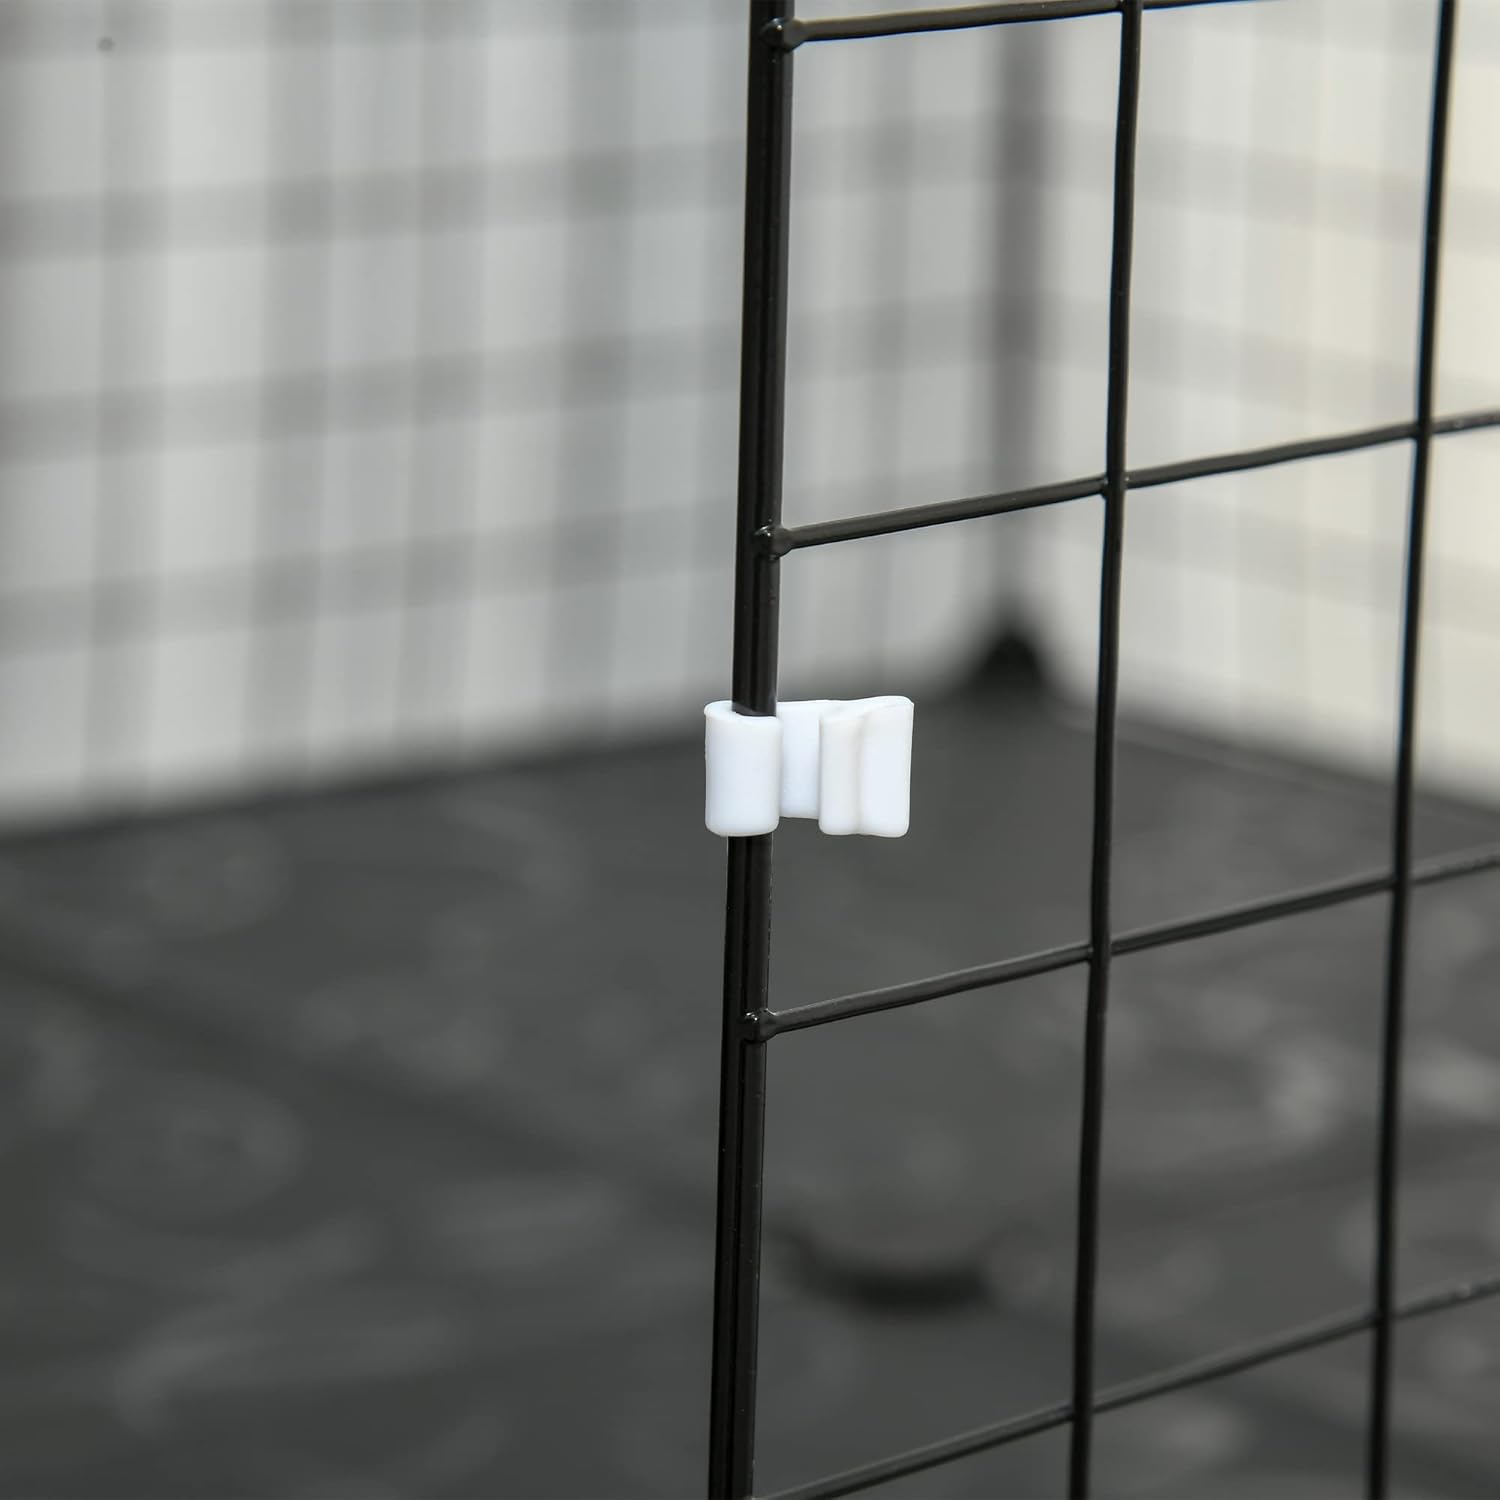
Image 4.1: Detail of panel and connector assembly with cable tie reinforcement.
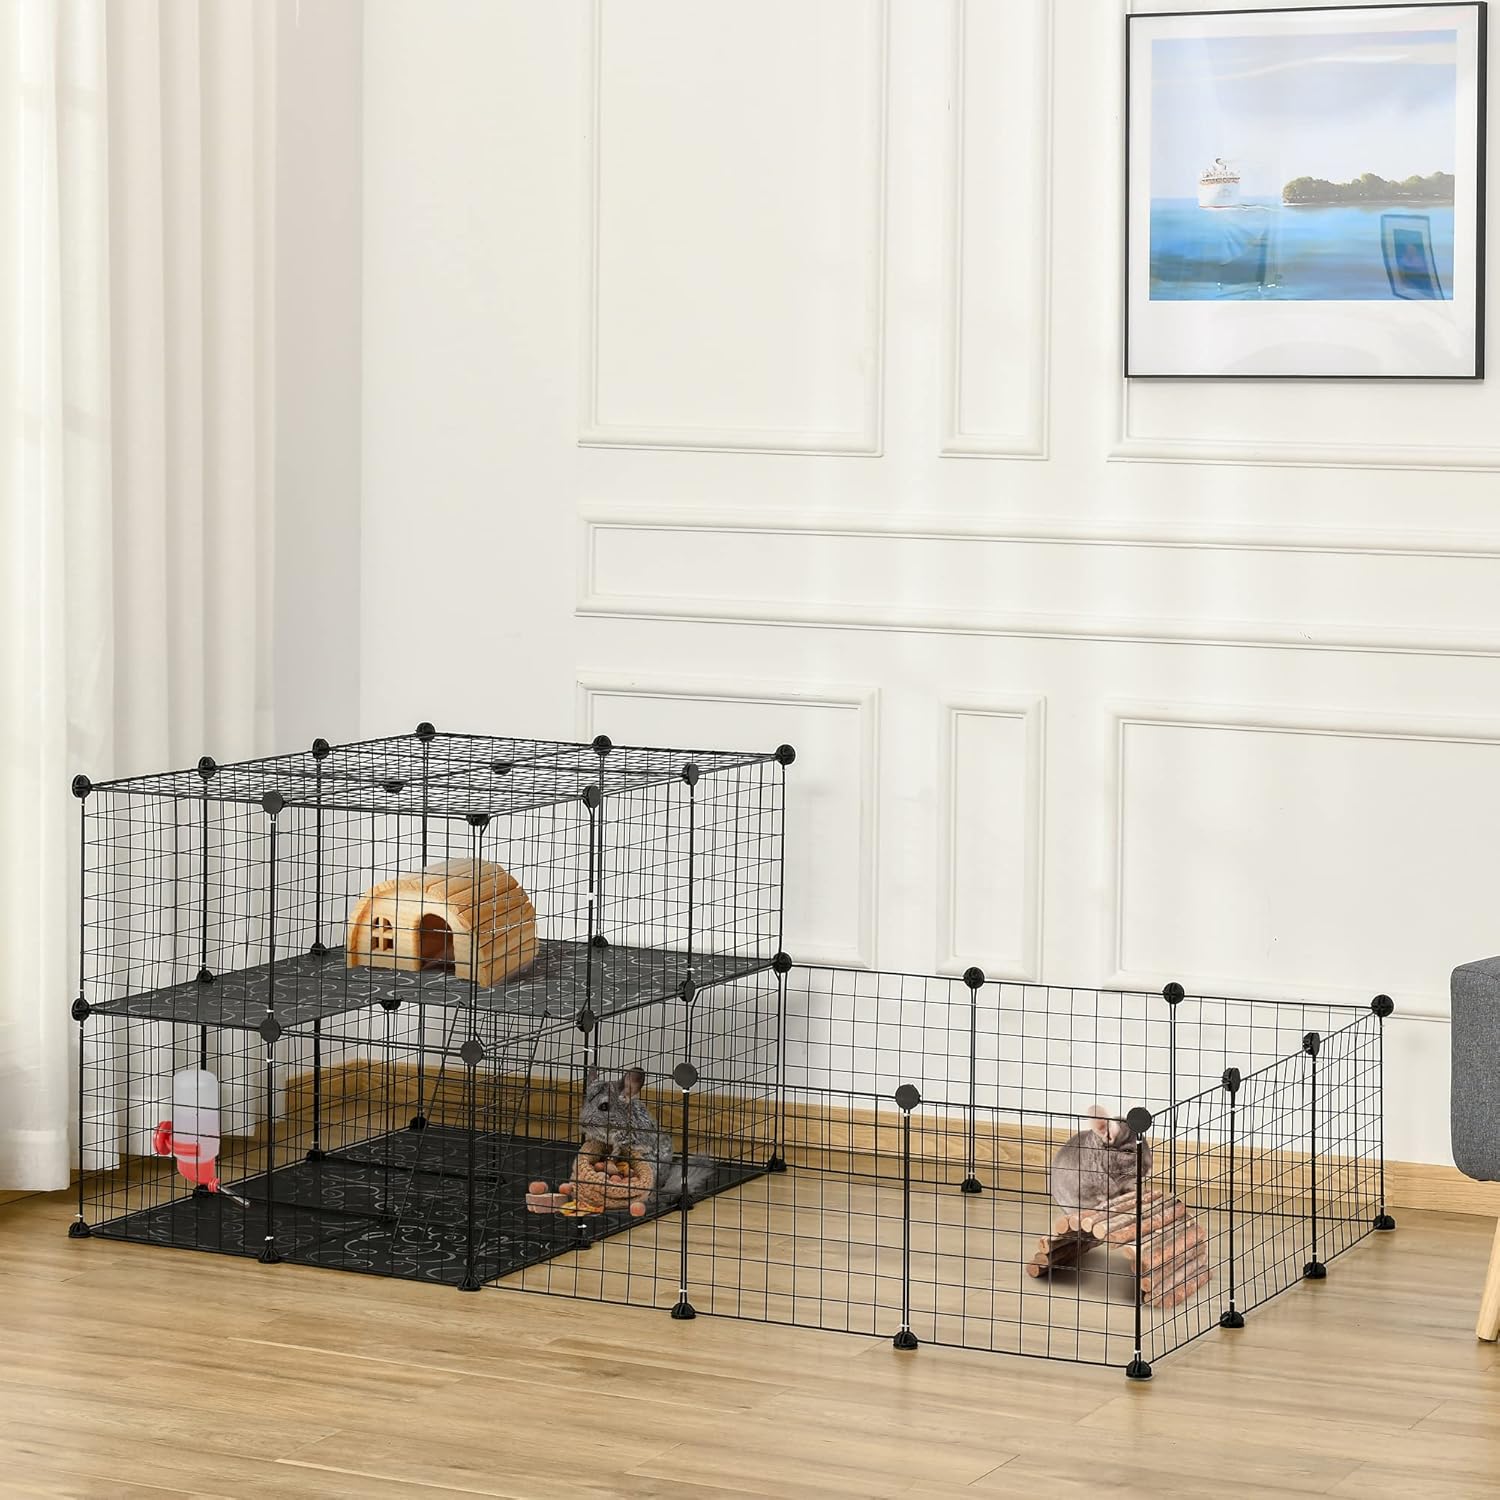
Image 4.2: Example of an assembled playpen configuration.
5. Customization and Usage
The PawHut Pet Playpen offers extensive customization options:
- Personalized Layouts: Arrange the panels to create various shapes and sizes, including designated areas for resting, playing, and feeding.
- Expandability: If more space is needed, additional PawHut playpen sets can be purchased and integrated to create a larger enclosure.
- Suitable Animals: This playpen is suitable for a wide range of small animals, including guinea pigs, chinchillas, rabbits, and ferrets. Ensure the enclosure size and configuration are appropriate for your specific pet's needs and activity level.
- Indoor and Outdoor Use: The durable metal and PP resin materials make the playpen suitable for both indoor and outdoor environments. When used outdoors, ensure it is placed on a flat, stable surface and provides adequate shade and protection from elements.
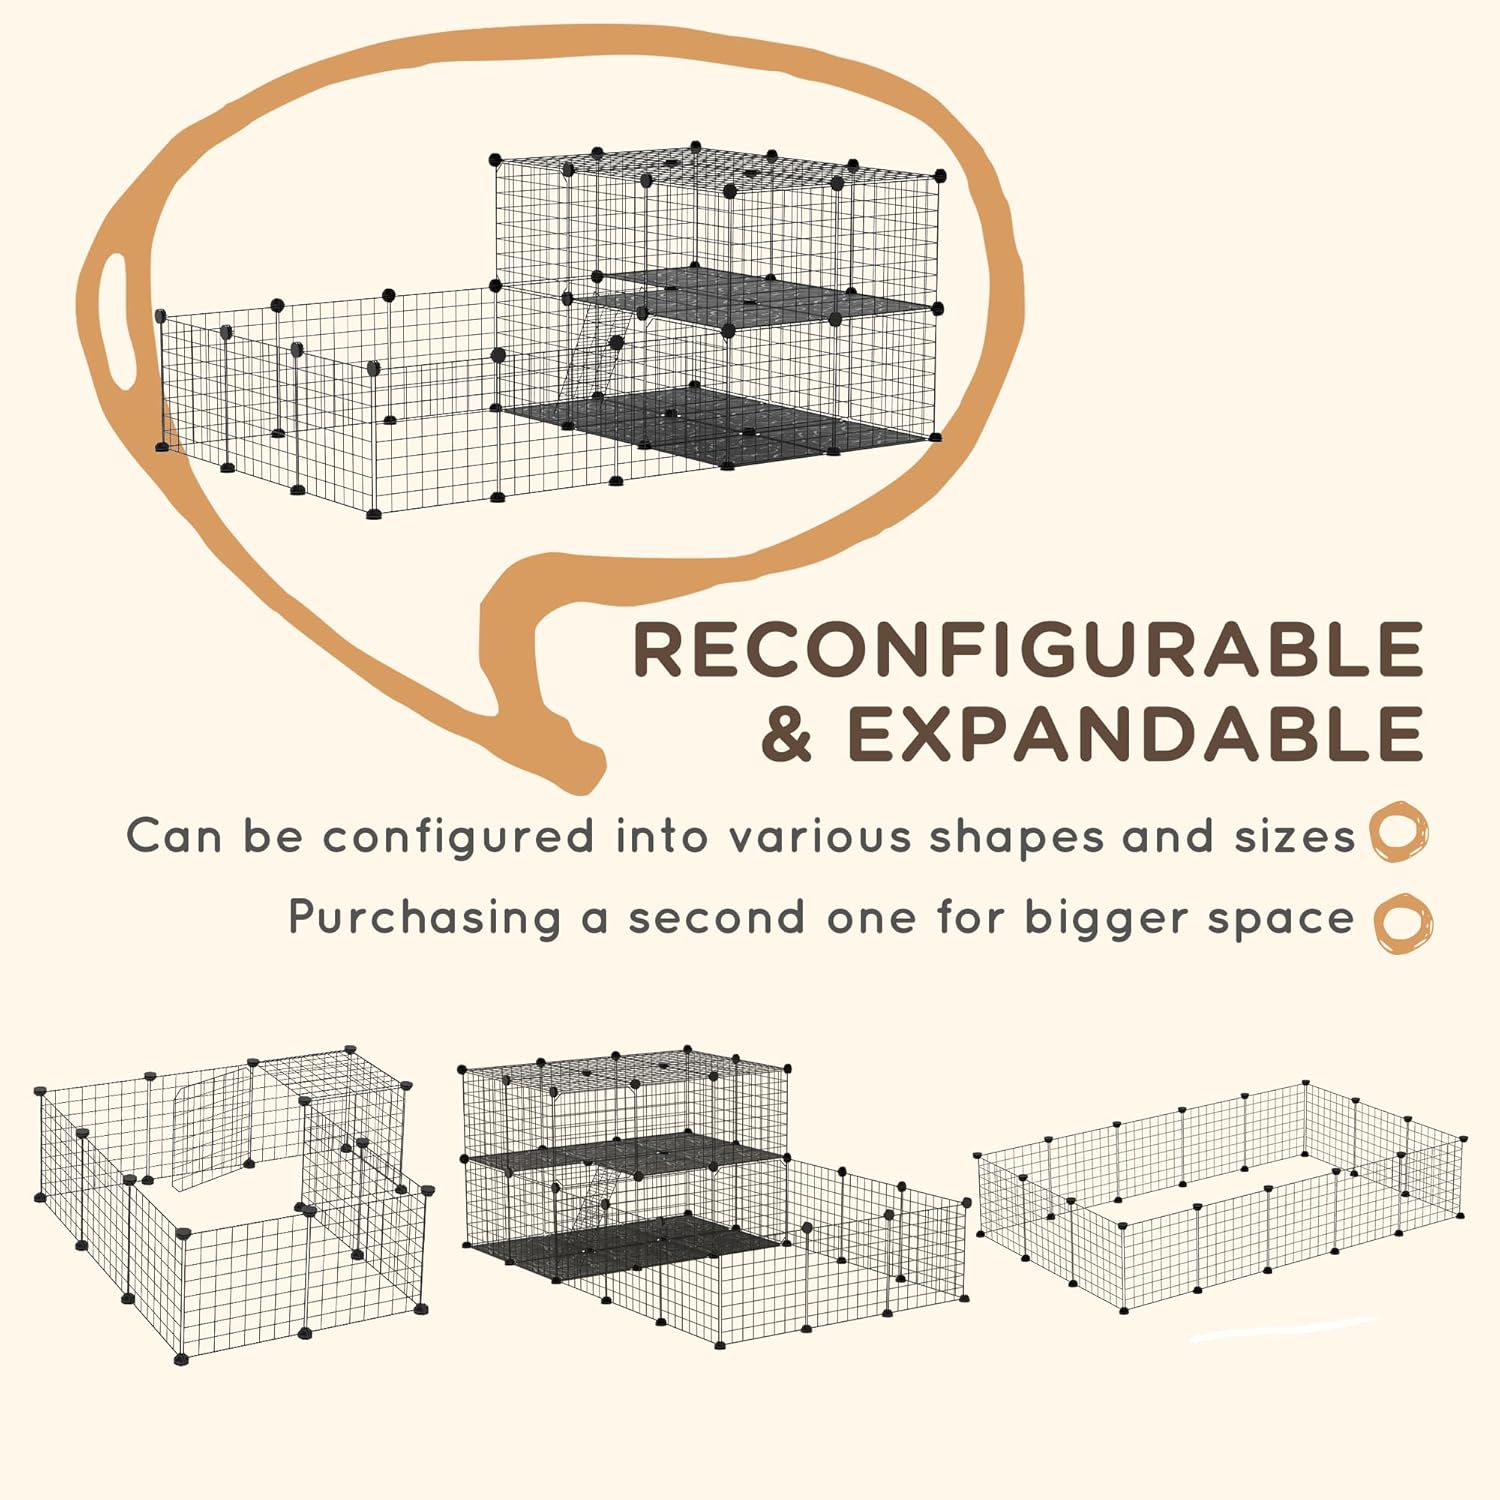
Image 5.1: Examples of reconfigurable and expandable playpen designs.

Image 5.2: Playpen suitability for various small pets.
6. Maintenance
Proper maintenance ensures the longevity and hygiene of your pet playpen:
- Regular Cleaning: Clean the panels and connectors regularly with a pet-safe cleaner and water. Rinse thoroughly and dry completely before reassembly or placing pets back inside.
- Inspect for Wear: Periodically check all components for signs of wear, rust, or damage. Replace any compromised parts to maintain structural integrity.
- Secure Connections: Re-tighten cable ties and ensure all panel connections are firm, especially after moving the playpen.
- Storage: If disassembling for storage, clean all parts and store them in a dry place away from direct sunlight to prevent material degradation.
7. Troubleshooting
- Playpen feels unstable: Ensure all panel corners are fully inserted into the connectors. Use the wooden mallet to tap them firmly into place. Reinforce critical connections with additional cable ties.
- Panels detach easily: This often indicates insufficient connection. Disassemble the affected section and reassemble, ensuring each panel corner clicks securely into the connector. Use cable ties for extra security.
- Door does not stay closed: Check if the door buckles are correctly installed and functioning. If the door mechanism is loose, reinforce with cable ties or consider using an external clip for added security.
- Pet is escaping: Review the playpen configuration to identify any gaps or weak points. Ensure the panel spacing is appropriate for your pet's size. For very small or determined pets, additional barriers or a different enclosure type may be necessary.
8. Specifications
| Model Number | D51-254 |
| Overall Dimensions (Standard Shape) | 175 cm W x 105 cm D x 70 cm H (68.9" W x 41.3" D x 27.6" H) |
| Single Panel Size | 35 cm L x 35 cm W (13.8" L x 13.8" W) |
| Gap Size | 1.6 Inches (4 cm) |
| Material | Alloy Steel, Polypropylene |
| Manufacturer | Aosom Canada |
| Country of Origin | China |

Image 8.1: Playpen dimensions diagram.
9. Warranty and Support
For warranty information, product support, or to purchase replacement parts, please contact PawHut customer service or refer to the official PawHut website. Keep your purchase receipt for warranty claims.


