1. Introduction
This manual provides detailed instructions for the setup, operation, maintenance, and troubleshooting of your AVer CAM570 Video Conferencing Camera. Please read this manual thoroughly before using the device to ensure proper functionality and to prevent damage.
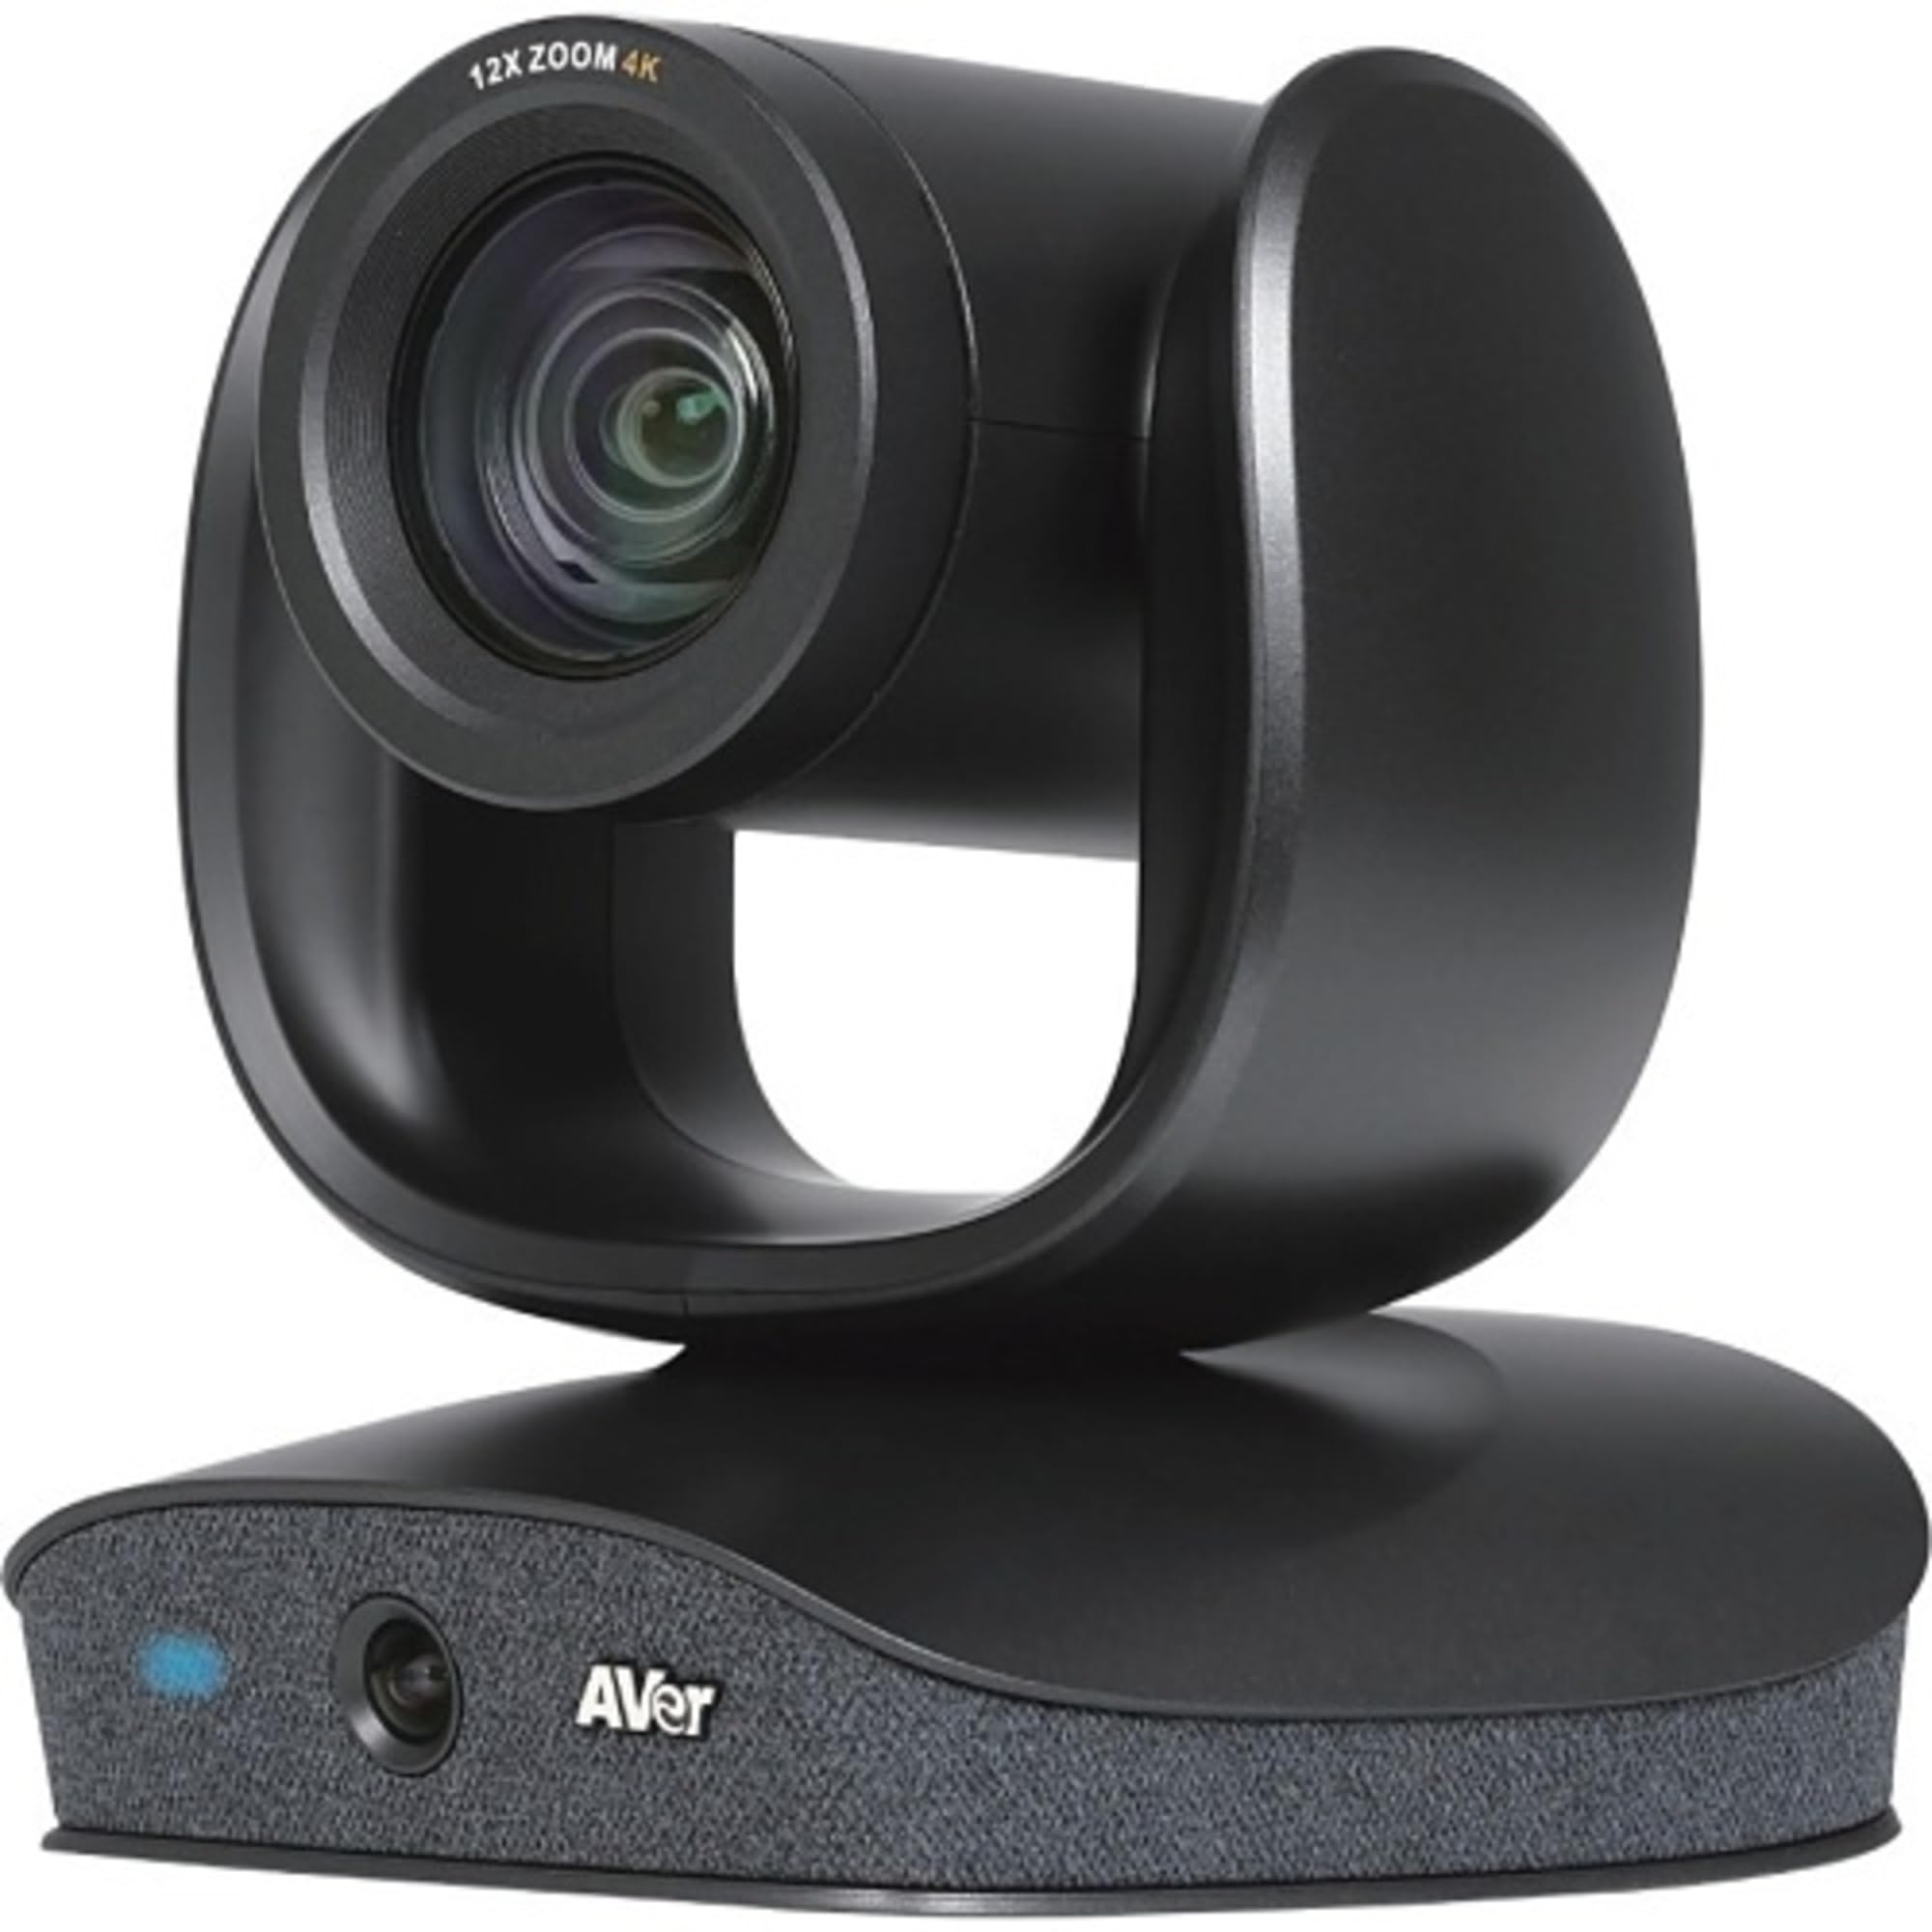
Image: The AVer CAM570 Video Conferencing Camera, featuring a dual-lens design with a PTZ camera on top and an AI lens integrated into the base, which also houses the microphone array and AVer branding.
2. Key Features
- 4K Dual-Lens Camera: Features a PTZ camera with 36X total zoom and an AI lens with a 95-degree Field of View (FOV).
- Audio Tracking: Three built-in voice sensors with beamforming technology track speakers up to 10 meters away.
- AI Smart Frame: Automatically adjusts camera angle and zoom to capture all meeting participants.
- Smart Gallery: Merges close-ups and panoramic views for equitable representation in meetings.
- Picture-in-Picture (PIP): Offers simultaneous speaker and wide-angle views.
- Connectivity: USB 3.1 (Gen 1) Type B, RS232, Visca over IP.
- Compatibility: Zoom certified, works with Google Meet, Microsoft Teams, and other video conferencing platforms.
3. What's in the Box
Upon unpacking your AVer CAM570, please verify that all components are present:
- AVer CAM570 Video Conferencing Camera
- USB Cable
- User Manual (this document)
4. Setup Instructions
4.1 Physical Placement
Place the CAM570 on a stable, flat surface, such as a conference table or a dedicated camera stand. Ensure the camera has an unobstructed view of the meeting area.
4.2 Connecting the Camera
- Connect the provided USB cable to the USB 3.1 Type B port on the CAM570.
- Connect the other end of the USB cable to an available USB 3.1 (or higher) port on your computer or conferencing hub.
- (Optional) For advanced control, connect an RS232 or Ethernet cable for Visca over IP to the respective ports on the camera.
- Connect the power adapter to the camera and then to a power outlet. The camera will power on automatically.
4.3 Driver Installation (Windows/macOS)
The AVer CAM570 is a plug-and-play device. Most operating systems (Windows 10/11, macOS) will automatically detect and install the necessary drivers upon connection. If prompted, allow the system to complete the driver installation.
For optimal performance and access to advanced features, download and install the latest PTZApp2 software from the official AVer website: www.aver.com/download-center.
5. Operating the Camera
5.1 Basic Operation
- Power On/Off: The camera powers on when connected to power. Disconnect power to turn off.
- Status Indicator: A blue LED on the front of the base indicates the camera is active.
- Selecting as Video Source: In your video conferencing application (e.g., Zoom, Microsoft Teams, Google Meet), select "AVer CAM570" as your camera and microphone source.
5.2 Using PTZApp2 Software
The PTZApp2 software provides comprehensive control over the CAM570's features:
- Pan, Tilt, Zoom (PTZ) Control: Manually adjust the PTZ camera's position and zoom level.
- Preset Management: Save and recall up to 10 camera positions for quick transitions.
- AI Features: Enable/disable and configure AI Smart Frame, Smart Gallery, and Audio Tracking.
- Image Settings: Adjust brightness, contrast, saturation, white balance, and other image parameters.
- Firmware Updates: Keep your camera's firmware up-to-date for optimal performance and new features.
5.3 Audio Tracking and Smart Frame
The CAM570 automatically focuses on active speakers and frames participants using its AI capabilities. Ensure these features are enabled in the PTZApp2 for best results.
- Audio Tracking: The PTZ camera will automatically follow the person speaking.
- AI Smart Frame: The camera dynamically adjusts its view to include all participants in the room.
- Smart Gallery: Provides individual close-ups alongside a panoramic view, configurable via PTZApp2.
6. Maintenance
6.1 Cleaning
- Gently wipe the camera lens with a soft, lint-free cloth specifically designed for optical surfaces. Do not use abrasive cleaners or solvents.
- Clean the camera body with a dry or slightly damp soft cloth.
- Ensure the camera is powered off and disconnected from all cables before cleaning.
6.2 Firmware Updates
Regularly check for and install firmware updates via the AVer PTZApp2 software. Firmware updates can improve performance, add new features, and resolve potential issues.
7. Troubleshooting
| Problem | Possible Cause | Solution |
|---|---|---|
| No video output |
|
|
| No audio input |
|
|
| AI features not working |
|
|
| Camera not recognized by computer |
|
|
8. Specifications
| Feature | Detail |
|---|---|
| Model | CAM570 |
| Max Screen Resolution | UHD (Ultra High Definition) |
| Rear Webcam Resolution | 8 MP |
| Frame Rate | 60 fps |
| Zoom | 36X Total Zoom (12x Optical + 3x Digital) |
| AI Lens FOV | 95 degrees |
| Connectivity | USB 3.1 (Gen 1) Type B, RS232, Visca over IP |
| Microphone | Integrated with beamforming technology |
| Dimensions (LxWxH) | 10.7 x 10.2 x 9.9 inches |
| Weight | 10.03 pounds |
| Color | Black |
| Hardware Platform | PC |
9. Warranty and Support
9.1 Warranty Information
For detailed warranty information, please refer to the warranty card included with your product or visit the official AVer website. Warranty terms and conditions may vary by region.
9.2 Technical Support
If you encounter any issues not covered in the troubleshooting section, or require further assistance, please contact AVer technical support:
- AVer Support Website: www.aver.com/support
- Contact Information: Refer to the support section of the AVer website for regional contact numbers and email addresses.
When contacting support, please have your product model (CAM570) and serial number ready.


