1. Introduction
This manual provides essential information for the proper handling, installation, and maintenance of your Hconcet Fuel Injector Set. Please read this manual thoroughly before attempting any installation or service to ensure safety and optimal performance of the product. This product is designed for specific automotive applications and requires professional installation.
2. Product Overview
The Hconcet Fuel Injector Set consists of four new fuel injectors designed for precise fuel delivery in compatible diesel engines. These injectors are critical components of the engine's fuel system, responsible for atomizing and injecting fuel into the combustion chamber at the correct time and pressure, which directly impacts engine performance, fuel efficiency, and emissions.
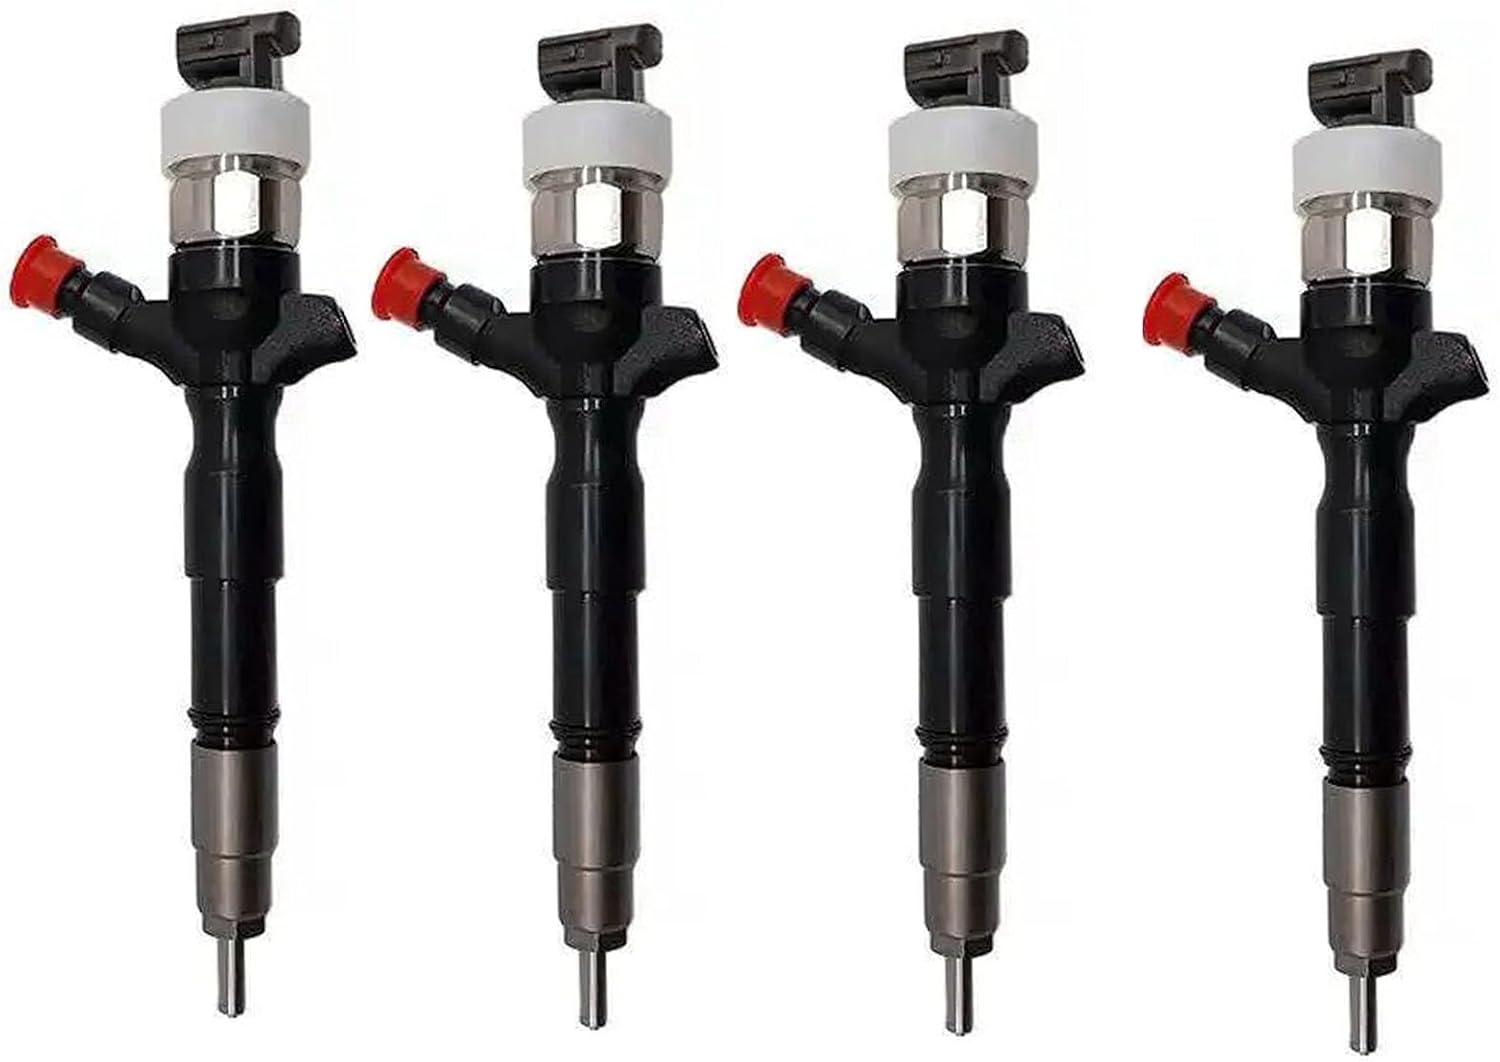
Figure 2.1: A set of four Hconcet fuel injectors. Each injector features a black body, a silver nozzle tip, a white electrical connector, and a red protective cap on the fuel inlet.
3. Compatibility
This fuel injector set is specifically compatible with the following vehicle and engine configuration:
- Vehicle: Toyota Hiace
- Engine: 2KD-FTV 2.5L Diesel Engine
- Part Numbers: 23670-39125, 23670-30090
It is crucial to verify these part numbers and engine specifications against your vehicle's requirements before purchase and installation. Incorrect part usage can lead to severe engine damage.
4. Safety Information
Working with fuel systems and automotive components can be hazardous. Adhere to all safety precautions to prevent injury or damage.
- Professional Installation Recommended: Due to the complexity and critical nature of fuel injector replacement, installation by a certified automotive technician is strongly recommended.
- Fuel Handling: Diesel fuel is flammable. Ensure adequate ventilation and keep ignition sources away from the work area. Wear appropriate personal protective equipment (PPE), including gloves and eye protection.
- High Pressure: The fuel system operates under high pressure. Always relieve fuel system pressure before disconnecting any fuel lines or components. Refer to your vehicle's service manual for specific procedures.
- Electrical Connections: Disconnect the vehicle's battery before working on electrical components to prevent electrical shock or damage to the vehicle's electrical system.
- Cleanliness: Maintain a clean work environment. Even small particles of dirt can cause significant damage to fuel system components.
- Torque Specifications: Always use the manufacturer's specified torque values for all fasteners. Overtightening or undertightening can lead to leaks or component failure.
5. Setup and Installation
The following is a general guide for fuel injector replacement. Always consult your vehicle's specific service manual for detailed, step-by-step instructions and torque specifications.
- Preparation:
- Ensure the engine is cool.
- Disconnect the negative terminal of the vehicle's battery.
- Relieve fuel system pressure according to the vehicle service manual.
- Gather all necessary tools, including torque wrenches, sockets, and specialized fuel line tools if required.
- Accessing Injectors:
- Remove any engine covers, air intake components, or other obstructions to gain access to the fuel rail and injectors.
- Disconnecting Old Injectors:
- Carefully disconnect the electrical connectors from each injector.
- Disconnect the high-pressure fuel lines from the injectors and fuel rail. Be prepared for residual fuel leakage and use appropriate catch pans.
- Remove the injector hold-down clamps or bolts.
- Gently pull the old injectors from their seats. Note the position and orientation of each injector.
- Installing New Injectors:

Figure 5.1: A single fuel injector, highlighting the main body, electrical connector, and fuel inlet. The part number 23670-30090 is visible on the side.
- Inspect the new injectors for any damage.
- Ensure the injector seats in the cylinder head are clean and free of debris.
- Install new O-rings and seals on the new injectors as required, lubricating them with clean engine oil or a suitable lubricant to prevent damage during installation.
- Carefully insert each new injector into its respective seat, ensuring it is fully seated and correctly oriented.
- Secure the injectors with their hold-down clamps or bolts, tightening them to the manufacturer's specified torque.
- Reconnecting Components:

Figure 5.2: Top section of a fuel injector, showing the white electrical connector and the hexagonal nut for securing the injector.
- Reconnect the high-pressure fuel lines to the injectors and fuel rail, tightening to specified torque values.
- Reconnect the electrical connectors to each injector, ensuring a secure connection.
- Reinstall any removed engine covers, air intake components, or other parts.
- Post-Installation Checks:
- Reconnect the vehicle's battery.
- Cycle the ignition key several times (without starting the engine) to allow the fuel pump to prime the system and build pressure. Check for any fuel leaks.
- Start the engine and carefully check for any fuel leaks, unusual noises, or warning lights.
- Allow the engine to run for a few minutes and monitor its operation.
6. Operating Considerations
Once installed, the fuel injectors operate automatically as part of the engine management system. Proper operation is indicated by smooth engine running, consistent power delivery, and expected fuel economy. Any deviations from normal engine behavior should be investigated promptly.
7. Maintenance
Fuel injectors are precision components that generally do not require routine maintenance beyond ensuring a clean fuel supply. To prolong the life and performance of your fuel injectors:
- Use Quality Fuel: Always use high-quality diesel fuel from reputable sources.
- Regular Fuel Filter Replacement: Adhere to your vehicle manufacturer's recommended schedule for fuel filter replacement. A clogged fuel filter can restrict fuel flow and introduce contaminants to the injectors.
- Avoid Fuel Contaminants: Prevent water, dirt, or other contaminants from entering the fuel tank.
- Professional Inspection: Have your fuel system inspected by a qualified technician during routine vehicle servicing.
8. Troubleshooting
If you experience issues after installing new fuel injectors, consider the following common problems and potential solutions. Always consult a qualified mechanic for diagnosis and repair.
- Engine Misfire or Rough Idling:
- Check electrical connections to injectors.
- Verify proper seating of injectors and absence of fuel leaks.
- Ensure correct part numbers were installed.
- Diagnostic scan for fault codes.
- Fuel Leaks:
- Re-check all fuel line connections and torque specifications.
- Inspect O-rings and seals for damage during installation.
- Check Engine Light:
- A diagnostic scan tool is required to read fault codes and identify the specific issue.
- Poor Fuel Economy or Reduced Power:
- Could indicate an issue with fuel delivery or other engine systems. Professional diagnosis is necessary.
9. Specifications
| Feature | Specification |
|---|---|
| Product Name | Fuel Injector |
| Brand | Hconcet |
| Part Numbers | 23670-39125, 23670-30090 |
| Compatible Engine | Toyota Hiace 2KD-FTV 2.5L Engine |
| Fuel Type | Diesel |
| Condition | New |
| Inlet Connection Size | 0.03 Inches |
| Inlet Connection Type | SAE |
| Outlet Connection Type | SAE |
| Number of Ports | 2 |
| Outlet Connection Size | 0.03 Inches |
| Color | Black |
10. Warranty Information
This Hconcet Fuel Injector Set comes with a 1-year warranty from the date of purchase. This warranty covers manufacturing defects and material flaws under normal use and service. It does not cover damage resulting from improper installation, misuse, neglect, accident, modification, or normal wear and tear.
For warranty claims, please retain your proof of purchase and contact the seller or manufacturer directly. The return policy typically allows for a refund or replacement within 30 days of purchase, subject to seller terms.
11. Support
For technical assistance, installation guidance, or troubleshooting beyond the scope of this manual, it is highly recommended to consult a certified automotive technician or contact the product seller. When seeking support, please have your product model number (23670-39125, 23670-30090) and proof of purchase readily available.


