
NICE-POWER 15V 30A 450W
NICE-POWER 15V 30A 450W DC Power Supply User Manual
Model: 15V 30A 450W
Brand: NICE-POWER
Introduction
This user manual provides comprehensive instructions for the safe and efficient operation of your NICE-POWER 15V 30A 450W DC Power Supply. This high-power bench power supply features an encoder knob for precise adjustments, an output switch for enhanced safety, and stable output in both constant voltage (CV) and constant current (CC) modes. It is designed for various applications including laboratory use, battery charging, electronics repair, and DIY projects.
Important Safety Information
Please read and understand all safety warnings before operating the device. Failure to follow these instructions may result in electric shock, fire, or serious injury.
- Load Connection Sequence: Due to an adjustment delay, always turn on the DC power supply first, set the desired voltage and current, and then connect the load.
- High Current Output: If the output current exceeds 5 Amps, always connect the load to the high-current terminals located on the rear panel of the unit. Do not connect to both front and rear terminals simultaneously. The front panel terminals are rated for a maximum of 5 Amps.
- Power Off: Turn off the DC power supply and disconnect the power cord when not in use.
- Cleaning: Ensure the power cord is disconnected before cleaning the DC power supply.
- Cleaning Agents: Do not use solvents containing hydrocarbons, chlorides, or similar substances. Avoid detergents with abrasive ingredients.
- Voltage Discharge: The output voltage will gradually decrease after the power is turned off, as it takes time for internal capacitors to discharge.
Product Overview
The NICE-POWER DC Power Supply is a robust and precise instrument designed for various electrical and electronic applications. Below are key components and features:
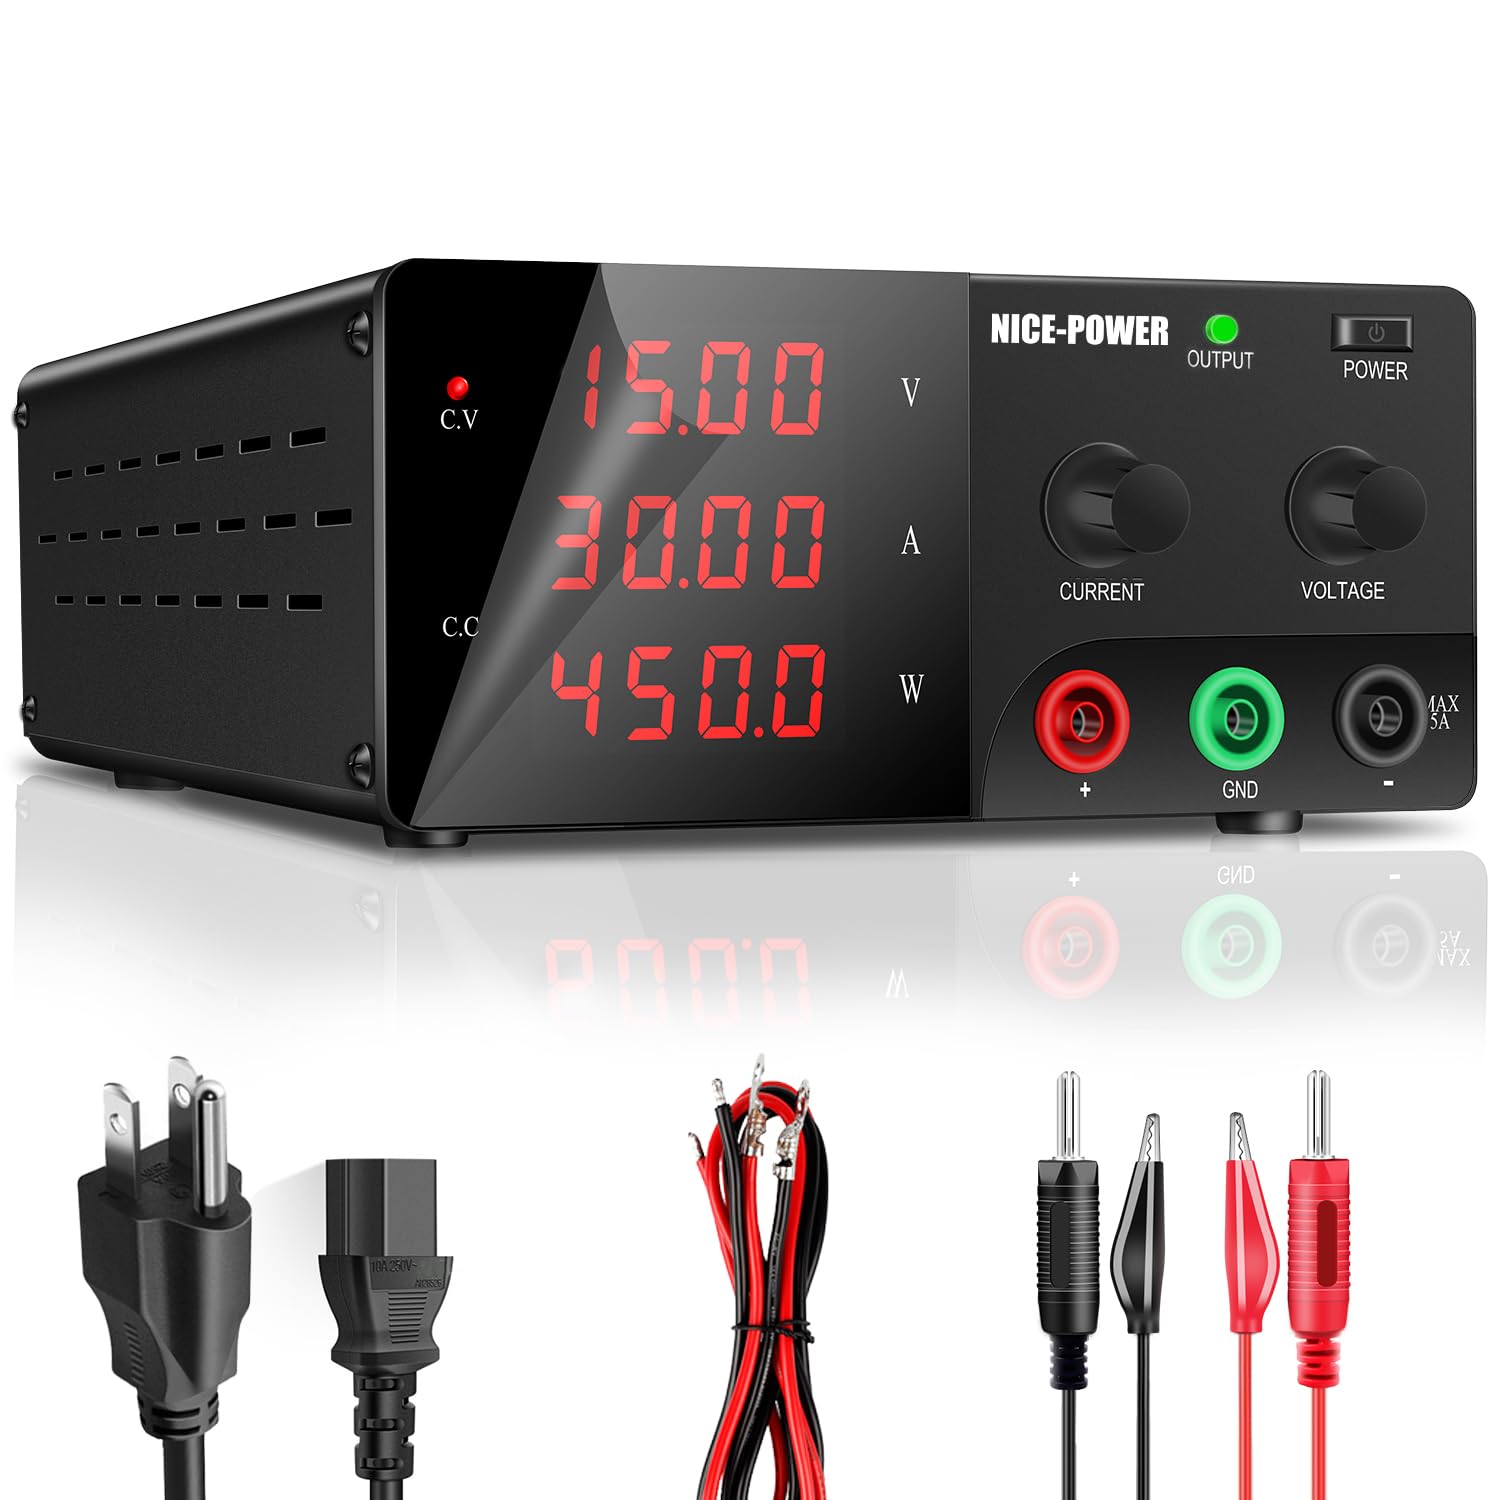
Figure 1: Front view of the NICE-POWER DC Power Supply with included power cord and output cables (low-power and high-power).

Figure 2: Detailed view of the front panel, highlighting the 4-digit LED displays for Voltage, Current, and Power, along with the Current and Voltage adjustment knobs, Output switch, and Power button. Front terminals are clearly marked for positive (+), ground (GND), and negative (-) with a 5A max rating.

Figure 3: Rear panel of the unit, featuring the smart cooling fan for efficient heat dissipation and the fuse box for voltage overload protection. High-current output terminals are also visible.

Figure 4: Illustration of the upgraded high-precision encoder knob. Pressing the knob switches between digits, allowing precise setting of voltage and current values from 0-9 by rotating the knob.

Figure 5: The Output Enable/Disable button, a safety feature that allows presetting voltage and current before activating the output, preventing accidental damage to connected loads.
Setup
- Unpacking: Carefully remove the power supply and all accessories from the packaging. Verify that all components listed in the packing list are present: DC power supply unit, power cord, English manual, low-power output cable, and high-power output cable.
- Placement: Place the power supply on a stable, flat surface with adequate ventilation. Ensure the rear cooling fan is not obstructed. The unit has shock-absorbing rubber feet for stability.
- Power Connection: Connect the provided power cord to the AC input socket on the rear panel of the power supply and then to a suitable wall outlet.
- Initial Power On: Press the POWER button on the front panel to turn on the unit. The LED displays will illuminate.
Operating Instructions
1. Setting Voltage and Current
The NICE-POWER DC Power Supply utilizes an encoder knob for precise digital setting of voltage and current, replacing traditional potentiometers.
- Select Parameter: Ensure the output is OFF (the OUTPUT indicator is off). Press the VOLTAGE knob to select the digit you wish to adjust for voltage. Similarly, press the CURRENT knob for current.
- Adjust Value: Rotate the selected knob to change the value of the highlighted digit (0-9).
- Confirm Setting: Once the desired voltage and current values are set, you can proceed to connect your load.
The encoder knob allows for precise digital input. Press the knob to move the cursor to the desired digit, then rotate to adjust the numerical value. This method ensures accurate and repeatable settings.
2. Using the Output Switch
The dedicated OUTPUT switch provides an added layer of safety and convenience.
- Enable Output: After setting the voltage and current and connecting your load, press the OUTPUT button to enable the power output. The OUTPUT indicator light will turn green.
- Disable Output: Press the OUTPUT button again to disable the power output. This allows you to safely adjust settings or change loads without powering down the entire unit.
The Output button allows you to safely preset voltage and current values before applying power to your circuit, preventing accidental overvoltage or overcurrent conditions.
3. Constant Voltage (CV) and Constant Current (CC) Modes
The power supply automatically switches between Constant Voltage (CV) and Constant Current (CC) modes depending on the load requirements.
- Constant Voltage (CV): When the load resistance is high, the power supply maintains the set output voltage, and the output current will vary according to the load. The C.V indicator will be lit.
- Constant Current (CC): When the load resistance is low, causing the current to exceed the set current limit, the power supply will automatically switch to Constant Current mode. It will maintain the set output current, and the output voltage will drop accordingly. The C.C indicator will be lit.
4. Battery Charging Function
This power supply is suitable for charging various battery types, including LiFePO4, lead-acid, and Ni-MH batteries. Always ensure correct voltage and current settings before charging.
- Connection: Connect the positive (+) terminal of the power supply to the positive terminal of the battery, and the negative (-) terminal of the power supply to the negative terminal of the battery.
- Charging Parameters:
- Charging Voltage: Set the charging voltage to approximately 1.2 times the battery's rated voltage.
- Charging Current: Set the charging current to approximately 1/3 of the battery's rated current.
- Disconnection: If the charging current drops to 50mA or less, disconnect the battery promptly to prevent overcharging.

The power supply can be used for charging various battery types. Always ensure correct polarity and set appropriate voltage and current limits to prevent damage to the battery.
Maintenance
Proper maintenance ensures the longevity and reliable operation of your power supply.
- Cleaning: Regularly clean the exterior of the unit with a soft, dry cloth. Ensure the power cord is disconnected before cleaning. Avoid using harsh chemicals or abrasive cleaners.
- Cooling Fan: The intelligent cooling fan activates automatically when the internal temperature exceeds 122°F (50°C) to dissipate heat. Ensure the fan vents on the rear panel are clear of obstructions to maintain optimal airflow.
- Storage: When not in use for extended periods, store the power supply in a cool, dry place, away from direct sunlight and excessive dust.
The smart cooling fan automatically engages to prevent overheating, ensuring stable operation and extending the lifespan of the device.
Troubleshooting
This section addresses common issues you might encounter with your DC power supply.
| Problem | Possible Cause | Solution |
|---|---|---|
| No output voltage/current after connecting load. | Output switch is OFF. Incorrect connection sequence. | Press the OUTPUT button to enable output. Ensure power supply is ON and settings are made before connecting the load. |
| Output current limited to 5A despite higher setting. | Load connected to front panel terminals. | For currents above 5A, always use the high-current terminals on the rear panel. |
| Voltage drops significantly under load. | Power supply is in Constant Current (CC) mode due to current limit. Load resistance is too low for set voltage. | Check the C.C indicator. Increase the current limit setting if the load requires more current at the desired voltage. Ensure the load is appropriate for the power supply's capabilities. |
| Unit feels hot, fan is running loudly. | Normal operation under heavy load. Obstructed fan vents. | This is normal when the unit is under significant load. Ensure the rear fan vents are clear of any obstructions. If overheating persists without heavy load, contact support. |
| Voltage slowly decreases after power off. | Normal capacitor discharge. | This is expected behavior as internal capacitors discharge. No action required. |
Specifications
Key technical specifications for the NICE-POWER 15V 30A 450W DC Power Supply:
- Model: 15V 30A 450W
- Output Voltage: 0-15V (Adjustable)
- Output Current: 0-30A (Adjustable)
- Output Wattage: 450 Watts
- Display: 4-Digit LED (Voltage, Current, Power)
- Voltage Resolution: 0.01V
- Current Resolution: 0.001A
- Cooling Method: Intelligent Air Cooling Fan
- Front Panel Current Limit: Max 5 Amps
- Dimensions: Approximately 14.57 x 9.06 x 4.72 inches (38 x 24 x 13 cm)
- Weight: Approximately 5.95 Pounds (3 kg)
- Certifications: CE & FCC Certified
Warranty and Support
NICE-POWER offers a 12-month repair policy for this DC power supply. If you encounter any issues or have questions regarding the operation, maintenance, or performance of your unit, please contact NICE-POWER customer support. Please refer to the contact information provided with your purchase or visit the official NICE-POWER website for assistance.
Related documents15V 30A 450W


Ask a question about this manual
Ask about setup, troubleshooting, compatibility, parts, safety, or missing instructions. Manuals+ will review the question and use this page’s manual context to help answer it.