1. Introduction
This manual provides essential instructions for the safe assembly, operation, and maintenance of your HOVER HEART Mini Kids Dirt Bike, Model DB001. Please read this manual thoroughly before operating the dirt bike to ensure proper use and safety.

Image 1.1: Overview of the HOVER HEART Mini Kids Dirt Bike DB001.
2. Safety Information
Operating a dirt bike can be hazardous. Always prioritize safety. Failure to follow these instructions may result in serious injury or death.
- Protective Gear: Always wear a helmet, eye protection, gloves, long sleeves, long pants, and sturdy footwear.
- Supervision: This dirt bike is intended for children under adult supervision only.
- Weight Limit: Do not exceed the maximum load capacity of 160 lbs (72.5 kg).
- Operating Environment: Operate only in safe, open areas away from traffic, pedestrians, and obstacles. Avoid public roads.
- Pre-Ride Check: Before each ride, inspect tires, brakes, chain, and all fasteners to ensure they are secure and in good working order.
- Fuel Handling: Handle fuel in a well-ventilated area, away from open flames or sparks. Use the correct fuel mixture as specified.
- Kill Switch: Familiarize yourself with the kill switch location and operation for emergency stops.
- EPA Approved: This product is EPA approved, meaning it meets environmental standards and is designed to not cause unreasonable adverse effects on user health when used according to the instruction manual.
3. Package Contents
Verify that all items are present in the package:
- HOVER HEART Mini Kids Dirt Bike (main unit)
- Instruction Manual (this document)
- Handlebar assembly components
- Front fender
- Oil mixing container (Graduated Oil Can)
- Tool kit (for assembly)
4. Assembly and Setup
The HOVER HEART Mini Kids Dirt Bike requires some assembly before first use. Follow these steps carefully:
- Unpack: Carefully remove the dirt bike and all components from its packaging.
- Handlebar Installation: Attach the handlebar clamps to the handlebars and secure them firmly. Ensure all bolts are tightened.
- Front Fender: Secure the front fender to the front wheel assembly.
- Kill Switch Connection: Locate the kill switch cable and ensure it is securely connected. This is a critical safety feature.

Image 4.1: Ensure the kill switch cable is connected for safe operation.
- Fuel Mixture: The DB001 uses a 2-stroke engine and requires a specific fuel-to-oil mixture. Use standard or #91 gasoline mixed with 2-cycle engine oil at a 25:1 ratio. Use the included graduated oil can for accurate measurement.
Video 4.1: This video demonstrates the fuel mixing process and initial starting steps for the mini gas dirt bike.
- Add Fuel: Carefully add the pre-mixed fuel to the gas tank. Do not overfill.

Image 4.2: The 49cc high-torque engine requires proper fuel mixture.
5. Operating Instructions
Once assembled and fueled, follow these steps to operate your dirt bike:
- Prime the Carburetor: Press the carburetor primer bulb several times until fuel is visible in the clear line, sending oil into the engine.
- Adjust Choke: Set the choke lever to the "Start" or "Choke" position (usually a lever on the carburetor).
- Start the Engine: With the kill switch in the "Run" position, firmly pull the pull-start cord multiple times until the engine starts. You may need to give a slight throttle input.
- Warm-up: Once started, allow the engine to warm up for a minute or two. Gradually move the choke lever to the "Run" position as the engine warms.
- Throttle Control: The dirt bike features a handle throttle. Apply throttle gradually to accelerate.
- Braking: The bike is equipped with disc brakes. Apply both front and rear brakes smoothly and evenly to slow down or stop.
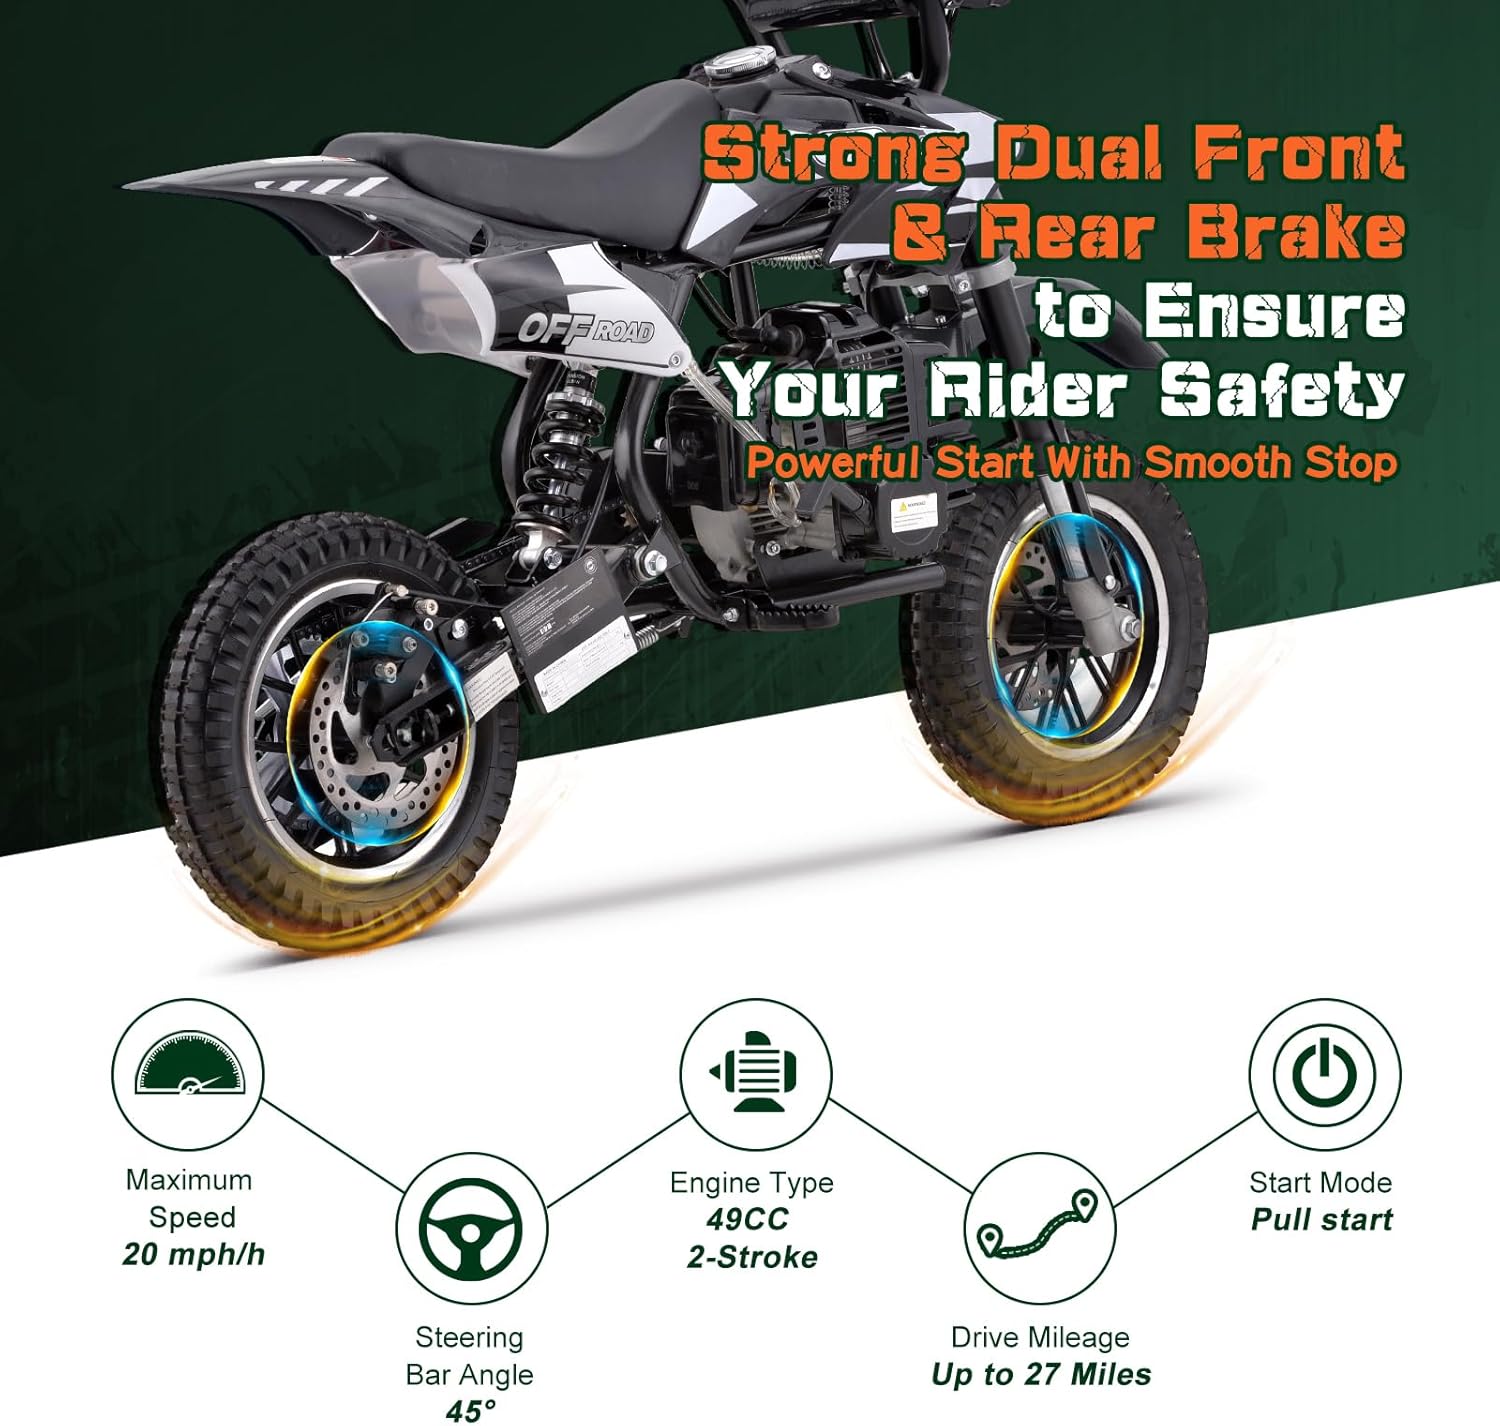
Image 5.1: The dirt bike features strong dual front and rear disc brakes for effective stopping power.
- Stopping the Engine: To stop the engine, press the red kill switch button located on the handlebar.
6. Maintenance
Regular maintenance ensures the longevity and safe operation of your dirt bike.
- Tire Pressure: Check tire pressure before each ride. The low-pressure pneumatic tires provide a soft and smooth ride.
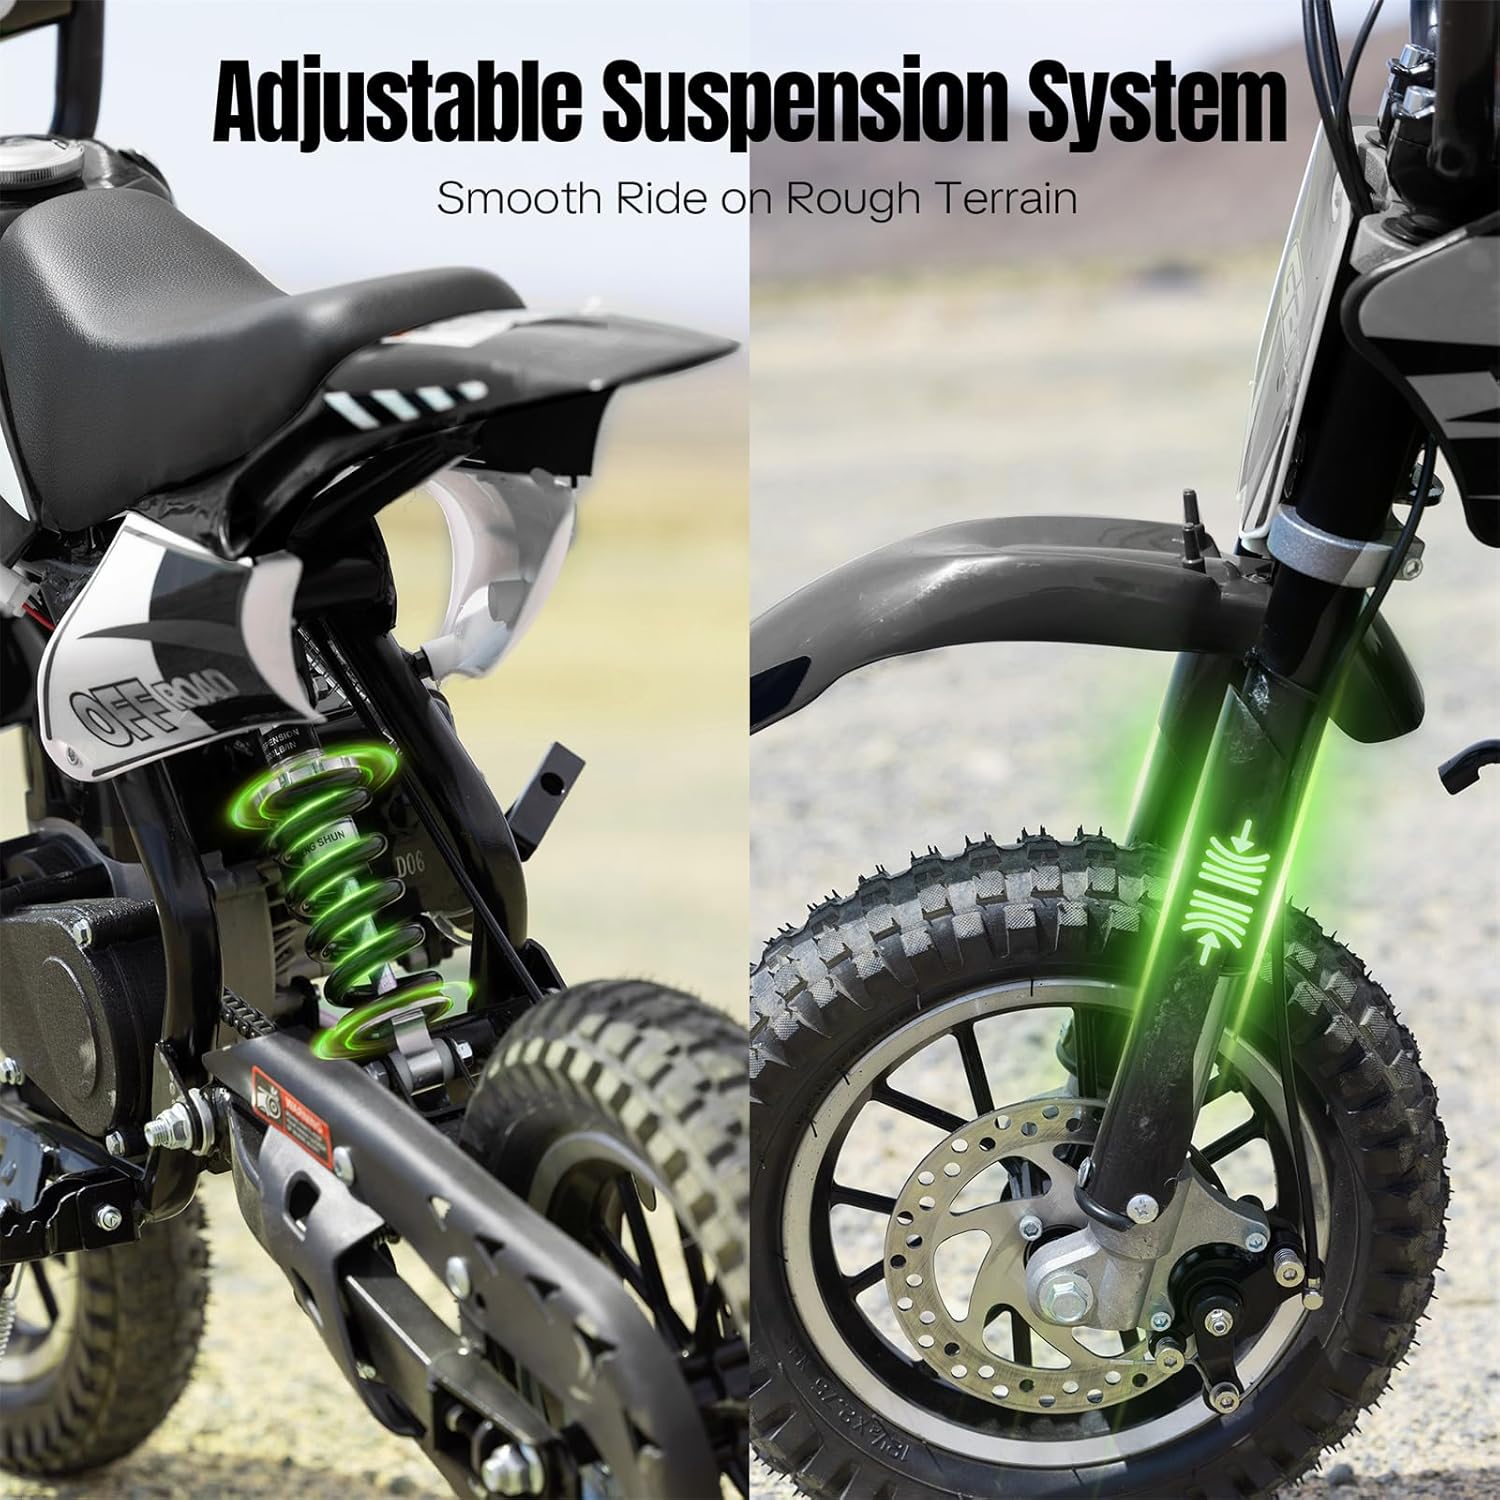
Image 6.1: The adjustable suspension system and pneumatic tires contribute to a smooth ride.
- Chain Lubrication: Lubricate the drive chain regularly to prevent wear and ensure smooth operation.
- Brake Inspection: Regularly inspect brake pads and cables for wear and proper adjustment.
- Spark Plug: Check and clean or replace the spark plug as needed.
- Air Filter: Clean the air filter periodically, especially after riding in dusty conditions.
- Fasteners: Periodically check all nuts and bolts for tightness.
7. Troubleshooting
If you encounter issues, refer to the following common problems and solutions:
- Engine Fails to Start:
- Check fuel level and ensure correct fuel-oil mixture.
- Verify kill switch is in the "Run" position and cable is connected.
- Ensure choke is properly set for starting.
- Check spark plug for fouling or damage.
- Ensure carburetor is primed.
- Loss of Power:
- Check fuel quality and mixture.
- Inspect air filter for blockage.
- Check spark plug.
- Brakes Not Effective:
- Inspect brake pads for wear.
- Check brake cable tension and adjust as necessary.
8. Specifications
| Feature | Specification |
|---|---|
| Model Number | DB001 |
| Engine Type | 49cc 2-Stroke Gas Engine |
| Maximum Speed | Up to 20 Mph (32 km/h) |
| Maximum Load | 160 lbs (72.5 kg) |
| Product Dimensions (L x W x H) | 45" x 13" x 26" (114.3 cm x 33 cm x 66 cm) |
| Net Weight | 40.31 lbs (18.28 kg) |
| Start Mode | Pull Start |
| Tires | Off-Road, Low-Pressure Pneumatic |
| Brakes | Disc Brakes (Front & Rear) |
| Fuel Requirement | 25:1 Gas to 2-Cycle Engine Oil Mixture |

Image 8.1: Key dimensions and maximum load capacity of the HOVER HEART Mini Kids Dirt Bike.
9. Warranty and Support
For warranty information, technical support, or to order replacement parts, please contact HOVER HEART customer service. Refer to your purchase documentation for specific warranty terms and contact details.
Manufacturer: BKAA GROUP CORPORATION


