
GMKtec M3
GMKtec M3 Mini PC User Manual
Model: M3
1. Introduction
Thank you for choosing the GMKtec M3 Mini PC. This compact yet powerful desktop computer is designed for a wide range of applications, from daily office tasks and multimedia consumption to light gaming and professional work. Equipped with an Intel Core i5-12450H processor, ample memory, and high-speed storage, it offers exceptional performance in a small form factor. This manual provides detailed instructions for setting up, operating, maintaining, and troubleshooting your new Mini PC.
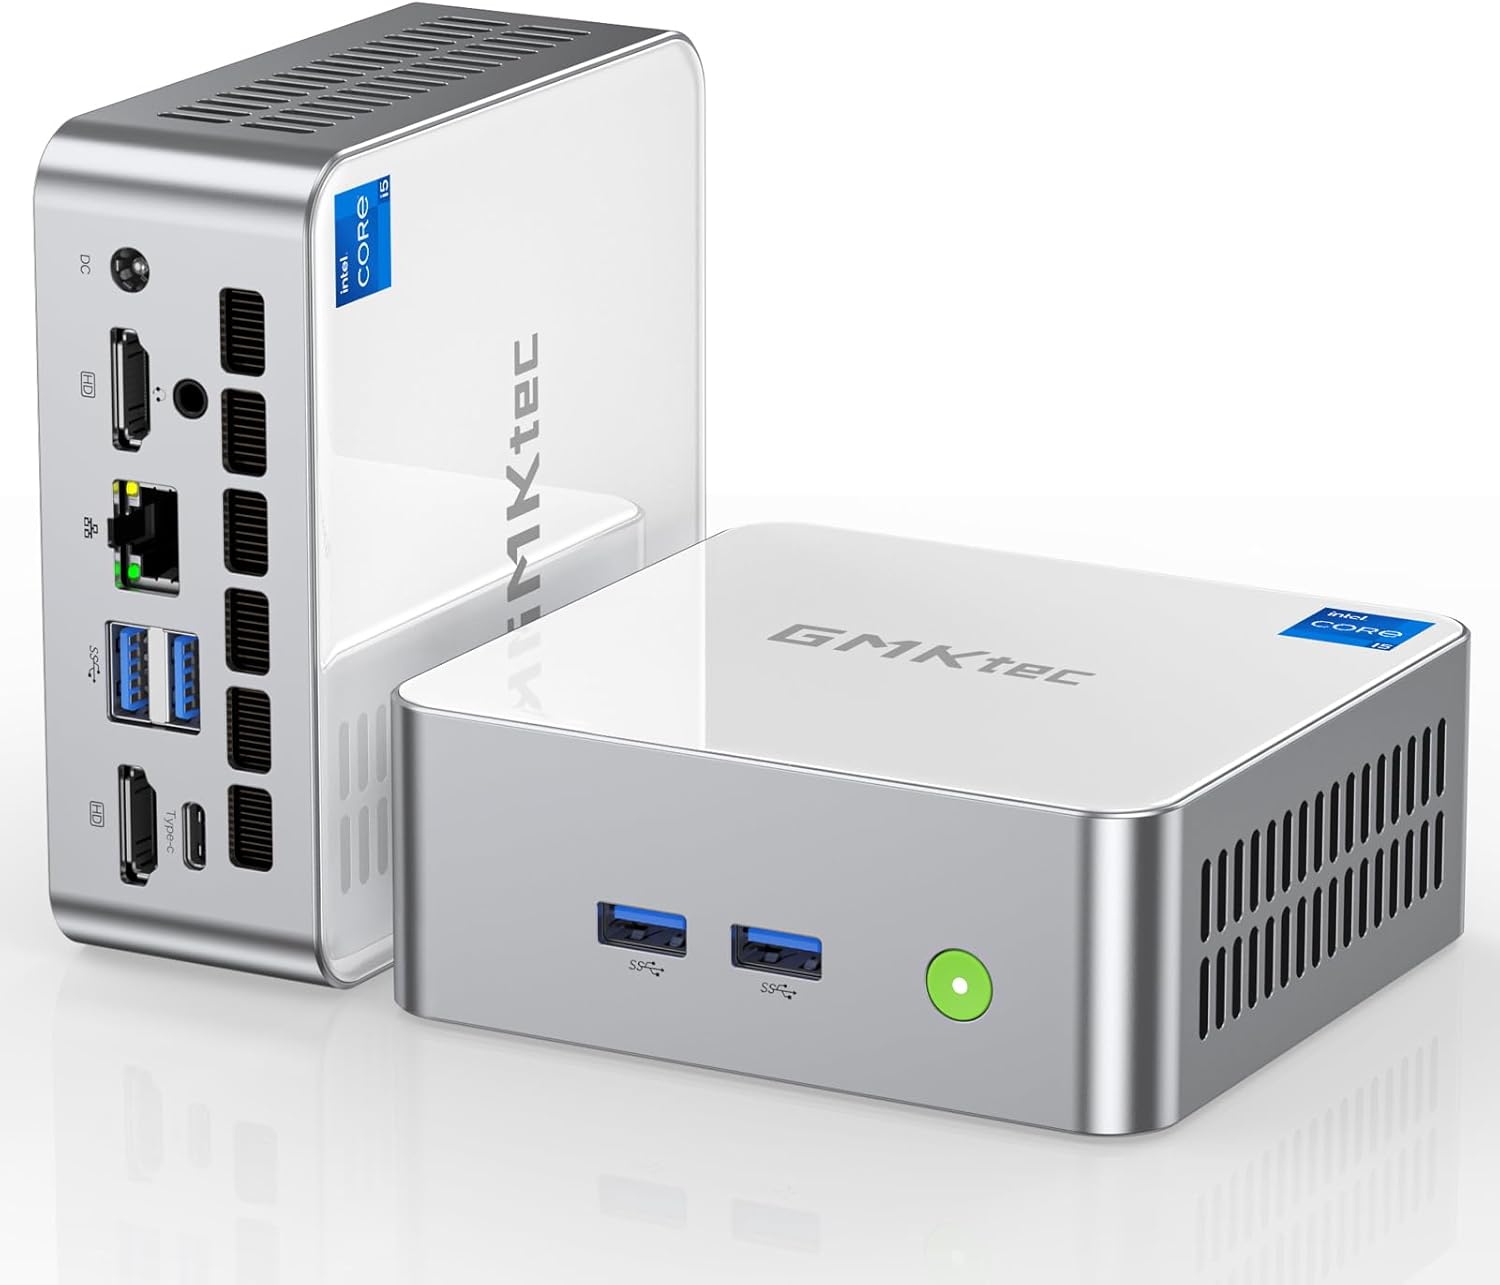
Image: The GMKtec M3 Mini PC, showcasing its compact design and various ports on the front and rear panels.
2. Package Contents
Please verify that all items listed below are included in your package. If any items are missing or damaged, please contact GMKtec support.
- 1 x GMKtec Nucbox M3 Intel Core i5-12450H Mini PC Computer
- 1 x Power Adapter
- 1 x VESA Mount with Screws
- 1 x HDMI Cable
- 1 x User Manual

Image: All components included in the GMKtec M3 Mini PC retail package, including the Mini PC, power adapter, HDMI cable, VESA mount, and user manual.
3. Setup Guide
3.1 Connecting Peripherals
- Connect Display: Use the provided HDMI cable to connect your monitor(s) to the HDMI ports on the rear of the Mini PC. For triple display setup, utilize both HDMI ports and the USB Type-C port (with a compatible adapter/cable).
- Connect Keyboard and Mouse: Plug your USB keyboard and mouse into any available USB 3.2 ports on the front or rear of the Mini PC.
- Connect Network (Optional): For a wired connection, connect an Ethernet cable from your router/modem to the 2.5G RJ45 port on the rear. For wireless, the Mini PC supports Wi-Fi 6.
- Connect Power: Plug the power adapter into the DC IN port on the rear of the Mini PC, then plug the adapter into a power outlet.

Image: A detailed view of the GMKtec M3 Mini PC's front and rear interfaces, highlighting USB 3.2, USB 2.0, Type-C (DP/DATA), HDMI, RJ45 (2.5G), DC port, and audio jack.
3.2 Initial Power On and Windows Setup
After connecting all peripherals and power, press the power button located on the front of the Mini PC. The system will boot up. Follow the on-screen instructions to complete the initial Windows 11 Pro setup, including language, region, network connection, and user account creation.
3.3 VESA Mount Installation
The included VESA mount allows you to attach the Mini PC to the back of a compatible monitor or to a wall, saving desk space. Secure the VESA mount to your monitor's VESA holes using the provided screws, then slide the Mini PC onto the mount until it clicks into place.
4. Operating Instructions
4.1 General Operation
The GMKtec M3 Mini PC runs on Windows 11 Pro, providing a familiar and intuitive user experience. You can use it for various tasks such as web browsing, document editing, media playback, and running demanding applications thanks to its Intel Core i5-12450H processor and 32GB DDR4 RAM.

Image: An infographic detailing the Intel 12th Gen Core i5-12450H processor, rich interface options, Wi-Fi 6, Bluetooth 5.2, and efficient heat dissipation of the GMKtec M3 Mini PC.
4.2 Triple Display Setup
The Mini PC supports up to three independent 4K displays simultaneously. Connect two monitors via the HDMI 2.0 ports and a third via the USB Type-C port (which supports DisplayPort 1.4). This setup is ideal for multitasking, professional design, or immersive entertainment.

Image: The GMKtec M3 Mini PC powering a triple monitor setup, demonstrating its capability for extended display configurations.
4.3 Network and Bluetooth Connectivity
The Mini PC features dual-band Wi-Fi 6 (802.11ax) for fast and stable wireless internet access, and Bluetooth 5.2 for connecting wireless peripherals like headphones, speakers, or game controllers. The 2.5Gbps LAN port provides ultra-fast wired network speeds, significantly improving data transfer rates for demanding applications.

Image: An illustration highlighting the Super Speed Wi-Fi 6 and Bluetooth 5.2 capabilities of the GMKtec M3 Mini PC, showing faster speeds and wider coverage compared to older standards.
5. Maintenance
5.1 Cleaning
To ensure optimal performance and longevity, regularly clean the exterior of the Mini PC with a soft, dry cloth. Avoid using liquid cleaners or abrasive materials. Ensure the cooling vents are free from dust accumulation to maintain proper airflow.
5.2 Software Updates
Keep your Windows operating system and drivers updated to the latest versions. This ensures system stability, security, and optimal performance. Windows Update can be accessed via the Settings menu.
5.3 Storage and RAM Upgrades
The GMKtec M3 Mini PC allows for easy upgrades of its storage and RAM. It comes with a 1TB M.2 2280 NVMe SSD (PCIe 3.0) and supports expansion with an additional M.2 2242 SATA SSD up to 2TB. The 32GB DDR4 RAM (16GB*2) can also be upgraded to a maximum of 64GB (SO-DIMM*2).

Image: An exploded view of the GMKtec M3 Mini PC, illustrating the cooling fan, DDR4 RAM slots, and M.2 SSD slots, highlighting the ease of upgrading components.
6. Troubleshooting
If you encounter issues with your GMKtec M3 Mini PC, please refer to the following common troubleshooting steps:
- No Power: Ensure the power adapter is securely connected to both the Mini PC and a working power outlet. Try a different outlet.
- No Display: Check that the HDMI/Type-C cables are firmly connected to both the Mini PC and the monitor. Ensure the monitor is powered on and set to the correct input source.
- No Internet Connection: For wired connections, check the Ethernet cable and router. For Wi-Fi, ensure Wi-Fi is enabled in Windows settings and you are connected to the correct network with the correct password.
- Slow Performance: Close unnecessary applications. Check for background processes. Ensure sufficient free storage space. Consider updating drivers or performing a system scan for malware.
- Excessive Fan Noise: Ensure the Mini PC's vents are not obstructed. Dust accumulation can cause fans to work harder; refer to the cleaning section.
If the problem persists after attempting these steps, please contact GMKtec customer support for further assistance.
7. Specifications
| Feature | Specification |
|---|---|
| Processor | Intel Core i5-12450H (up to 4.4 GHz, 8 Cores, 12 Threads) |
| RAM | 32GB DDR4 (16GB*2), Dual Channel, 3200MHz (Max 64GB) |
| Storage | 1TB M.2 2280 NVMe SSD (PCIe 3.0), Expandable with M.2 2242 SATA (up to 2TB) |
| Graphics | Intel Iris Xe Graphics G7 96EU GPU |
| Video Output | 2 x HDMI (4K@60Hz), 1 x USB Type-C (4K@60Hz, DisplayPort 1.4) - Triple Display Support |
| Network | 2.5Gbps RJ45 LAN, Wi-Fi 6 (Dual Band 2.4G+5G), Bluetooth 5.2 |
| USB Ports | 4 x USB 3.2, 1 x USB 2.0, 1 x USB Type-C (DP/DATA) |
| Audio | 3.5mm CTIA Audio Jack |
| Operating System | Windows 11 Pro (Compatible with Ubuntu, Linux) |
| Dimensions | 4.48 x 4.17 x 1.67 inches |
| Weight | 2.88 pounds |
8. Warranty and Support
GMKtec provides a One-Year limited warranty and lifetime professional support for the GMKtec M3 Mini PC. For any pre-sale or after-sale inquiries, please do not hesitate to contact us.
8.1 Contacting Support
- Amazon Support: For purchases made on Amazon, you can contact support through your Amazon account. Navigate to "Your Orders," find the product, and select "Ask Product Question."
- Direct After-Sales Support: You can also send an email to the GMKtec After-Sales Team at support@gmktec.com for 24/7 customer support.

Image: Information regarding GMKtec's warranty and support channels, including Amazon contact and direct email support.
Related documentsM3


Ask a question about this manual
Ask about setup, troubleshooting, compatibility, parts, safety, or missing instructions. Manuals+ will review the question and use this page’s manual context to help answer it.