1. Introduction
The ZEEGII WPS3010H is a high-precision, stabilized DC power supply designed for a wide range of applications including laboratory research, electronic repair, production line testing, and DIY projects. It features a clear 4-digit LED display for voltage, current, and power, offering both constant voltage (CV) and constant current (CC) modes with automatic switching. This manual provides essential information for the safe and effective operation of your power supply.

Figure 1: Front view of the ZEEGII WPS3010H DC Power Supply.
2. Safety Instructions
To ensure safe operation and prolong the life of your device, please read and follow these safety instructions carefully:
- Always connect the power supply to a grounded outlet.
- Do not operate the device in wet or damp conditions.
- Ensure proper ventilation; do not block the cooling fan or vents.
- Avoid operating the device in environments with flammable gases or vapors.
- Do not open the casing; there are no user-serviceable parts inside. Refer all servicing to qualified personnel.
- Disconnect power before making or breaking connections to the output terminals.
- Verify the input voltage setting (110V/220V) matches your local power supply before connecting.
- In case of smoke, unusual odors, or abnormal operation, immediately disconnect power and contact support.
3. Product Features
The ZEEGII WPS3010H DC Power Supply offers a range of features for versatile and reliable performance:
- High Precision 4-Digit LED Display: Provides accurate real-time readouts for voltage, current, and power.
- Constant Voltage (C.V.) & Constant Current (C.C.) Modes: Automatic switching between modes based on load conditions.
- Adjustable Output: Output voltage and current can be continuously adjusted from 0 to nominal values using coarse and fine adjustment knobs.
- Comprehensive Protection: Includes Over Voltage Protection (OVP), Over Current Protection (OCP), and Over Temperature Protection (OTP).
- Efficient Cooling: Temperature-controlled fan cooling ensures stable operation and extends product life.
- Dual Voltage Input: Compatible with AC 110V and 220V power sources (user selectable).
- USB & Type-C Charging Ports: Convenient front-panel ports for fast charging compatible devices.
- Compact Design: Small size and light weight for easy portability and benchtop use.

Figure 2: Key features of the DC Power Supply.
4. Setup
- Unpacking: Carefully remove the power supply from its packaging and inspect for any signs of damage. Retain packaging for future transport or storage.
- Power Input Selection: Locate the voltage selector switch on the rear panel (if present) and ensure it is set to match your local AC power supply (110V or 220V).
- Placement: Place the power supply on a stable, level surface, ensuring adequate space around the unit for ventilation. Do not block the air intake or exhaust vents.
- Power Connection: Connect the provided AC power cord to the power input socket on the rear panel of the power supply, then plug the other end into a grounded electrical outlet.
- Output Connections: Before connecting any load, ensure the power supply is OFF. Connect your load to the positive (red) and negative (black) output terminals using appropriate test leads.
5. Operating Instructions
5.1 Front Panel Controls and Indicators
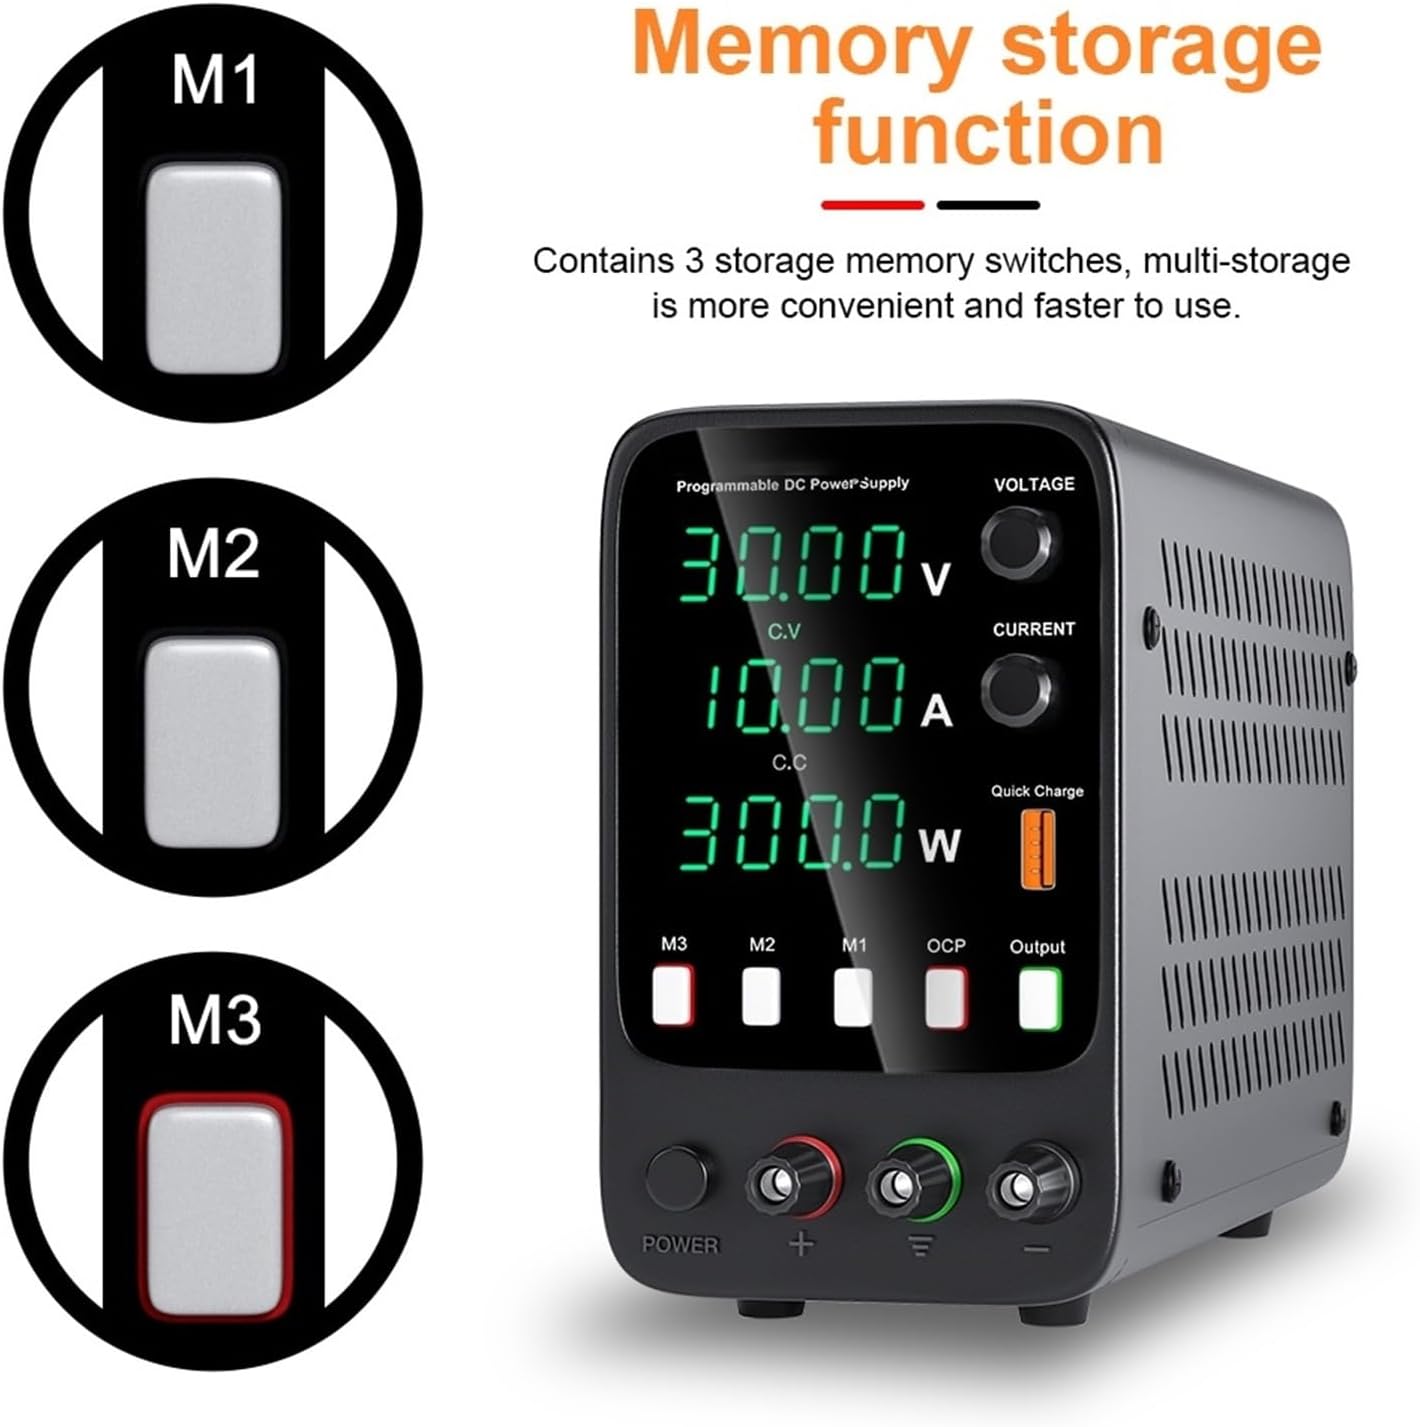
Figure 3: Front panel overview with key controls.

Figure 4: Encoder adjustment for Voltage and Current.
Figure 5: Detailed front panel controls and indicators.
- Power Switch: Turns the unit ON/OFF.
- Voltage Display: Shows the output voltage in Volts (V).
- Current Display: Shows the output current in Amperes (A).
- Power Display: Shows the output power in Watts (W).
- C.V. Indicator: Lights up when the power supply is operating in Constant Voltage mode.
- C.C. Indicator: Lights up when the power supply is operating in Constant Current mode.
- V-COARSE / V-FINE Knobs: Adjust the output voltage. Use COARSE for large changes and FINE for precise adjustments.
- A-COARSE / A-FINE Knobs: Adjust the output current limit. Use COARSE for large changes and FINE for precise adjustments.
- Output Terminals: Red (+) for positive, Black (-) for negative.
- USB-A / USB-C Ports: For charging external devices.
- OCP Indicator: Lights up when Over Current Protection is active.
5.2 Basic Operation
- Power On: Press the power switch to turn on the unit. The LED displays will illuminate.
- Pre-setting Voltage and Current (No Load):
- Ensure no load is connected to the output terminals.
- Adjust the V-COARSE and V-FINE knobs to set the desired output voltage.
- Adjust the A-COARSE and A-FINE knobs to set the desired current limit. Turn the current knobs clockwise to increase the limit.
- Connecting Load: After setting the desired voltage and current limit, turn off the power supply. Connect your load to the output terminals. Ensure correct polarity.
- Applying Power to Load: Turn the power supply ON. The unit will operate in Constant Voltage (CV) mode if the load resistance is high enough, or switch to Constant Current (CC) mode if the load draws current exceeding the set limit.
- Monitoring: Observe the voltage, current, and power displays. The CV or CC indicator will show the current operating mode.
- Adjusting During Operation: You can fine-tune voltage and current during operation using the respective knobs. Be cautious when adjusting current limits with a connected load, as this can affect the voltage supplied to the load.
- Using USB/Type-C Ports: Connect compatible devices to the USB-A or USB-C ports for charging. These ports typically provide a fixed output voltage (e.g., 5V) and current, independent of the main adjustable output.
- Power Off: Disconnect the load first, then press the power switch to turn off the unit.
5.3 Memory Storage Function (Applicable to certain models in the series)
Some models in this series feature a memory storage function, allowing you to save and recall up to three sets of voltage and current settings. If your model has M1, M2, M3 buttons on the front panel, follow these steps:

Figure 6: Memory storage function buttons.
- To Save Settings: Set the desired voltage and current. Press and hold the M1, M2, or M3 button for a few seconds until a confirmation (e.g., a beep or display flash) indicates the settings are saved.
- To Recall Settings: Briefly press the M1, M2, or M3 button corresponding to the saved settings you wish to recall. The power supply will automatically adjust to the stored voltage and current.
6. Maintenance
- Cleaning: Disconnect power before cleaning. Use a soft, dry cloth to wipe the exterior of the unit. Do not use abrasive cleaners or solvents.
- Ventilation: Regularly check that the cooling fan and vents are free from dust and obstructions. Use compressed air to clear dust if necessary.
- Storage: When not in use for extended periods, store the power supply in a cool, dry place, away from direct sunlight and extreme temperatures.
- Calibration: The unit is factory calibrated. If you suspect accuracy issues, contact qualified service personnel for recalibration.
7. Troubleshooting
If you encounter issues with your power supply, refer to the following common problems and solutions:
| Problem | Possible Cause | Solution |
|---|---|---|
| No power when switched ON | Power cord not connected; No power from outlet; Blown fuse. | Check power cord connection; Test outlet with another device; Check and replace fuse (if accessible and safe to do so, otherwise contact support). |
| No output voltage/current | Output terminals not connected; Voltage/current set to zero; OCP activated. | Ensure load is properly connected; Adjust voltage/current knobs; Check for short circuit in load, clear fault, and reset OCP (if applicable). |
| Unstable output | Loose connections; Overheating; Faulty load. | Check all connections; Ensure proper ventilation; Test with a different load. |
| Overheating | Blocked ventilation; Excessive ambient temperature; Prolonged high load. | Clear vents; Operate in a cooler environment; Reduce load or operating time. |
If the problem persists after attempting these solutions, please contact ZEEGII customer support for assistance.
8. Specifications
| Parameter | Value |
|---|---|
| Model | WPS3010H |
| Output Voltage | 0 ~ 30V (Continuously adjustable) |
| Output Current | 0 ~ 10A (Continuously adjustable) |
| Output Power | 300W |
| Input Voltage | AC230V/115V ±10%; 50Hz/60Hz |
| Working Environment Temperature | 0°C to 40°C |
| Working Environment Humidity | <80%RH |
| Storage Environment Temperature | -10°C to 70°C |
| Storage Environment Humidity | <70%RH |
| Voltage Stability (CV) | 0.1% ±3mV |
| Load Stability (CV) | 0.2% ±3mV |
| Ripple Voltage (CV) | 0.5% Vp-p |
| Current Stability (CC) | 0.1% ±3mA |
| Load Stability (CC) | 0.2% ±3mA |
| Ripple Current (CC) | 0.5% Vp-p |
| Recovery Time | 500μS |
| Temperature Coefficient | 100ppm/°C |
| Display Type | LED Digit Display |
| Display Accuracy | 0.5% ±digits |
| Display Resolution (Voltage) | 0.1V / 0.01V |
| Display Resolution (Current) | 0.01A / 0.001A |
| Item Weight | 4.41 pounds (approx. 2 kg) |
9. Warranty and Support
This ZEEGII product is covered by a standard manufacturer's warranty. For specific warranty terms, duration, and conditions, please refer to the documentation included with your purchase or contact ZEEGII customer support directly.
For technical assistance, troubleshooting beyond this manual, or warranty claims, please contact the manufacturer or your authorized dealer. Please have your product model number (WPS3010H) and purchase information ready when contacting support.
Manufacturer: ZEEGII


