1. Introduction and Important Safety Information
Thank you for choosing the Dripex Heavy Duty Inversion Table. This manual provides essential information for the safe assembly, operation, and maintenance of your inversion table. Please read all instructions carefully before use to ensure proper function and to prevent injury.
1.1 General Safety Guidelines
- Consult a physician before using the inversion table, especially if you have pre-existing medical conditions such as heart disease, high blood pressure, glaucoma, or are pregnant.
- Always ensure the inversion table is placed on a flat, stable surface.
- Inspect the equipment for loose parts, damage, or wear before each use. Do not use if any components are compromised.
- Ensure all locking mechanisms, including the ankle holding system and safety belt, are securely fastened before inverting.
- Do not exceed the maximum weight capacity of 300 lbs.
- Adjust the height setting accurately to your body to ensure proper balance and control during inversion.
- Begin with small inversion angles and gradually increase as your body adapts.
- Do not attempt to invert if you feel unwell or dizzy.

Figure 1.1: Multi-Safety Protection Features. This image illustrates the key safety components of the Dripex Inversion Table, including the adjustable safety belt, rear cross bar to prevent dropping, safety pin with chain hanging, and comfortable ankle holders. These features are designed to provide a secure and stable inversion experience.

Figure 1.2: Detailed View of Safety Mechanisms. A closer look at the adjustable safety belt, the safety pin with its chain, and the comfortable ankle holding system, all crucial for user security during inversion.
2. Setup and Assembly
The Dripex Inversion Table is designed for simplified assembly. All necessary tools are typically included. Follow the instructions provided in the separate assembly guide for detailed, step-by-step instructions. Ensure all parts are accounted for and undamaged before beginning assembly.
2.1 Initial Assembly Steps
- Unpack all components and verify against the parts list in your assembly guide.
- Assemble the main frame components, ensuring all bolts are tightened securely.
- Attach the backrest and ankle holding system according to the guide.
- Before first use, perform a balance test without inverting to ensure the table is stable and correctly assembled.
2.2 Folding for Storage
The inversion table features a quick-fold design for convenient storage. To fold, pull out the designated pin, allowing the frame to collapse. This reduces the occupied space significantly.

Figure 2.1: Foldable Design. This image demonstrates how the Dripex Inversion Table can be folded to save space, highlighting the pin mechanism for quick folding.

Figure 2.2: Quick Folding Mechanism. An illustration showing the inversion table in its folded state, emphasizing its compact storage capability.
3. Operating Instructions
Proper adjustment and controlled movement are key to a safe and effective inversion experience.
3.1 Height Adjustment
The inversion table accommodates users from 4'92" to 6'33". Adjust the height setting on the main shaft to match your height. This is crucial for achieving proper balance and smooth inversion. The table features 12 adjustable height options.

Figure 3.1: Height Adjustment Mechanism. This image displays the height adjustment feature, indicating the range from 4.9 ft to 6.33 ft, ensuring suitability for various user heights.
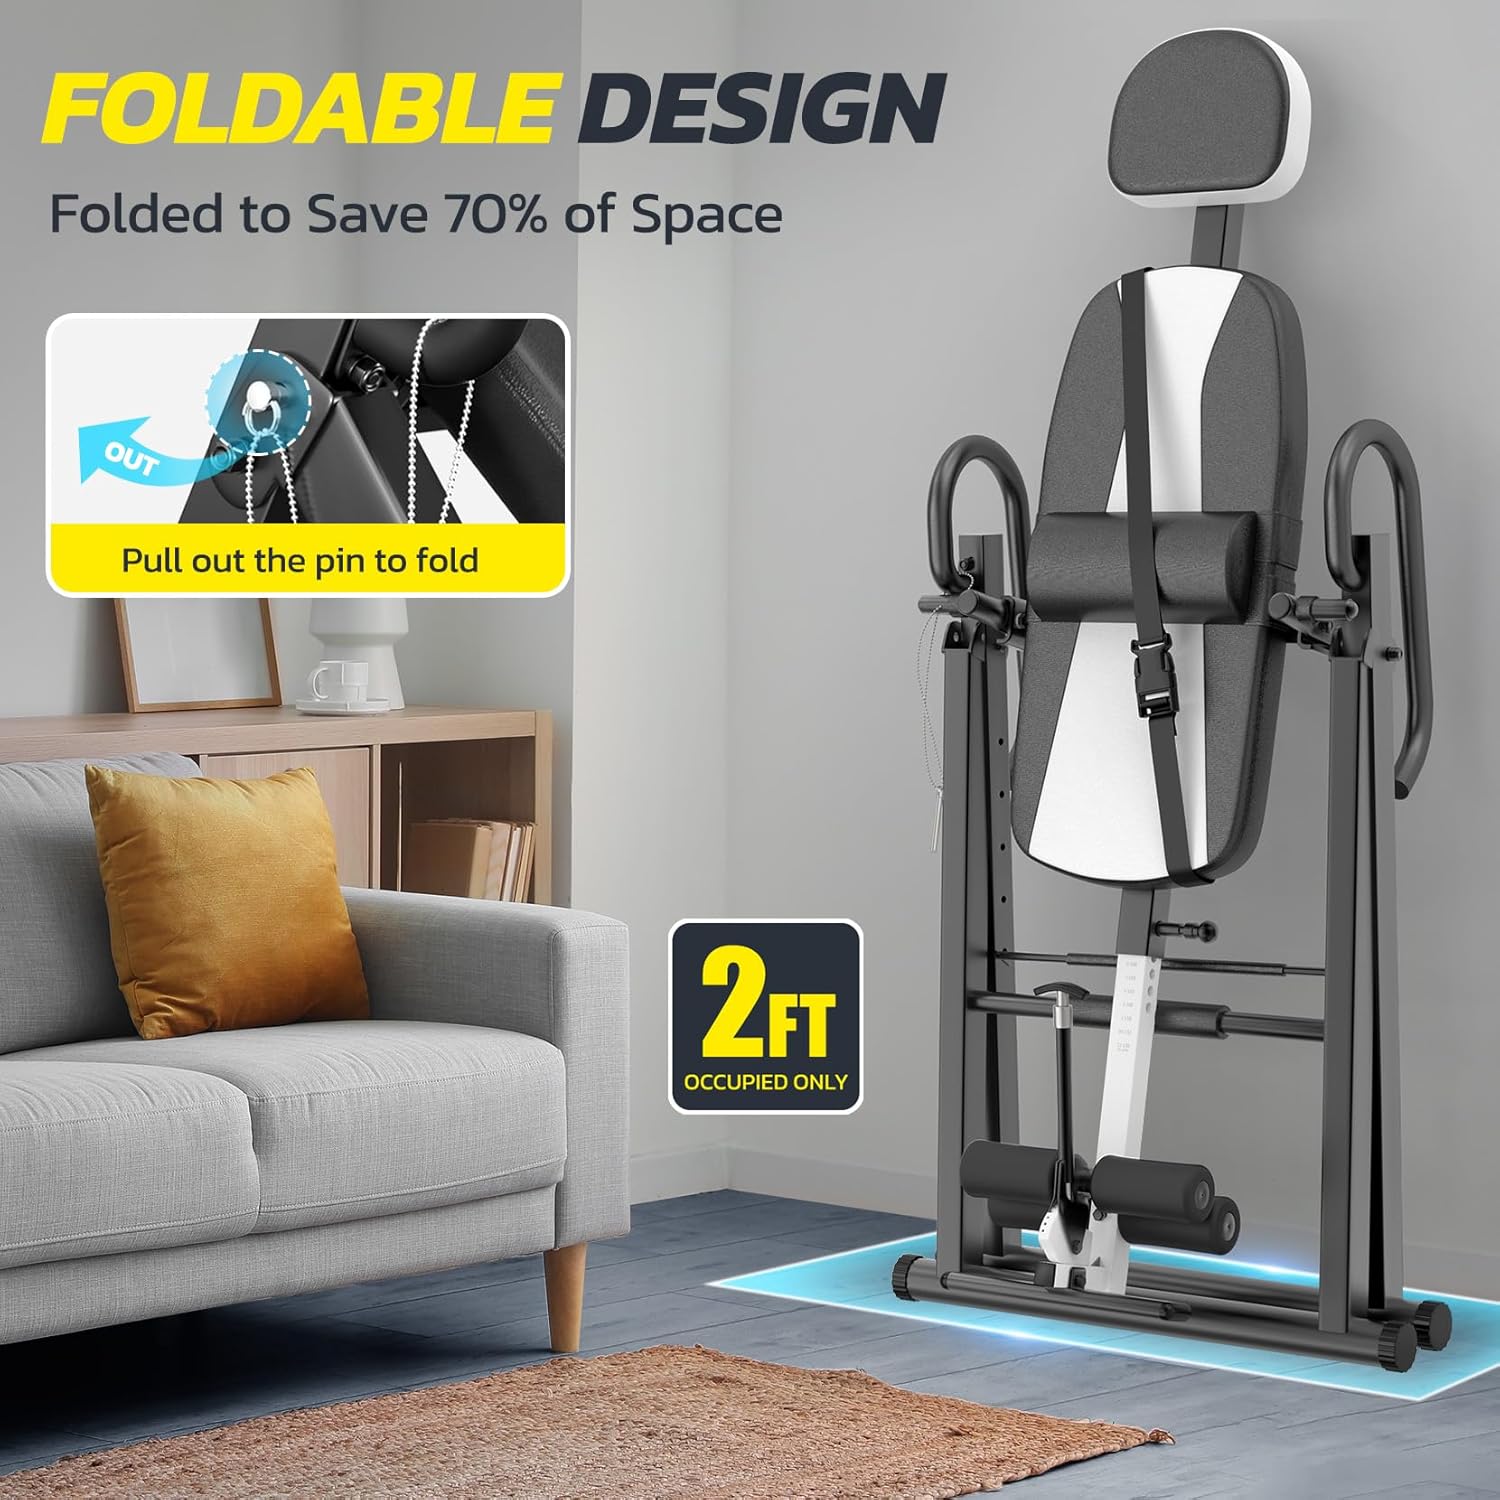
Figure 3.2: Detailed Height Adjustment Tube. A close-up of the height adjustment tube, showing the various settings for precise user height calibration.
3.2 Ankle Holding System and Safety Belt
Secure your ankles firmly in the ankle holding system. Adjust the protective belt around your waist or chest for added security. Ensure both are snug but comfortable.
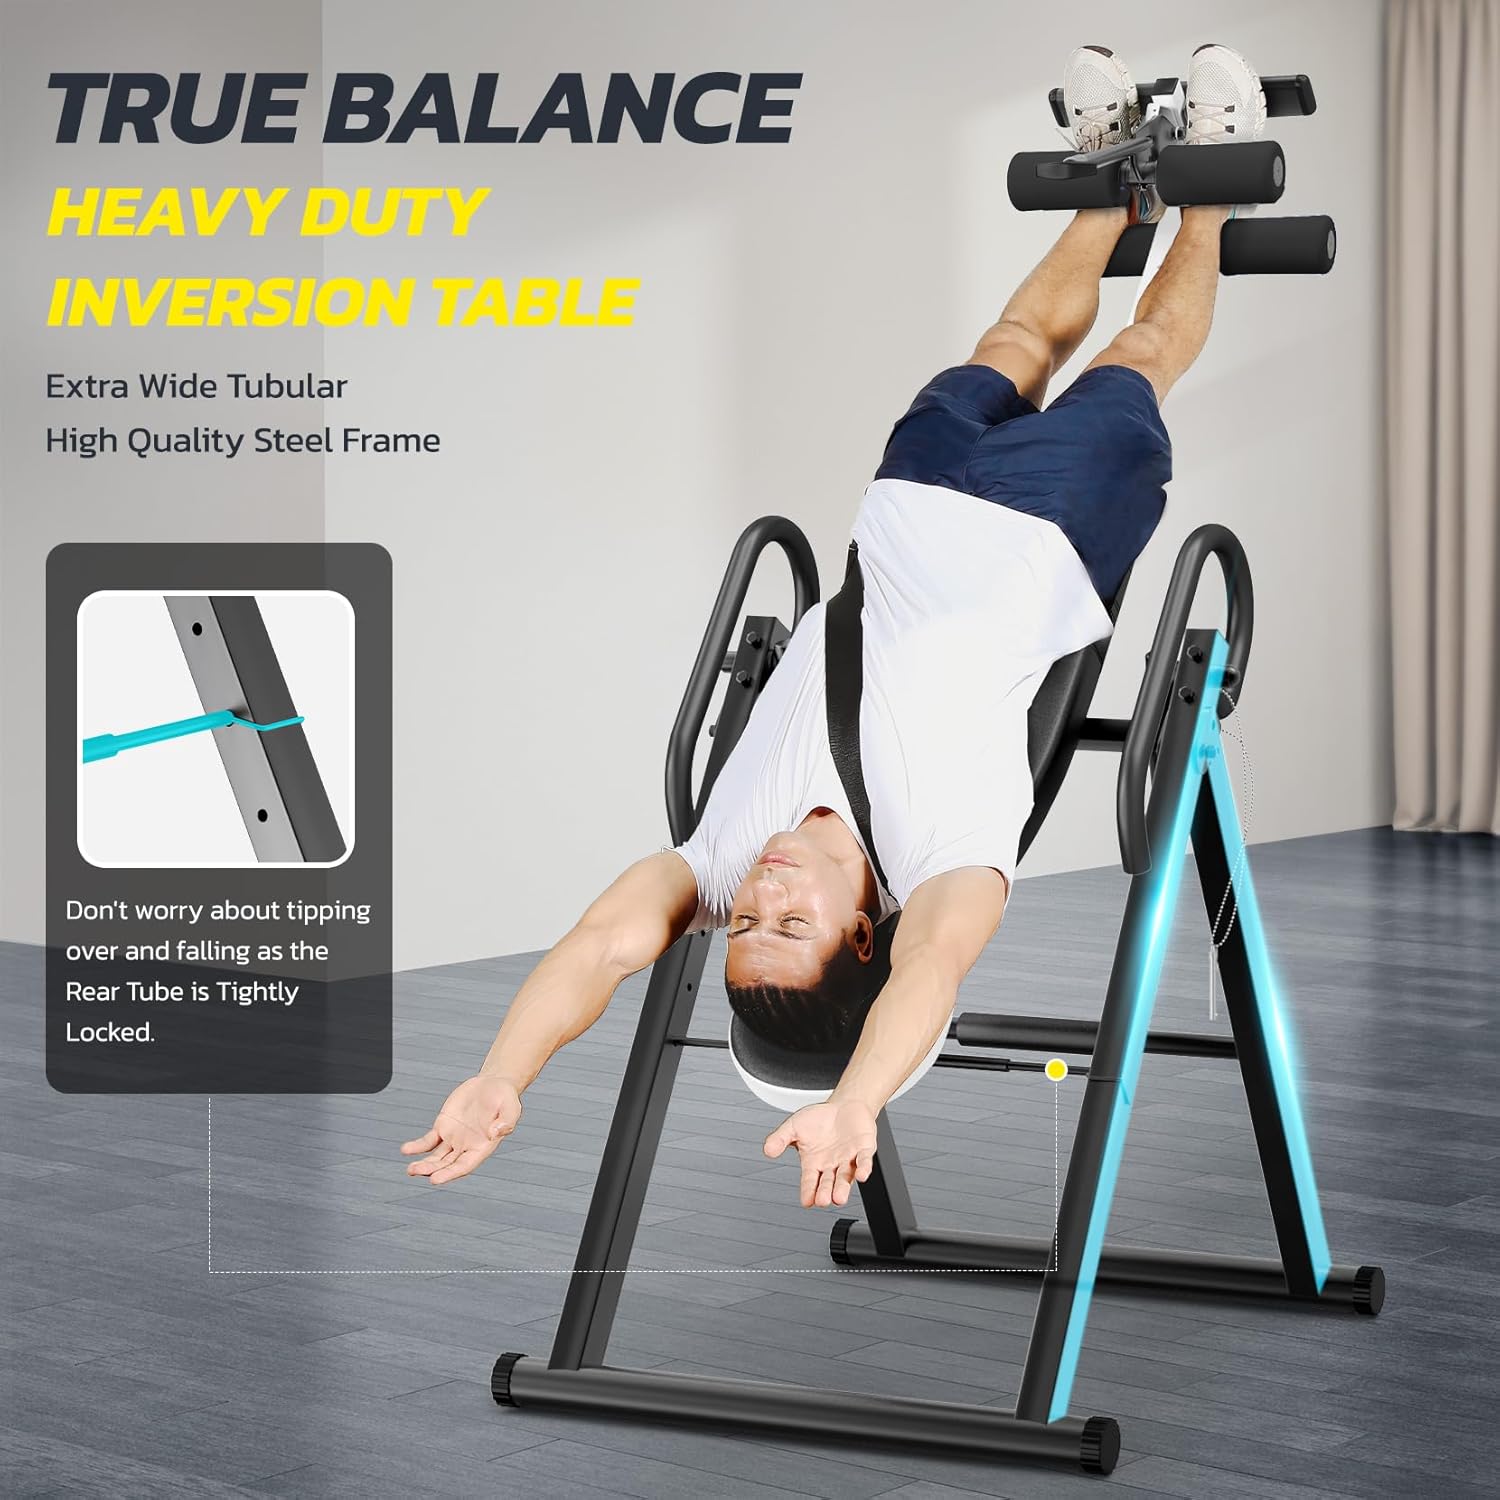
Figure 3.3: True Balance Structure in Use. A user demonstrating inversion, highlighting the table's true balance structure and the secure ankle and body support.
3.3 Inversion Angle Adjustment
The inversion table offers six angle positions, from 0 degrees (flat) to 85 degrees (near full inversion). Use the adjustable rear cross bar to select your desired inversion angle. Start with a shallow angle and gradually increase as you become more comfortable.

Figure 3.4: Six Angle Position Adjustment. This image illustrates the various inversion angles available, from 0° to 85°, allowing users to customize their inversion experience.

Figure 3.5: Angle Adjustment Mechanism. A visual representation of how the inversion angle can be adjusted using the rear cross bar.
4. Maintenance
Regular maintenance ensures the longevity and safe operation of your Dripex Inversion Table.
- Cleaning: Wipe down the frame and backrest with a damp cloth after each use. Avoid abrasive cleaners.
- Inspection: Periodically check all bolts, nuts, and moving parts for tightness and wear. Tighten any loose fasteners.
- Lubrication: Apply a small amount of silicone-based lubricant to pivot points if movement becomes stiff.
- Storage: Store the inversion table in a dry, cool place away from direct sunlight and extreme temperatures. Utilize its foldable design for compact storage.
5. Troubleshooting
If you encounter issues with your inversion table, refer to the following common problems and solutions:
- Table does not balance correctly: Ensure the height adjustment is set precisely to your height. Small adjustments can significantly impact balance. Your center of gravity needs to align with the pivot point.
- Difficulty inverting or returning upright: Re-check your height setting. If the setting is too short for your height, it may be difficult to invert. If it's too tall, returning upright might be challenging. Adjust in small increments.
- Unstable feeling during use: Verify that all assembly bolts are securely tightened. Ensure the table is on a level, non-slip surface. Check for any damaged or bent frame components.
- Ankle discomfort: Ensure the ankle holders are adjusted snugly but not overly tight. Wear appropriate footwear (e.g., athletic shoes) to provide cushioning. If discomfort persists, limit inversion time or consult a physician.
- Missing or damaged parts upon arrival: If any critical safety components, such as the safety bar, are missing or damaged, do not attempt to assemble or use the product. Contact customer support immediately for replacement parts.
6. Specifications
| Feature | Specification |
|---|---|
| Brand | Dripex |
| Model | Heavy Duty Inversion Table |
| Material | Aluminum |
| Weight Capacity | 300 lbs |
| User Height Range | 4'92" to 6'33" |
| Item Dimensions (LxWxH) | 45.28 x 31.1 x 59.84 inches |
| Package Dimensions (LxWxH) | 49.41 x 22.24 x 5.31 inches |
| Package Weight | 25.2 Kilograms |
| Included Components | Inversion Table |

Figure 6.1: Robust and Stable Design. This image highlights the inversion table's robust construction, including its 300 lbs weight capacity, stable triangle structure, and thickened steel tubes, ensuring durability and safety.
7. Warranty Information
The Dripex Heavy Duty Inversion Table comes with a 2-year warranty. This warranty covers manufacturing defects and material flaws under normal use. Please retain your proof of purchase for warranty claims. For specific terms and conditions, refer to the warranty documentation included with your product or contact customer support.
8. Customer Support
For any questions, assistance with assembly, troubleshooting, or warranty claims, please contact Dripex customer support. You can find more information and contact details on the official Dripex store page:


