
1. Product Overview
The Saker Rechargeable Camping Fan (Model SAK) is a versatile, battery-powered device designed for various outdoor and indoor uses. It combines a powerful fan with an integrated LED lantern and can function as a power bank for charging other devices. Its portable design allows for both standing and hanging applications.
Package Contents:
- Saker Rechargeable Camping Fan (Model SAK)
- Remote Control
- USB-C Charging Cable
- User Manual

Image: Saker Rechargeable Camping Fan highlighting its 20000mAh battery, working time, and USB-C charging bank capability.
2. Safety Instructions
- Do not insert fingers or any objects into the fan grille when the fan is operating.
- Keep the fan away from water or other liquids to prevent electric shock.
- Do not disassemble or attempt to repair the fan yourself. Contact customer support for assistance.
- Ensure the fan is placed on a stable surface when standing, or securely hung when suspended.
- Keep out of reach of children.
- Use only the provided charging cable or a certified USB-C cable for charging.
- Avoid exposing the fan to extreme temperatures or direct sunlight for prolonged periods.
3. Product Diagram
Familiarize yourself with the components of your Saker Rechargeable Camping Fan.

Image: Diagram illustrating the fan's control panel, remote control, 270-degree manual rotation, and 45/90-degree automatic oscillation features.
Key Components:
- Fan Grille: Protects the fan blades.
- Fan Blades: Dual-blade design for enhanced airflow.
- LED Light Ring: Provides illumination.
- Control Panel: Buttons for fan speed, light, oscillation, sleep mode, and timer.
- Battery Indicator: Displays remaining power.
- USB-C Input Port: For charging the fan.
- USB-A Output Port: For power bank function.
- Hanging Hook: For suspending the fan.
- Sturdy Base: For stable placement on flat surfaces.
- Remote Control Slot: Located on the side of the base for remote storage.
4. Setup
4.1 Initial Charging
Before first use, fully charge the fan. Connect the provided USB-C charging cable to the fan's USB-C input port and a compatible USB power adapter (not included). The battery indicator lights will show the charging progress. A full charge typically takes 9-10 hours.
4.2 Placement Options
The Saker Camping Fan offers flexible placement:
- Standing: Place the fan on any flat, stable surface using its sturdy base.
- Hanging: Utilize the integrated hook to hang the fan inside a tent, from a canopy, or other suitable structures.
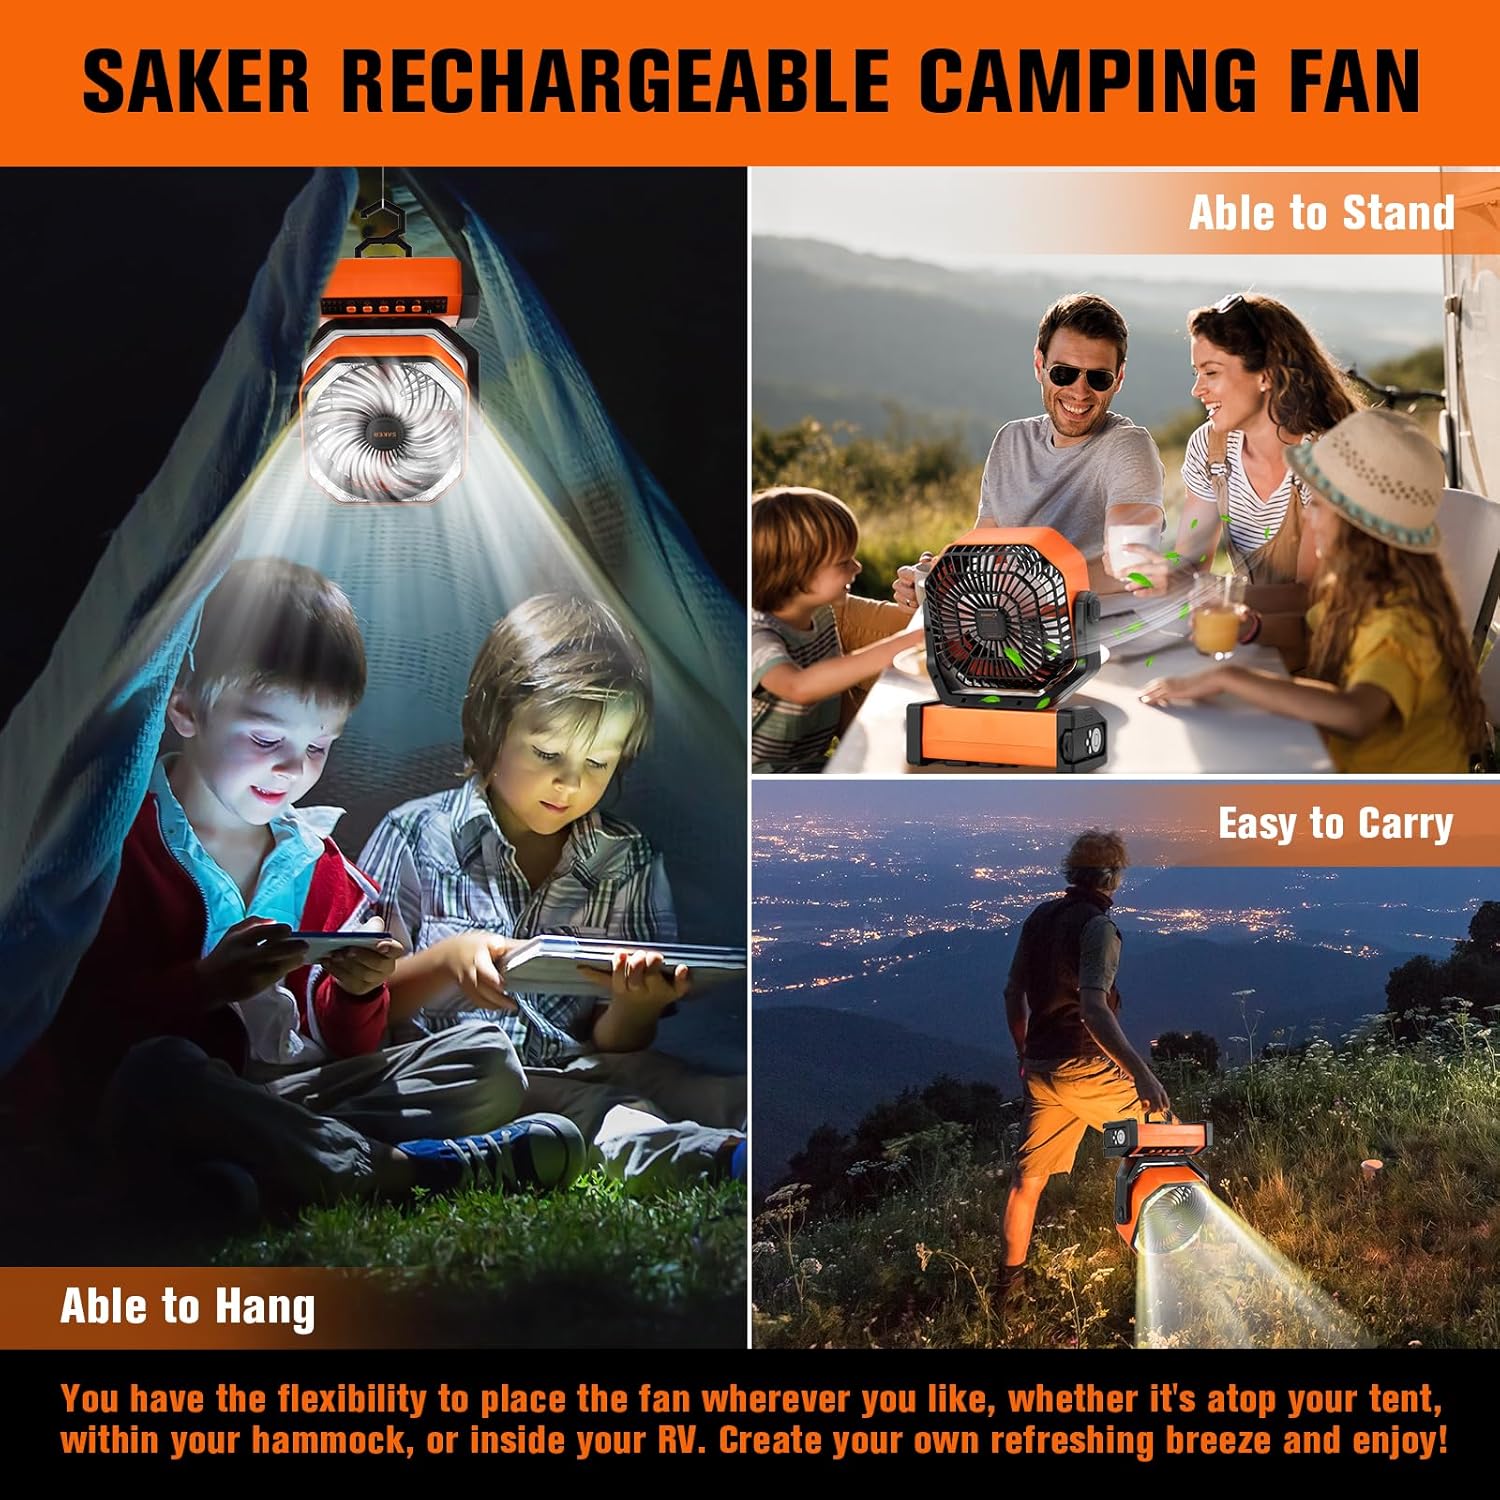
Image: The fan demonstrated in both hanging and standing configurations, suitable for various outdoor environments.
5. Operating Instructions
5.1 Power On/Off
Press the power button on the control panel or the 'OFF' button on the remote control to turn the fan on or off.
5.2 Fan Speed Adjustment
The fan has 4 adjustable speeds. Press the fan speed button on the control panel or the '+' / '-' buttons on the remote to cycle through Natural Wind, Low, Medium, and High speeds.

Image: Visual representation of the four fan speed settings available on the Saker Camping Fan.
5.3 LED Light Adjustment
The integrated LED lantern offers 3 brightness levels. Press the light button on the control panel or the light icon button on the remote to cycle through Low, Mid, and High brightness settings.

Image: The fan's LED light feature demonstrating three distinct brightness levels for various lighting needs.
5.4 Oscillation and Rotation
- Automatic Oscillation: Press the oscillation button on the control panel or the remote to activate automatic horizontal oscillation between 45° and 90°.
- Manual Rotation: The fan head can be manually rotated 270° vertically to direct airflow precisely.
5.5 Sleep Mode
Activate Sleep Mode by pressing the sleep mode button on the remote control. This mode turns off all indicator lights on the fan, ensuring a dark environment for undisturbed sleep.
5.6 Timer Function
Set the fan to operate for a specific duration using the timer function. Press the timer button on the control panel or the remote to select 1, 2, 4, or 8 hours. The fan will automatically turn off after the selected time.

Image: The fan operating in sleep mode, with visual indicators for the 1, 2, 4, and 8-hour timer settings.
5.7 Remote Control Usage
The remote control allows convenient operation from up to 16.4 feet away. It controls fan speed, light brightness, oscillation, sleep mode, and timer settings. When not in use, store the remote in the dedicated slot on the side of the fan's base.
Video: Demonstration of the Saker Camping Fan's features, including fan and LED lantern operation, controlled by the remote.
6. Charging and Power Bank Function
6.1 Charging the Fan
To charge the fan, connect a USB-C cable to the fan's USB-C input port and a power source. The battery indicator lights will illuminate to show the current charge level. All four lights indicate a full charge.
6.2 Using as a Power Bank
The fan features a built-in 20000mAh battery and can serve as a power bank. Connect your device (e.g., smartphone, tablet) to the fan's USB-A or USB-C output port using a compatible charging cable. The fan will then provide power to your device.
Video: Overview of the Saker Rechargeable Camping Fan, demonstrating its charging capabilities and power bank function.
7. Maintenance
- Cleaning: Ensure the fan is turned off and unplugged before cleaning. Use a soft, dry cloth to wipe the exterior. For the fan blades, carefully use a soft brush or compressed air to remove dust. Do not use abrasive cleaners or immerse the fan in water.
- Storage: Store the fan in a cool, dry place away from direct sunlight and extreme temperatures. If storing for an extended period, charge the battery to approximately 50-70% to prolong its lifespan.
8. Troubleshooting
| Problem | Possible Cause | Solution |
|---|---|---|
| Fan does not turn on. | Battery is depleted. | Charge the fan using the USB-C cable. |
| Fan does not oscillate. | Oscillation function not activated. | Press the oscillation button on the control panel or remote. |
| LED light does not turn on. | Light function not activated or battery low. | Press the light button. If battery is low, charge the fan. |
| Remote control is not working. | Remote battery depleted or out of range. | Ensure remote is within 16.4ft. Replace remote battery if necessary. |
| Device not charging from fan (power bank function). | Fan battery low or incorrect cable. | Ensure fan is sufficiently charged. Use a compatible charging cable for your device. |
9. Specifications
| Feature | Detail |
|---|---|
| Brand | Saker |
| Model Number | SAK |
| Battery Capacity | 20000 mAh |
| Working Time | 8.5 - 200 hours (depending on settings) |
| Charging Time | 9-10 hours |
| Fan Speeds | 4 (Natural Wind, Low, Medium, High) |
| LED Brightness Levels | 3 |
| Oscillation | 45° to 90° Automatic Horizontal |
| Rotation | 270° Manual Vertical |
| Air Flow Capacity | Up to 213 m³/h |
| Product Dimensions (D x W x H) | 4.05" x 8.58" x 10.66" |
| Weight | 3.08 lbs |
| Power Source | Battery Powered |
| Input Connector | USB Type-C |
| Output Connectors | USB Type-C, USB Type-A |
| Material | Plastic |
| Control Method | Button Control, Remote Control |
10. Warranty and Support
Saker products are designed for reliability and performance. This product comes with a standard manufacturer's warranty. For specific warranty details, please refer to the warranty card included in your package or visit the official Saker website.
If you encounter any issues or have questions regarding your Saker Rechargeable Camping Fan, please contact our customer support team:
- Email: [Insert Customer Support Email Here]
- Phone: [Insert Customer Support Phone Number Here]
- Website: Saker Official Store
Please have your model number (SAK) and purchase date ready when contacting support.
