
FOAOOD DQ201-B2
FOAOOD 2K Wireless Outdoor Solar Security Camera Instruction Manual
Model: DQ201-B2
1. Introduction
This manual provides detailed instructions for the installation, operation, and maintenance of your FOAOOD 2K Wireless Outdoor Solar Security Camera (Model DQ201-B2). Please read this manual thoroughly before using the product to ensure proper functionality and safety.
The FOAOOD DQ201-B2 is a 2K QHD resolution, 360° Pan-Tilt-Zoom (PTZ) outdoor security camera featuring solar power, color night vision, PIR motion detection, and two-way audio. It is designed for continuous outdoor surveillance with IP66 weather resistance.
2. Package Contents
Verify that all components are present in your package:
- FOAOOD 2K Wireless Outdoor Solar Security Camera (x2)
- Solar Panel (x2)
- Mounting Bracket and Screws
- USB Charging Cable
- User Manual (this document)

Image: Two FOAOOD DQ201-B2 cameras with solar panels, illustrating the main product components.
3. Specifications
| Feature | Detail |
|---|---|
| Model | DQ201-B2 |
| Video Capture Resolution | 3 MP (2K QHD) |
| Connectivity Technology | Wireless (2.4GHz Wi-Fi only) |
| Mounting Type | Wall Mount |
| Special Features | 360° PTZ, 2-Way Audio, Color Night Vision, PIR Motion Detection, IP66 Waterproof |
| Power Source | Solar Powered with Rechargeable Lithium Polymer Battery |
| Operating System Compatibility | Android, iOS |
| Material | Metal |
| Operating Temperature | -20°C to 60°C |
4. Setup Guide
4.1 Initial Charging
Before installation, fully charge the camera using the provided USB cable. Connect the cable to the camera's charging port and a standard 5V USB power adapter (not included). The charging indicator will show the status.
4.2 App Installation and Account Creation
Download the companion mobile application to your smartphone. The app is available for both Android and iOS devices.
- For Android: Download from Google Play Store
- For iOS: Download from Apple App Store
After installation, open the app and follow the on-screen instructions to create a new user account or log in if you already have one.

Image: A smartphone displaying the camera's mobile application, indicating app functionality.
4.3 Camera Pairing with App
- Open the app and select "Add Device" or the '+' icon.
- Choose your camera model or scan the QR code on the camera/packaging.
- Ensure your phone is connected to a 2.4GHz Wi-Fi network. 5GHz Wi-Fi is not supported.
- Follow the app's instructions to connect the camera to your Wi-Fi network. This typically involves scanning a QR code generated by the app with the camera lens.
- Once connected, name your camera and complete the setup.
4.4 Mounting the Camera and Solar Panel
Select a mounting location that provides a clear view of the area you wish to monitor and receives ample direct sunlight for the solar panel. The camera is IP66 waterproof, suitable for outdoor use.
- Positioning: Mount the camera at a height that offers optimal coverage and detection. The solar panel should be positioned to maximize sun exposure throughout the day.
- Drilling: Use the mounting bracket as a template to mark drill holes. Drill pilot holes and insert wall anchors if necessary.
- Secure Mounting: Attach the camera and solar panel mounting brackets securely to the wall or desired surface using the provided screws.
- Connect Solar Panel: Connect the solar panel cable to the camera's charging port.

Image: A FOAOOD camera mounted outdoors, showing its 360-degree rotation capability and remote control via a mobile app.

Image: An outdoor camera installation on a wooden surface, illustrating the solar panel connection for continuous power and 2.4GHz Wi-Fi requirement.
5. Operating Instructions
5.1 Live View and PTZ Control
Open the app and select the desired camera to view the live feed. Use the on-screen controls to pan (horizontal rotation) and tilt (vertical rotation) the camera for a 360° coverage. You can also zoom in on the live feed.
5.2 Two-Way Audio
The camera features a built-in microphone and speaker. Tap the microphone icon in the app to speak through the camera, and listen to audio from the camera's location.

Image: A user interacting with the two-way audio feature on the mobile app, demonstrating communication with someone near the camera.
5.3 Motion Detection and Alerts
The camera uses PIR (Passive Infrared) human detection to minimize false alarms. When motion is detected, the camera can trigger various alerts:
- Mobile Notifications: Receive instant alerts on your smartphone.
- Light Alarm: The camera's built-in light will activate.
- Siren Alarm: The camera will emit an audible siren.
You can customize detection zones, sensitivity levels, and alarm schedules within the app settings.

Image: An illustration of the camera's smart features, including customizable detection zones, scheduling, siren, and sensitivity settings.

Image: A night scene showing the camera's light alarm activated by a detected person, with a notification pop-up on a phone.
5.4 Night Vision Modes
The camera supports both color night vision and infrared night vision for clear monitoring in low-light conditions.
- Color Night Vision: Utilizes built-in spotlights to provide full-color video at night.
- Infrared Night Vision: Uses infrared LEDs for black and white video in complete darkness, conserving power.
You can switch between these modes or set the camera to automatically select the appropriate mode based on ambient light.
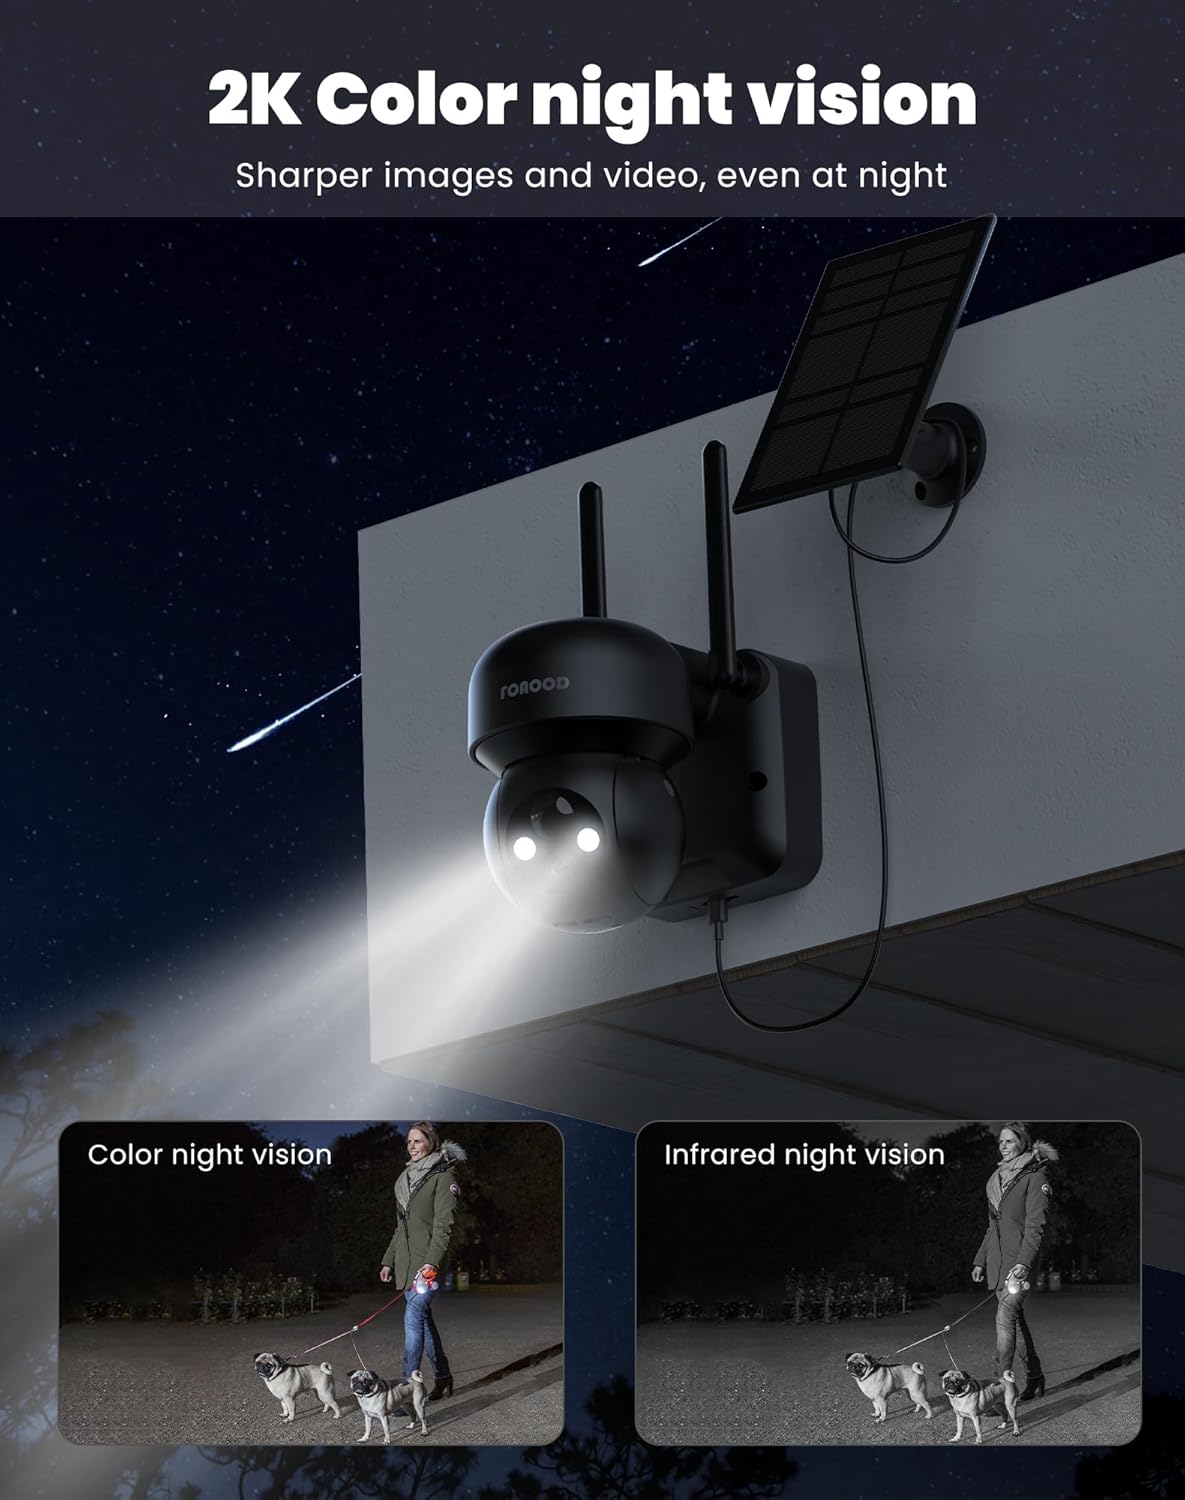
Image: A night view of the camera with its lights on, demonstrating the clarity of color night vision compared to infrared night vision.
5.5 Storage Options
The camera supports local storage via an SD card (not included) and cloud storage (subscription may be required). Recorded footage can be accessed and reviewed through the mobile app.
5.6 Family Sharing
You can share camera access with up to 5 family members or trusted individuals through the app, allowing multiple users to view live feeds and recordings simultaneously.

Image: A graphic depicting the family sharing function, where multiple users can access the camera feed from different locations.
6. Maintenance
- Cleaning: Periodically clean the camera lens and solar panel with a soft, damp cloth to ensure optimal performance. Avoid abrasive cleaners.
- Battery Health: The solar panel is designed to keep the battery charged. In prolonged periods of low sunlight, the camera can operate for 60-90 days on a full charge. If the battery level drops significantly, consider temporarily charging it via USB.
- Firmware Updates: Check the app regularly for firmware updates to ensure your camera has the latest features and security enhancements.
7. Troubleshooting
- Camera not connecting to Wi-Fi:
- Ensure your Wi-Fi network is 2.4GHz. 5GHz networks are not supported.
- Check Wi-Fi signal strength at the camera's location.
- Restart your router and the camera.
- Ensure the camera is within range of your Wi-Fi router.
- Poor image quality:
- Clean the camera lens.
- Check your internet connection speed.
- Ensure there are no obstructions in front of the lens.
- Solar panel not charging:
- Ensure the solar panel is positioned to receive direct sunlight for several hours daily.
- Clean the surface of the solar panel.
- Check the connection cable between the solar panel and the camera.
- Motion detection not working or too many false alarms:
- Adjust the PIR sensitivity settings in the app.
- Configure detection zones to exclude areas with frequent irrelevant motion (e.g., busy roads, swaying trees).
- Ensure the camera lens is clean.
8. Warranty and Support
FOAOOD provides technical support for its products. For any issues not covered in this manual, or for warranty inquiries, please contact FOAOOD customer service.
Contact Email: foaood@520newice.com
Please refer to your purchase documentation for specific warranty terms and conditions.
Related documentsDQ201-B2


Ask a question about this manual
Ask about setup, troubleshooting, compatibility, parts, safety, or missing instructions. Manuals+ will review the question and use this page’s manual context to help answer it.