1. Introduction
Thank you for choosing the Mesqool CR1024 Projection Alarm Clock. This device combines a digital alarm clock with a time projector, displaying time on your wall or ceiling. It also features temperature and humidity monitoring, dual alarms, a night light, and USB charging ports. This manual will guide you through the setup, operation, and maintenance of your new alarm clock.
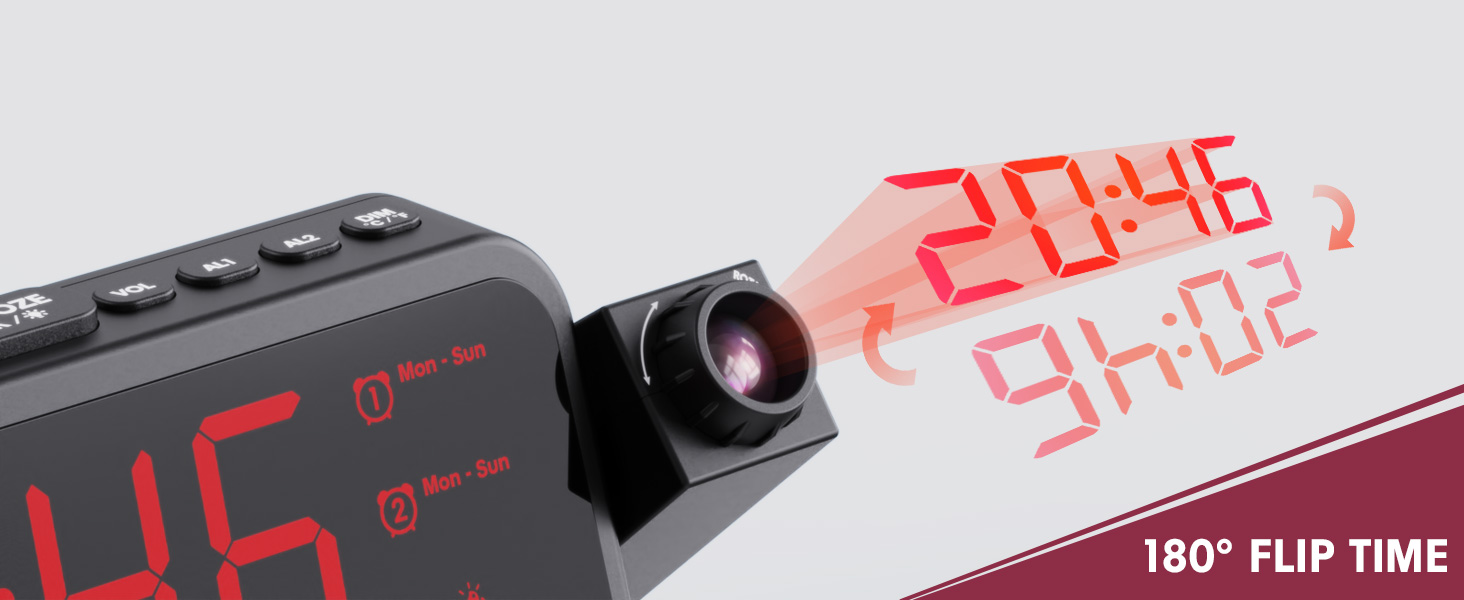
Image 1.1: Mesqool CR1024 Projection Alarm Clock with a smartphone connected for charging.
Key Features:
- 180° Swivel Projection with Adjustable Focus
- Large LED Display with Time, Date, Day, Temperature, and Humidity
- Dual Alarms with Weekday/Weekend/7-Day/One-time Modes
- 9-Minute Snooze Function
- Integrated Soft LED Night Light with Adjustable Brightness
- 7-Level Adjustable Alarm Volume
- 5-Level Display Dimmer
- Memory Function (requires 2x AAA batteries, not included)
- Dual USB Charging Ports (Type-C and USB-A)
2. Setup
2.1 Power Connection
- Connect the provided power adapter to the DC IN port on the back of the alarm clock.
- Plug the power adapter into a standard electrical outlet. The clock display will illuminate.
- For backup power during outages, insert two AAA batteries (not included) into the battery compartment. This will preserve time and alarm settings.
2.2 Initial Time and Date Setting
- Press and hold the TIME SET button to enter time setting mode.
- Use the + or - buttons to adjust the hour. Press TIME SET to confirm.
- Repeat the process to set the minute, year, month, and day.
- Press TIME SET again to exit the setting mode.
2.3 12/24 Hour Format and DST
- To switch between 12-hour and 24-hour time formats, press the 12/24H button.
- To activate or deactivate Daylight Saving Time (DST), press the DST button. An indicator will appear on the display when DST is active.

Image 2.1: The clock displaying time in both 12-hour and 24-hour formats.
3. Operating Instructions
3.1 Setting Alarms
The clock supports two independent alarms (AL1 and AL2).
- Press and hold the AL1 or AL2 button to enter alarm setting mode.
- Use the + or - buttons to adjust the alarm hour. Press the respective alarm button (AL1 or AL2) to confirm.
- Repeat to set the alarm minute.
- After setting the minute, use + or - to select the alarm mode: Mon-Sun, Mon-Fri, Sat-Sun, or One-time.
- Press the alarm button again to confirm and exit.
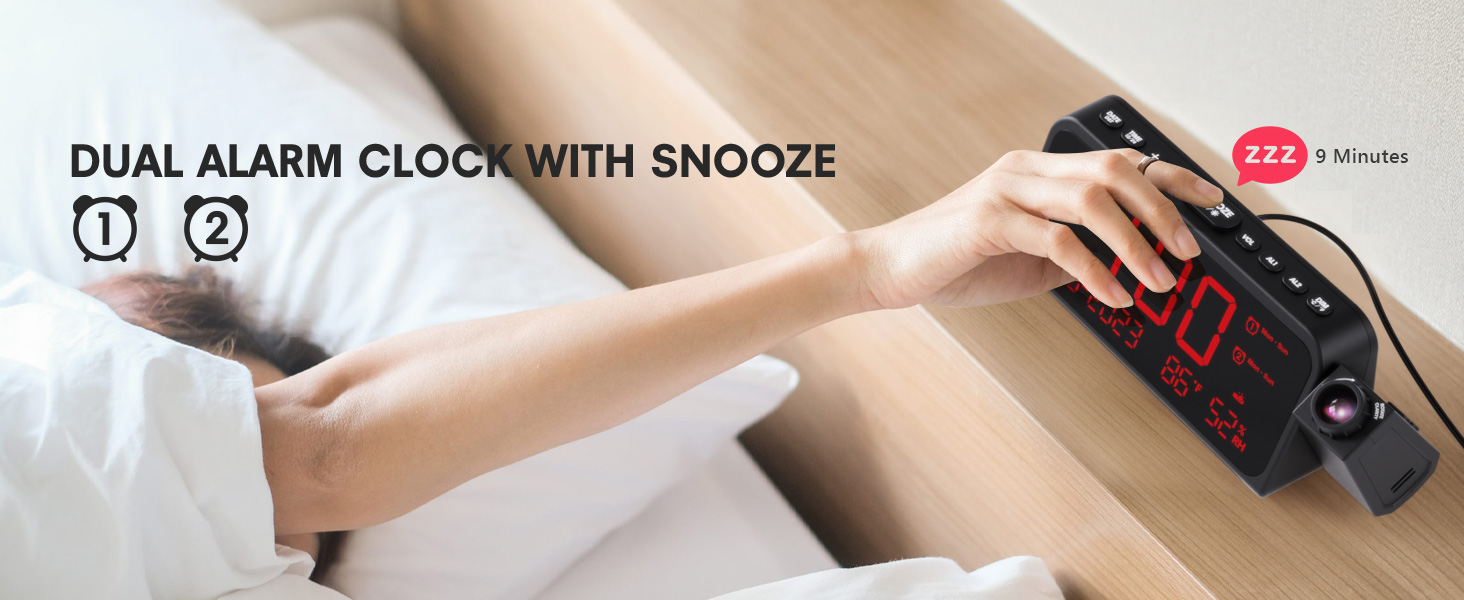
Image 3.1: The clock displaying dual alarm settings and snooze functionality.
3.2 Snooze Function
When an alarm sounds, press the large SNOOZE/OK/* button to activate the snooze function. The alarm will pause for 9 minutes and then sound again.
3.3 Alarm Volume Adjustment
Press the VOL button to cycle through 7 levels of alarm volume. Adjust to your preferred loudness.

Image 3.2: Visual representation of the 4 alarm modes and 7 adjustable volume levels.
3.4 Projection Settings
- Projection ON/OFF: Press the PROJECTION button to turn the projection on or off.
- Projection Brightness: Repeatedly press the PROJECTION button to cycle through 5 brightness levels (Dim, Low, Medium, High, Full).
- Projection Orientation: The projector arm can swivel 180 degrees. Rotate the arm to direct the time display to your desired surface (wall or ceiling).
- Focus Adjustment: Use the focus ring on the projector lens to sharpen the projected image.
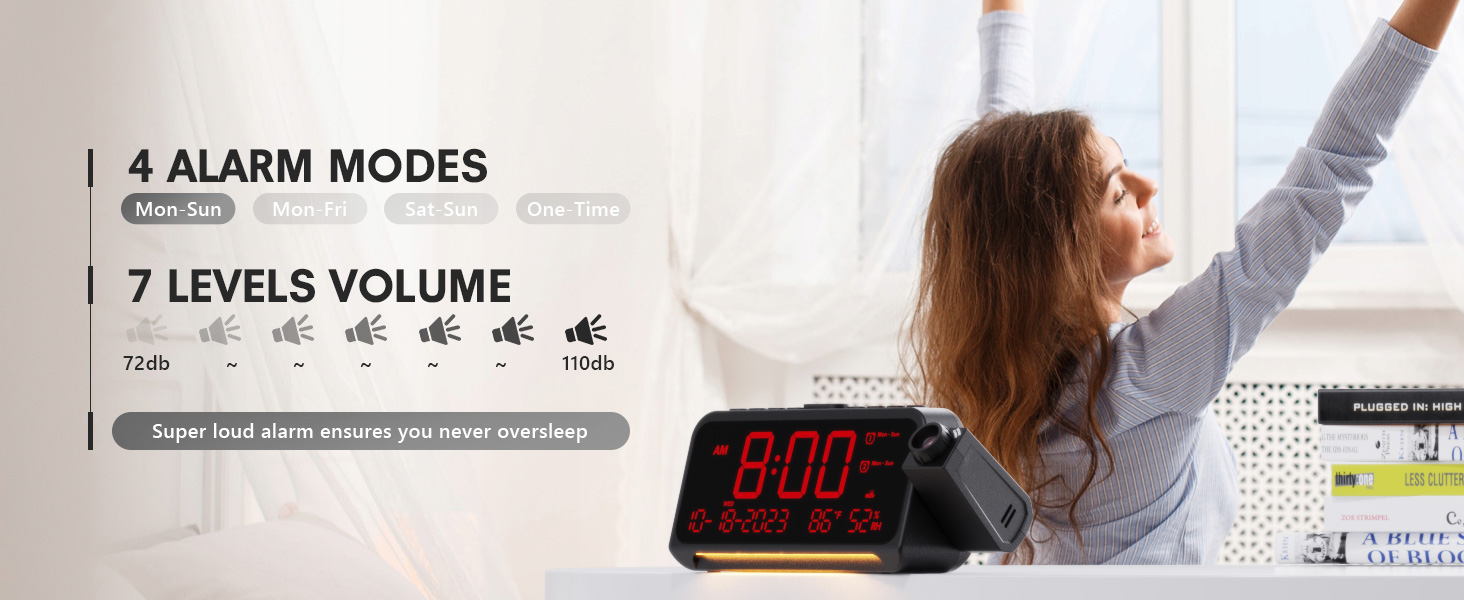
Image 3.3: Detailed view of the projection features, including distance, time flip, rotation, focus, and brightness levels.
3.5 Display Dimmer
Press the DIMMER button to adjust the brightness of the main LED display. There are 5 levels of brightness to choose from, allowing you to customize it for comfort, especially at night.
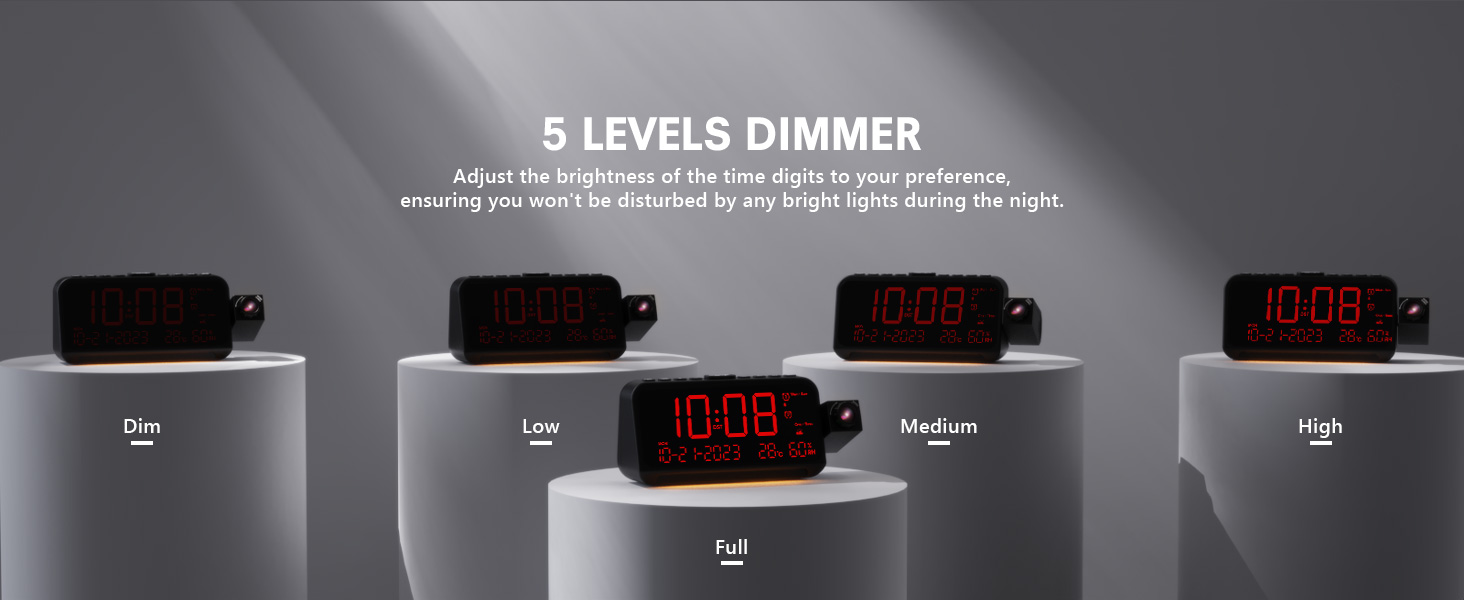
Image 3.4: The clock demonstrating its 5-level adjustable display dimmer.
3.6 Night Light
The clock features a soft LED night light located at the bottom. Press the LIGHT button to cycle through Off, Medium, and Full brightness settings for the night light.
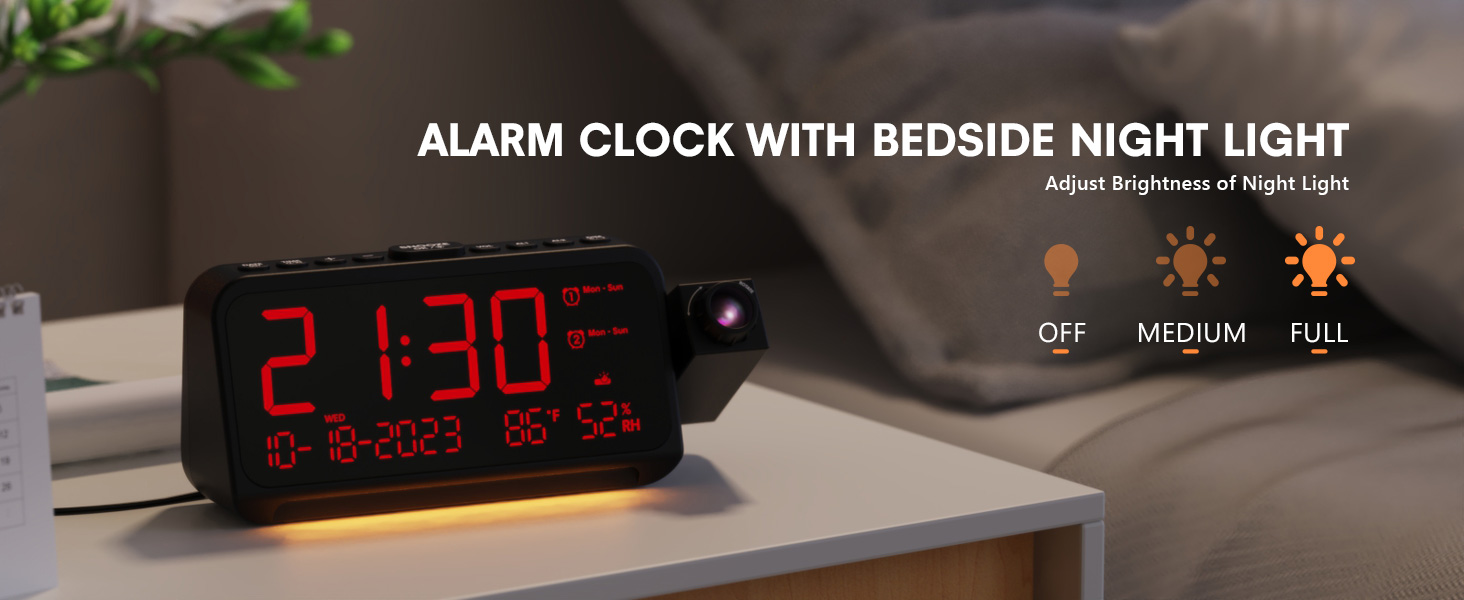
Image 3.5: The clock with its integrated night light, showing different brightness options.
3.7 USB Charging Ports
The clock is equipped with a Type-C and a standard USB-A charging port on the back. You can use these ports to charge your mobile devices while the clock is powered.

Image 3.6: The back of the clock showing the Type-C and USB-A charging ports in use.
4. Maintenance
To ensure the longevity and optimal performance of your Mesqool CR1024 Projection Alarm Clock, follow these maintenance guidelines:
- Cleaning: Wipe the clock's surface with a soft, dry cloth. Avoid using abrasive cleaners, solvents, or chemical sprays, as these can damage the finish or electronic components.
- Environment: Place the clock in a dry environment, away from direct sunlight, extreme temperatures, and high humidity.
- Ventilation: Ensure the ventilation openings are not blocked to prevent overheating.
- Battery Replacement: If using AAA batteries for backup, replace them annually or when the low battery indicator appears to ensure settings are retained during power outages.
5. Troubleshooting
If you encounter issues with your Mesqool CR1024 Projection Alarm Clock, please refer to the following common problems and solutions:
| Problem | Possible Cause | Solution |
|---|---|---|
| Projection is blurry or unclear. | Incorrect focus or projection distance. | Adjust the focus ring on the projector lens. Ensure the clock is within the optimal projection distance (4.92-9.84 ft). |
| Alarm does not sound or is too quiet. | Alarm not activated or volume set too low. | Ensure the alarm is enabled (AL1/AL2 indicator on display). Press the VOL button to increase the alarm volume. |
| Display is too bright or too dim. | Display dimmer setting is not optimal. | Press the DIMMER button to cycle through the 5 brightness levels. |
| Time/settings reset after power outage. | No backup batteries or batteries are depleted. | Install two fresh AAA batteries (not included) in the battery compartment for memory backup. |
| Cannot change time format from 24-hour to 12-hour. | Incorrect button press or temporary glitch. | Press the 12/24H button. If the issue persists, try unplugging the clock for a few minutes and then reconnecting power. |
6. Specifications
| Feature | Detail |
|---|---|
| Brand | Mesqool |
| Model Number | CR1024 |
| Display Type | Digital LED |
| Power Source | Corded Electric |
| Battery Backup | 2x AAA batteries (not included) |
| Product Dimensions | 7.87"W x 3.4"H (7.87x2.36x3.43 inch) |
| Item Weight | 12 ounces (0.34 Kilograms) |
| Material | Acrylonitrile Butadiene Styrene (ABS) |
| Special Features | Projection, Dual Alarms, Snooze, Night Light, Temperature, Humidity, Calendar, DST, USB Charging |

Image 6.1: Dimensions of the Mesqool CR1024 Projection Alarm Clock.
7. Warranty and Support
7.1 Warranty Information
This Mesqool CR1024 Projection Alarm Clock comes with a 24-month warranty from the date of purchase. Mesqool also provides lifetime support for this product. Please retain your proof of purchase for warranty claims.
7.2 Customer Support
For any questions, technical assistance, or warranty inquiries, please contact Mesqool customer support through the retailer where you purchased the product or refer to the official Mesqool website for contact information.


