
TEmkin B0CCDNWJB3
TEmkin Robotic Vacuum Cleaner User Manual
Model: B0CCDNWJB3
1. Introduction
Thank you for choosing the TEmkin Robotic Vacuum Cleaner. This intelligent device is designed to provide efficient and convenient cleaning for your home, supporting sweeping, vacuuming, and mopping functions. It features intelligent navigation, automatic recharging, and advanced safety sensors to protect your furniture and ensure thorough cleaning.
Please read this manual carefully before using the product to ensure proper operation, maintenance, and to maximize its lifespan.
2. Package Contents
Verify that all items listed below are included in your package:
- Robot vacuum cleaner ×1
- Charger ×1
- Remote control ×1
- Dust box ×1
- Battery ×1
- Filter ×1
- Charging base ×1
- Rag ×1
- Side brush ×1
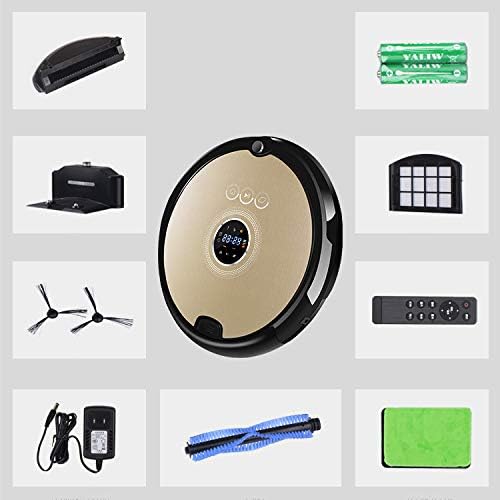
Image: Overview of the TEmkin Robotic Vacuum Cleaner and its included accessories, such as the remote control, charging base, and various cleaning components.
3. Product Features
- 2-in-1 Vacuuming and Mopping: Equipped with a large dust container, the robotic vacuum cleaner can sweep and mop simultaneously, offering up to 120 minutes of cleaning time and covering a 150m² area.
- Auto Charging: The robot vacuum automatically seeks its charging base when cleaning is complete or the battery is low, ensuring it is always ready for the next cleaning cycle.
- Anti-falling & Obstacle Detection: Infrared capture technology allows the robotic vacuum cleaner to detect stairs and obstacles, re-planning its route to avoid collisions and falls, thereby protecting furniture.
- Low Noise Operation: An advanced motor significantly reduces vacuuming noise, allowing for a quiet environment during operation.
- Efficient Filtering: The dual-layer filtration system, including a primary filter and an original HEPA premium filter, effectively removes fine dust particles and allergens, improving air quality. The 500ml dustbox is easily emptied.

Image: Visual representation of the robot vacuum's intelligent anti-collision system, which uses infrared rays to detect obstacles, and its automatic escape system, which activates if the robot gets stuck.

Image: Illustration of the robot vacuum's smart recharge system, showing it automatically returning to its base when power is low, and its intelligent anti-drop sensors detecting stairs.

Image: Depiction of the robot vacuum's high-efficiency filtration system, highlighting the primary filter for larger particles and the HEPA filter for fine dust.
4. Setup
4.1 Charging Base Placement
Place the charging base against a wall in an open, uncluttered area. Ensure there are no obstacles within 1 meter (3 feet) to the front and 0.5 meters (1.5 feet) to the sides of the charging base. Connect the charger to the charging base and plug it into a power outlet.
4.2 Initial Charging
Before first use, fully charge the robot vacuum. Place the robot onto the charging base, ensuring the charging contacts align. The indicator lights on the robot will show charging status. A full charge typically takes 180-240 minutes.
4.3 Side Brush Installation
Attach the side brushes by pressing them firmly into their designated slots on the bottom of the robot until they click into place.
4.4 Dust Box and Mopping Rag Preparation
Ensure the dust box is properly inserted. If using the mopping function, dampen the mopping rag and attach it to the designated area on the robot.
5. Operating Instructions
5.1 Power On/Off
Press and hold the power button on the robot for a few seconds to turn it on or off. The robot will emit a sound indicating its status.
5.2 Starting a Cleaning Cycle
Press the "Clean" button on the robot or the remote control to start an automatic cleaning cycle. The robot will intelligently plan its route.
5.3 Cleaning Modes
The robot supports various cleaning modes, selectable via the remote control:
- Automatic Cleaning: The robot plans its route for general cleaning.
- Key Cleaning: Focuses on a specific area.
- Circular Cleaning: Cleans in a spiral pattern, ideal for concentrated dirt.
- Rectangular Cleaning: Cleans along edges and corners.
5.4 Auto-Recharge Function
When the battery level is low (below 10%) or a cleaning cycle is complete, the robot will automatically return to its charging base. Ensure the charging base is powered on and accessible.
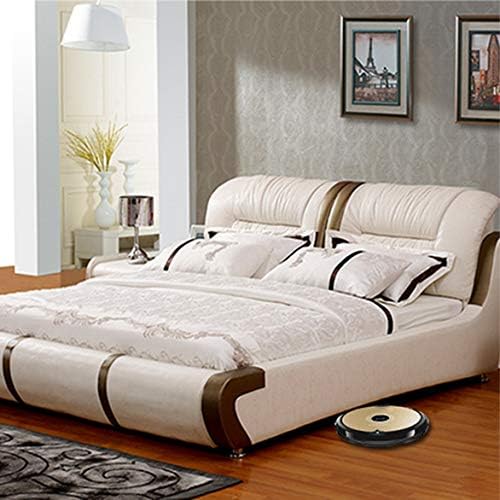
Image: The TEmkin Robotic Vacuum Cleaner operating under a bed, demonstrating its ability to clean hard-to-reach areas.

Image: The TEmkin Robotic Vacuum Cleaner operating quietly in a living space, allowing a user to work undisturbed.
6. Maintenance
Regular maintenance ensures optimal performance and extends the lifespan of your robot vacuum.
6.1 Emptying the Dust Box
Empty the 500ml dust box after each cleaning cycle or when full. Press the release button to remove the dust box, open it, and discard the debris. Rinse the dust box with water if necessary, and allow it to air dry completely before reinserting.
6.2 Cleaning/Replacing Filters
Remove the primary filter and HEPA filter from the dust box. Tap them gently to remove loose dirt. For thorough cleaning, rinse the primary filter with water. The HEPA filter should not be washed; tap it clean. Replace filters every 3-6 months, or more frequently depending on usage.
6.3 Cleaning Brushes
Regularly check and clean the main brush and side brushes. Use the cleaning tool provided to remove hair and debris tangled around the brushes. If side brushes are worn or damaged, replace them.
6.4 Cleaning Sensors and Charging Contacts
Wipe the anti-drop sensors, anti-collision sensors, and charging contacts on both the robot and the charging base with a clean, dry cloth. This ensures proper navigation and charging.
7. Troubleshooting
| Problem | Possible Cause | Solution |
|---|---|---|
| Robot does not power on. | Low battery; power button not pressed long enough. | Charge the robot fully; press and hold the power button for 3-5 seconds. |
| Robot does not charge. | Charging contacts are dirty; charging base not powered; robot not aligned. | Clean charging contacts; ensure charging base is plugged in; reposition robot on base. |
| Robot gets stuck frequently. | Too many obstacles; sensors are dirty. | Clear the cleaning area of cables, rugs, and small objects; clean all sensors. |
| Poor cleaning performance. | Dust box full; filters clogged; brushes tangled. | Empty dust box; clean/replace filters; clean main and side brushes. |
| Robot does not return to charging base. | Charging base is blocked or not powered; robot is too far. | Ensure charging base is accessible and powered; manually place robot near base. |
8. Specifications
| Parameter | Value |
|---|---|
| Size | 350mm x 350mm x 78mm |
| Cleaning Area | 150-180m² |
| Cleaning Time | 120-150 minutes |
| Charging Type | Automatic charging / Direct line charging |
| Charging Time | 180-240 minutes |
| Dust Box Capacity | 500ml |
| Appointment Function | 24 hours a day |
| Noise Level | <50dB |
| Remote Control Range | 8 meters |
| Battery Capacity | 2000mAh |
| Net Weight | 2.5kg |
| Power Source | Battery Powered |
| Lithium Battery Voltage | 3.7 Volts |
| Filter Type | Cartridge, Foam, Cloth (Primary, HEPA) |
| Form Factor | Robotic |
| Country of Origin | China |
9. Warranty and Support
TEmkin products are manufactured to high-quality standards. For information regarding warranty coverage, please refer to the warranty card included with your product or visit the official TEmkin website. Keep your purchase receipt as proof of purchase.
For technical support, troubleshooting assistance, or spare parts, please contact TEmkin customer service. Contact details can typically be found on the product packaging or the official brand website.
Website: TEmkin Official Amazon Store
Ask a question about this manual
Ask about setup, troubleshooting, compatibility, parts, safety, or missing instructions. Manuals+ will review the question and use this page’s manual context to help answer it.