
1. Setup
Before first use, please read all instructions carefully. Keep this manual for future reference.
1.1 Unpacking
- Remove all packaging materials, stickers, and labels from the toaster.
- Check that all parts are present and undamaged.
1.2 Placement
- Place the toaster on a stable, flat, heat-resistant surface.
- Ensure adequate ventilation around the toaster. Do not place it near curtains, walls, or under cabinets.
- Keep the toaster away from water or other liquids.
1.3 Initial Cleaning
- Wipe the exterior of the toaster with a damp cloth.
- Ensure the crumb trays are empty and properly inserted.
- For the first use, operate the toaster without bread on the highest setting (Level 6) in a well-ventilated area to burn off any manufacturing residues. A slight odor or smoke may be present; this is normal.
2. Operating Instructions
This KITCHMIX toaster features dual independent control panels, allowing you to toast different items simultaneously with separate settings.
2.1 Controls Overview
- Browning Control Dials (1-6): Adjust the desired toast shade from light (1) to dark (6).
- Toast Levers: Push down to start the toasting cycle.
- CANCEL Button: Stops the toasting cycle at any time.
- BAGEL Button: Toasts the cut side of bagels while gently warming the other side.
- DEFROST Button: Defrosts and toasts frozen bread.
- REHEAT Button: Warms previously toasted items without further browning.

Image: Toaster control panel with browning dials and function buttons for Cancel, Bagel, and Defrost/Reheat.
2.2 Toasting Bread
- Insert up to four slices of bread into the 1.5-inch wide slots.
- Select your desired browning level using the browning control dial (1-6). Start with a medium setting (e.g., 3 or 4) and adjust as needed.
- Press the toast lever down until it locks into place. The indicator light for the selected function (if any) will illuminate.
- The toaster will automatically raise the toast when the cycle is complete.

Image: Visual guide demonstrating the steps for toasting: insert bread, press lever, set shade knob, and automatic pop-up.
2.3 Using Special Functions (Bagel, Defrost, Reheat)
- Bagel: Insert bagels with the cut side facing inwards. Select your browning level, then press the toast lever down and press the BAGEL button.
- Defrost: Insert frozen bread. Select your browning level, then press the toast lever down and press the DEFROST button. This cycle will automatically adjust the toasting time.
- Reheat: Insert previously toasted items. Select a low browning level (e.g., 1 or 2), then press the toast lever down and press the REHEAT button. This function warms without additional browning.

Image: Illustration of 6 browning levels and their approximate toasting times, from Level 1 (70s) to Level 6 (210s).
3. Maintenance and Cleaning
Regular cleaning ensures optimal performance and extends the life of your toaster.
3.1 Crumb Tray Cleaning
- Always unplug the toaster and allow it to cool completely before cleaning.
- Locate the two removable crumb trays at the back of the toaster.
- Pull out the crumb trays to remove accumulated crumbs.
- Discard crumbs and wipe the trays with a damp cloth. Dry thoroughly before reinserting.
- Push the crumb trays back into place until they click securely.

Image: The toaster with its two slide-out crumb trays partially removed, illustrating the easy cleaning feature.
3.2 Exterior Cleaning
- Wipe the exterior of the toaster with a soft, damp cloth. Do not use abrasive cleaners or scouring pads, as they may scratch the surface.
- Never immerse the toaster in water or any other liquid.
4. Troubleshooting
If you encounter issues with your toaster, refer to the following common problems and solutions:
| Problem | Possible Cause | Solution |
|---|---|---|
| Toaster does not turn on. | Not plugged in; power outage; circuit breaker tripped. | Ensure the toaster is securely plugged into a working outlet. Check your home's circuit breaker. |
| Bread does not toast evenly. | Uneven bread thickness; crumb accumulation; first use. | Ensure bread slices are of uniform thickness. Clean crumb trays regularly. The first few uses may result in uneven toasting. |
| Bread stuck in slots. | Oversized bread; mechanical issue. | Unplug the toaster. Carefully remove the bread using non-metallic tongs. Do not force the toast lever. |
| Smoke coming from toaster. | Crumb accumulation; food stuck; first use residue. | Immediately press CANCEL and unplug. Clean crumb trays. Remove any food stuck in slots. Ensure proper ventilation. |
5. Specifications
- Brand: KITCHMIX
- Model: WT-340A
- Color: Pink
- Material: Stainless Steel
- Product Dimensions: 12.2"D x 13.39"W x 7.28"H
- Wattage: 1650 watts
- Voltage: 110 Volts
- Number of Slices: 4
- Number of Browning Settings: 6
- Special Features: 1.5-inch Extra-wide Slots, Cancel/Defrost/Reheat Functions, Dual Independent Control Panel, Removable Crumb Trays, Retro Style
- Item Weight: 5.88 pounds
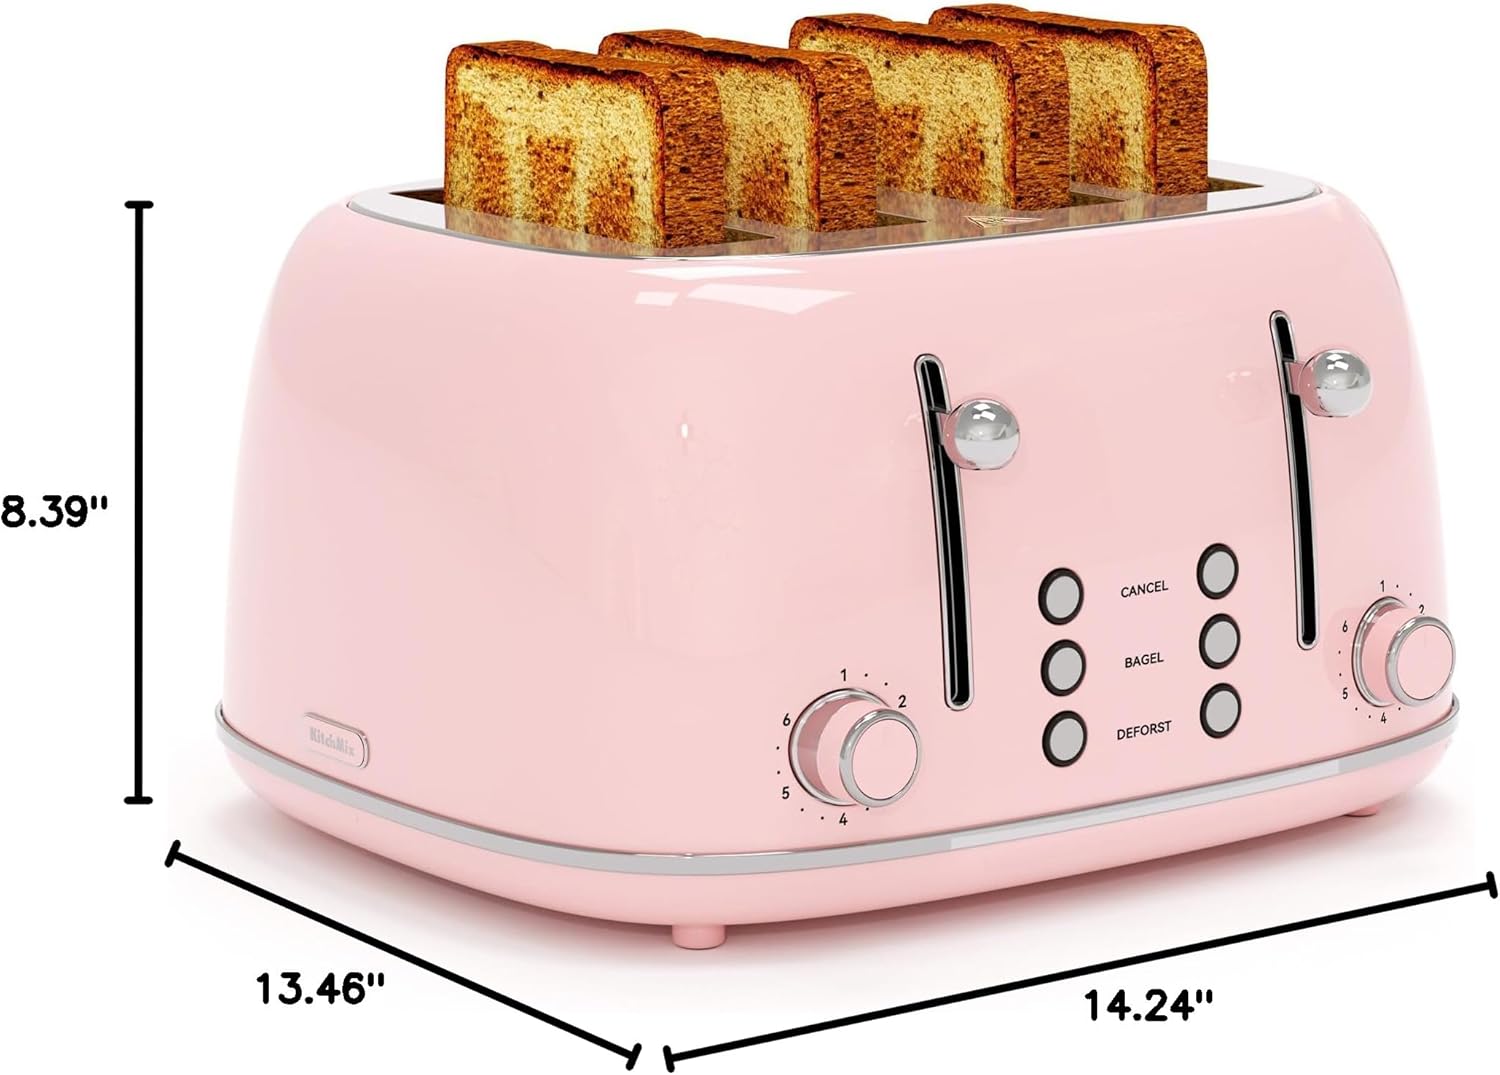
Image: Product dimensions of the KITCHMIX 4-slice toaster.
6. Warranty and Support
For warranty information or product support, please contact KITCHMIX customer service. Keep your purchase receipt as proof of purchase.
- Customer Service: Refer to the contact information provided with your product packaging or visit the official KITCHMIX website.
- Online Resources: Check the KITCHMIX website for FAQs, additional product information, and registration.