
TRQ ALA90108
TRQ Alternator Instruction Manual
Model: ALA90108
Brand: TRQ
1. Product Overview
The TRQ ALA90108 Alternator is a critical component in your vehicle's electrical system, responsible for generating electricity to power the vehicle's electrical components and recharge the battery. This manual provides essential information for understanding, installing, and maintaining your TRQ alternator.

Figure 1: Main view of the TRQ ALA90108 Alternator.
2. Product Features
- Engineered to match exact vehicle specifications: Ensures a precise fit and optimal performance for compatible vehicles.
- Upgraded Service Life: Features Pressure-Fit High-Capacity Diodes for improved heat dissipation, contributing to longer operational life.
- Improved Reliability: Incorporates double insulated rotors and stators designed to reduce signal degradation, enhancing overall reliability.
3. Vehicle Compatibility (Fitment)
This TRQ ALA90108 Alternator is compatible with the following vehicle models. Always verify fitment with your vehicle's specific year, make, and model before installation.
| Year Range | Make | Model | Engine |
|---|---|---|---|
| 2015-2018 | Kia | Sorento | V6 3.3L |
| 2013-2018 | Hyundai | Santa Fe | |
| 2014-2018 | Kia | Sedona | |
| 2011 | Kia | Sorento | V6 3.5L |
| 2011-2012 | Kia | Sedona | |
| 2012-2017 | Hyundai | Azera | |
| 2014-2016 | Kia | Cadenza | |
| 2012 | Hyundai | Genesis | V6 3.8L |
| 2019 | Hyundai | Santa Fe XL | |
| 2016-2017 | Kia | K900 | V6 3.8L |

Figure 2: Always verify fitment for your specific vehicle.
4. Technical Specifications
Detailed specifications for the TRQ ALA90108 Alternator:
| Attribute | Value |
|---|---|
| Model Number | ALA90108 |
| Voltage | 12 VDC |
| Amperage Rating | 150 A |
| Distance Between Mounting Feet | 1.73 in (43.5 mm) |
| Drive End To Pulley 1st Groove Distance | 3.15 in (80 mm) |
| Pulley Groove Quantity | 6 |
| Rotation Direction | Clockwise (Right) |
| Fan Type | Internal |
| External Regulator Included | No |
| Decoupled Or Clutch Pulley | No |
| Brushless | No |
| Pulley Included | Yes |
| External Fan Included | Yes |
| Reference Number(s) | WAI: 11686N |
| Item Weight | 13.82 pounds |
| Product Dimensions | 8 x 9 x 7 inches |
| Country of Origin | China |
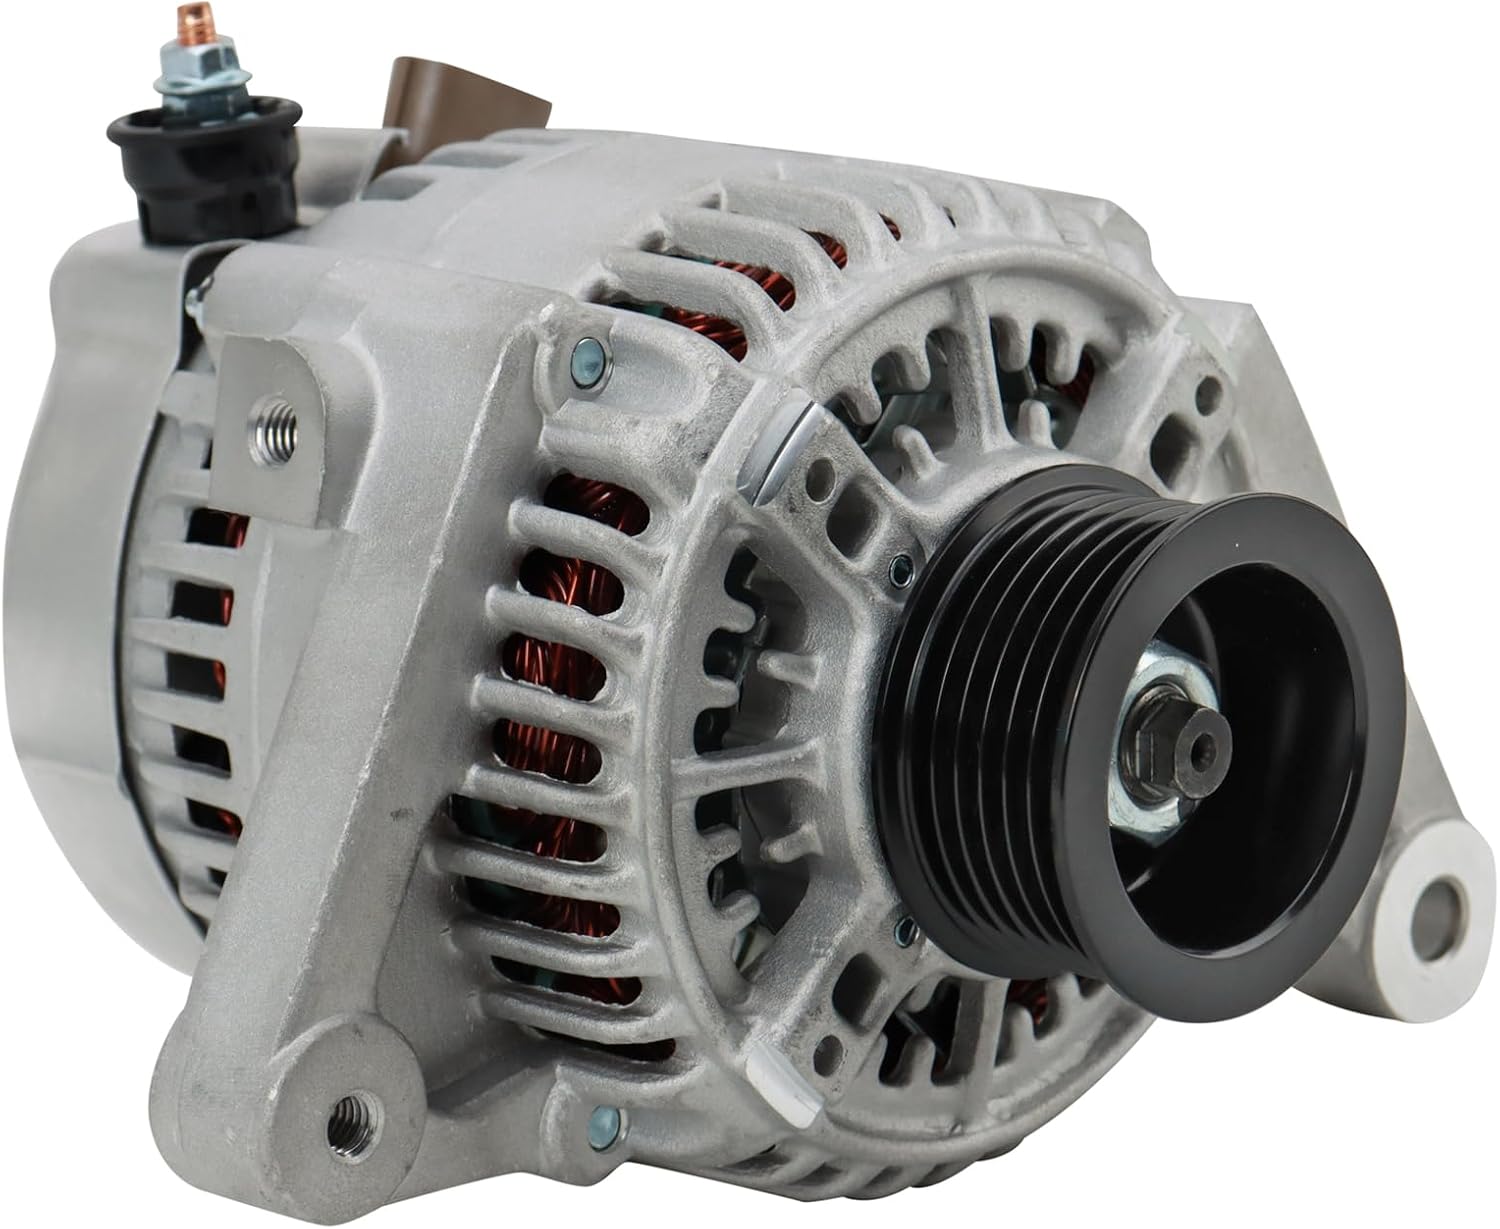
Figure 3: Detail of the electrical connector on the TRQ Alternator.
5. Installation Guide
Replacing an alternator requires mechanical knowledge and appropriate tools. If you are not confident in your abilities, it is recommended to seek professional assistance. Always disconnect the battery before beginning any work on your vehicle's electrical system.
General Steps:
- Safety First: Ensure the vehicle is off, the parking brake is engaged, and the negative battery terminal is disconnected.
- Access the Alternator: Locate the alternator in your engine bay. This may require removing other components like belts, hoses, or air intake ducts.
- Disconnect Wiring: Carefully disconnect all electrical connections from the old alternator, including the main power wire and any sensor wires.
- Remove Mounting Bolts: Loosen and remove the bolts securing the alternator to the engine block. Note their positions for reinstallation.
- Remove Old Alternator: Carefully extract the old alternator from its mounting position.
- Install New Alternator: Position the new TRQ alternator in place and secure it with the mounting bolts. Ensure it is seated correctly.
- Reconnect Wiring: Reconnect all electrical connections, ensuring they are tight and secure.
- Reinstall Components: Reinstall any components that were removed to gain access.
- Reconnect Battery: Reconnect the negative battery terminal.
- Test System: Start the vehicle and check for proper charging system operation (e.g., battery light off, voltage reading).
TRQ provides extensive DIY video resources to assist with installations. Search for specific installation guides for your vehicle model on the TRQ website or their official video channels.

Figure 4: TRQ's "View Before You Do" initiative offers video installation guides.
6. Maintenance
Alternators are generally low-maintenance components. However, regular checks can help ensure their longevity and proper function:
- Belt Inspection: Periodically check the serpentine belt that drives the alternator for cracks, fraying, or excessive wear. Ensure it has proper tension.
- Battery Health: A healthy battery reduces the workload on the alternator. Ensure your battery is in good condition and its terminals are clean and corrosion-free.
- Wiring Connections: Inspect the alternator's electrical connections for corrosion or looseness. Clean and tighten as necessary.
- Listen for Noise: Pay attention to any unusual noises (e.g., grinding, squealing) coming from the alternator, which could indicate bearing issues.
7. Troubleshooting Common Issues
If you experience issues with your vehicle's charging system, consider these common troubleshooting steps:
| Symptom | Possible Cause | Action |
|---|---|---|
| Battery Warning Light On | Failing alternator, loose belt, faulty wiring, dead battery. | Check belt tension, inspect wiring, test battery and alternator output with a multimeter. |
| Dim Headlights/Interior Lights | Alternator not producing enough power, weak battery. | Test alternator output and battery voltage. Ensure all connections are clean and tight. |
| Grinding or Whining Noise | Worn alternator bearings. | This typically indicates the alternator needs replacement. |
| Dead Battery | Alternator not charging, parasitic drain, old battery. | Test charging system. Check for current draw when vehicle is off. Test battery health. |
For more complex issues, consult a certified automotive technician.
8. Warranty and Customer Support
TRQ is committed to providing high-quality replacement parts and an excellent customer experience. For specific warranty information regarding your ALA90108 Alternator, please refer to the documentation included with your purchase or visit the official TRQ website.
For further assistance, technical support, or to explore more TRQ products and DIY resources, please visit the TRQ Store on Amazon or their official website.
Ask a question about this manual
Ask about setup, troubleshooting, compatibility, parts, safety, or missing instructions. Manuals+ will review the question and use this page’s manual context to help answer it.