
Introduction
Thank you for purchasing the Naroote Digital Alarm Clock. This Northern European style digital clock features a large, easy-to-read font, making it ideal for bedrooms and various indoor settings. It is designed for simple operation and provides convenient time, calendar, and temperature display functions. This manual provides detailed instructions for setup, operation, and maintenance to ensure optimal performance of your device.

Image: Front view of the Naroote Digital Alarm Clock, showcasing its large, clear digital display and minimalist design.
Package Contents
- 1 x Digital Clock
- 1 x English User Manual
- 1 x USB Cable
Note: AAA Batteries are not included and must be purchased separately.

Image: The Naroote Digital Alarm Clock shown alongside its included USB cable, illustrating the items typically found in the package.
Specifications
| Feature | Description |
|---|---|
| Brand | Naroote |
| Model Number | Narootezxu5fp6134 |
| Color | White |
| Display Type | Digital |
| Style | Modern |
| Special Feature | Timer, Alarm Clock |
| Power Source | Battery Powered, Corded Electric |
| Room Type | Bedroom |
| Indoor/Outdoor Usage | Indoor |
| Frame Material | Plastic |
| Item Weight | 5.2 ounces |
| Package Dimensions | 5.91 x 3.15 x 1.97 inches |
Setup
1. Initial Power On
Plug in the power plug (USB cable) for the first time. The device will automatically start and display the time after approximately 8 seconds. This provides continuous power to the clock.

Image: The digital clock displaying "0:00" in a dimly lit environment, representing its state immediately after being powered on for the first time.
2. Battery Installation (Backup Power)
Open the battery cover located on the back of the clock. According to the battery polarity signs (+ and -), install three AAA batteries (not included). Close the battery cover securely. These batteries serve as a backup in case of power outages, ensuring time settings are retained.
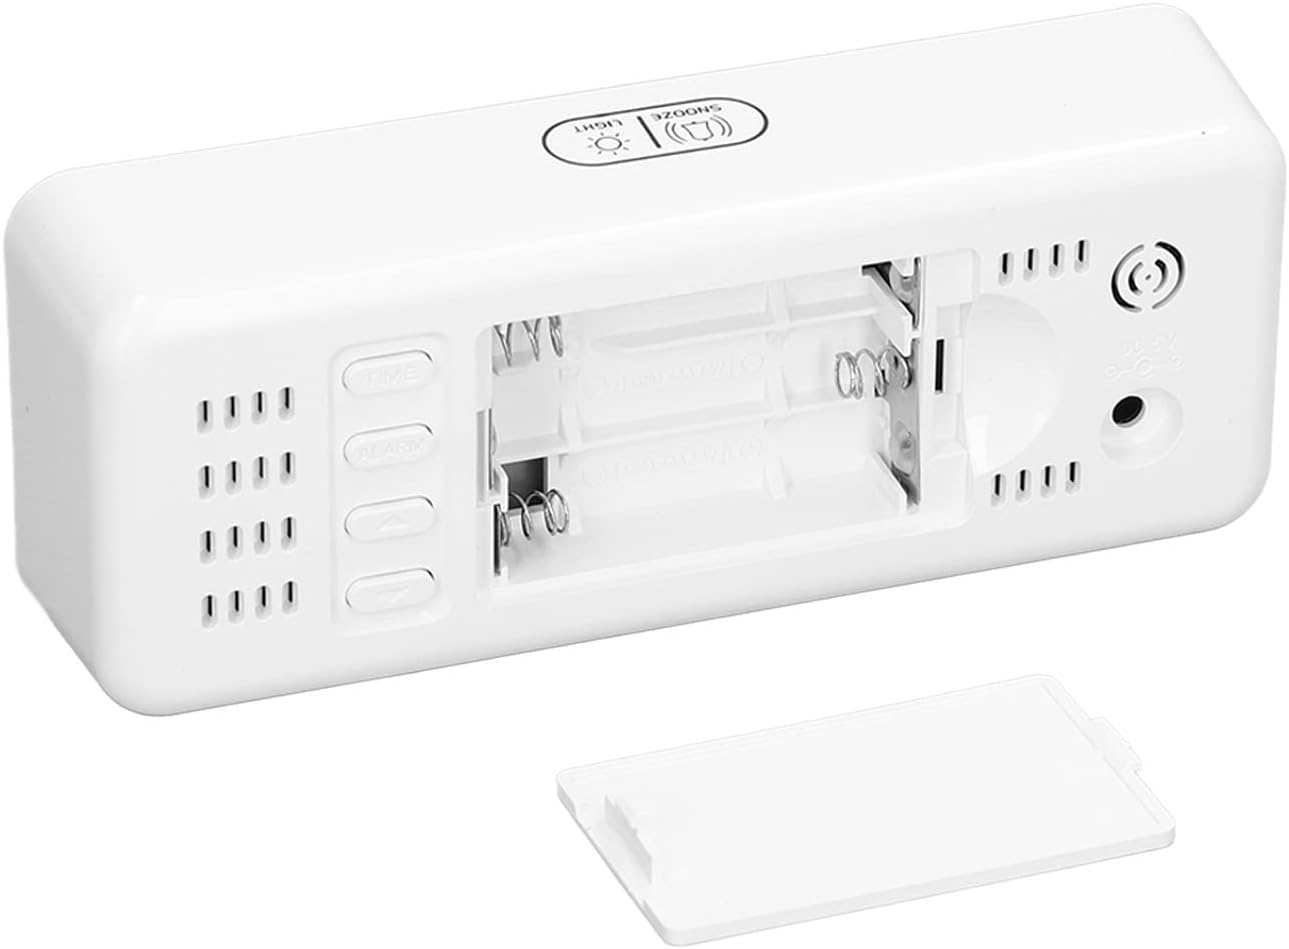
Image: Rear view of the digital clock with the battery compartment cover removed, clearly showing the slots for three AAA batteries and the power input port.
Operating Instructions
1. Viewing Time, Calendar, and Temperature
After power on, the LED display will show the current time. To switch and view different items, press the TIME button once. The display will cycle through the following order:
- Time
- Calendar (Month and Day)
- Temperature

Image: The digital clock displaying the time (21:42) on a wooden surface, illustrating its primary function.

Image: The digital clock displaying the temperature (23°C), demonstrating its ability to show environmental data.
2. Setting Time and Calendar
To set the time and calendar, ensure the clock is in time display mode. Follow these steps:
- Enter Setting Mode: Long press the TIME key for more than 3 seconds. The content of the item being set will flash, indicating you are in setting mode.
- Adjust Values: Use the + key or - key to adjust the value of the flashing item. Long press the + or - key for rapid adjustment.
- Switch Items: Press the TIME key again to switch to the next setting item.
- Setting Sequence: The setting items will appear in the following order:
- Time System (12-hour or 24-hour)
- Hour
- Minute
- Month
- Day
- Exit Setting Mode: The setting mode will automatically exit after 15 seconds if no key is pressed.
3. Alarm Clock Settings
The clock supports 2 groups of alarm clock settings. Specific instructions for setting the alarm are typically found by pressing an ALARM button or similar, then following a similar adjustment process as setting the time. Refer to the on-screen prompts or the physical buttons on your device for precise alarm setting steps.

Image: The digital clock positioned on a bedside table, displaying the time (21:33), with a blurred image of a person sleeping in the background, highlighting its use as a bedroom alarm clock.
Maintenance
- Cleaning: Use a soft, dry cloth to clean the clock's surface. Avoid using abrasive cleaners or solvents, as they may damage the finish.
- Placement: Place the clock on a stable, flat surface away from direct sunlight, excessive heat, or moisture.
- Battery Replacement: If using batteries for backup, replace them annually or when the display shows signs of dimming during power outages to ensure continuous timekeeping.
- Storage: If storing the clock for an extended period, remove the AAA batteries to prevent leakage.
Troubleshooting
| Problem | Possible Cause / Solution |
|---|---|
| Clock display is blank or off. |
|
| Time/settings reset after power outage. |
|
| Buttons are unresponsive. |
|
| Display is too dim or too bright. |
|
Warranty and Support
Specific warranty information for this product is not provided in the available documentation. For any product support, warranty claims, or technical assistance, please contact the seller or manufacturer directly through your purchase platform. Keep your purchase receipt or order number handy for faster service.
Manufacturer: Naroote


