
PARKSIDE PHET 15 C2
PARKSIDE PHET 15 C2 Electric Stapler Instruction Manual
Model: PHET 15 C2
Introduction
Thank you for choosing the PARKSIDE PHET 15 C2 Electric Stapler. This manual provides important information regarding the safe operation, setup, maintenance, and troubleshooting of your new tool. Please read this manual thoroughly before first use and keep it for future reference.
Safety Instructions
Always observe the following safety precautions to reduce the risk of electric shock, fire, and serious injury.
- Work Area Safety: Keep the work area clean and well-lit. Cluttered or dark areas invite accidents. Do not operate power tools in explosive atmospheres, such as in the presence of flammable liquids, gases, or dust.
- Electrical Safety: Power tool plugs must match the outlet. Never modify the plug in any way. Do not abuse the cord. Never use the cord for carrying, pulling, or unplugging the power tool. Keep cord away from heat, oil, sharp edges, or moving parts.
- Personal Safety: Always wear eye protection. Use hearing protection when operating for extended periods. Dress properly; avoid loose clothing or jewelry. Keep hair, clothing, and gloves away from moving parts.
- Tool Use and Care: Do not force the power tool. Use the correct power tool for your application. Disconnect the plug from the power source before making any adjustments, changing accessories, or storing power tools.
- Specific Stapler Safety: Always assume the tool contains fasteners. Do not point the tool at yourself or others. Keep hands and body parts away from the discharge area. Ensure the workpiece is stable before fastening.
Product Overview
The PARKSIDE PHET 15 C2 is a lightweight and compact electric stapler designed for quick and comfortable fastening tasks. It features a non-slip soft grip for comfortable one-handed operation.

Figure 1: Side view of the PARKSIDE PHET 15 C2 Electric Stapler, highlighting its compact design and ergonomic grip. The power cord is visible at the rear.

Figure 2: The PARKSIDE PHET 15 C2 Electric Stapler displayed with a selection of compatible staples and nails, ready for use.
Key Components:
- Trigger: Activates the stapling mechanism.
- Magazine: Holds staples or nails. Features a level indicator.
- Nose/Discharge Area: Where fasteners exit the tool.
- Soft Grip Handle: Provides comfort and control during operation.
- Power Cord: Connects the tool to an electrical outlet.
Setup
1. Loading Fasteners
Ensure the tool is unplugged from the power source before loading fasteners.
- Locate the magazine release mechanism, typically at the bottom or rear of the tool.
- Slide open the magazine.
- Insert the appropriate staples (6-14 mm) or nails (14-15 mm) into the magazine. Ensure they are oriented correctly, with the points facing forward.
- Close the magazine securely until it clicks into place. The level indicator on both sides of the magazine will show the remaining fastener quantity.
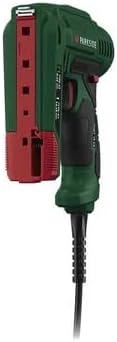
Figure 3: Rear view of the stapler with the magazine open, illustrating how to load staples or nails. The red tab indicates the magazine release.
2. Connecting Power
Once fasteners are loaded, plug the power cord into a suitable electrical outlet (230V AC, 50Hz).
Operating Instructions
The PARKSIDE PHET 15 C2 is designed for comfortable one-handed operation with its soft grip.
- Prepare Workpiece: Ensure the material you are fastening is clean, dry, and free from obstructions.
- Position Tool: Place the nose of the stapler firmly against the workpiece at the desired fastening point. Ensure the tool is held perpendicular to the surface for optimal penetration.
- Activate: Press the trigger to drive a fastener into the material. Release the trigger to stop.
- Check Fastening: Inspect the driven fastener to ensure it is properly seated. Adjust pressure or position if necessary for subsequent fastenings.
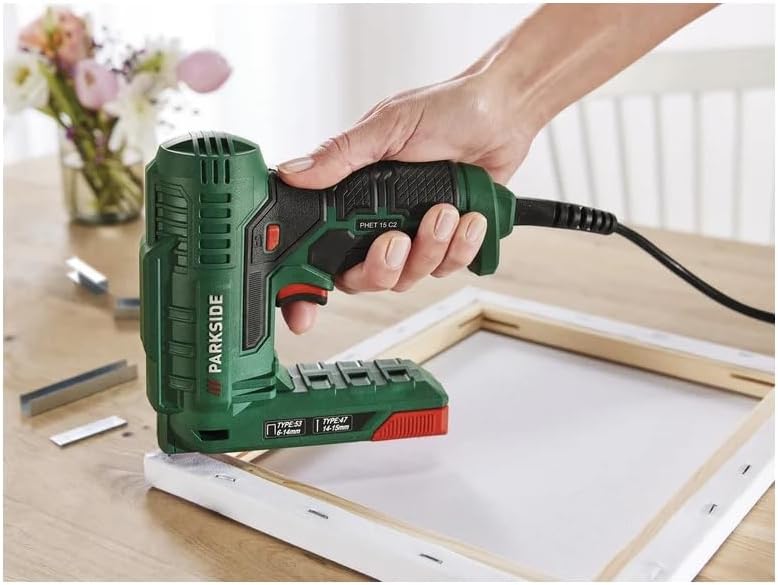
Figure 4: The electric stapler in action, securing fabric to a canvas frame. This illustrates the tool's ease of use for upholstery and crafting projects.
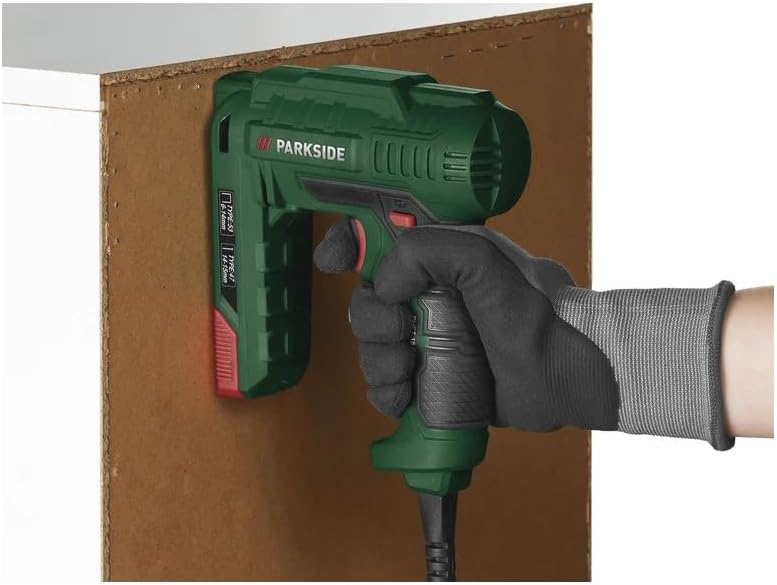
Figure 5: The stapler being used to attach a board, showcasing its application in general DIY and construction tasks.
Applications:
This electric stapler is suitable for various tasks including:
- Decoration projects
- DIY crafts
- Light upholstery
- Home repairs and fastening tasks

Figure 6: Detail of fabric securely fastened to a wooden chair frame using staples, demonstrating a typical upholstery application.
Maintenance
Regular maintenance ensures the longevity and safe operation of your electric stapler.
- Cleaning: Disconnect the tool from the power supply. Use a dry cloth to wipe down the exterior. Do not use harsh chemicals or abrasive cleaners. Periodically clear any dust or debris from the magazine and discharge area.
- Storage: Store the tool in a dry, secure location out of reach of children. Ensure the power cord is neatly coiled and not kinked.
- Inspection: Before each use, inspect the power cord for damage. Check the tool for any loose parts or signs of wear. Do not use a damaged tool.
Troubleshooting
Refer to the following table for common issues and their solutions.
| Problem | Possible Cause | Solution |
|---|---|---|
| Tool does not operate. | No power supply. | Check if the power cord is securely plugged into a working outlet. |
| Fasteners do not drive properly. | Incorrect fastener size or type. Magazine empty. Tool not pressed firmly against workpiece. | Ensure correct staples/nails (6-14mm staples, 14-15mm nails) are used. Reload magazine. Apply firm, even pressure to the tool. |
| Fastener jam. | Debris in magazine or discharge area. Bent fasteners. | Unplug the tool. Open the magazine and carefully remove any jammed fasteners or debris. Use only undamaged fasteners. |
If problems persist after attempting these solutions, please contact customer support.
Specifications
- Model: PHET 15 C2
- Power: 70 W
- Input Voltage: 230V AC, 50Hz
- Compatible Staples: Type 53, 6-14 mm
- Compatible Nails: Type 47, 14-15 mm
- Operation Mode: Automatic
- Features: Lightweight, compact, soft grip, double-sided level indicator.
- Included Accessories: 400 x 10 mm staples, 100 x 14 mm nails.
Warranty and Support
For warranty information or technical support, please refer to the documentation provided with your purchase or contact the manufacturer directly. Keep your proof of purchase for any warranty claims.
Related documentsPHET 15 C2


Ask a question about this manual
Ask about setup, troubleshooting, compatibility, parts, safety, or missing instructions. Manuals+ will review the question and use this page’s manual context to help answer it.