1. Product Overview
This manual provides essential information for the installation, operation, and maintenance of the PARTS R37901900 Genuine Printhead, designed specifically for the SATO CL4NX Plus Thermal Label Printer (300dpi). This printhead is a critical component responsible for the thermal transfer of images and text onto labels, ensuring high-quality print output.
Note: This printhead is compatible only with the SATO CL4NX Plus model and is not suitable for the standard CL4NX printer.
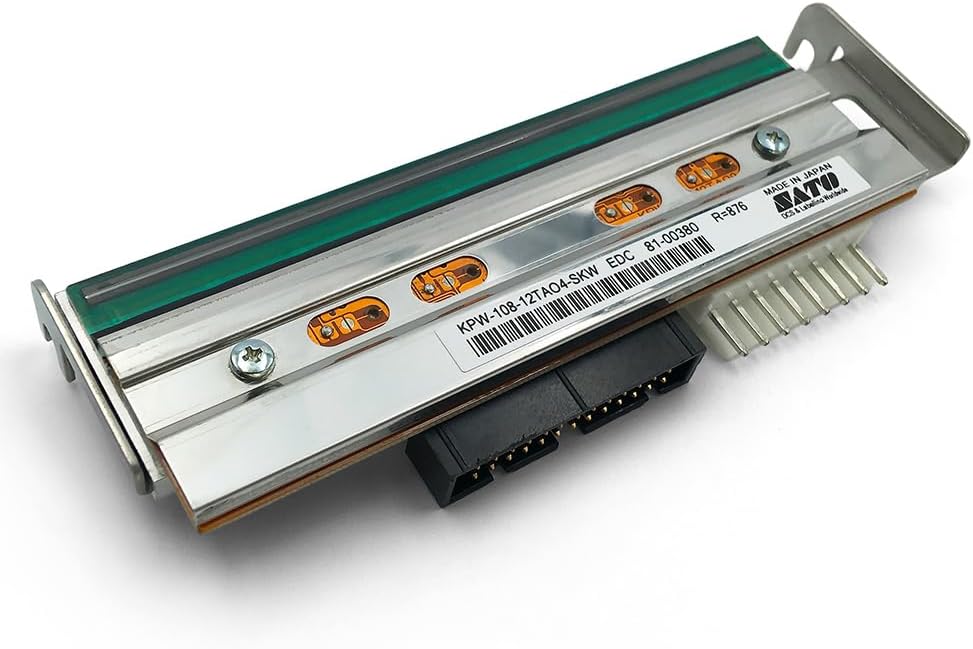
Image 1.1: The R37901900 printhead, showing its top surface with internal components and connectors. This is the primary view of the printhead module.
2. Product Components
The package for the R37901900 printhead typically includes the following:
- 1x Thermal Genuine Printhead CL4NX PLUS, 300dpi (Part Number: R37901900)

Image 2.1: Underside view of the printhead, highlighting the electrical connectors and mounting points essential for integration into the printer.

Image 2.2: The printhead securely packaged in protective pink bubble wrap, ensuring safe transit and delivery.
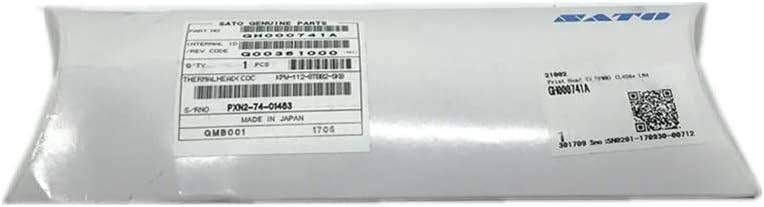
Image 2.3: The printhead sealed within its original anti-static packaging, displaying the SATO Genuine Parts label and QR code.
3. Installation Guide
3.1 Safety Precautions
- Always power off and unplug the SATO CL4NX Plus printer before beginning any installation or maintenance.
- Allow the printhead to cool down if the printer has been recently in use.
- Wear anti-static gloves to prevent damage from electrostatic discharge.
- Handle the printhead by its edges; avoid touching the print elements or connectors.
- Keep the work area clean and free of debris.
3.2 Installation Steps
Follow these steps to replace the printhead in your SATO CL4NX Plus printer. Refer to your printer's official service manual for detailed diagrams and specific instructions if available.
- Prepare the Printer: Turn off the printer and disconnect the power cord from the electrical outlet. Open the printer's top cover to access the printhead assembly.
- Remove Old Printhead: Carefully locate the existing printhead. Depending on the printer model, there may be latches, screws, or levers securing it. Disconnect any ribbon cables or connectors attached to the old printhead. Gently lift and remove the old printhead.
- Unpack New Printhead: Remove the new R37901900 printhead from its anti-static packaging. Avoid touching the delicate print surface.
- Install New Printhead: Align the new printhead with the mounting points in the printer. Gently lower it into place, ensuring it seats correctly. Secure it using the original latches, screws, or levers.
- Connect Cables: Reconnect any ribbon cables or electrical connectors to the new printhead, ensuring they are firmly seated.
- Close Printer: Close the printer's top cover.
- Power On and Test: Reconnect the power cord and turn on the printer. Perform a test print to verify proper installation and print quality. Adjust print settings if necessary.
4. Operation
The R37901900 printhead functions as an integral part of the SATO CL4NX Plus thermal label printer. Once correctly installed, its operation is managed by the printer's internal software and hardware. The printhead heats specific elements to transfer ink from a ribbon (thermal transfer printing) or directly activate heat-sensitive paper (direct thermal printing), creating the desired image or text.
Ensure your printer drivers are up-to-date and that you are using appropriate label media and ribbons (if applicable) for optimal performance and printhead longevity.
5. Maintenance
Regular maintenance of the printhead is crucial for maintaining print quality and extending its lifespan.
- Cleaning Frequency: Clean the printhead regularly, ideally after every roll of labels or ribbon, or if print quality degrades.
- Cleaning Procedure:
- Turn off and unplug the printer.
- Allow the printhead to cool completely.
- Use a lint-free cloth or a specialized printhead cleaning wipe moistened with isopropyl alcohol (99% pure).
- Gently wipe across the print elements from one end to the other. Do not scrub or apply excessive pressure.
- Allow the printhead to dry completely before closing the printer and powering it on.
- Avoid Abrasives: Never use abrasive materials or sharp objects to clean the printhead.
- Proper Media: Use only high-quality, compatible label media and ribbons to prevent residue buildup and premature wear.
6. Troubleshooting
This section addresses common issues that may arise with printhead performance.
| Problem | Possible Cause | Solution |
|---|---|---|
| Faint or Missing Lines in Print | Dirty printhead elements; Worn out printhead; Incorrect media/ribbon. | Clean the printhead (refer to Maintenance section); Replace printhead if cleaning does not resolve; Ensure correct media/ribbon is used. |
| Poor Print Quality / Smudging | Printhead temperature too low/high; Incorrect ribbon type; Dirty printhead. | Adjust printhead temperature settings in printer driver; Use compatible ribbon; Clean the printhead. |
| Printhead Error Message | Printhead not seated correctly; Damaged cable; Faulty printhead. | Re-seat the printhead; Check cable connections; If issues persist, the printhead may need replacement. |
For persistent issues, consult the SATO CL4NX Plus printer's official user manual or contact professional technical support.
7. Specifications
| Feature | Detail |
|---|---|
| Brand | PARTS |
| Model Number | R37901900 |
| Compatibility | SATO CL4NX Plus Thermal Label Printer (Does not fit CL4NX) |
| Print Resolution | 300 dpi (dots per inch) |
| Printing Technology | Thermal |
| Item Weight | 7 ounces (0.2 Kilograms) |
| Package Dimensions | 6.5 x 3 x 1.5 inches |
| Connectivity Technology | USB (referring to printer interface) |
| Specific Uses For Product | Label printing |
| Included Components | Printhead |
| Date First Available | July 12, 2023 |
8. Warranty and Support
Warranty: This Genuine SATO Printhead comes with a 3-month warranty guarantee from the manufacturer, PARTS.
Return Policy: GETPARTS offers a 30-day money-back guarantee. Customers can return the product for a refund if not satisfied for any reason within 30 days of purchase.
For technical support or warranty claims, please contact the vendor or manufacturer directly. Ensure you have your purchase details and the printhead's part number (R37901900) available.


