
Introduction
The JacobsParts Ultra-Small Lithium Battery Charging Board is designed for efficient charging of 3.7V lithium batteries. This compact module features a 1A high-current linear charging system, providing fast and reliable charging. It includes a Type-C interface for power input, ensuring compatibility with standard 5V USB-C power sources. The board integrates a protection circuit to enhance battery safety and longevity.
Key features include automatic charge cycle termination, automatic resumption, and a pre-charging process for deeply discharged batteries. Its small size and integrated safety features make it suitable for various portable electronic projects.

Image: The JacobsParts charger board shown next to a half-dollar coin, illustrating its compact dimensions.
Setup Instructions
This charging board is designed for straightforward integration. Ensure all connections are made correctly to prevent damage to the board or battery.
- Power Input Connection: Connect a 5V USB-C power source to the Type-C port on the board. The operational input voltage range is 5-6V.
- Battery Connection: Connect your 3.7V lithium battery to the designated B+ and B- pads on the board. Ensure correct polarity: B+ to the positive terminal of the battery, and B- to the negative terminal.
- Load Output Connection (Optional): If you intend to power a load directly from the battery through the protection circuit, connect your load to the OUT+ and OUT- pads. This output is protected against over-discharge and over-current.
- Direct Input Connection (Optional): For alternative 5V input, connect 5V to IN+ and ground to IN- pads.
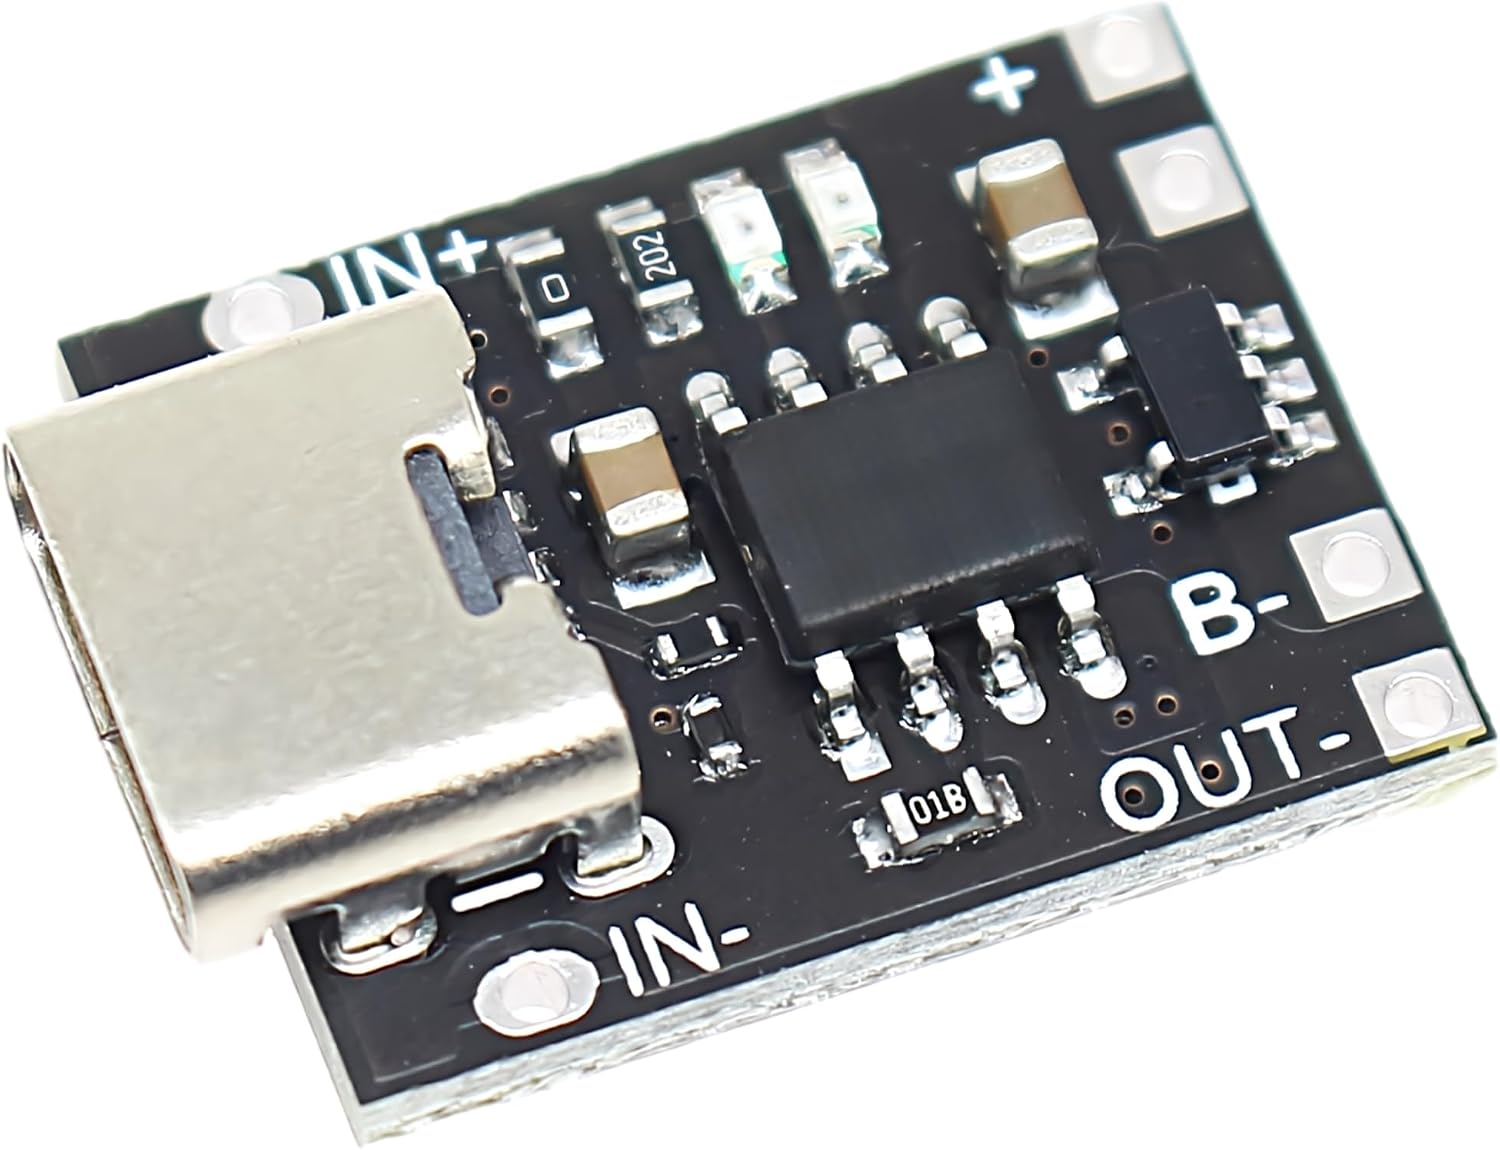
Image: Top view of the charging board, highlighting the USB-C input and various connection pads.
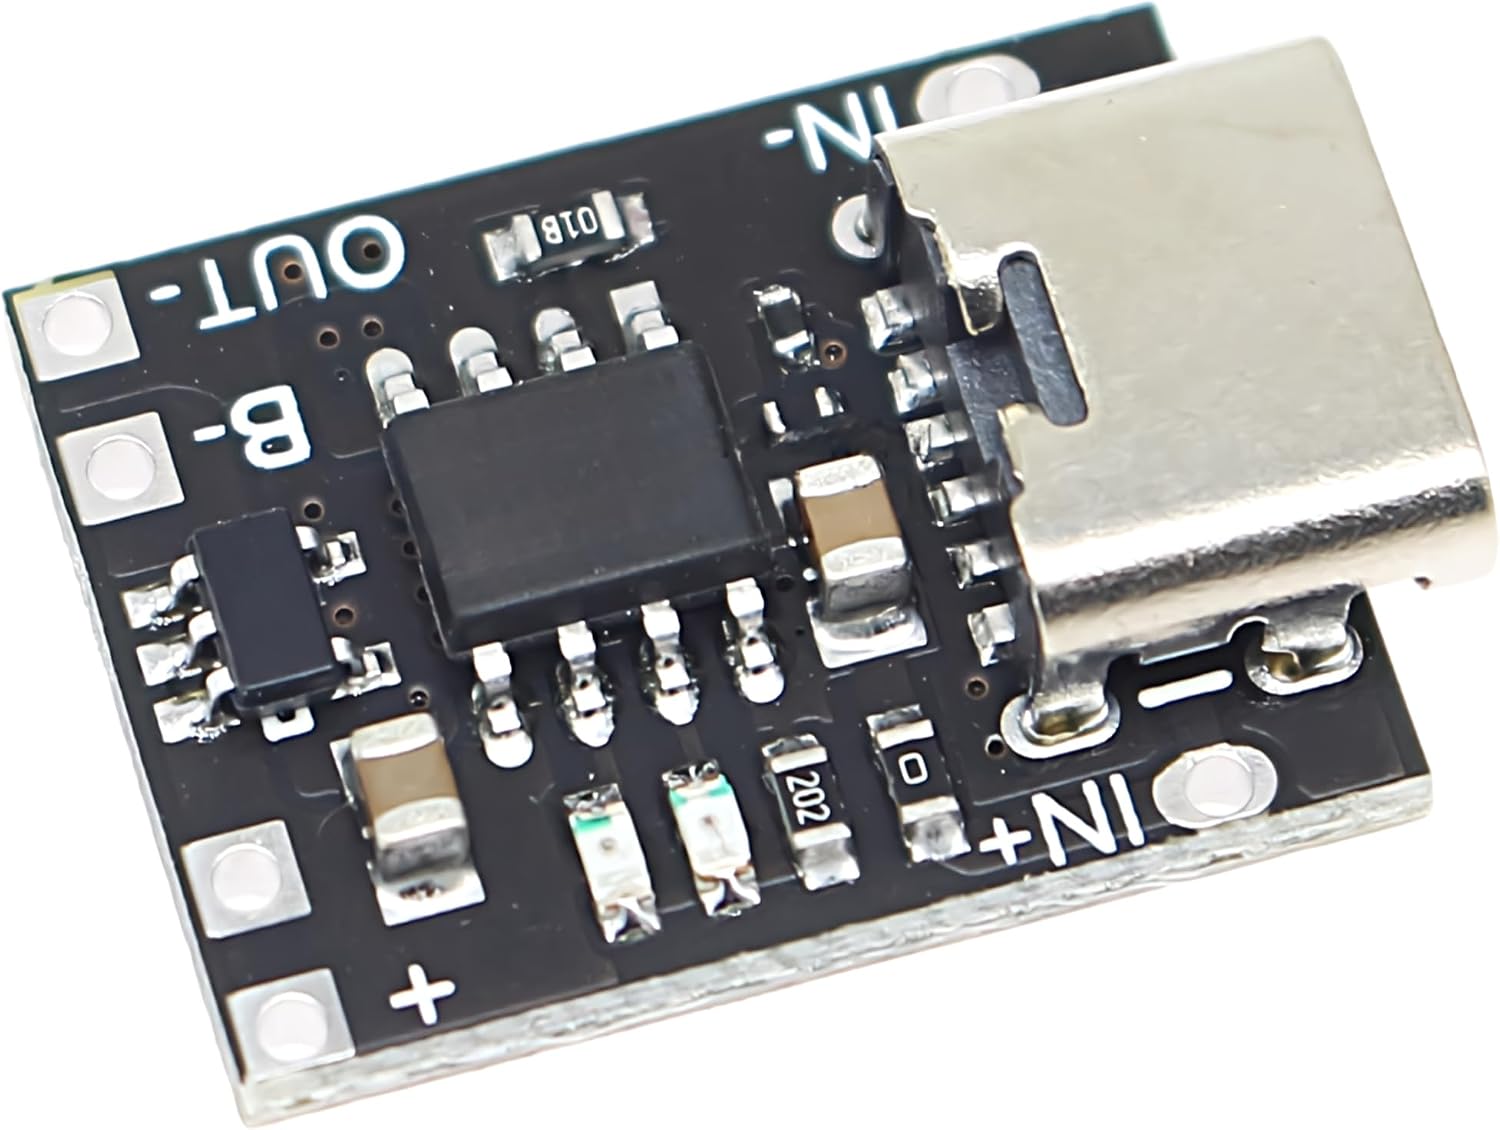
Image: Angled view of the charging board, showing additional connection pads for battery and load.
Operating Instructions
Once connected, the charging board operates automatically to manage the battery charging process.
- Charging Cycle: The board charges 3.7V lithium batteries to a stable output voltage of 4.2V.
- Automatic Termination: Charging automatically stops when the battery reaches its final float voltage and the charging current drops to 100mA.
- Automatic Resumption: The charging cycle will automatically restart if the battery voltage falls below 4.05V, which corresponds to approximately 80-90% of the battery's capacity.
- Pre-charging: If the battery voltage is below 2.9V, the board initiates a pre-charging process with a reduced current of 100mA to safely rejuvenate the battery before full-rate charging begins.
- LED Indicators: The board features LED indicators to show the charging status. A solid red light typically indicates that the battery is currently charging.
Maintenance
The JacobsParts charging board is designed for durability and requires minimal maintenance.
- Cleaning: Keep the board free from dust and debris. If cleaning is necessary, use a soft, dry brush or compressed air. Avoid using liquids.
- Storage: Store the board in a dry environment, away from extreme temperatures and direct sunlight.
- Inspection: Periodically inspect the solder joints and connections for any signs of damage or corrosion.
Troubleshooting
If you encounter issues with your charging board, consider the following:
- No Charging Indication:
- Verify that the 5V USB-C power source is functioning correctly and providing power within the 5-6V input range.
- Check all battery connections (B+, B-) for correct polarity and secure contact.
- Ensure the battery itself is not completely dead or damaged. The board has a pre-charging function for low voltage batteries, but extremely damaged batteries may not respond.
- Battery Not Reaching Full Charge (4.2V):
- Confirm the battery's nominal voltage is 3.7V. This board is designed for 3.7V lithium batteries charging to 4.2V.
- Ensure the input power supply can deliver sufficient current (at least 1A) to the charging board.
- Allow adequate time for charging, especially for higher capacity batteries or those undergoing pre-charging.
- Board Overheating:
- While some warmth during charging is normal, excessive heat may indicate an issue. Ensure the input power source is appropriate (e.g., a 1A charger is recommended; higher current chargers might cause more heat).
- Verify that the battery is not short-circuited or damaged.
- No Output from OUT+/OUT-:
- The board's protection circuit may have activated due to over-discharge (battery voltage below 2.4V) or over-current (load exceeding 4A). Remove the load and recharge the battery to reset the protection.
- Note that the USB-C input port is for charging only; it does not provide power output for a load.
- Physical Damage: If any connectors or components appear defective, discontinue use and consider replacement.
Specifications
| Product Dimensions | 0.71 x 0.55 x 0.2 inches (18 x 14 x 5 mm) |
| Item Weight | 1 ounce (approximately 28 grams) |
| Input Voltage | 5-6V DC (via USB Type-C or IN+/IN- pads) |
| Output Voltage (Charging) | 4.2V |
| Charging Current | 1A (maximum) |
| Compatible Battery Type | 3.7V Lithium Batteries |
| Over-Discharge Protection | 2.4V |
| Over-Current Protection | 4A |
| Pre-Charging Current | 100mA (for batteries below 2.9V) |

Image: Bottom view of the charging board, indicating key electrical specifications.
Warranty and Support
Specific warranty details for the JacobsParts Smallest USB Type C 3.7V Lithium Battery Charger Board are not provided in this manual. For warranty information, technical support, or assistance with product issues, please contact JacobsParts directly through their official website or the retailer where the product was purchased.