
Introduction
This manual provides essential information for the safe operation, assembly, and maintenance of your Nasitip HZB-219-2 Electric Kids Ride On Bumper Car. Please read all instructions carefully before use to ensure proper function and safety for the child.
Safety Information
Important Safety Warnings:
- Adult supervision is required at all times.
- Recommended age for use: 3-8 years.
- Maximum weight capacity: 66 lbs (30 kg).
- Always ensure the child is securely fastened with the safety belt.
- Do not operate near stairs, steep inclines, public roads, or swimming pools.
- Ensure the bumper car is fully charged before each use.
- Only use the provided charger and battery.
- Inspect the product regularly for damage to electrical components, cord, plug, enclosure, and other parts. If any damage is found, the product must not be used until the damage has been properly repaired.
Package Contents
Verify that all components are present before assembly:
- 1 x Electric Bumper Car
- 1 x Remote Control
- 1 x Charger
- 1 x User Manual

Overall view of the Nasitip Ride On Bumper Car in pink, showing the seat, joysticks, and LED lights. The remote control is also visible in the top left corner.
Assembly Instructions
The Nasitip Bumper Car requires minimal assembly. Follow these steps:
- Unpack Components: Carefully remove all parts from the packaging.
- Connect Battery: Locate the battery compartment, usually under the seat. Connect the battery terminals according to the polarity markings (+ to + and - to -).
- Secure Seat: Place the seat onto the bumper car and secure it using the provided fasteners. Ensure it is firmly attached.
- Initial Charge: Before first use, fully charge the bumper car for 8-12 hours. Refer to the Charging Instructions section.
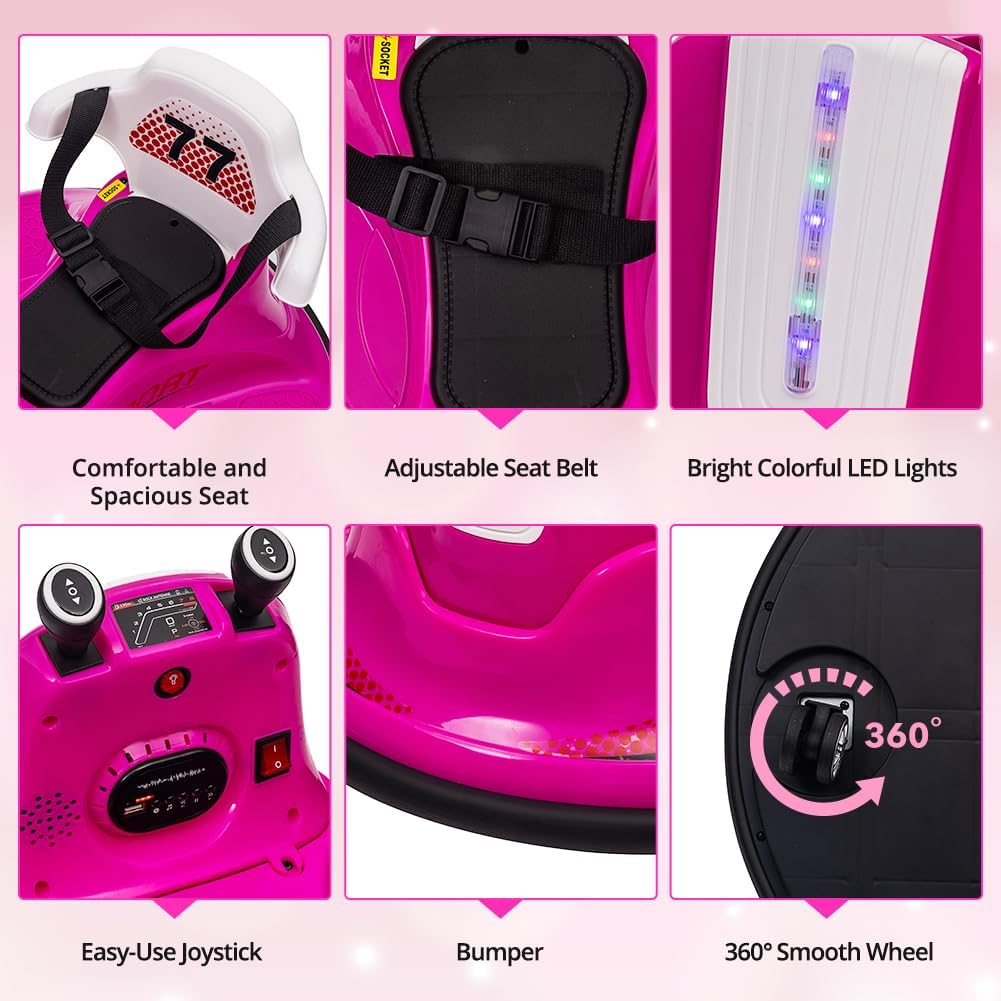
Detailed view of the bumper car's components, including the comfortable seat, adjustable seat belt, LED lights, joysticks, bumper, and smooth wheels.
Charging Instructions
To ensure optimal performance and battery life, follow these charging guidelines:
- Charger: Use only the supplied 6V 500MA charger.
- Charging Port: Locate the charging port on the bumper car.
- Connect Charger: Plug the charger into the charging port, then plug the charger into a standard wall outlet.
- Charging Time: For the first charge, allow 8-12 hours. Subsequent charges typically take 6-8 hours. Do not overcharge for more than 12 hours.
- Battery Indicator: The bumper car features a battery indicator to show the current charge level. Charge when the indicator shows low battery.
Operating Instructions
The bumper car offers two operating modes: manual control by the child and remote control by an adult.
Manual Control (Child Operation)
- Power On: Press the power button on the control panel to turn on the bumper car.
- Safety Belt: Ensure the child is seated properly and the adjustable safety belt is securely fastened.
- Joysticks: The bumper car is controlled using two joysticks.
- Push both joysticks forward to move forward.
- Pull both joysticks backward to move backward.
- Push one joystick forward and pull the other backward to spin 360 degrees.
- Music and Lights: Use the buttons on the control panel to activate dynamic music, stories, and colorful LED flashing lights. A USB port is available for additional audio input.
Remote Control (Parent Operation)
The 2.4G remote control allows parents to safely guide the bumper car, especially for younger children.
- Pairing: Turn on the bumper car. Turn on the remote control. The remote control should automatically pair with the car. If not, refer to the remote control's specific pairing instructions.
- Controls: The remote control typically features buttons for forward, backward, left, right, brake, and speed adjustment.
- Safety Override: The remote control has priority over manual controls for safety.

Close-up of the bumper car's control panel, showing icons for battery indicator, light, music, story, USB port, and horn.
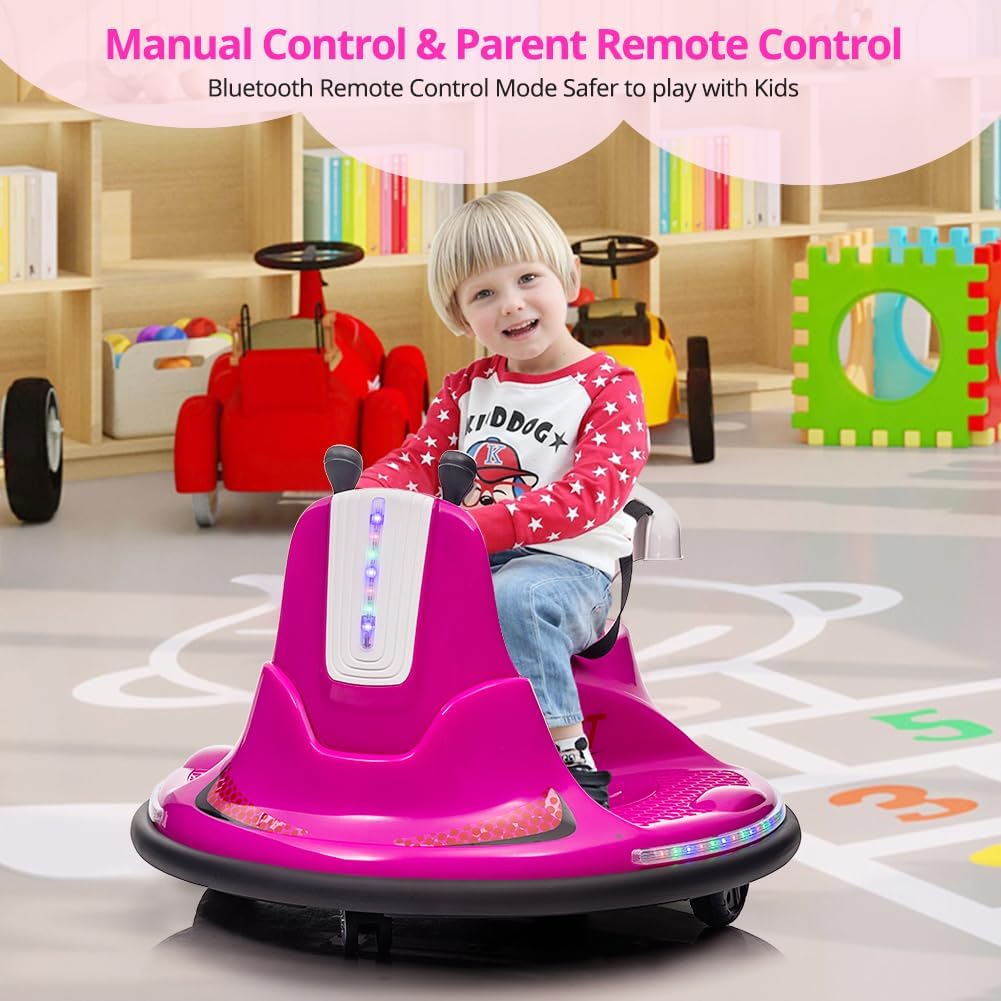
A child enjoying the bumper car, with an inset image of the remote control, demonstrating both manual and remote operation capabilities.
Maintenance
Regular maintenance ensures the longevity and safe operation of your bumper car.
- Cleaning: Wipe the car with a soft, damp cloth. Do not use abrasive cleaners or solvents. Avoid spraying water directly onto electrical components.
- Storage: Store the bumper car in a dry, cool place away from direct sunlight when not in use. If storing for extended periods, charge the battery every 30 days to maintain its health.
- Battery Care: Do not allow the battery to fully discharge. Always recharge promptly after use.
- Inspection: Periodically check all screws, connections, and the safety belt for tightness and wear.
Troubleshooting
If you encounter issues, refer to the following common problems and solutions:
| Problem | Possible Cause | Solution |
|---|---|---|
| Car does not move | Low battery; Loose battery connection; Blown fuse | Charge battery; Check battery terminals; Replace fuse (if applicable, consult professional) |
| Car moves slowly | Low battery; Overloaded; Operating on unsuitable surface | Charge battery; Reduce load; Move to a smoother, flatter surface |
| Lights/Music not working | Loose connection; Malfunction | Check connections; Contact customer support if issue persists |
| Remote control not working | Remote battery low; Not paired; Interference | Replace remote batteries; Re-pair remote; Move away from other electronic devices |
Specifications
| Feature | Detail |
|---|---|
| Model Number | HZB-219-2 |
| Product Dimensions | 26.2 x 26.2 x 18.7 inches (66.5 x 66.5 x 47.6 cm) |
| Item Weight | 16.12 pounds (7.31 kg) |
| Battery | 6V4AH |
| Speed | 2-2.5 mph (2-5 km/h) |
| Charger | 6V 500MA |
| Load Capacity | 66 lbs (30 kg) |
| Recommended Age | 3 - 8 years (37-95 months) |
| Driving Modes | Manual (joystick) and Remote Control |
| Features | Music, Stories, LED Lights, USB Port, Horn, 360 Degree Spin, Soft Bumper |

Visual representation of the bumper car's dimensions and examples of suitable terrains for operation.
Warranty and Support
For warranty information, product support, or to purchase replacement parts, please refer to the documentation included with your purchase or contact Nasitip customer service directly. Contact details are typically available on the product packaging or the manufacturer's official website.