
Introduction
This manual provides comprehensive instructions for the installation, setup, and operation of your Prichor Universal Ceiling Fan Remote Control Kit. This kit is designed to replace existing ceiling fan remotes and is compatible with a wide range of 3-speed AC ceiling fans, including models from Hampton Bay, Home Decorators Collection, Harbor Breeze, Hunter, and Honeywell. It offers convenient control over fan speeds and light functions, including dimming and a time delay feature.
Product Features

Image: Overview of the remote's key features including fan speed and light control.
- Universal Compatibility: Designed to work with most 3-speed AC ceiling fans, including popular brands like Hampton Bay, Home Decorators Collection, Harbor Breeze, Hunter, and Honeywell.
- 3-Speed Fan Control: Easily switch between Low, Medium, and High fan speeds.
- Light Dimmer Function: Compatible with incandescent light bulbs and dimmable LED/CFL lamps. For non-dimmable LED/CFL lamps, it supports ON/OFF functionality only.
- Walk-Away Time Delay: Allows the light to remain on for a set period after activation, providing convenience when leaving a room.
- Compact Receiver: The receiver unit is designed to fit within most ceiling fan canopies for discreet installation.
- Easy DIP Code Setting: Simple configuration of DIP switches on both the remote and receiver for seamless pairing.

Image: Visual guide to compatible lamp types (Halogen, Incandescent, Dimmable CFL, Dimmable LED) and fan styles (downrod style fans).
Package Contents

Image: All components included in the Prichor Universal Ceiling Fan Remote Control Kit.
Your Prichor Universal Ceiling Fan Remote Control Kit includes the following items:
- Remote Control (1)
- Receiver (1) - Dimensions: 4.65 x 2.09 x 1.18 inches
- Wall Mount Holder (1)
- User Guide (1)
- Wiring Cap (6)
- Screws (2)
Note: A 12V battery for the remote control is NOT included and must be purchased separately.
Safety Precautions

Image: Important safety warnings and electrical requirements for installation.
WARNING: HIGH VOLTAGE!
- Always disconnect power by removing the fuse or switching off the circuit breaker before installation or maintenance.
- Do not use this kit with solid-state fans.
- All electrical wiring must meet local and national electrical code requirements.
- The power supply for the fan must be 110/120 Volt, 60Hz.
- Maximum fan motor amps: 1.0.
- Maximum light watts: 300 (for dimmable LED or incandescent only).
- Failure to follow these instructions may result in serious injury or death.
Installation Guide
Follow these steps carefully to install your new ceiling fan remote control kit. It is recommended to watch the provided installation video for a visual guide.
Video: Step-by-step installation guide for the Prichor Universal Ceiling Fan Remote Control Kit, demonstrating wiring and setup.

Image: Visual steps for disconnecting existing wiring and installing the new receiver unit.
- Disconnect Power: Before beginning, ensure all power to the ceiling fan is turned off at the circuit breaker.
- Remove Original Receiver (if applicable): Carefully remove the fan canopy to access the existing wiring and receiver. Disconnect and remove the old receiver unit.
- Identify Wires: You will typically find three wires coming from the ceiling (Live, Neutral, Ground) and three wires from the fan (Fan Live, Light Live, Neutral, Ground).
- Set DIP Switches: Before connecting, locate the DIP switches on both the new remote control and the receiver. Slide them to the same non-default position. This ensures proper communication between the remote and receiver. (Refer to "Remote Control Setting" section below for more details).
- Insert New Receiver: Carefully insert the new receiver unit into the fan's mounting bracket or canopy.
- Connect Wiring: Use the provided wiring caps to make secure connections.
- Connect the Red wire from the receiver to the Red/Black wire from the ceiling (Live).
- Connect the 2-wire end White wire from the receiver to the White wire from the ceiling (Neutral).
- Connect the 3-wire end White wire from the receiver to the White wire from the fan (Neutral).
- Connect the Blue wire from the receiver to the Blue wire from the fan (Light Live).
- Connect the Black wire from the receiver to the Black wire from the fan (Fan Live).
- Finally, connect all the Green ground wires together (from ceiling, fan, and bracket).
- Secure Wiring: Ensure all connections are tight and properly insulated with wiring caps. Neatly tuck all wires into the canopy.
- Reattach Canopy: Carefully reattach the fan canopy to conceal the wiring and receiver.
- Restore Power: Turn the power back on at the circuit breaker.
Remote Control Setting (DIP Switches)
The remote control and receiver communicate via DIP switches. It is crucial that both units have their DIP switches set to the exact same non-default pattern for proper operation.

Image: Detailed view of DIP switches on both the remote and receiver, illustrating the matching process.
- Locate DIP Switches: On the remote, the DIP switches are typically found in the battery compartment. On the receiver, they are usually on the side or bottom.
- Set Matching Pattern: Using a small tool (like a pen tip or small screwdriver), slide the switches on both the remote and receiver to a matching pattern. Avoid using the default "0000" setting as it may cause interference with other devices.
- Dimming Option: If your light bulbs are dimmable, select "D" on the separate dial/switch if present. Otherwise, select "0" for ON/OFF functionality.
Operation
Once installed and configured, your Prichor Universal Ceiling Fan Remote Control provides easy access to your fan and light functions.
- Power Button (⏻): Press to turn the fan and light ON or OFF.
- Fan Speed Button (☠): Cycles through fan speeds: Low, Medium, High, and OFF.
- Light Button (💡):
- Press once to turn the light ON/OFF.
- Press and hold to dim the light (if dimmable bulbs are installed and the dimming option is selected on the DIP switch).
- Walk-Away Time Delay: This feature allows the light to stay on for a short period after you press the light off button, giving you time to exit the room before the light extinguishes.
Troubleshooting
If you experience issues with your remote control kit, please refer to the following common solutions:
| Problem | Possible Cause | Solution |
|---|---|---|
| Fan or Light does not respond to remote. |
|
|
| Light does not dim. |
|
|
| Fan operates but light does not. |
|
|
Specifications
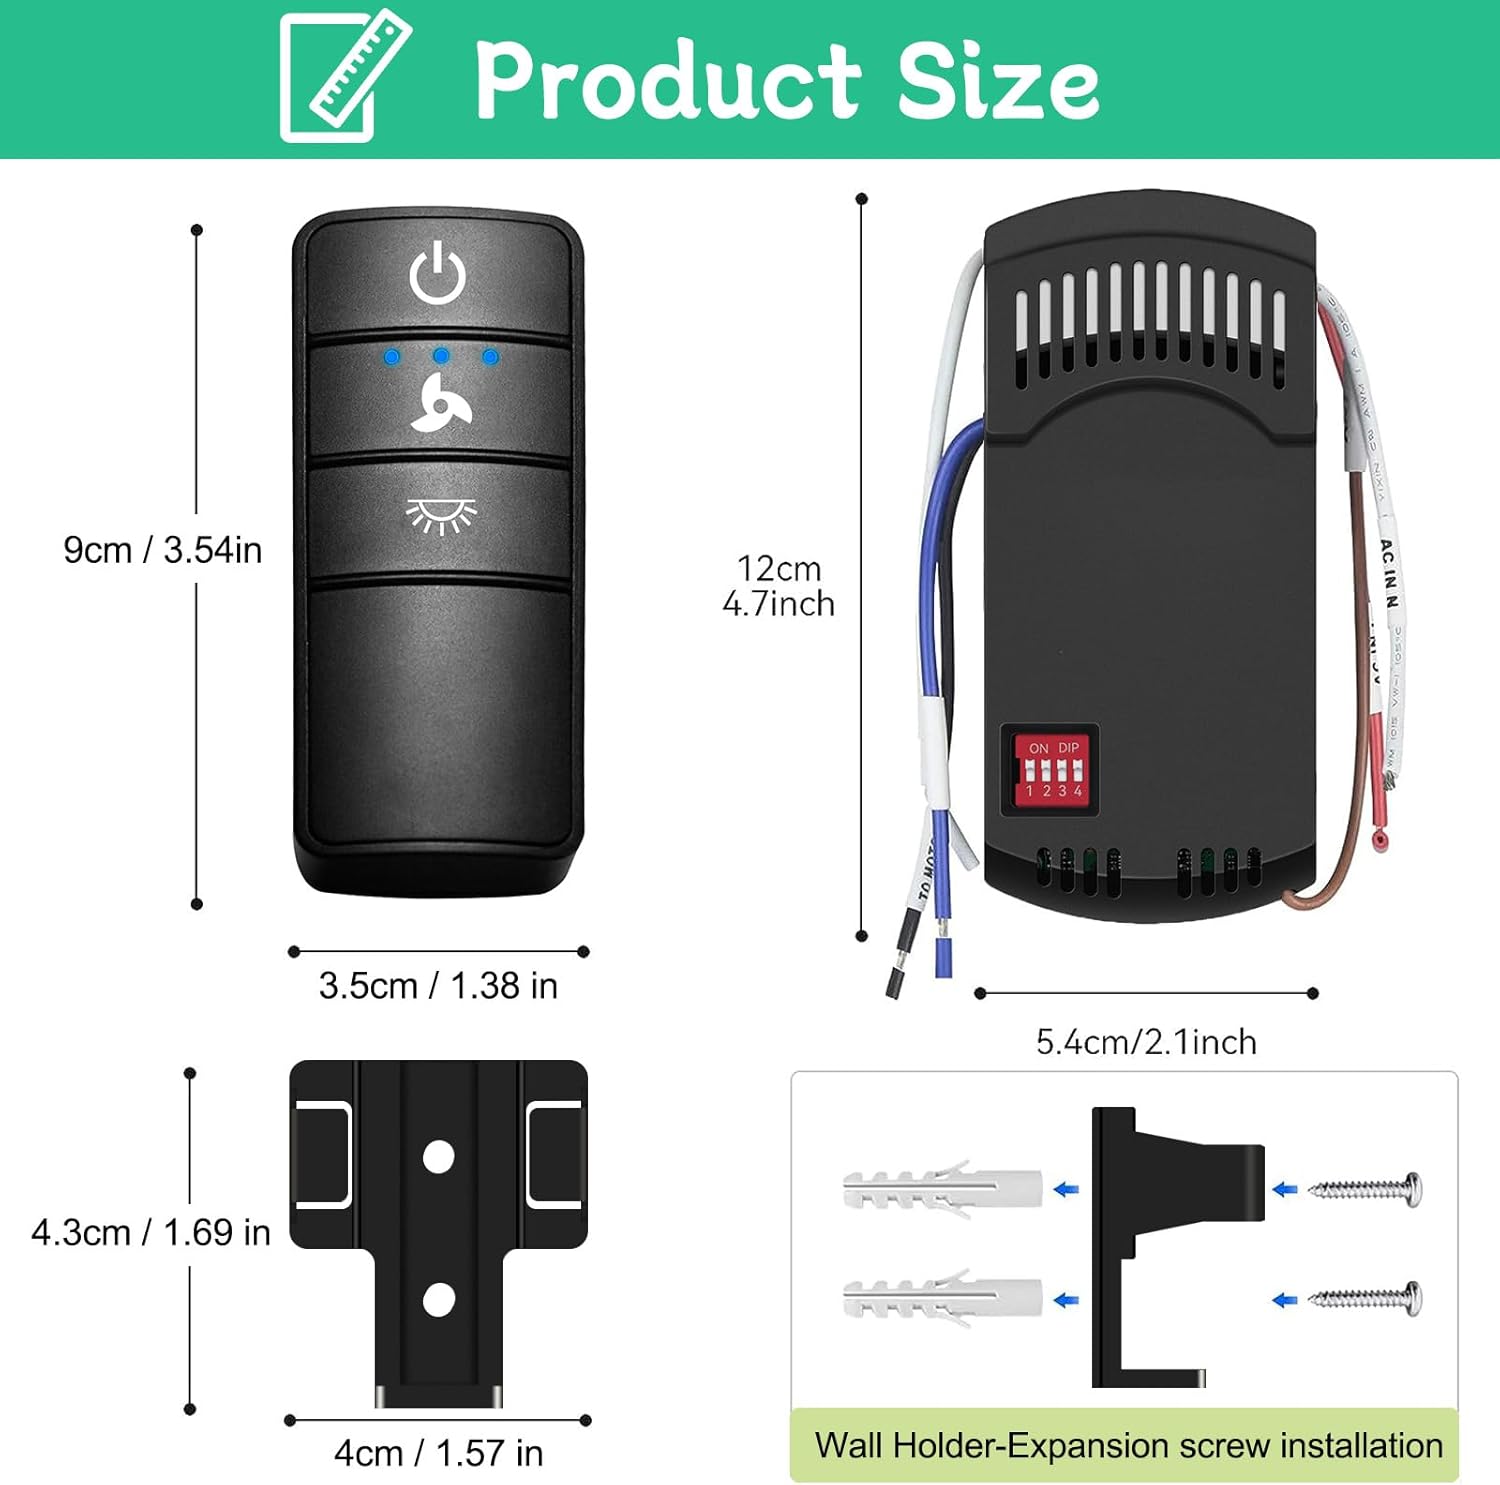
Image: Detailed product dimensions for the remote, receiver, and wall mount.
| Feature | Detail |
|---|---|
| Product Dimensions (Remote) | 3.54 x 1.38 x 0.79 inches (9 x 3.5 x 2 cm) |
| Product Dimensions (Receiver) | 4.65 x 2.09 x 1.18 inches (12 x 5.4 x 3 cm) |
| Item Weight | 5.1 ounces |
| Model Number | RC-72T & RC-72R |
| Batteries Required | 1 x 12V battery (not included) |
| Max Fan Motor Amps | 1.0A |
| Max Light Watts | 300W (Dimmable LED/Incandescent) |
| Manufacturer | Prichor |
| Country of Origin | China |
Warranty and Support
Prichor stands behind the quality of its products. For warranty information, technical support, or any inquiries regarding your Universal Ceiling Fan Remote Control Kit, please contact Prichor customer service.
You can also visit the official Prichor store on Amazon for more product information and support resources: