
1. Introduction
The Toyvian Hydraulic Lift Toy DIY Assembly Kit is an educational science experiment kit designed for children to explore fundamental principles of hydraulics, air pressure, and simple lifting platforms. This kit provides a hands-on learning experience, allowing users to assemble a functional hydraulic lift model from wooden components and syringes.
Through assembly and operation, users will gain practical understanding of how hydraulic systems transmit force and create lifting motion. This kit is suitable for educational purposes, fostering curiosity and problem-solving skills.
2. Safety Information
- This kit contains small parts and is not suitable for children under 3 years old due to choking hazards. Adult supervision is recommended during assembly and use.
- Handle wooden components carefully to avoid splinters.
- Ensure all connections, especially the syringe tubing, are secure to prevent leaks during operation.
- Do not ingest any parts or liquids used with the kit.
3. Package Contents
Before beginning assembly, please verify that all components listed below are present in your kit:
- Pre-cut wooden pieces for the lift structure
- Syringes (typically two)
- Flexible tubing for hydraulic connection
- Fasteners (screws, nuts, or similar connectors)
- Small rubber bands or ties
- Sandpaper or file (optional, for smoothing edges)

Figure 3.1: All components included in the kit.
4. Setup and Assembly Instructions
Follow these steps carefully to assemble your hydraulic lift model. Refer to the images for visual guidance.
- Prepare Components: Remove all puzzle pieces from the packaging. Gently detach any remaining wood fragments. If necessary, use sandpaper to smooth rough edges on the wooden pieces.
- Assemble the Base and Top Platforms: Identify the main base and top platform pieces. These are typically larger, flat wooden pieces.
- Construct the Scissor Mechanism: Connect the smaller wooden strips to form the scissor-like lifting mechanism. Use the provided fasteners (screws and nuts) to join these pieces at their pivot points. Ensure the connections are secure but allow for smooth movement.
- Attach Scissor Mechanism to Platforms: Secure one end of the assembled scissor mechanism to the base platform and the other end to the top platform. Ensure the mechanism can expand and contract freely.
- Connect Syringes: Attach one syringe to the base of the lift mechanism. This syringe will act as the actuator. Connect the flexible tubing to this syringe.
- Fill and Connect Second Syringe: Fill the second syringe with water (or air, depending on the desired experiment). Connect the other end of the flexible tubing to this second syringe. Ensure both syringes are filled with the same medium (water or air) and that there are no air bubbles in the water if using water.
- Secure Connections: Double-check all connections, especially where the tubing meets the syringes, to prevent any leaks or disconnections during operation.

Figure 4.1: Assembled hydraulic lift in use.
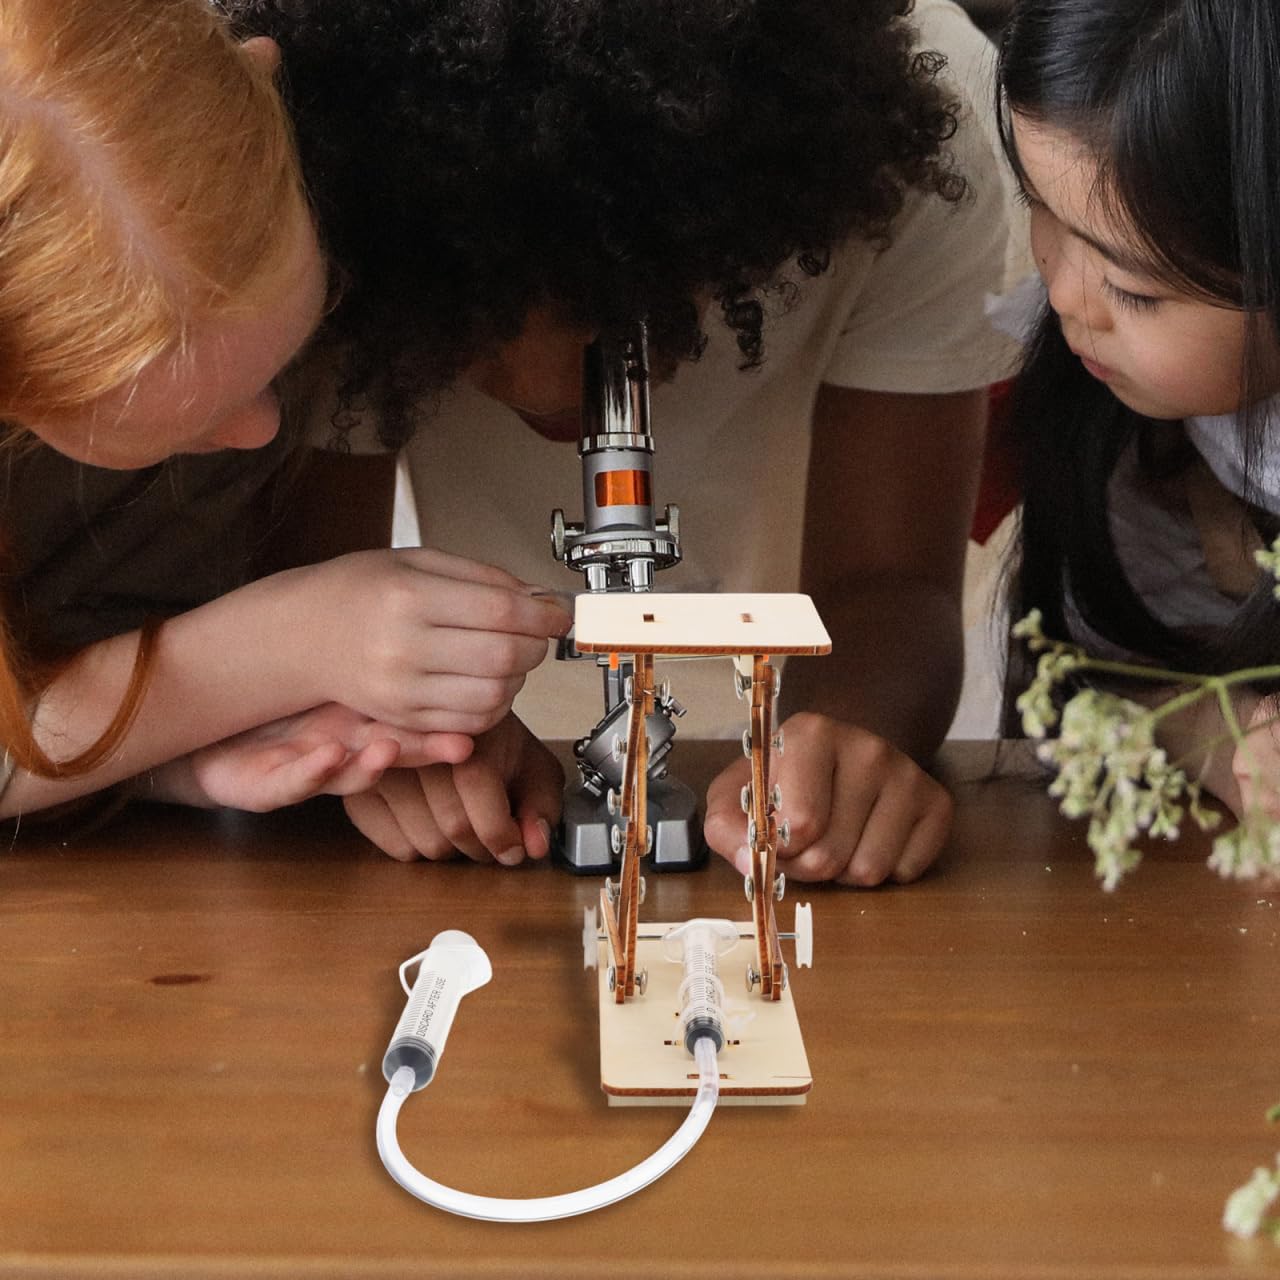
Figure 4.2: Close-up of the assembled hydraulic lift.

Figure 4.3: Detailed view of the syringe connection.
5. Operating Instructions
Once assembled, the hydraulic lift operates based on Pascal's principle, where pressure applied to an enclosed fluid is transmitted undiminished to every portion of the fluid and the walls of the containing vessel.
- Initiate Lift: Gently push the plunger of the input syringe (the one not directly attached to the lift). This action will transfer the fluid (or air) through the tubing to the output syringe, causing the lift mechanism to extend and raise the top platform.
- Lower Lift: To lower the platform, gently pull the plunger of the input syringe. This will draw the fluid (or air) back, causing the lift mechanism to retract and lower the top platform.
- Observe Principles: Pay attention to how the force applied to the smaller syringe translates into lifting power on the platform. Experiment with different amounts of force and observe the corresponding movement.
Video 5.1: Demonstration of the hydraulic lift in operation, showing the platform raising and lowering.
Video 5.2: Another view of the hydraulic lift demonstrating its lifting capabilities.
6. Maintenance
- Cleaning: Wipe wooden parts with a dry cloth. If using water in the syringes, ensure they are thoroughly drained and dried after use to prevent mold or damage.
- Storage: Store the kit in a dry place away from direct sunlight and extreme temperatures to preserve the integrity of the wooden components.
- Inspections: Periodically check all fasteners and connections to ensure they remain tight and secure.
7. Troubleshooting
- Lift not moving smoothly or getting stuck:
- Check if all pivot points are loose enough to allow movement but tight enough to hold the structure.
- Ensure wooden pieces are not rubbing against each other excessively. Light sanding may be required.
- Verify that the scissor mechanism is assembled correctly and not misaligned.
- Hydraulic system not responding (no lift or weak lift):
- Check for leaks in the tubing or at the syringe connections. Tighten connections if necessary.
- If using water, ensure there are no large air bubbles in the system, as air is compressible and reduces efficiency.
- Ensure the syringe plungers are moving freely and not obstructed.
- Broken or damaged wooden pieces:
- Small breaks may be repaired with wood glue. For significant damage, replacement parts may be needed (contact manufacturer if available).
8. Specifications
| Brand | Toyvian |
| Model Number | 07S051532BVMC |
| Material Type | Wood |
| Educational Objective | Hydraulic Transmission, Air Pressure, Simple Lifting Platforms |
| Item Dimensions (assembled) | Approximately 22 x 0.5 x 12 inches (55.88 x 1.27 x 30.48 cm) |
| Item Weight | 1.76 ounces (approximately 50 grams) |
| Recommended Age | 0 - 3 years (Note: Adult supervision recommended for all ages due to small parts and assembly requirements) |

Figure 8.1: Dimensions of the wooden components.
9. Warranty and Support
Information regarding product warranty or specific customer support contacts is not provided in the available product details. For any issues or inquiries, please refer to the retailer or the Toyvian brand's official channels if available.