1. Overview
The VIVOHOME Level 2 Portable EV Charger is designed to provide efficient and safe charging for your electric vehicle. Featuring a 32A, 240V capacity and a NEMA 14-50 plug, this charger offers fast charging speeds, allowing for approximately 44 miles of driving range per hour of charge. It includes a smart screen for real-time monitoring and adjustable current settings to suit various charging needs. The portable design, coupled with a 23.2ft charging cable, ensures convenience for both home and on-the-go use.
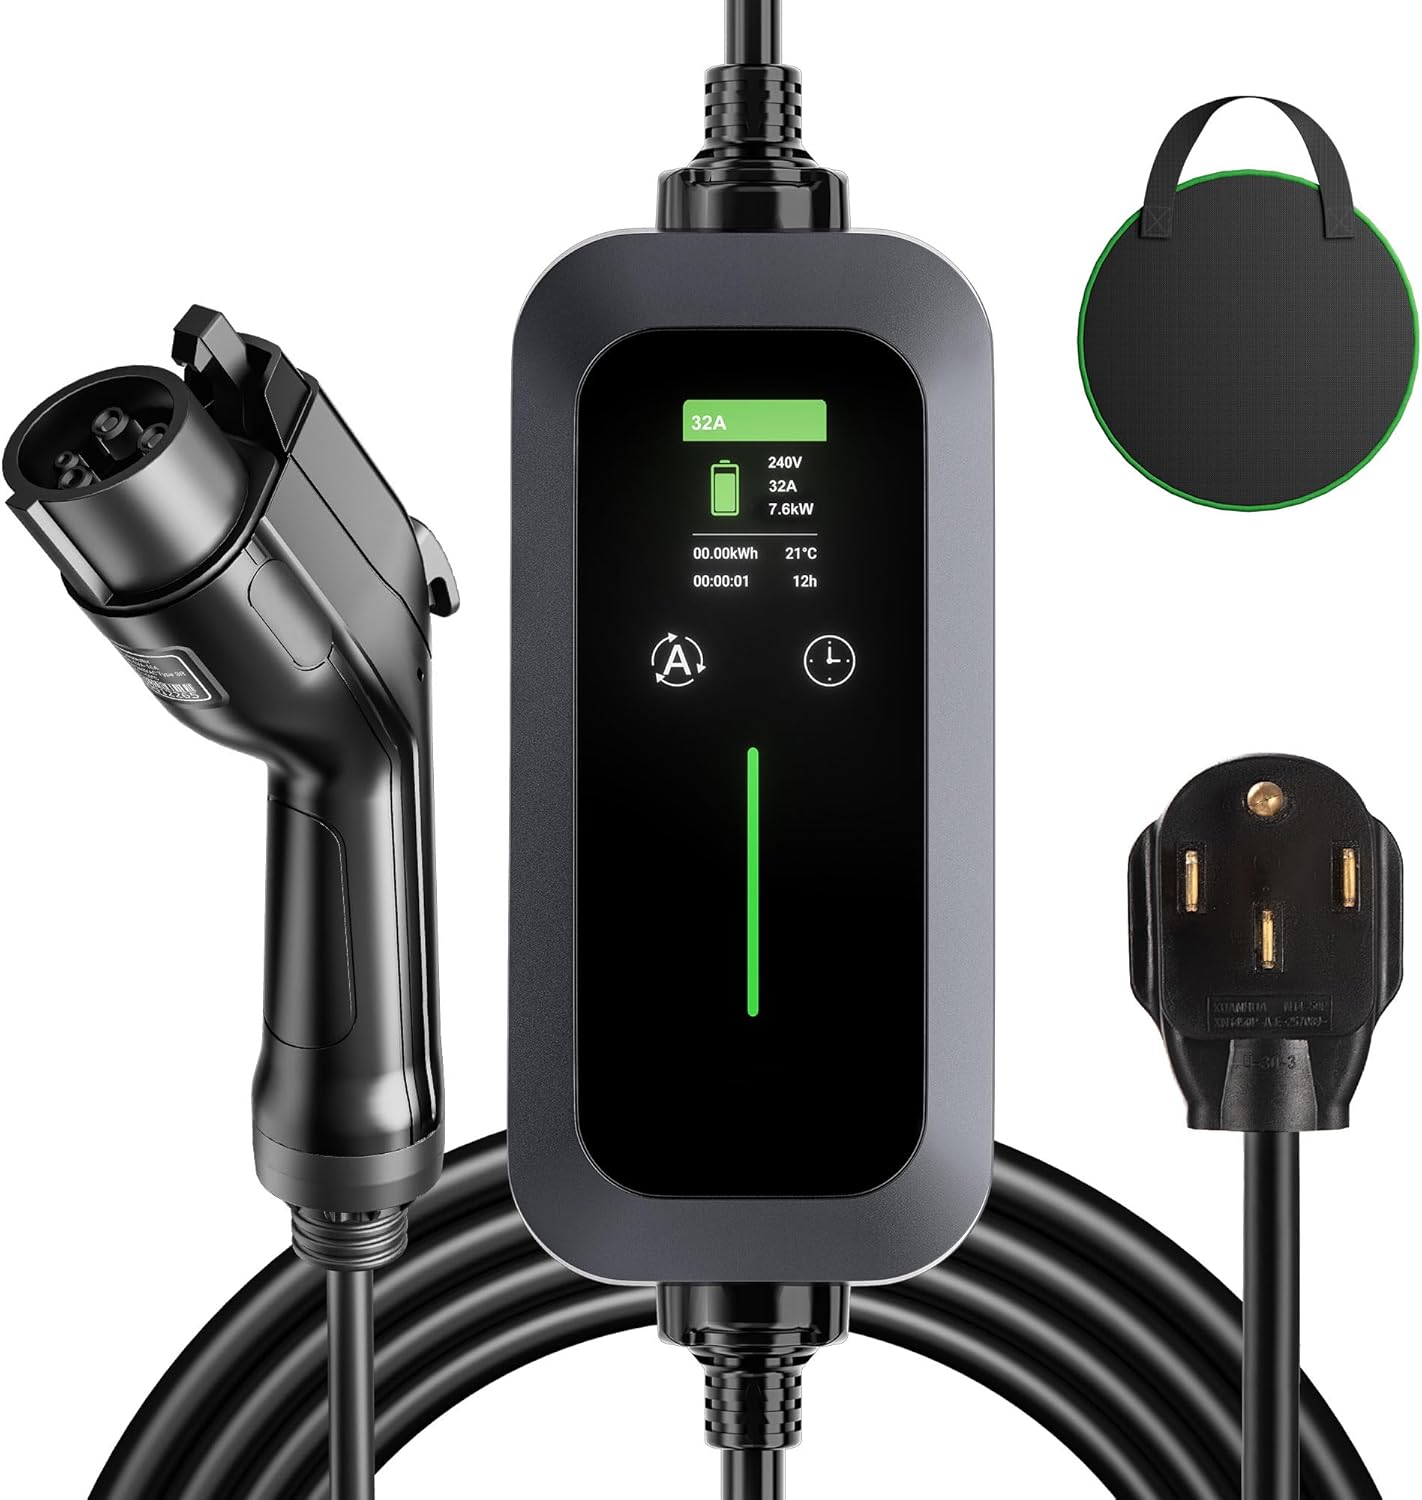
Image 1: VIVOHOME Level 2 Portable EV Charger components.
2. Package Contents
Verify that all items are present in the package:
- Instruction Manual x 1
- Charging Gun (J1772 Connector) x 1
- Storage Bag x 1
3. Setup Instructions
3.1 Connecting the Charger to Power
1. Ensure the NEMA 14-50 plug is clean and free of debris.
2. Insert the NEMA 14-50 plug into a compatible 240V NEMA 14-50 wall outlet. Ensure the connection is secure.
3. The charger's control box will power on, and the smart screen will display standby information.
Video 1: Demonstration of unboxing, plugging the charger into a NEMA 14-50 outlet, and connecting to an EV.
3.2 Connecting to Your Electric Vehicle
1. Open the charging port cover on your electric vehicle.
2. Take the J1772 charging connector and firmly insert it into your vehicle's charging port until it clicks into place. For Tesla vehicles, an appropriate adapter (not included) is required.
3. Once connected, the charger will initiate the charging process, and the smart screen will update to show active charging status.

Image 2: Portable EV charger connected to an electric vehicle.
4. Operating Instructions
4.1 Adjusting Charging Current
The charger allows you to adjust the charging current to optimize for your vehicle's needs or available power supply. To change the current:
- Ensure the charger is in standby mode (not actively charging).
- Press and hold the 'A' button on the control box for 3 seconds. This prevents accidental changes during charging.
- Briefly press the 'A' button to cycle through available current settings: 10A, 16A, 20A, 24A, 32A.
- The selected current will be displayed on the screen. The charger will use this setting for subsequent charging sessions until changed again.
4.2 Scheduled Charging
Utilize the smart scheduling feature to charge during off-peak electricity hours:
- While in standby mode, press the 'Time' button on the control box.
- Each press will increase the delay time by one hour, from 0 to 12 hours.
- Once the desired delay is set, the charger will automatically begin charging after the specified time has elapsed.

Image 3: Scheduled charging feature on the VIVOHOME EV charger.
4.3 Monitoring Charging Status
The integrated smart screen provides real-time information about the charging process:
- Current and Voltage: Displays the real-time charging current (Amps) and voltage (Volts).
- Temperature: Shows the operating temperature of the charger.
- Charging Duration: Indicates how long the current charging session has been active.
- Real-time Battery Capacity: Provides an estimate of the energy delivered to the vehicle.
- LED Indicators: Lights on the control box indicate charging status (e.g., green for charging, orange for standby, red for fault).

Image 4: LCD Control Screen displaying charging information.
Video 2: Overview of the VIVOHOME Portable EV Charger, highlighting its smart screen and portability.
5. Safety Guidelines
The VIVOHOME EV Charger is designed with multiple safety features to ensure a secure charging experience. Always adhere to the following guidelines:
- UL Certified Components: The charger head and cable are UL-certified for safety.
- Protective Cover: The charger head is equipped with a protective cover.
- Low Voltage Protection: Automatically shuts off if input voltage is too low.
- Overcurrent Protection: Prevents damage from excessive current flow.
- High Voltage Protection: Safeguards against dangerously high input voltage.
- Overheating Protection: Monitors internal temperature and reduces power or shuts down if overheating occurs.
- Lightning Protection: Offers protection against electrical surges from lightning.
- Leakage Protection: Detects and prevents electrical leakage.
- IP55 Waterproof: Provides protection against dust and low-pressure water jets. While designed to withstand harsh weather, it is not recommended for use in heavy rain or snow.

Image 5: IP55 Waterproof rating and safety features.
6. Vehicle Compatibility
The VIVOHOME Level 2 Portable EV Charger is widely compatible with electric vehicles that use the SAE J1772 charging standard. This includes most electric vehicles and Plug-in Hybrid Electric Vehicles (PHEVs). For Tesla vehicles, a separate J1772 to Tesla adapter is required (not included).

Image 6: J1772 charger compatibility with various EV models.
7. Maintenance and Care
To ensure the longevity and optimal performance of your VIVOHOME EV Charger, follow these maintenance guidelines:
- Cleaning: Regularly wipe the control box and cables with a dry, soft cloth. Do not use harsh chemicals or abrasive cleaners. Ensure the charging connector is free of dust and moisture.
- Storage: When not in use, store the charger in its provided storage bag in a cool, dry place, away from direct sunlight and extreme temperatures. Avoid coiling the cable too tightly.
- Inspection: Periodically inspect the cable, plug, and connector for any signs of damage, fraying, or corrosion. Do not use the charger if any damage is observed.
- Environmental Conditions: While IP55 rated, avoid prolonged exposure to heavy rain, snow, or extreme humidity to prevent potential damage.
8. Troubleshooting
If you encounter issues with your VIVOHOME EV Charger, refer to the following common troubleshooting steps:
8.1 Charger Not Powering On
- Ensure the NEMA 14-50 plug is fully and securely inserted into the wall outlet.
- Check the circuit breaker for the outlet to ensure it has not tripped.
- Verify that the wall outlet is providing power (e.g., by plugging in another appliance).
8.2 Charging Not Initiating
- Confirm that the J1772 connector is firmly seated in the vehicle's charging port. Listen for a click.
- Check the vehicle's dashboard or infotainment system to ensure it is ready to accept a charge.
- If scheduled charging is enabled, verify the set delay time. The charger will only start after the delay.
- Ensure the vehicle's charging settings (if any) are not preventing charging.
8.3 Slow Charging Speed
- Check the current setting on the charger's control box. Ensure it is set to the desired amperage (e.g., 32A for maximum speed).
- Verify that your vehicle is capable of accepting the higher charging rate.
- Environmental factors (extreme cold or heat) can sometimes affect charging efficiency.
8.4 Error Codes on Screen
If an error code appears on the smart screen, consult the specific error code section in the full VIVOHOME product manual (if available) or contact customer support for assistance. Common error codes relate to overcurrent, overvoltage, undervoltage, or overheating.
9. Technical Specifications
| Specification | Value |
|---|---|
| Brand | VIVOHOME |
| Model Number | VH1239US |
| Amperage | 32 Amps (Adjustable: 10/16/20/24/32A) |
| Output Voltage | 240 Volts |
| Wattage | 7.2 KW |
| Plug Type | NEMA 14-50 |
| Connector Type | SAE J1772 |
| Cable Length | 23.2 ft |
| Waterproof Level | IP55 |
| Item Weight | 8.4 Pounds |
| Product Dimensions | 3.9 x 2.2 x 8.7 inches (Control Box) |
| Special Features | Charging Indicator, Fast Charging, Travel, Waterproof |
| Certification | UL (Charger head and cable) |

Image 7: Product dimensions and key specifications.
10. Warranty and Customer Support
For warranty information, product registration, or technical support, please refer to the official VIVOHOME website or contact their customer service department. Keep your purchase receipt as proof of purchase for warranty claims.


