
1. Introduction
This user manual provides detailed instructions for the safe and efficient operation, installation, and maintenance of your Shinco 12,000 BTU Portable Air Conditioner. Please read this manual thoroughly before using the appliance and retain it for future reference.

Figure 1.1: Shinco 12,000 BTU Portable Air Conditioner and its remote control.
2. Product Features
- Auto Evaporation System: Designed to automatically remove condensation, reducing the need for manual drainage. Excess water is discharged via a water pipe.
- Outstanding Cooling Ability: Provides 11,500 BTU (ASHRAE) / 7,400 BTU (SACC) cooling capacity, suitable for rooms up to 400 sq.ft. Adjustable temperature range from 60°F to 86°F.
- 3-in-1 Functionality: Offers Cool, Fan, and Dry (dehumidifier) modes. Dehumidification capacity up to 43.2L/day without a bucket due to self-evaporating operation. Features 3 fan speeds.
- Quick Installation: Includes an exhaust hose and window sealing kit for easy setup without additional tools.
- Easy-to-Use Design: Compact size with 4 casters for portability. Features an LED display and a remote control with a 23ft maximum range. Auto swing function is adjustable.
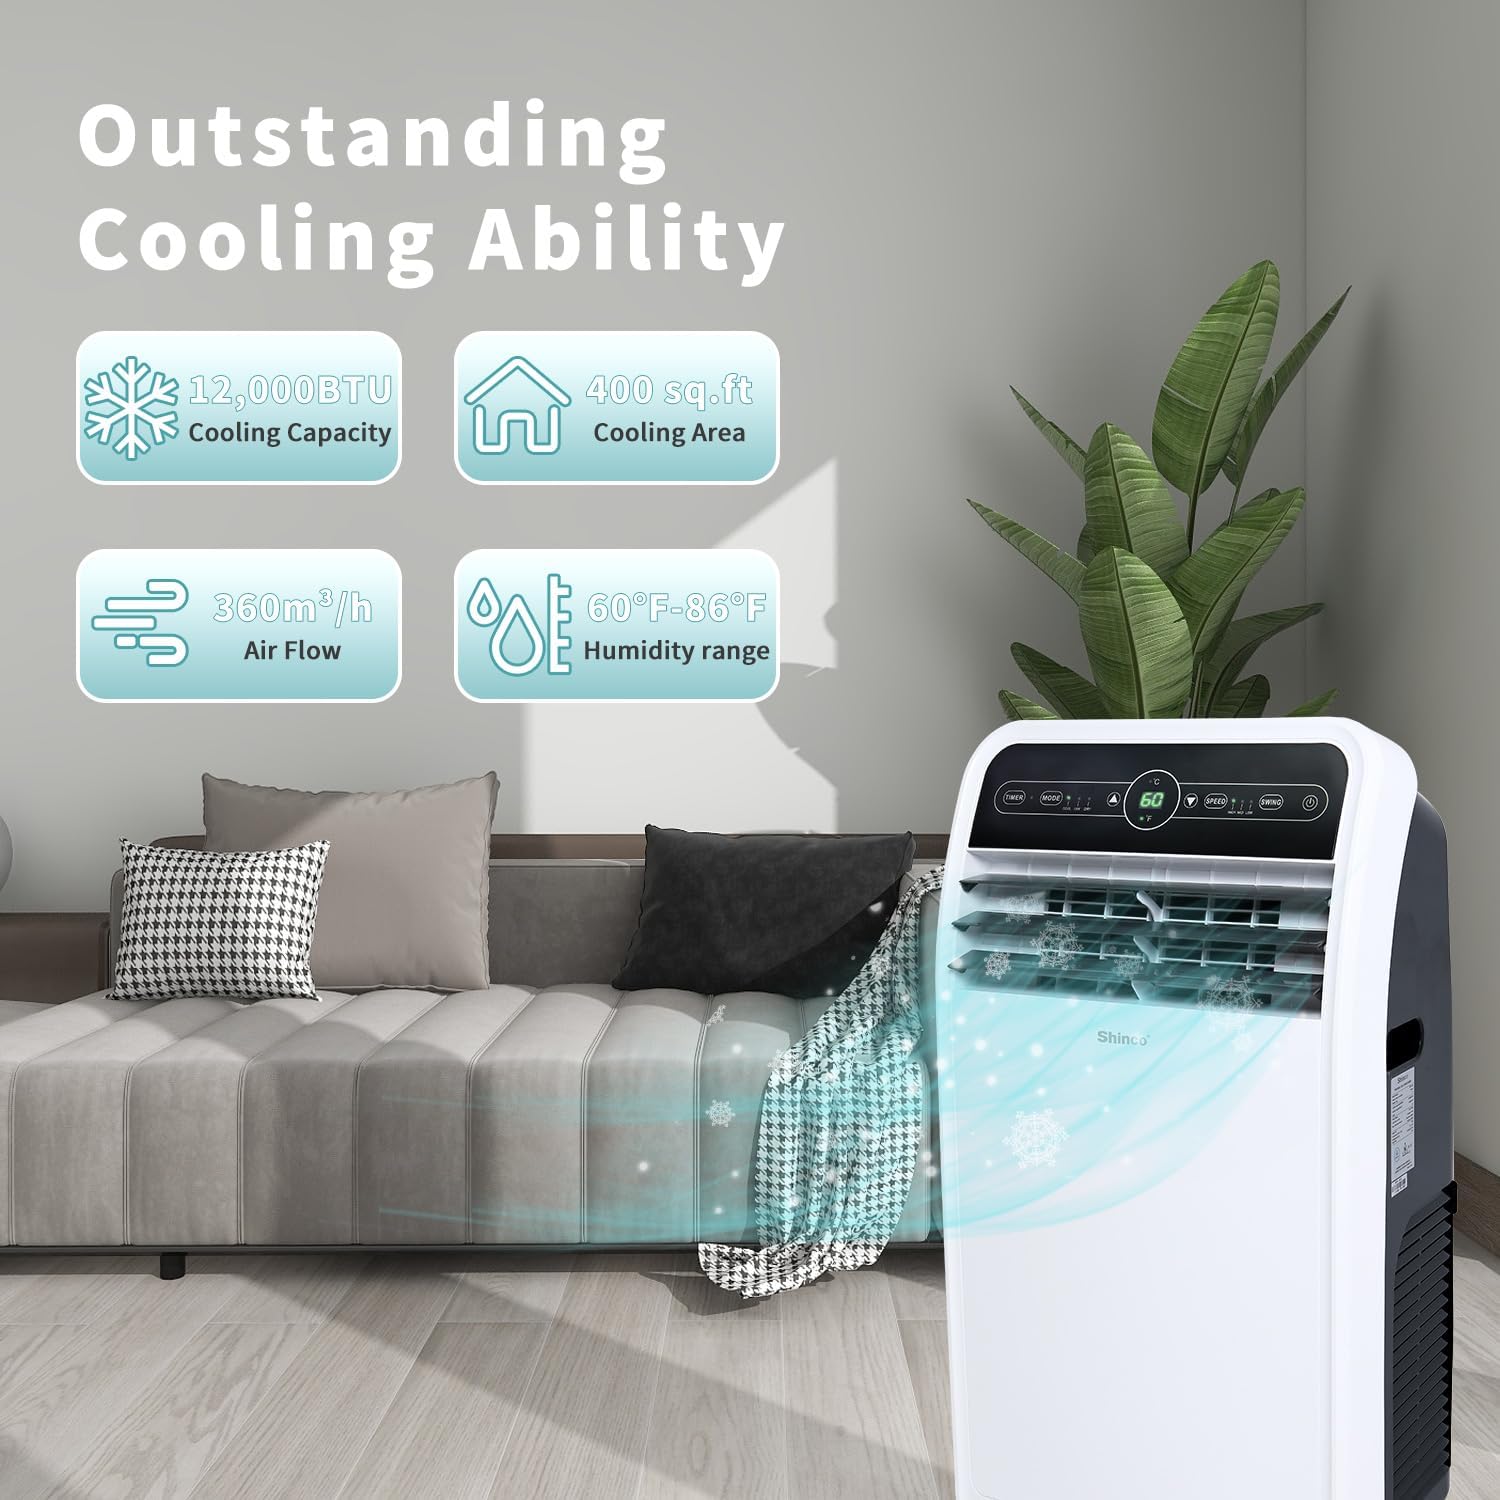
Figure 2.1: The Shinco Portable AC unit demonstrating its cooling capabilities for spaces up to 400 sq.ft.

Figure 2.2: Illustration of the 3-in-1 functionality: Cool, Fan, and Dry modes.
3. Product Components
The following components are included with your Shinco Portable Air Conditioner:
- Portable Air Conditioner Unit
- Remote Control
- Exhaust Hose
- Window Sealing Kit (adjustable panel)
- Drainage Hose
- User Manual
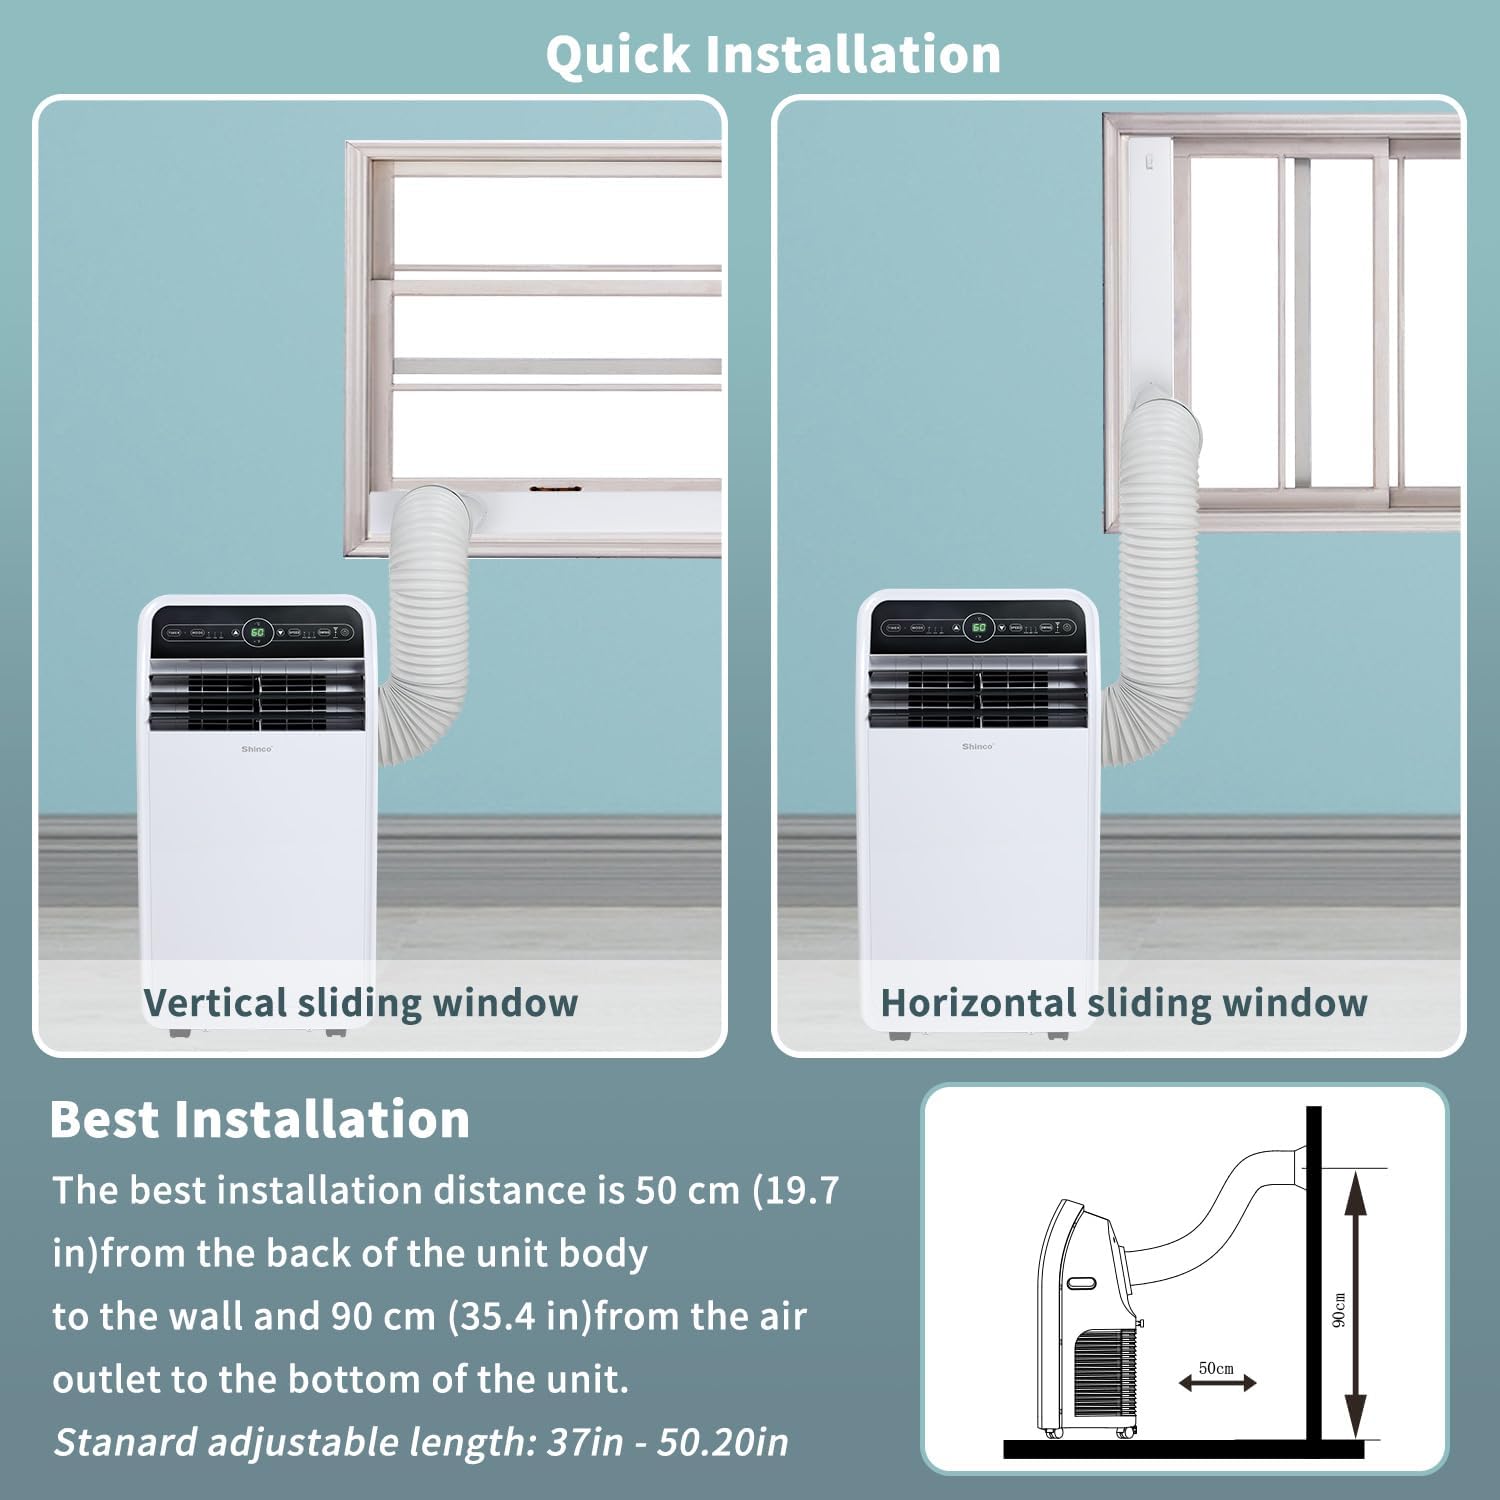
Figure 3.1: All components included with the Shinco Portable Air Conditioner, including the main unit, exhaust hose, window kit, remote, and manual.
4. Setup and Installation
Follow these steps for proper setup and installation of your portable air conditioner:
- Positioning the Unit: Place the unit on a flat, stable surface. Ensure there is at least 50 cm (19.7 inches) of space from the back of the unit to any wall or obstruction.
- Window Kit Assembly:
- Adjust the window sealing kit to fit your sliding window (vertical or horizontal). The standard size is 37-50.2 inches.
- Secure the window kit in the open window frame.
- Connecting the Exhaust Hose:
- Attach one end of the 59-inch telescopic exhaust hose to the air outlet on the back of the unit.
- Attach the other end of the hose to the opening in the window sealing kit. Ensure a secure connection to prevent hot air from re-entering the room.
- Power Connection: Plug the power cord into a grounded electrical outlet.

Figure 4.1: Examples of quick installation in vertical and horizontal sliding windows.

Figure 4.2: Standard window types and recommended sizes for the window sealing kit.
5. Operating Instructions
Your Shinco Portable Air Conditioner can be operated using the control panel on the unit or the included remote control.
5.1 Control Panel and Remote Control

Figure 5.1: The unit's LED display and remote control for easy operation.
The LED display shows the current temperature and settings. The remote control allows you to adjust settings from up to 23 feet away.
5.2 Operating Modes
- Cool Mode: For cooling the room. Set your desired temperature between 60°F and 86°F.
- Fan Mode: Circulates air without cooling. Choose from 3 fan speeds (Low, Medium, High).
- Dry Mode (Dehumidifier): Removes moisture from the air. The unit can remove up to 43.2L/day.

Figure 5.2: The unit operating in Cool Mode, providing refreshing air.

Figure 5.3: The unit operating in Dry Mode, effectively removing humidity from the environment.
5.3 Additional Functions
- Timer Function: Set the unit to turn on or off automatically within a 24-hour period. This is particularly useful for maintaining comfort while saving energy.
- Auto Swing: Manually control the direction of the air outlet grille to direct airflow where needed.

Figure 5.4: The 24-hour timer function allows for scheduled operation, contributing to energy efficiency.

Figure 5.5: The adjustable air outlet grille allows for manual control of airflow direction.
6. Maintenance
Regular maintenance ensures optimal performance and longevity of your unit.
6.1 Air Filter Cleaning
The air filter should be cleaned regularly, especially if the unit is used frequently. A dirty filter can reduce cooling efficiency.
- Turn off and unplug the unit before cleaning.
- Locate the air filter on the side or back of the unit.
- Carefully remove the filter.
- Clean the filter using a vacuum cleaner or wash it with warm, soapy water. Rinse thoroughly.
- Allow the filter to dry completely before reinserting it into the unit.

Figure 6.1: Removing the air filter for cleaning.
6.2 Water Drainage
While the unit features an auto-evaporation system, occasional manual drainage may be required, especially in high humidity environments or if the unit indicates a full water tank.
- Turn off and unplug the unit.
- Place a shallow pan or bucket under the drainage port at the bottom rear of the unit.
- Remove the drain plug to allow water to flow out.
- Once drained, replace the drain plug securely.

Figure 6.2: Draining excess water from the unit.
7. Troubleshooting
Before contacting customer support, please refer to the following troubleshooting guide for common issues:
| Problem | Possible Cause | Solution |
|---|---|---|
| Unit does not turn on. | No power, power cord unplugged, circuit breaker tripped, full water tank. | Check power connection, reset circuit breaker, empty water tank if full. |
| Unit does not cool effectively. | Dirty air filter, blocked air intake/outlet, room too large, windows/doors open, exhaust hose not properly installed. | Clean air filter, ensure clear airflow, close windows/doors, check exhaust hose connection. |
| Unit is noisy. | Unit not on a level surface, internal components vibrating. | Ensure unit is on a flat, stable surface. Some operational noise is normal. |
| Water leakage. | Drain plug not secure, unit not level, excessive humidity. | Check drain plug, ensure unit is level, drain water manually if auto-evaporation is overwhelmed. |
8. Specifications
| Specification | Value |
|---|---|
| Product Dimensions | 13.39 x 17.44 x 32.68 inches |
| Item Weight | 72.8 pounds |
| Model Number | SPF1-12C |
| Form Factor | Portable |
| Capacity (Dehumidifier) | 43.2 Liters/day |
| Floor Area Coverage | Up to 400 Square Feet |
| Voltage | 115 Volts |
| Noise Level | 52 dB |
| Brand | Shinco |
| Cooling Power | 12000 British Thermal Units (BTU) |
| Special Features | Auto Swing, Dehumidifier, Portable |
| Seasonal Energy Efficiency Ratio (SEER) | 13 |
| Color | White |
| Refrigerant | R 410A |
9. Warranty and Support
Your Shinco Portable Air Conditioner comes with a 1 Year Warranty from the purchase date.
For technical support, troubleshooting assistance, or warranty claims, please contact Shinco customer service. Refer to the contact information provided on the product packaging or the official Shinco website.


