
1. Product Overview
This manual provides detailed instructions for the installation, operation, and maintenance of your ARIEL 16" x 19.63" Oval Undermount Bathroom Sink, Model BD-OVL-SK. This sink is designed for undermount installation and features durable porcelain construction with an overflow hole for enhanced functionality.
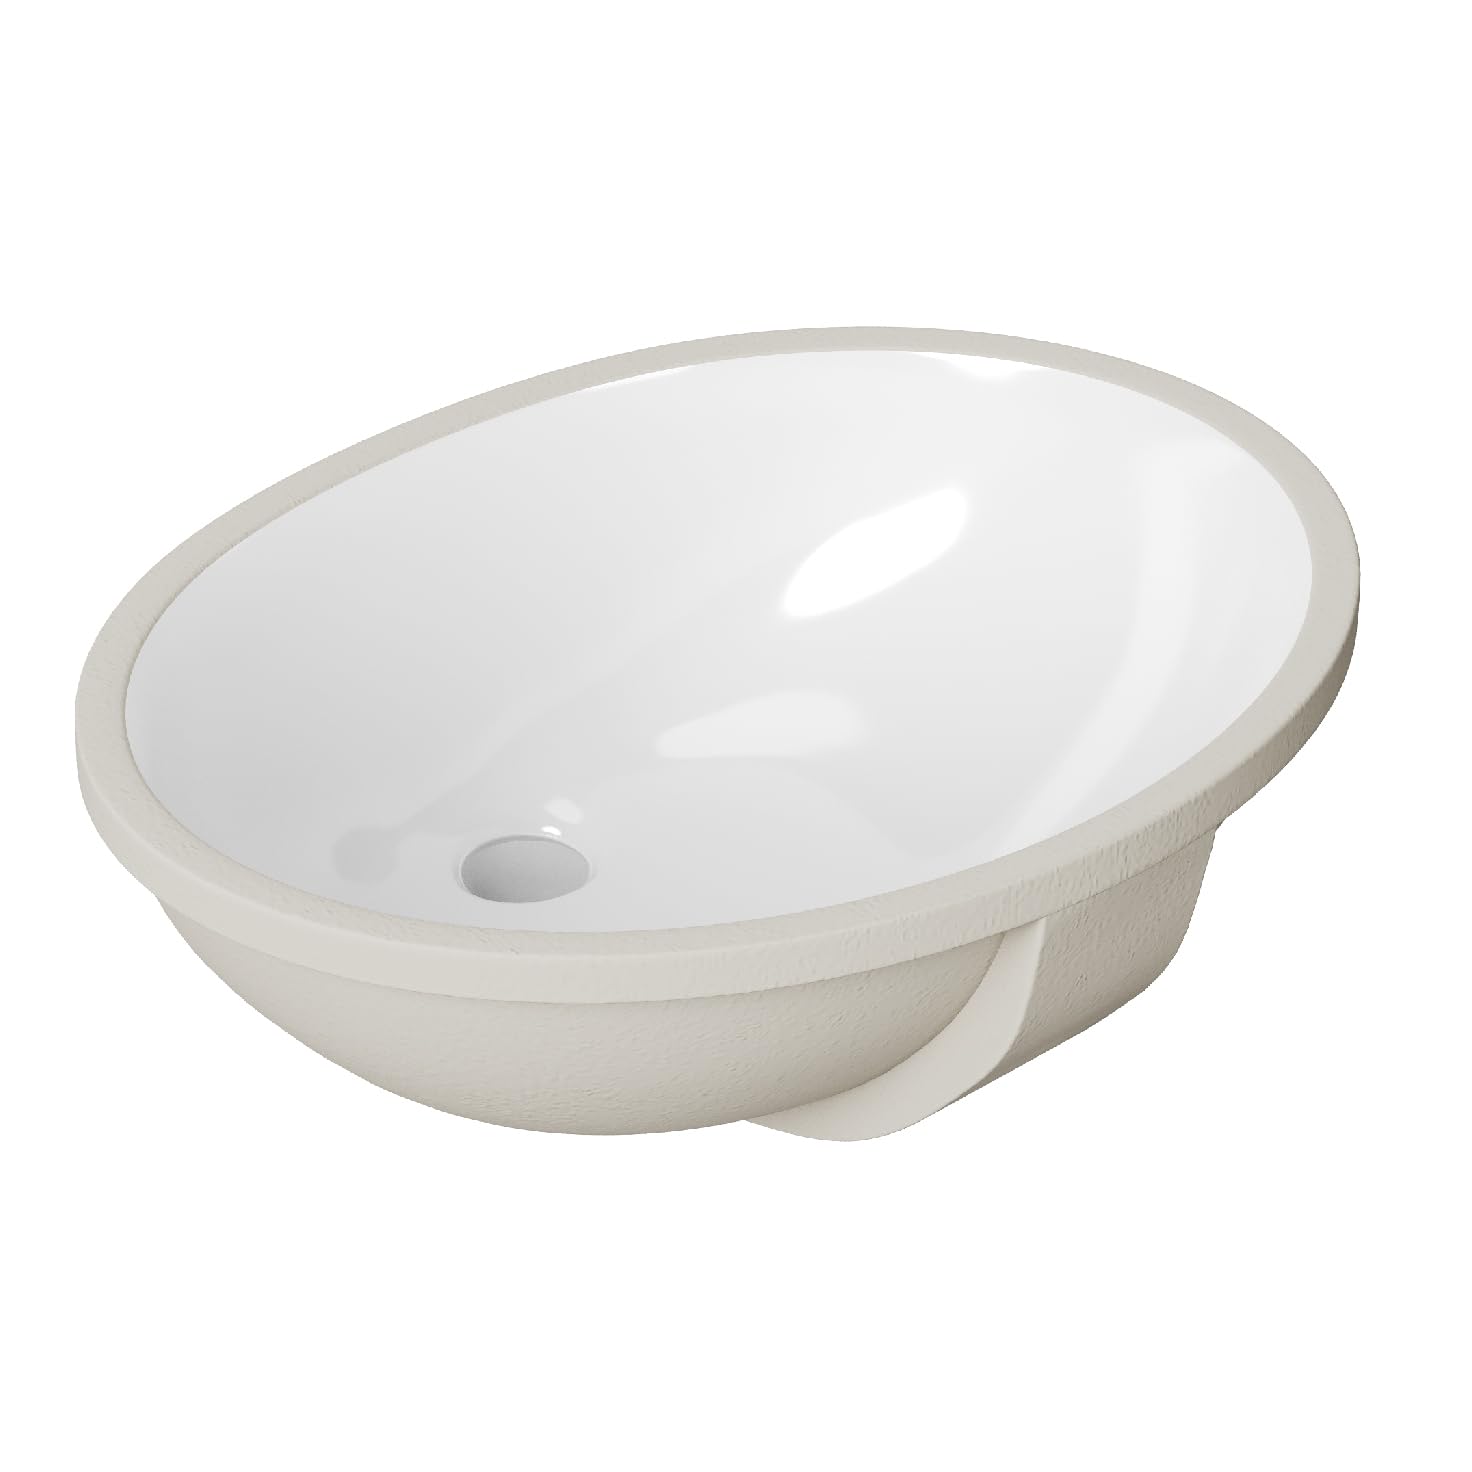
Image 1.1: Top view of the ARIEL Oval Undermount Bathroom Sink.
2. Key Features
- Exterior Size: 16" L x 19.63" W x 8.25" H
- Interior Size: 14.13" L x 17.75'' W x 7'' D
- Constructed from Porcelain UPC Certified Material, designed for durability and resistance to scratches and stains.
- Features an overflow hole to prevent spills and overflow issues.
- Engineered to resist yellowing, maintaining its original white color over time.
- Easy-to-clean surface ensures simple and hassle-free maintenance.

Image 2.1: Illustration of the overflow-proof design.

Image 2.2: Demonstrating the easy-to-clean surface of the sink.
3. Specifications
| Specification | Detail |
|---|---|
| Brand | ARIEL |
| Model Number | BD-OVL-SK |
| Color | White |
| Material | Porcelain |
| Exterior Dimensions (L x W x H) | 16" x 19.63" x 8.25" |
| Interior Dimensions (L x W x D) | 14.13" x 17.75" x 7" |
| Shape | Oval |
| Installation Type | Undermount |
| Drain Type | Pop-Up (Drain not included) |
| Hole Count | 1 (for drain) |
| Manufacturer | Atlas International Inc |
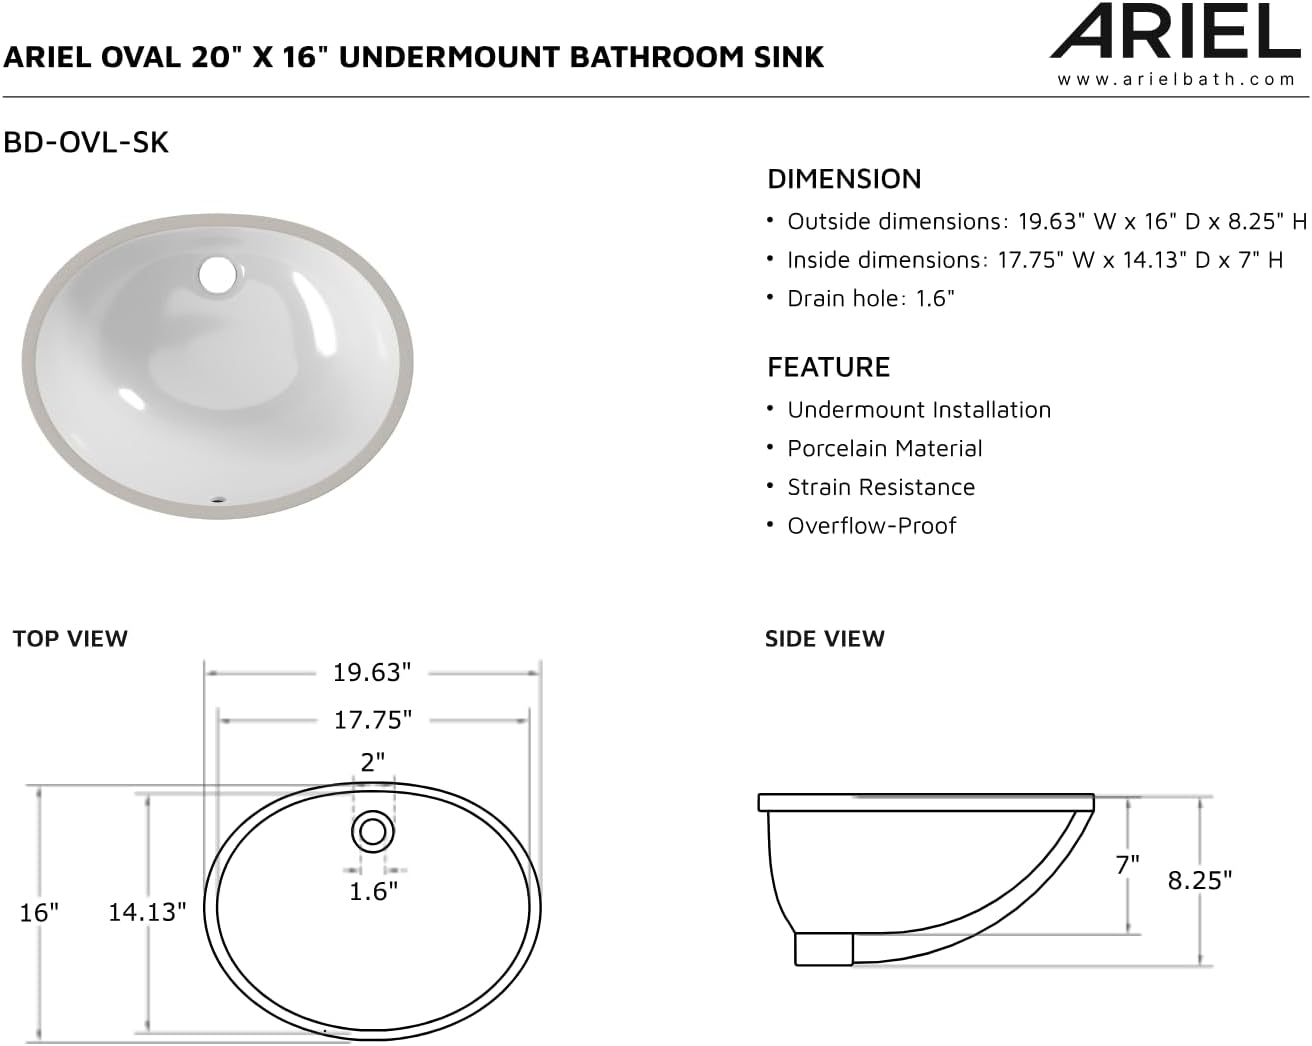
Image 3.1: Detailed dimensions diagram for the ARIEL Oval Undermount Sink.

Image 3.2: Visual representation of the sink's dimensions.
4. Installation Instructions
4.1. Before You Begin
- Inspect the sink for any damage before installation.
- Ensure you have all necessary tools and materials (e.g., silicone sealant, mounting clips, drill, safety glasses).
- Read all instructions thoroughly before proceeding. Professional installation is recommended.
4.2. Undermount Installation Steps
- Prepare Countertop: Ensure the countertop opening is correctly sized for the sink. Use the provided template (if applicable) or the sink itself to trace the opening.
- Clean Surfaces: Clean the underside of the countertop and the rim of the sink thoroughly to ensure proper adhesion.
- Apply Sealant: Apply a continuous bead of silicone sealant around the rim of the sink where it will contact the countertop.
- Position Sink: Carefully lift the sink and align it with the countertop opening from below. Press firmly to ensure good contact with the sealant.
- Secure with Clips: Attach the mounting clips to the underside of the countertop and tighten them evenly to secure the sink in place. Do not overtighten.
- Connect Plumbing: Install the drain assembly and connect the P-trap and water supply lines according to local plumbing codes.
- Cure Sealant: Allow the sealant to cure completely as per the manufacturer's instructions before using the sink.

Image 4.1: An ARIEL Oval Undermount Sink installed in a bathroom vanity.
Video 4.2: Demonstration of ARIEL Undermount Sink features, including premium ceramic quality, overflow hole, and easy-to-clean surface. Note: The video may show a different size sink, but the features are representative.
5. Operating Instructions
The ARIEL Oval Undermount Bathroom Sink operates like any standard bathroom sink. Turn on the faucet to use water for washing hands or other tasks. The integrated overflow hole helps prevent water from spilling over the rim if the drain is closed and the water level rises too high.

Image 5.1: Water filling the ARIEL Oval Undermount Sink.
6. Maintenance and Care
Proper care will ensure the longevity and appearance of your ARIEL porcelain sink.
6.1. Daily Cleaning
- Wipe the sink with a soft, dry cloth after each use to prevent water spots and mineral buildup.
- For general cleaning, use a mild soap or non-abrasive cleaner with a soft sponge or cloth.
- Rinse thoroughly with clean water and dry completely.
6.2. Avoiding Damage
- Avoid using abrasive cleaners, scouring pads, or harsh chemicals (e.g., strong acids, bleach) as these can damage the porcelain finish.
- Do not drop heavy or sharp objects into the sink, as this can cause chips or cracks.
- Promptly clean any spills of staining agents (e.g., hair dye, nail polish) to prevent permanent discoloration.

Image 6.1: Side profile of the ARIEL Oval Undermount Sink, highlighting its smooth finish.
7. Troubleshooting
7.1. Slow Drainage
- Cause: Clog in the drain or P-trap.
- Solution: Remove the drain stopper and clear any visible debris. If the clog persists, disassemble and clean the P-trap. Avoid using harsh chemical drain cleaners that can damage plumbing.
7.2. Leaks Around Drain
- Cause: Improperly sealed drain assembly or loose connections.
- Solution: Tighten all connections on the drain assembly. If the leak continues, disassemble the drain, reapply plumber's putty or silicone sealant, and reassemble.
7.3. Water Spots/Stains
- Cause: Hard water deposits or residue from products.
- Solution: Use a mild vinegar solution (diluted with water) to gently scrub away mineral deposits. Rinse thoroughly. For other stains, use a non-abrasive bathroom cleaner.
8. Warranty and Support
8.1. Manufacturer's Warranty
This ARIEL sink comes with a 1 Year Limited Manufacturer's Warranty. This warranty covers defects in material and workmanship under normal use and service. Please retain your proof of purchase for warranty claims.
8.2. Customer Support
For technical assistance, warranty inquiries, or to order replacement parts, please contact ARIEL customer support. Refer to the product packaging or the ARIEL website for the most current contact information.


