
1. Product Overview
The LiTime 3000W Pure Sine Wave Inverter converts 12V DC power from batteries into 120V AC power, suitable for various applications including RVs, camping, and off-grid solar systems. It provides 3000W of continuous power and a 6000W peak surge capacity, ensuring stable operation for sensitive electronics.
This inverter features multiple safety protections, a remote control for convenient operation, and a display screen for real-time status monitoring.

Image 1.1: Front view of the LiTime 3000W Pure Sine Wave Inverter, showing the brand logo, wattage, and output specifications.
2. Safety Information
Read all instructions and cautionary markings on the inverter, the batteries, and all appropriate sections of this manual before use. Improper installation or use can result in electric shock, fire, or serious injury.
- Ventilation: Ensure adequate ventilation around the inverter. Do not install in a zero-clearance compartment.
- Moisture: Do not expose the inverter to rain, snow, spray, or bilge water.
- Flammable Materials: Do not operate the inverter near flammable materials, fumes, or gases.
- Battery Connection: Connect the inverter only to a 12V battery system. Ensure correct polarity.
- Grounding: The inverter must be properly grounded.
- Overload Protection: Avoid connecting loads that exceed the inverter's continuous or peak power ratings. Inductive loads (e.g., air conditioners, refrigerators, microwaves) can have high startup surge currents.
- Temperature: Operate the inverter within the specified temperature range (-20°C to 40°C).
- Servicing: Do not attempt to service the inverter yourself. Refer all servicing to qualified personnel.
- Children: Keep the inverter out of reach of children.

Image 2.1: Visual representation of the inverter's multi-functional safety protections, including over voltage, low voltage, overheat, overload, and short circuit protection.
3. Package Contents
Verify that all items are present in the package:
- LiTime 3000W Pure Sine Wave Inverter
- 2 x 1.64FT 4AWG Battery to Inverter Cables (Red and Black)
- 1 x 3.28FT Ground Cable
- 1 x Remote Control Unit
- 1 x 14.76FT Remote Control Cable
- 6 x Mounting Screws
- 6 x Plastic Anchors
- User Manual (this document)
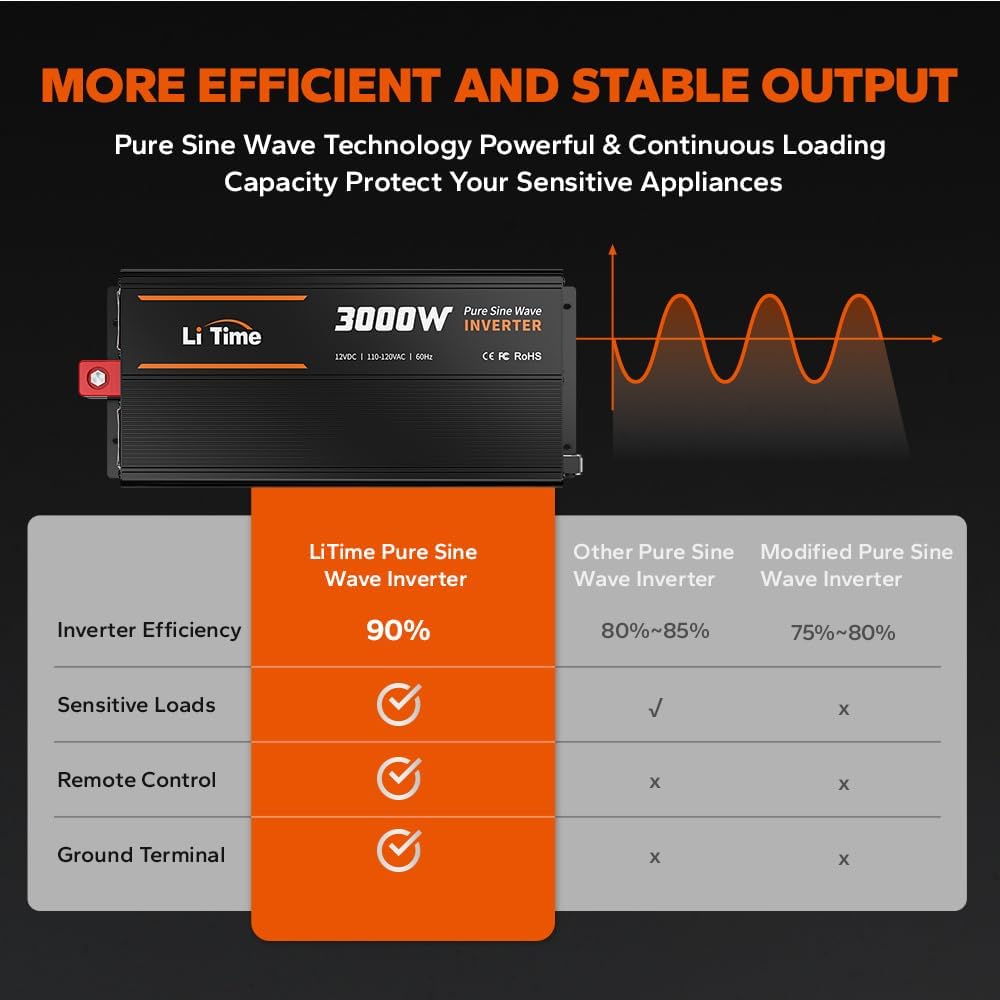
Image 3.1: An illustration showing the inverter, battery cables, ground cable, remote control, remote control cable, mounting screws, and plastic anchors included in the package.
4. Product Features
- Pure Sine Wave Output: Provides clean and stable AC power, suitable for sensitive electronics.
- High Power Output: 3000W continuous DC to AC power, 6000W peak surge capacity.
- Remote Control: Includes a remote control with a 14.76FT cable for convenient operation from a distance.
- Real-time Status Display: Integrated screen on the remote control shows battery voltage, inverter output, temperature, frequency, error codes, and output power.
- Multiple AC Outlets: Equipped with 4 AC outlets for connecting various appliances.
- USB Outputs: Features 2 USB outputs for charging mobile devices.
- Efficient Cooling System: Two cooling fans ensure regular operation in temperatures from -20°C to 40°C, preventing overheating.
- Comprehensive Safety Protections: Includes low voltage, over voltage, overheat, output overload, and output short circuit protection.
- Durable Construction: Robust metal housing designed for heat dissipation and protection.

Image 4.1: The remote control unit's display screen, illustrating real-time monitoring of inverter inputs and outputs such as DC input voltage, temperature, frequency, AC output voltage, error code, output power, and output waveform.
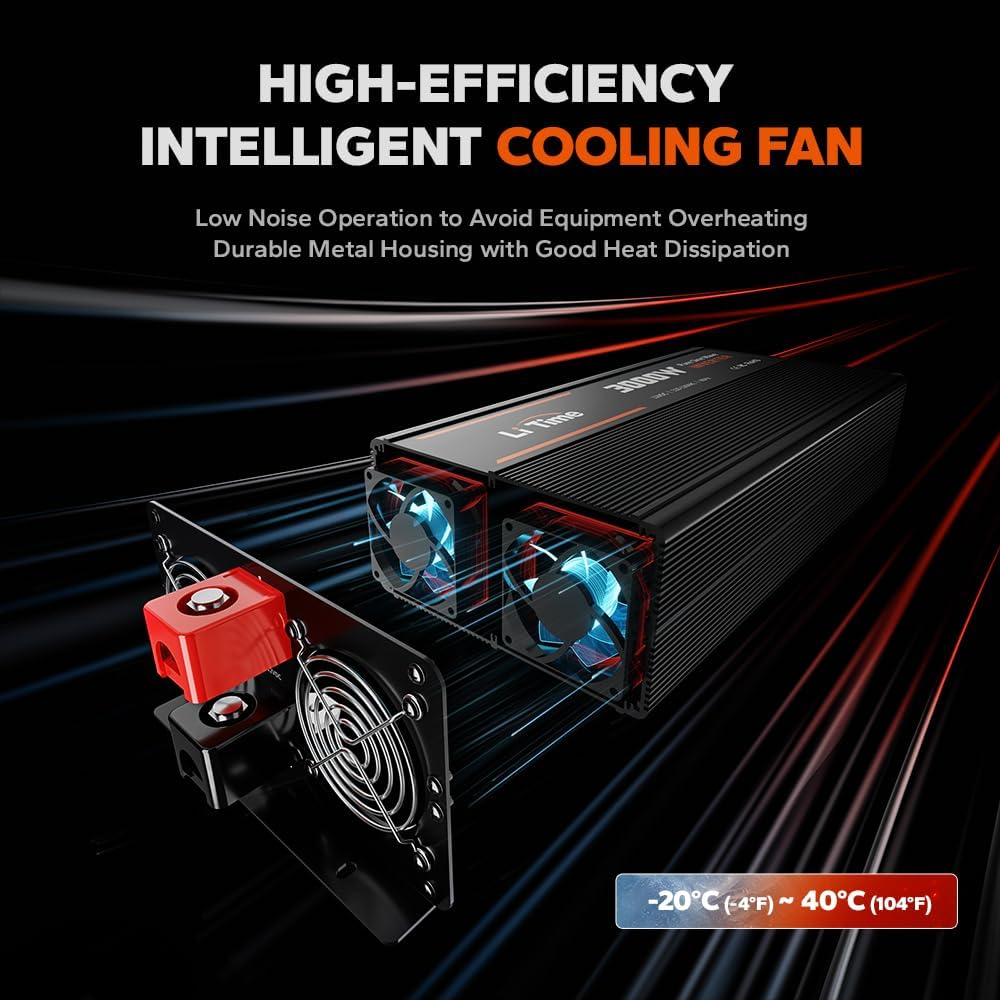
Image 4.2: An internal view of the inverter highlighting the high-efficiency intelligent cooling fans, designed for low noise operation and effective heat dissipation.
5. Setup and Installation
5.1 Choosing a Location
Select a location that is:
- Dry and well-ventilated.
- Away from direct sunlight and heat sources.
- Accessible for connections and maintenance.
- Securely mounted to prevent movement.
- Not in a compartment with batteries or flammable liquids.
5.2 Mounting the Inverter
- Position the inverter in the chosen location.
- Mark the mounting points using the inverter's mounting brackets as a template.
- Drill pilot holes if necessary.
- Secure the inverter using the provided mounting screws and plastic anchors.
5.3 Wiring Connections
WARNING: Ensure the battery is disconnected or the main DC breaker is off before making any connections. Incorrect wiring can cause damage to the inverter, battery, or personal injury.
- Grounding: Connect the provided ground cable from the inverter's ground terminal to a reliable earth ground point (e.g., vehicle chassis, ground bus bar).
- DC Input Connection:
- Connect the red (positive) battery cable to the positive (+) terminal of the inverter and the positive (+) terminal of your 12V battery.
- Connect the black (negative) battery cable to the negative (-) terminal of the inverter and the negative (-) terminal of your 12V battery.
- Ensure all connections are tight and secure to prevent loose connections and overheating.
- Remote Control Connection: Plug the remote control cable into the designated port on the inverter and the remote control unit.
- AC Output Connection:
- Plug your AC appliances directly into the 4 AC outlets on the inverter.
- For hardwired applications, ensure proper wiring by a qualified electrician, adhering to local electrical codes.

Image 5.1: An illustration showing the LiTime inverter installed within an RV setup, with the remote control unit mounted on a wall for easy access and control.
6. Operating Instructions
6.1 Powering On/Off
- After all connections are secure, connect the battery (if not already connected).
- Press and hold the power button on the inverter or the remote control for a few seconds until the display illuminates.
- The inverter will perform a self-test. If the "HOOH" code is displayed during startup, this indicates a power-on self-test. Allow 0.5-1 hour for the machine to cool down completely if it has been recently under heavy load.
- To power off, press and hold the power button again until the display turns off.
6.2 Using the Remote Control
The remote control allows you to monitor the inverter's status and power it on/off from a convenient location. The display shows:
- DC Input Voltage
- Temperature
- Frequency
- AC Output Voltage
- Error Code (if any)
- Output Power (in Watts)
- Output Waveform
6.3 Connecting Appliances
- Plug your 120V AC appliances into the inverter's AC outlets.
- Ensure the total continuous power draw of all connected appliances does not exceed 3000W.
- Be mindful of the startup surge requirements for inductive loads. The inverter can handle up to 6000W peak surge.
- Do not connect loads with excessive power that could overload the inverter.
7. Maintenance
- Cleaning: Periodically clean the exterior of the inverter with a dry cloth. Do not use liquid cleaners or solvents.
- Ventilation: Ensure the cooling vents are free from dust and obstructions to maintain proper airflow.
- Connections: Regularly check all electrical connections (DC input, ground, AC output) for tightness and corrosion. Tighten any loose connections.
- Battery Health: Monitor your battery's health and charge level to ensure optimal inverter performance.
- Storage: If storing the inverter for an extended period, disconnect it from the battery and store it in a cool, dry place.
8. Troubleshooting
This section addresses common issues you might encounter with your LiTime inverter. For problems not listed here, contact customer service.
| Problem | Possible Cause | Solution |
|---|---|---|
| Inverter does not turn on. |
|
|
| Inverter shuts down or beeps under load. |
|
|
| "HOOH" code displayed during startup. | Power-on self-test or inverter recently under heavy load. | This is normal during startup. If it persists, allow 0.5-1 hour for the machine to cool down completely. |
| AC output is unstable or intermittent. |
|
|
9. Specifications
| Feature | Detail |
|---|---|
| Model Name | 30000W 12V Pure Sine Wave Inverter |
| Item Model Number | L12V3KW-E-0 |
| Continuous Power | 3000W |
| Peak Surge Power | 6000W |
| Input Voltage | 12V DC |
| Output Voltage | 120V AC |
| Output Frequency | 60Hz |
| Output Waveform | Pure Sine Wave |
| Product Dimensions | 18 x 7 x 3 inches |
| Item Weight | 13.23 pounds |
| Operating Temperature | -20°C to 40°C (-4°F to 104°F) |
| AC Outlets | 4 |
| USB Outputs | 2 |
| Certifications | CE/FCC/RoHS |
10. Warranty and Customer Support
LiTime products are CE/FCC/RoHS certified, ensuring safety and quality. The inverter comes with comprehensive after-sales service. For technical support, warranty claims, or any questions, please contact LiTime customer service.
Professional technical support and customer service are available via phone or online services, with feedback typically provided within 24 hours.
Please refer to your purchase documentation or the official LiTime website for the most current warranty terms and contact information.


