
1. Introduction
Welcome to your new ZHXINSD PTZ4MSO Solar Powered Wireless Outdoor Security Camera System. This manual provides detailed instructions for installation, operation, maintenance, and troubleshooting to ensure optimal performance and longevity of your device. Please read this manual thoroughly before using the product.
2. Product Overview
The ZHXINSD PTZ4MSO is a versatile outdoor security camera system designed for comprehensive surveillance. It features solar power for continuous operation, pan-tilt functionality for 360-degree coverage, 2K resolution with color night vision, two-way audio, and intelligent motion detection.
Key Features
- Solar-Powered: Utilizes solar panels for continuous power, ensuring 100% wireless operation without external wiring.
- Pan-Tilt-Zoom (PTZ) Functionality: Offers pan, tilt, and 2K night vision capabilities, capturing clear details up to 40 feet in low light.
- Intelligent Motion Detection: Features a highly sensitive PIR motion sensor for smart human/vehicle detection and instant alerts. Supports local recording to a micro SD card (up to 128GB, not included).
- Easy Installation & Weatherproof: Designed for simple indoor/outdoor installation with IP65 weatherproof certification. Quick setup via QR code scan with the dedicated app.
- Secure Storage & Two-Way Audio: Supports local SD card storage (up to 128GB, not included) for video playback. Includes two-way audio for communication.

An image showing the ZHXINSD PTZ4MSO wireless outdoor security camera connected to its solar panel, ready for installation.
3. Package Contents
Please verify that all items are present in your package:
- ZHXINSD PTZ4MSO Security Camera(s)
- Solar Panel(s)
- Mounting Brackets and Screws
- Power Adapter (for NVR, if applicable)
- USB Cable (for camera charging/setup)
- User Manual (this document)
- Warning Stickers
- NVR (Network Video Recorder) (if part of a system)
- Mouse (for NVR)
Video demonstrating the physical components of the ZHXINSD PTZ solar powered security camera system, including the camera, solar panel, and accessories.
4. Setup
4.1 Initial Camera Power-Up and Reset
Before installation, ensure the camera is powered on and reset if necessary.
- To power up the camera, hold the "on/off" button for 3 seconds. You will hear an audible confirmation.
- To reset the camera to factory settings, hold the "Reset" button for 3 seconds. The camera will announce "Restore factory settings, the camera will restart automatically."
Instructional video showing how to power up, reset, and pair a new ZHXINSD camera with the NVR system, including on-screen menu navigation.
4.2 NVR System Setup
Follow these steps to connect your cameras to the NVR system:
- Connect the NVR to a monitor and power source.
- Navigate to the "Camera Setup" menu on the NVR interface.
- Power on all cameras within 1 meter of the NVR.
- The NVR will search for and list available cameras. Wait until all cameras are listed.
- Once all cameras are found and connected, proceed to view the live feed.
4.3 Physical Installation
Choose a suitable outdoor location for your camera and solar panel.
- Mount the camera securely using the provided brackets and screws. Ensure a clear line of sight for surveillance.
- Position the solar panel in an area that receives maximum direct sunlight throughout the day to ensure continuous charging.
- Connect the solar panel to the camera.
- The camera is IP65 waterproof, suitable for various weather conditions.

The ZHXINSD PTZ4MSO camera with water droplets on its surface, illustrating its IP65 waterproof design suitable for outdoor use in various weather conditions.
5. Operating Instructions
5.1 Mobile App Access
Download the dedicated mobile application (refer to the quick start guide for app name and QR code) to access live view, recordings, and settings from your smartphone.
5.2 Live View and Playback
Access the live feed from your cameras via the NVR monitor or mobile app. Recorded events can be played back from the local SD card storage.

A smartphone screen showing the clear 2K color night vision feed from the camera, capturing a sleeping child in a dark room.
5.3 Pan, Tilt, and Zoom Control
Use the NVR interface or mobile app to remotely control the camera's pan and tilt functions for a 360-degree view. The camera supports optical zoom for detailed viewing.
5.4 Two-Way Audio
Utilize the two-way audio feature through the mobile app to communicate with visitors or deter intruders.
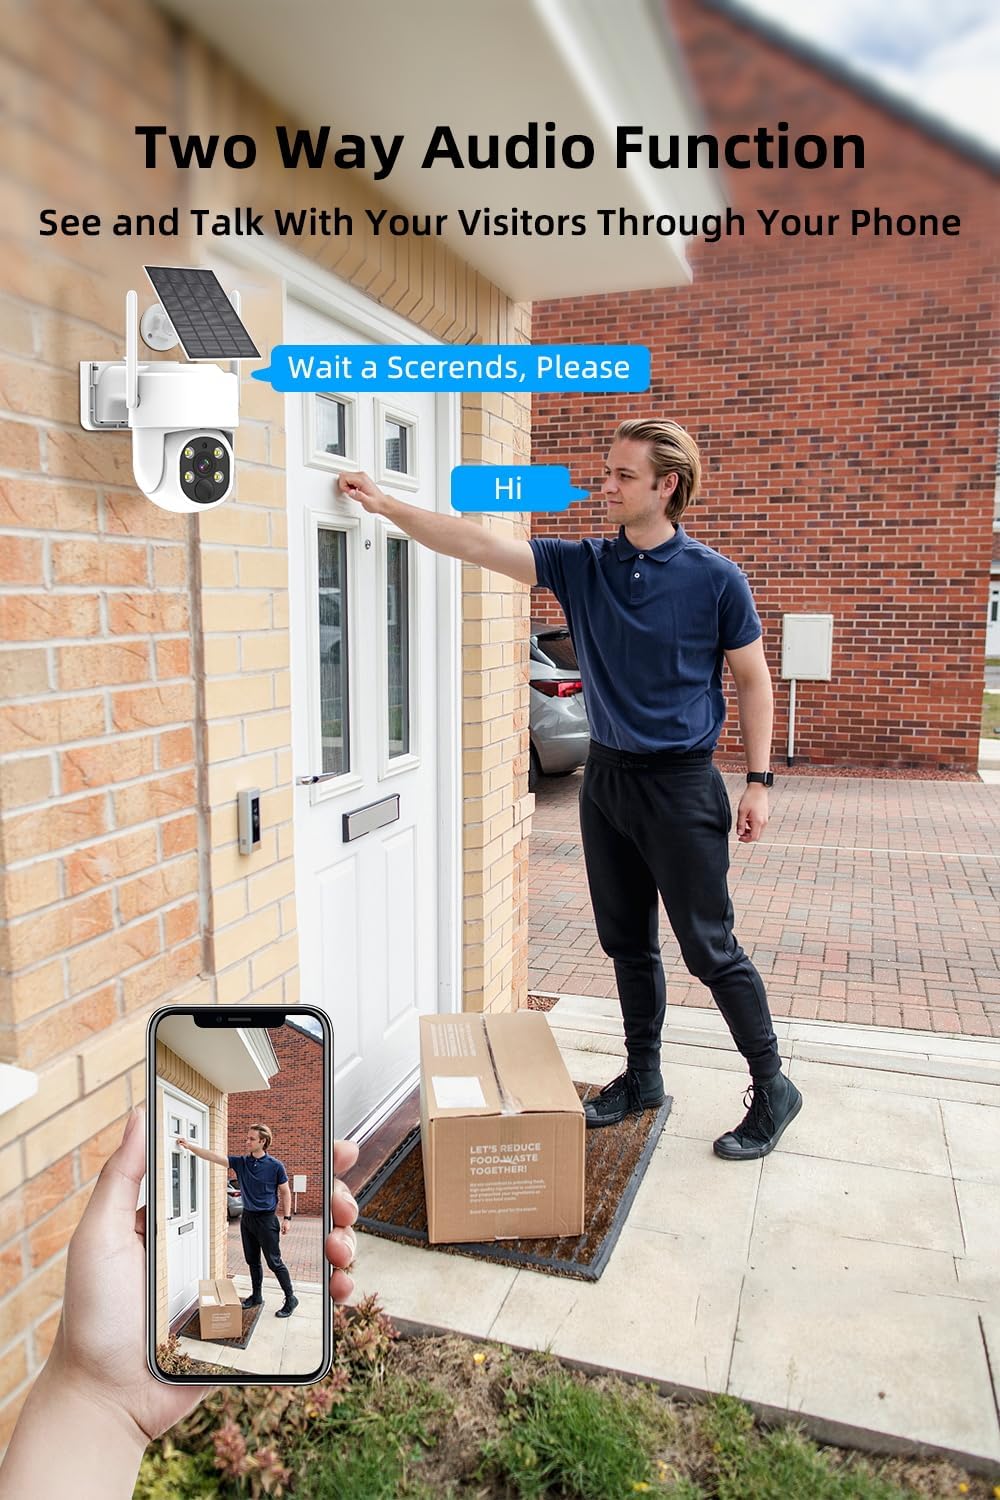
An illustration of the two-way audio function, showing a person at a door speaking to someone viewing and responding via a smartphone app.
5.5 Night Vision
The camera automatically switches to 2K color night vision in low-light conditions, providing clear images up to 40 feet.
5.6 Motion Detection and Alerts
The intelligent PIR motion sensor detects human and vehicle movement, sending instant alerts to your connected devices. Customize alert settings and recording modes via the NVR or app.

A smartphone screen displaying a motion detection alert from the camera, highlighting a person walking a dog, indicating intelligent human/vehicle detection.
6. Maintenance
- Regularly clean the camera lens and solar panel to ensure optimal performance. Use a soft, damp cloth.
- Check the solar panel for any obstructions (e.g., leaves, dirt) that might reduce charging efficiency.
- Periodically inspect mounting hardware for security and adjust as needed.
- Ensure the camera's software is up to date through the mobile app or NVR settings for the latest features and security patches.
7. Troubleshooting
7.1 No Power / Camera Not Turning On
- Ensure the solar panel is receiving adequate sunlight.
- Check the connection between the solar panel and the camera.
- Verify the camera's internal battery charge level via the app.
- Try resetting the camera by holding the "Reset" button for 3 seconds.
7.2 No Video Feed / Offline Camera
- Check the wireless connection between the camera and the NVR/router.
- Ensure the NVR is powered on and connected to a monitor.
- Re-pair the camera with the NVR if necessary (refer to NVR System Setup).
- Verify your Wi-Fi network is operational and within range.
7.3 Poor Image Quality
- Clean the camera lens.
- Ensure there are no obstructions in the camera's field of view.
- Check network signal strength; a weak signal can affect streaming quality.
7.4 Motion Detection Not Working
- Verify motion detection settings are enabled in the app/NVR.
- Adjust sensitivity settings if false alarms or missed detections occur.
- Ensure the camera's view is clear of moving objects that are not intended for detection (e.g., tree branches).
8. Specifications
| Feature | Detail |
|---|---|
| Recommended Uses For Product | Outdoor Security |
| Brand | ZHXINSD |
| Connectivity Technology | Wireless |
| Special Feature | Night Vision, PTZ Technology, Portable |
| Indoor/Outdoor Usage | Outdoor |
| Compatible Devices | Smartphone |
| Controller Type | Android |
| Mount Type | Wall Mount |
| Form Factor | Dome |
| Alert Type | Motion Only |
| Room Type | Hallway, Living Room, Study Room |
| Waterproof Rating | IP65 |
| Control Method | Remote |
| Power Source | Solar Powered |
| Are Batteries Required | Yes |
| Video Capture Resolution | 2K |
| Zoom Type | Optical Zoom |
| Item Dimensions | 7 x 5 x 8 inches |
| Item Weight | 0.89 Kilograms |
| Unit Count | 1.0 Count |
| Number of Items | 1 |
| Model Number | PTZ4MSO |
| Manufacturer | ZHXINSD |
| Connectivity Protocol | Wi-Fi |
| Wireless Technology | Wi-Fi |
| Number of Channels | 2 |
| Video Capture Format | MPEG-4 |
| Night Vision | Night Color |
9. Warranty and Support
9.1 Warranty Information
This ZHXINSD product comes with a 2-year warranty from the date of purchase. Please retain your proof of purchase for warranty claims. The warranty covers manufacturing defects and malfunctions under normal use. It does not cover damage caused by misuse, accidents, unauthorized modifications, or natural disasters.
9.2 Customer Support
For technical assistance, troubleshooting, or warranty inquiries, please contact ZHXINSD customer support. Refer to the product packaging or the official ZHXINSD website for contact details.

