
Introduction
Thank you for choosing the ritter E 16 Electric Universal Slicer. This appliance is designed for slicing various foods such as bread, fruits, vegetables, and cold cuts with precision and ease. Please read this instruction manual carefully before first use to ensure safe operation and optimal performance. Keep this manual for future reference.

Image: The ritter E 16 electric slicer in black, positioned on a kitchen countertop. Sliced tomatoes are visible in the collection tray, demonstrating its function.
Important Safety Instructions
Always observe the following safety precautions to prevent injury or damage to the appliance:
- Read all instructions before operating the appliance.
- Keep hands clear of the blade at all times. The blade is extremely sharp.
- Never operate the slicer without the food holder and carriage properly installed.
- Ensure the appliance is placed on a stable, flat, and dry surface.
- Unplug the appliance from the power outlet before cleaning, assembling, or disassembling parts.
- Do not immerse the motor unit in water or other liquids.
- This appliance is not intended for use by persons with reduced physical, sensory, or mental capabilities, or lack of experience and knowledge, unless they have been given supervision or instruction concerning use of the appliance by a person responsible for their safety.
- Children should be supervised to ensure that they do not play with the appliance.
- Do not use the appliance if the power cord or plug is damaged. Contact customer service for repair.
- Avoid slicing frozen foods or foods with bones, as this can damage the blade and motor.
Product Components
Familiarize yourself with the parts of your ritter E 16 slicer:
- Serrated Blade: For precise slicing of various foods.
- Food Carriage: Holds food securely and slides it towards the blade.
- Food Holder/Pusher: Protects fingers and helps push food.
- Thickness Adjustment Knob: Controls slice thickness from fine to approximately 20 mm.
- Safety Switch: Momentary and continuous operation modes.
- Collection Tray: Catches sliced food.
- ECO Motor: Energy-efficient 65-watt motor.

Image: A visual breakdown of the ritter E 16 slicer's main features, including the 65-watt ECO motor, the metal inclined design, the momentary and continuous safety switch, and the slice thickness adjustment knob (up to 20mm).
Setup and Assembly
- Unpacking: Carefully remove all packaging materials. Retain packaging for storage or future transport.
- Placement: Place the slicer on a clean, stable, and dry countertop. Ensure there is enough space around the appliance for safe operation.
- Install Collection Tray: Slide the collection tray into its designated position beneath the blade.
- Attach Food Carriage: Ensure the food carriage is securely attached to its rail. The carriage has approximately 18 cm of travel.
- Insert Food Holder: Place the food holder onto the food carriage. This protects your hands and helps to firmly hold the food against the blade.
- Power Connection: Plug the power cord into a suitable electrical outlet.
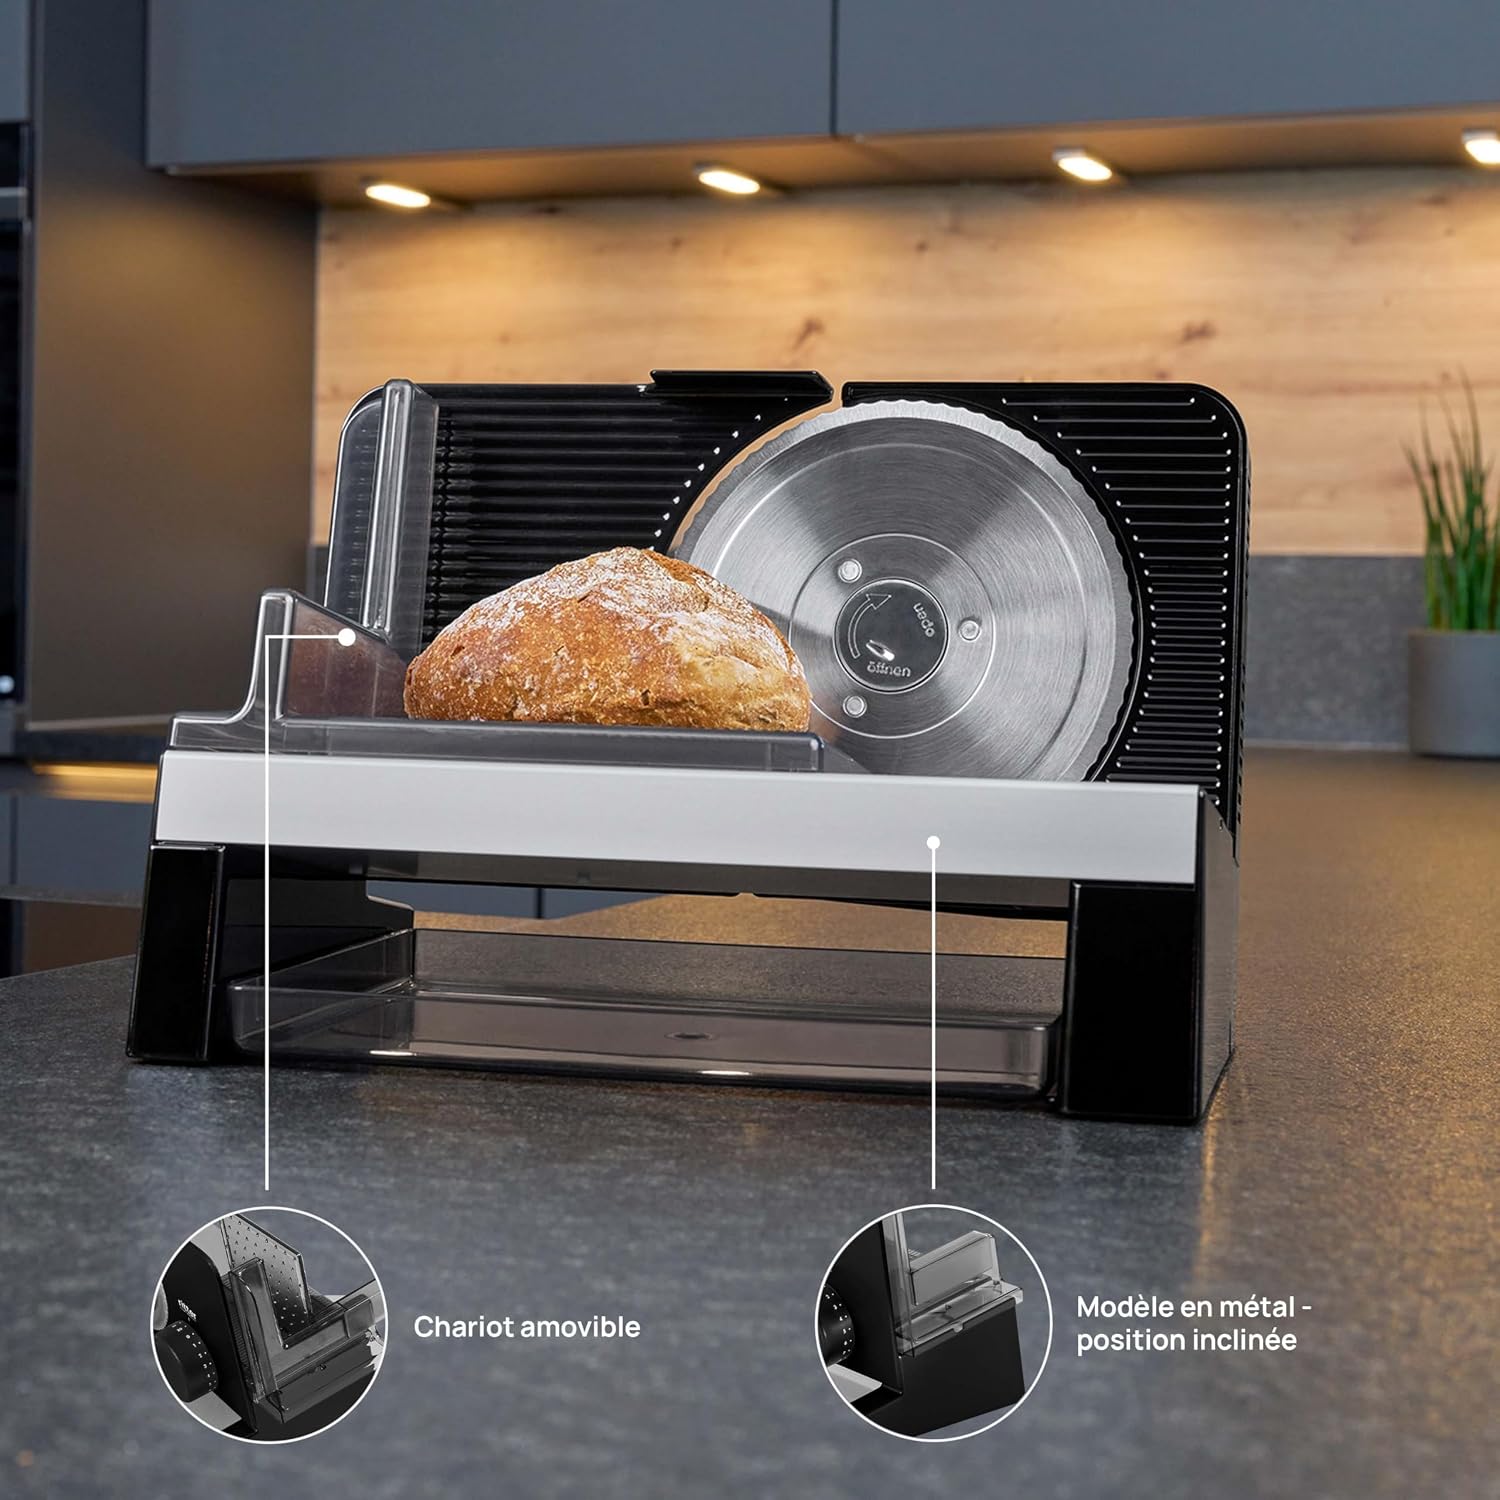
Image: The ritter E 16 slicer shown with a loaf of bread positioned on the removable food carriage. The image highlights the carriage's design and the appliance's inclined slicing position.
Operating Instructions
Slicing Food
- Prepare Food: Place the food item (e.g., bread, cheese, vegetables) onto the food carriage. Use the food holder to secure it firmly against the guide plate.
- Adjust Slice Thickness: Turn the thickness adjustment knob to select your desired slice thickness. The slicer allows for continuous adjustment from very thin to approximately 20 mm.
- Activate Slicer:
- Momentary Operation: Press and hold the safety switch for continuous slicing as long as the button is held.
- Continuous Operation: Engage the safety switch to the continuous position for hands-free operation. Always supervise the appliance during continuous operation.
- Begin Slicing: Gently push the food carriage forward and backward, guiding the food against the rotating blade. The sliced food will fall into the collection tray.
- Finish Slicing: Once slicing is complete, release the momentary switch or disengage the continuous switch. Wait for the blade to stop completely before removing any remaining food or sliced items.
- Unplug: Always unplug the appliance after use.
Tips for Best Results
- For softer foods, chilling them slightly before slicing can yield cleaner cuts.
- Apply even, gentle pressure when pushing the food carriage.
- Regularly empty the collection tray to prevent blockages.
Care and Maintenance
Proper cleaning and maintenance will extend the life of your slicer.
- Always Unplug: Before cleaning, always ensure the appliance is unplugged from the power outlet.
- Remove Parts: Carefully remove the food carriage, food holder, and collection tray.
- Clean Removable Parts: Wash the food carriage, food holder, and collection tray by hand using warm soapy water. Rinse thoroughly and dry completely. These parts are not dishwasher safe.
- Clean Blade: The blade is sharp. Use caution. Wipe the blade carefully with a damp cloth. For thorough cleaning, the blade can be removed by following the instructions in the full manual (not provided here, but generally involves turning a central locking mechanism). Always reattach the blade securely.
- Clean Main Unit: Wipe the main unit with a damp cloth. Do not immerse the motor unit in water.
- Drying: Ensure all parts are completely dry before reassembling or storing the appliance.
- Storage: Store the slicer in a clean, dry place, away from children.
Important: The manufacturer recommends hand washing only for all parts that come into contact with food.
Troubleshooting
| Problem | Possible Cause | Solution |
|---|---|---|
| Slicer does not turn on. | Not plugged in; power outage; safety switch not engaged; appliance malfunction. | Check power cord connection; verify power outlet; ensure safety switch is correctly pressed/engaged; if problem persists, contact customer support. |
| Slices are uneven or jagged. | Blade is dull; food not held firmly; incorrect slice thickness setting; slicing frozen or very hard food. | Ensure food is held firmly with the food holder; adjust slice thickness; avoid slicing frozen items; if blade is dull, contact service for replacement. |
| Motor sounds strained or stops. | Overloading the motor; slicing excessively hard food; food obstruction. | Reduce pressure on food; ensure food is not too hard for slicing; check for any obstructions around the blade; allow motor to cool down if overheated. |
| Food gets stuck or jams. | Food piece too large; collection tray full; food not moving smoothly on carriage. | Cut food into manageable pieces; empty collection tray; ensure carriage moves freely and is clean. |
Technical Specifications
| Model Number | 515.045 |
| Brand | ritter |
| Power | 65 Watt ECO Motor |
| Blade Material | Metal (Serrated) |
| Blade Length | 17 cm |
| Slice Thickness | Continuously adjustable up to approx. 20 mm |
| Dimensions (L x W x H) | 34.5 x 24.5 x 23.5 cm |
| Weight | 3 Kilograms |
| Material | Metallic, Plastic |
| Color | Black |
| Country of Origin | Germany |

Image: A diagram illustrating the physical dimensions of the ritter E 16 slicer, with measurements for length (33.5 cm), height (23.0 cm), and depth (22.5 cm).
Warranty and Support
ritterwerk GmbH stands by the quality of its products. This appliance is manufactured in Germany with high-quality materials and craftsmanship, designed for durability.
For warranty claims, repairs, or technical support, please contact ritter customer service. Keep your proof of purchase for warranty validation.
You can find more information and contact details on the official ritter website or through your retailer.


